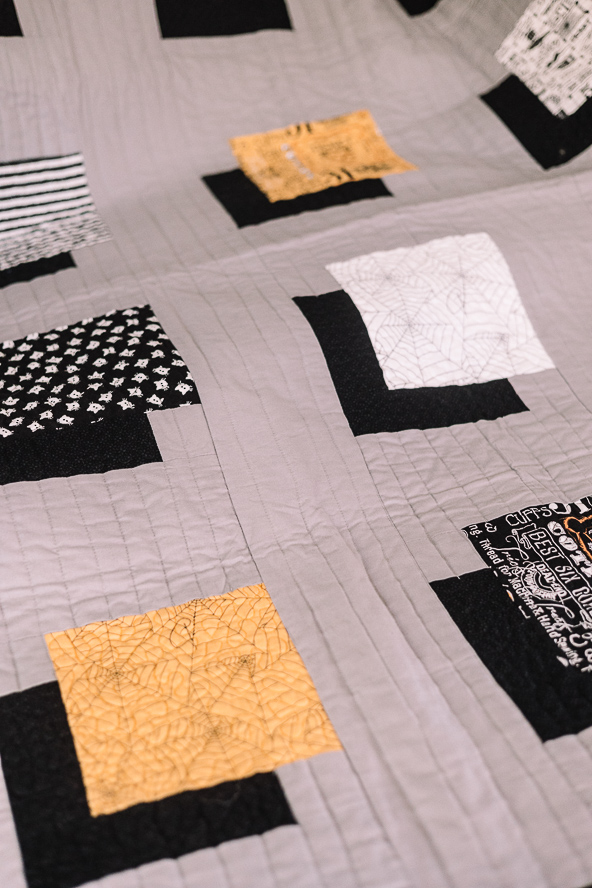
Get a jump start on your spooky season quilting with this bewitching throw quilt pattern! Show off your favorite Halloween prints and patterns with this floating block quilt from designer Mallory Hill. We love the eerie shadow effect of each block, created by using black fabric strips to surround the vibrant solid squares. Dive headfirst into everything Halloween with this playful quilt pattern.
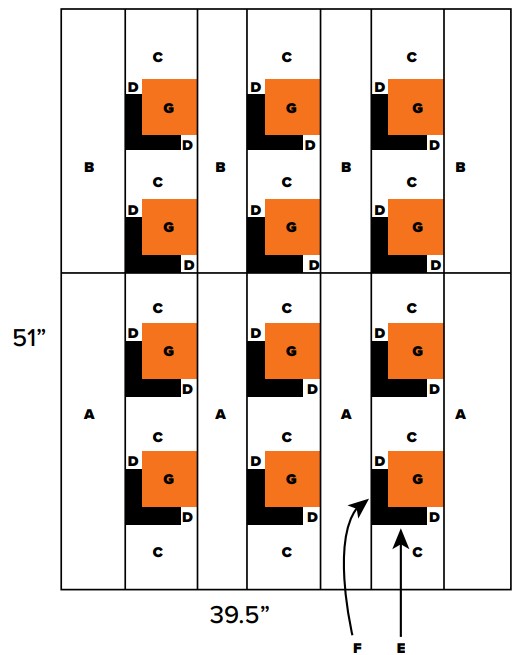
Finished Size: 39.5″ W x 51″ L plus binding
Designer Notes:
- Each individual block is a 6.5″ square (square plus the shadow area).
- Cut list below with 1/4″ seam allowance included.
Materials:
- Background fabric – gray (2 yards)
- A – 4 – 5.5″ x 33.5″ (long strips alongside and middle)
- B – 4 – 5.5″ x 28.5″ (long strips alongside and middle)
- C – 15 – 5.5″ x 9.5″ (between each block)
- D – 24 – 2.5″ x 2.5″ (small corner squares on each block)
- Black shadow fabric can be cut from 2.5″ precut strips OR 1/2 yd
- E – 12 – 2.5″ x 7.5″
- F – 12 – 2.5″ x 5.5″
- Solid squares can be cut from 10″ precut squares (sample uses Costume Maker’s Ball) OR 3/4 yd if all are from the same fabric OR up to 4 squares from one fat quarter
- G – 12 – 7.5″ x 7.5″
- Binding fabric: 184” of 2.5” strips OR 1/2 yd of fabric
- Backing fabric: 2 yds of fabric
- Basic sewing and quilting notions
- PDF Layout – This is located at the bottom of the page. Please see printing instructions below.
PRINTING INSTRUCTIONS:
To download the PDF layout, click on the download button at the bottom of the page. We recommend opening your download using Adobe Acrobat.
Instructions:
TO ASSEMBLE EACH COMPLETE FLOATING BLOCK:
- Attach one F strip to one D square to make an FD strip – 12 total.
- Attach one E strip to one D square to make an ED strip – 12 total.
- Attach ED strip to a G square to make GED – 12 total.
- Attach FD to GED to complete the floating block – 12 total blocks.
TO ASSEMBLE THE QUILT:
- Attach a Block C to the top and bottom of each complete block.
- Create 3 rows that include 4 completed floating blocks alternating with 5 C blocks.
- Attach one strip A to one strip B to complete the rows between the blocks – 4 strips total.
- Attach one AB strip to each side of the completed floating block strips to create 4 AB rows alternating with three floating block rows.
TO FINISH THE QUILT:
- Piece together back of quilt as desired.
- Layer the quilt top, batting and back of quilt, and baste.
- Quilt as desired.
- Bind.