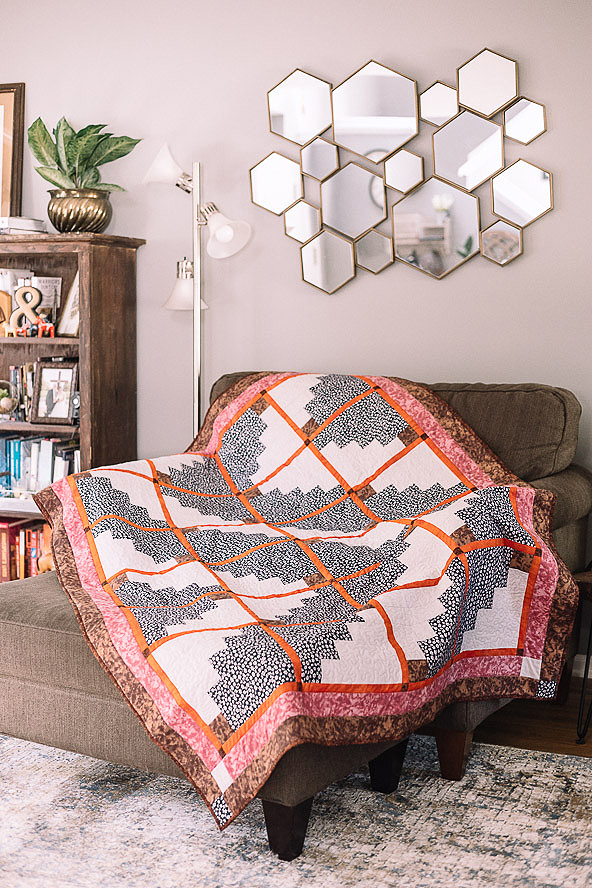
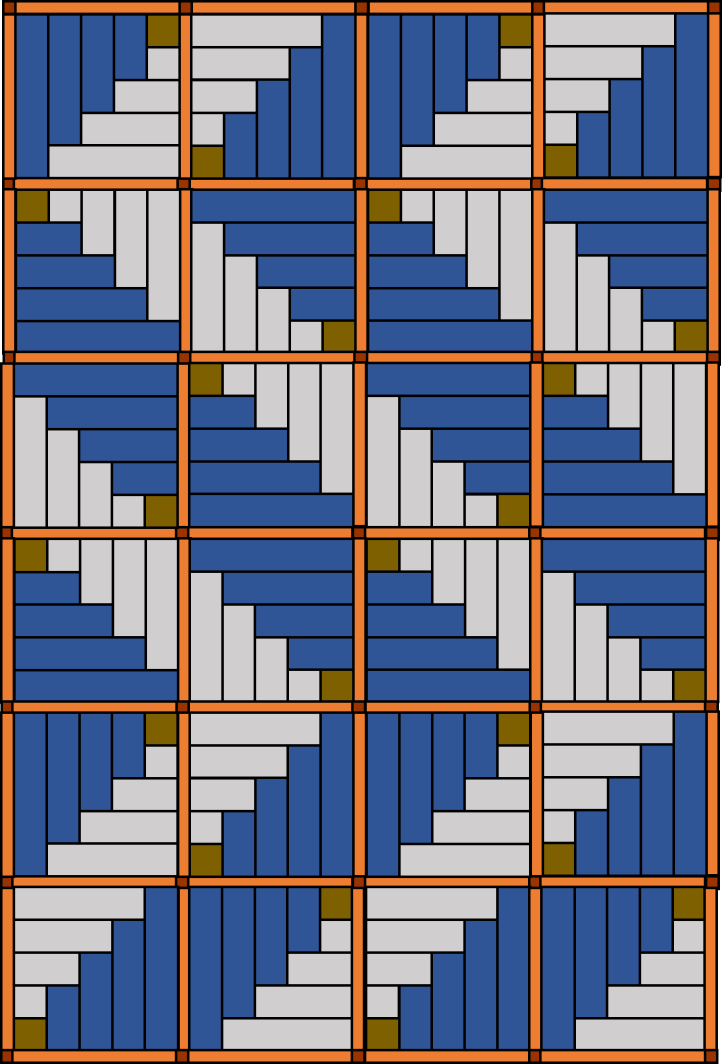
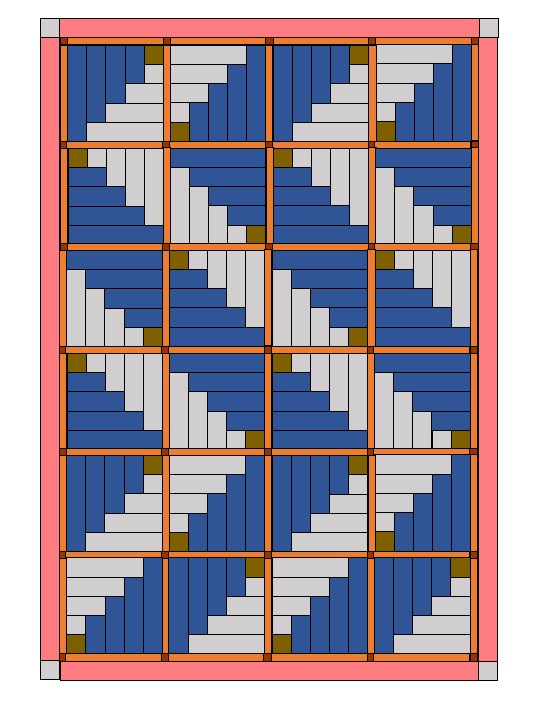
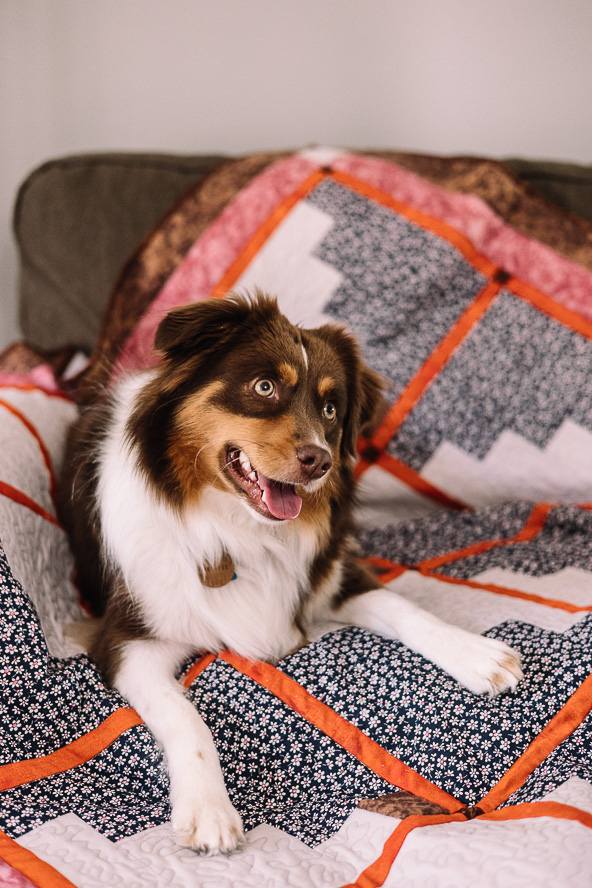
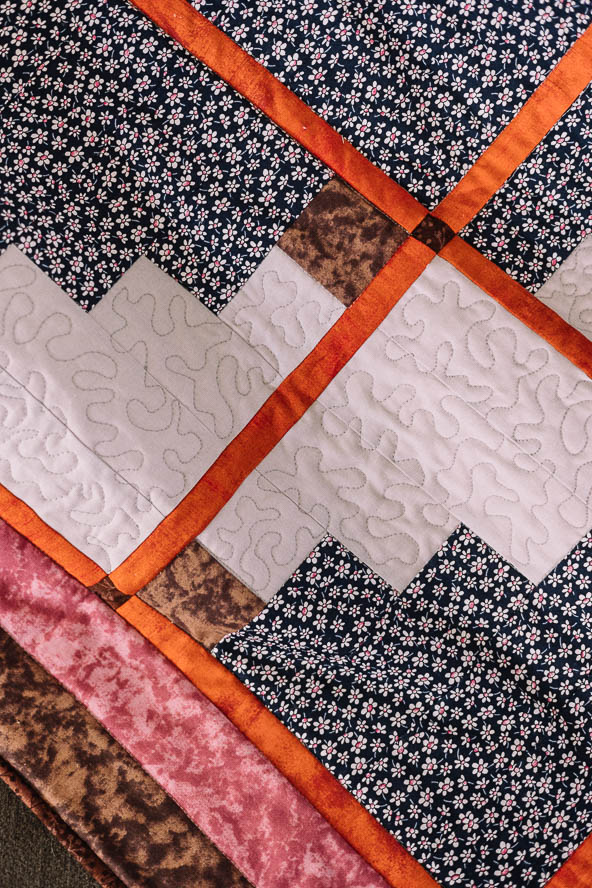
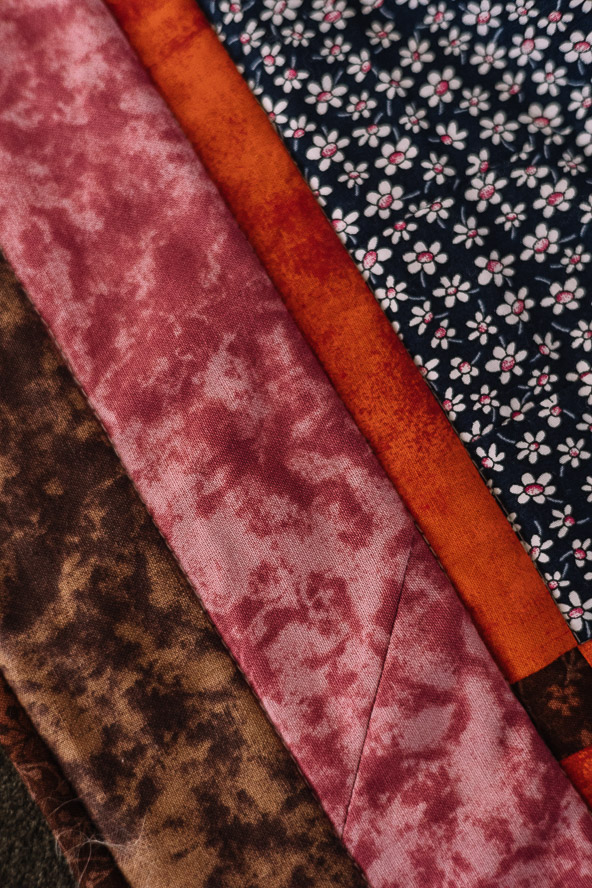
Get ready to break out your prettiest jelly rolls to make this gorgeous log cabin quilt pattern! Log cabin quilts are a classic among quilters and this simple but striking design plays with dark and light fabric to create the effect of a gently flowing river. Made using jelly roll precuts, these log cabin blocks are placed in a zig zag pattern to create a wave-like effect. This log cabin quilt also features sashing in a fiery autumn orange and uses earthy tones of mauve and coffee for its borders, showing you how to play with every color in your jelly roll.
Finished Size: Approximately 74 1/2” x 52 1/2″
Designer Note: Scant 1/4” seams used throughout.
Materials:
- Two jelly roll packs (42 strips each)
- 80” x 60” batting
- 85” x 65” backing fabric
- Basic sewing and quilting notions
SEPARATING YOUR JELLY ROLLS:
Separate the 2 1/2” Jelly Roll Strips into dark, medium and light.
Choose:
- 18 dark strips to make one half of the Log Cabin units
- 14 light strips to make the other half of the Log Cabin units
- 2 dark or medium strips for the corner square in each Log Cabin unit
- 8 medium strips for the sashing between the Log Cabin units
- 1 dark strip for the sashing cornerstones
- 6 strips for the inner border
- 6 strips for the outer border
- 7 strips for the binding
- Light leftovers for the inner border cornerstones
- Dark leftovers for the outer borders cornerstones
Instructions:
LOG CABIN UNITS:
- Cut 24 of the following strips (all 2 1/2” wide):
- Round 1 dark corner square – 2 1/2”
- Round 2 light – 2 1/2”
- Round 3 dark – 4 1/2”
- Round 4 light – 4 1/2”
- Round 5 dark – 6 1/2”
- Round 6 light – 6 1/2”
- Round 7 dark – 8 1/2”
- Round 8 light – 8 1/2”
- Round 9 dark – 10 1/2”
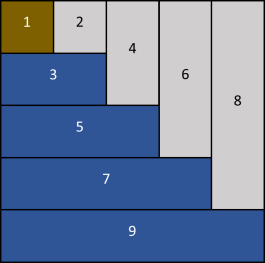
- With right sides together so ‘2’ is on the right hand side, stitch ‘1’ and ‘2’ together. Press the seam towards ‘1’.
- With right sides together and ‘1’ in the top left corner, stitch ‘3’ to the bottom of the ‘1/2’ unit. Press towards ‘3’.
- With right sides together and ‘1’ in the top left corner, stitch ‘4’ to the right of the ‘1/2/3’ unit. Press towards ‘4’.
- Continue to add the strips in number order to the bottom or the right of the unit.
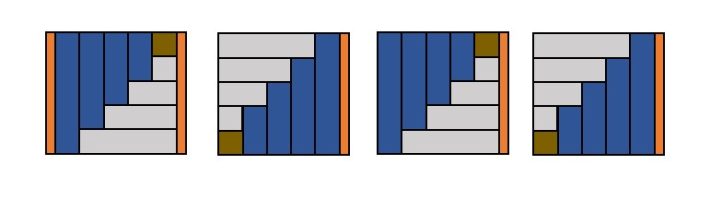
- Make 24 Log Cabin units.
- Tip: Chain piece the strips to finish all the Log Cabin units at the same time.
ADDING THE SASHING AND JOINING THE ROWS:
- Cut twenty-nine (29) 10 1/2” strips from the medium Jelly Roll strips chosen.
- Cut these 29 strips in half so you have fifty-eight (58) 10 1/2” x 1 1/4” strips.
- Cut thirty-five (35) 1 1/4” dark cornerstones by cutting eighteen (18) 1 1/4” strips from the 2 1/2” Jelly Roll strip chosen and then cutting them in half.
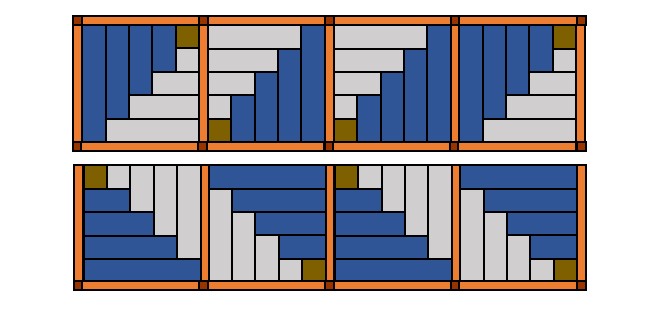
- Stitch four medium strips with a dark cornerstone in-between and at each end. Press the seams towards the cornerstones. Make seven long sashing strips.

- Lay out the Log Cabin units in the Zig Zag pattern. Stitch a sashing strip to both sides of the first Log Cabin unit and to the right side of each of the other Log Cabin units. Repeat for all Log Cabin units.
- Stitch the Log Cabin units into pairs and then into rows of four. Press the seams towards the Log Cabin units. Repeat to make six rows.
- Stitch a long sashing strip to the top and bottom of the first row and then to the bottom of the five other rows. Press the seams in one direction.
- Stitch the rows into pairs and then stitch the three pairs together. Press the seams in one direction.
ADDING THE INNER BORDER:
- Measure the quilt top through the middle for the length and width. It will be approximately 66 1/4” x 44 1/2”. Stitch the six medium Jelly Roll strips chosen for the inner border together to make one long strip and cut two strips for the length and two for the width.
- Pin and stitch the longer strips to the left and right sides of the quilt top. Press the seams towards the borders.
- Cut four 2 1/2” squares from the light Jelly Roll strip leftovers. Stitch one square to either end of the shorter border strips. Press the seams towards the border strip.
- Stitch the shorter border strips to the top and bottom of the quilt top, nesting the seams at the cornerstones. Press the seams towards the borders.
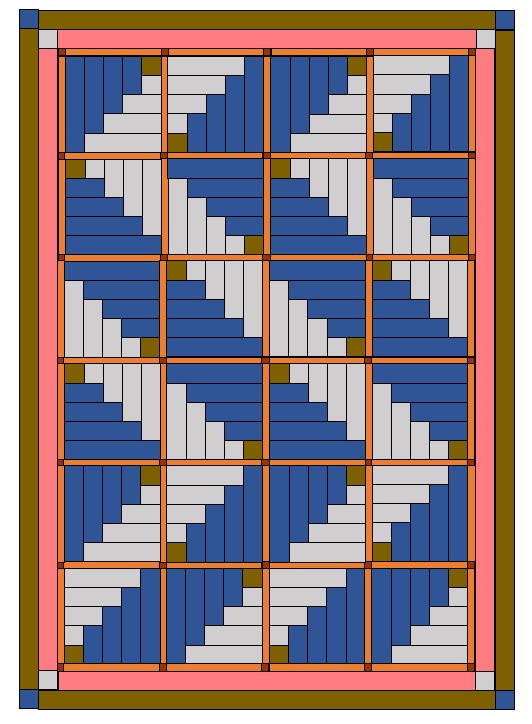
ADDING THE OUTER BORDER:
- Measure the quilt top through the middle for the length and width. It will be approximately 70 1/2” x 48 3/4”. Stitch the six medium Jelly Roll strips chosen for the outer border together to make one long strip and cut two strips for the length and two for the width.
- Pin and stitch the longer strips to the left and right sides of the quilt top. Press the seams towards the borders.
- Cut four 2 1/2” squares from the dark Jelly Roll strip leftovers. Stitch one square to either end of the shorter border strips. Press the seams towards the border strip.
- Pin and stitch the shorter border strips to the top and bottom of the quilt top, nesting the seams at the corner stones. Press the seams towards the borders.
QUILTING:
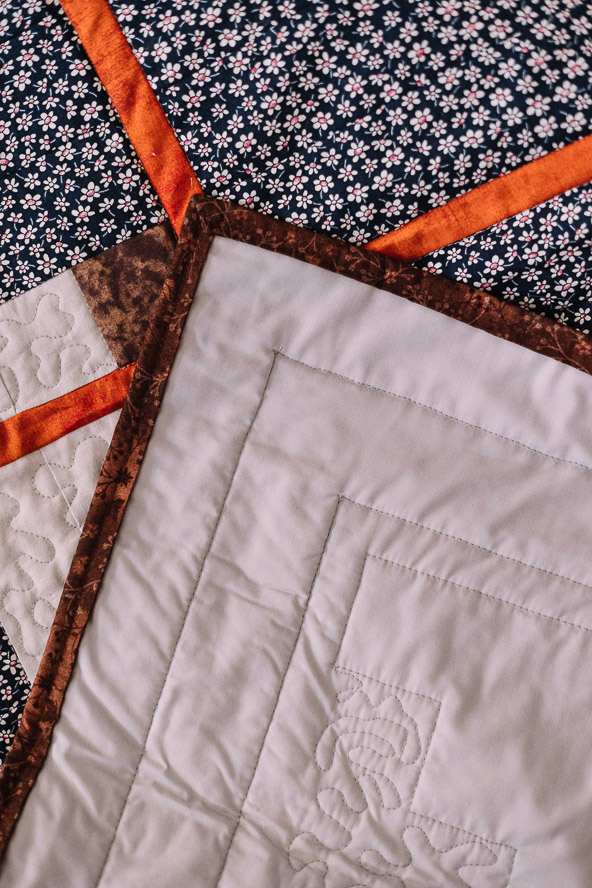
- Layer and secure the quilt top, batting and backing and quilt as desired.
- The designer used free motion quilting on the light half of the Log Cabin units and stitch in the ditch around the whole darker section each unit.
- The designer stitched in the ditch between the sashing and inner border and then the inner border and outer border.
BINDING:
- The designer bound the quilt with seven dark strips, stitched into one long strip and then folded in half width ways, to double bind and miter the corners.

can you tell me why my log cabin blocks are uneven. I have a pre cut log cabin package. when I sew them together I have some fabric left at the bottom of the sewing piece.
Hi Rita! We will reach out to the designer of this pattern for advice and will let you know when we have additional information. Thanks so much! – Ashley, WeLikeSewing
Hello again, Rita! The designer had some ideas for what could be causing issues. Below are her suggestions. Hope this helps! Have a great day 🙂 – Ashley, WeLikeSewing
* The precuts have been cut correctly and the instructions don’t say to trim them to size between rounds.
* Seam allowance – If the reader has been chain piecing, even one seam being too wide can effect the rest of the block.
* Pressing – If the seams are not pressed out, the block size can be effected.
how do I download this patter and instructions? I have a gold membership.
Thanks, Eileen Davis
Hi Eileen! This project does not have a pattern download; however, you can still print off the diagrams and instructions at home. There are a few ways to do this. You can hit the print icon at the top of the page next to the social media buttons or you can select/highlight the diagrams and instructions and either print off the entire webpage or copy and paste them into Microsoft Word. Hope this helps! – Ashley, WeLikeSewing
this is just what i have been looking for and it looks quick and easy. thank you so much.
You’re so welcome, Lynne! Have a great day! – Ashley, WeLikeSewing