Create a gorgeous autumn quilt that resembles showers of vibrant fall leaves with this quilt block design. This quilting project puts your skills to the test by using foundation paper piecing to make a delicate leaf pattern. Foundation paper piecing is all about accuracy, allowing you to create beautifully intricate designs, which is why this quilt block is a fantastic project for more experienced quilters. Whether pieced together as a quilt or featured on smaller projects like pillows, this quilt block is sure to be a stunner.
Finished Size: 6” or 12” quilt block
Skill Level: Intermediate
Materials:
- 1/8 yard each of cream, dark red, medium red, and light red
- 6” quilt block template pieces (for 6” blocks only)
- 12” quilt block template pieces (for 12” blocks only)
Instructions:
- Cut out the pattern pieces A-H on the dashed lines, making sure to not cut on the straight solid lines.
- Cut 1 square of cream fabric using pattern piece A.
- For pattern pieces B-H, use foundation pattern piecing techniques to apply the indicated fabric colors on the wrong side of the paper pattern piece.
- Trim the sewn block units B-H using the dashed line as a guide.
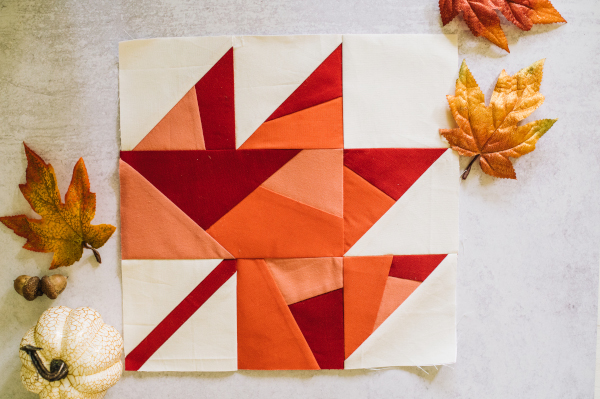
- Sew together the block units in rows and join the rows using the illustration below as an example.

- Stack two red fabric pieces for B1 and B2 together so that they have one straight edge aligned.
- Position the straight edge 1/4″ past the B1-B2 line on the WRONG SIDE of the paper pattern. (You may want to use a lightbox or window light to find the correct position. Use pins to check the placement.) Sew along the B1-B2 line of the paper and fabric using a 1.4mm stitch length (or shorter than is typical) and backstitch at both ends.
- Fold the paper back along the line you stitched, and trim the fabric so it extends 1/4″ from the folded paper edge.
- Press the fabrics in place on the back of the paper pattern, and add a piece of cream fabric to the back of pattern piece B that is large enough to cover the B3 section. Align the straight edge so it is at least 1/4″ past the B2-B3 line. Pin in place to check the placement and sew along the line. Fold the paper back along the line you stitched, and trim the fabric so it extends 1/4″ from the folded paper edge.