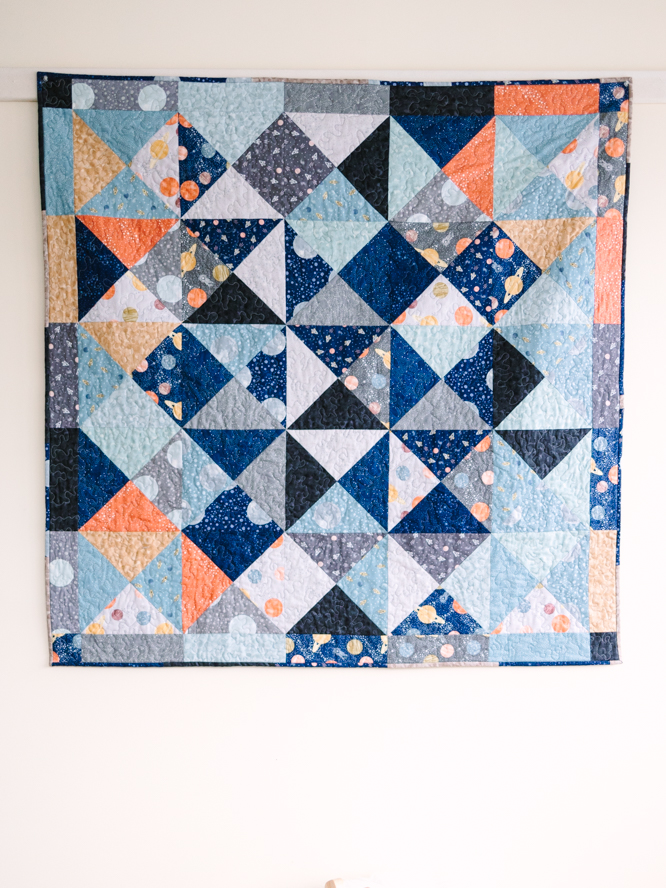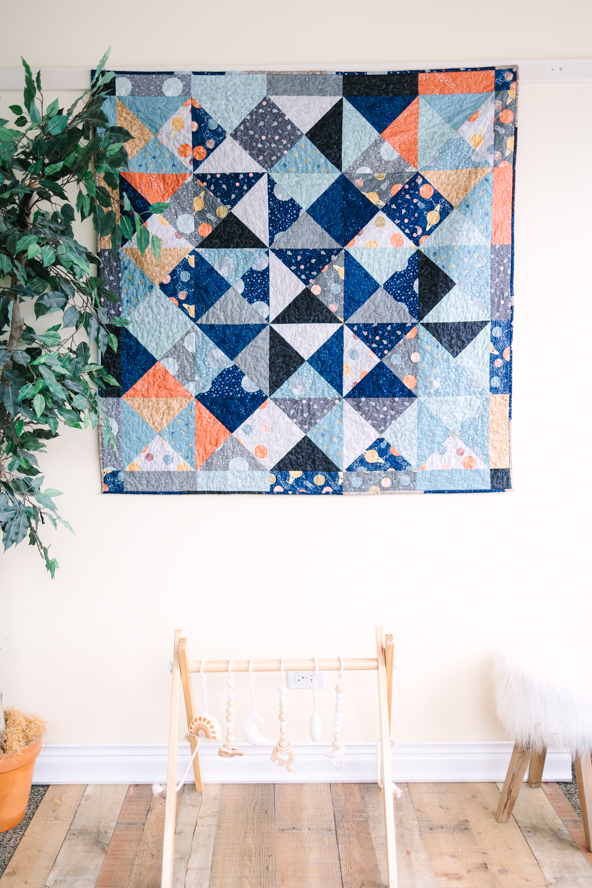
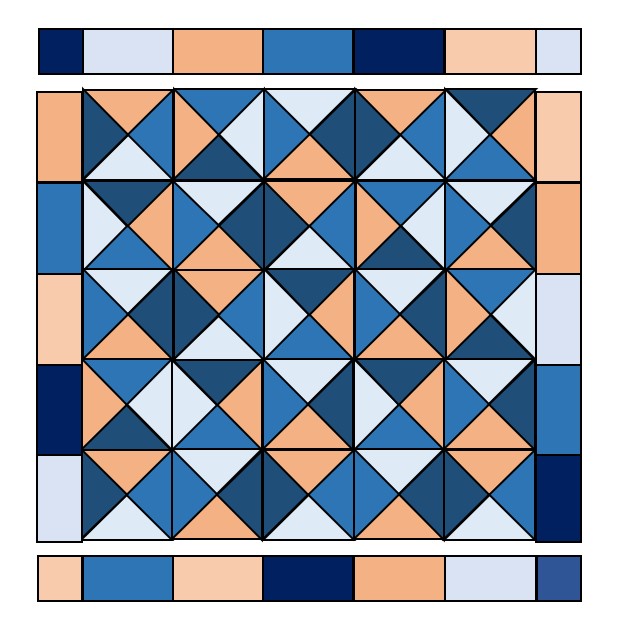
Create a beautiful throw quilt using quarter square triangles with this easy quilt pattern. Made using a layer cake in fun, space-themed prints, this precut-friendly quilt finishes at an approximately 50” square. The key to this pattern is color placement, and this project lets you play with combining light, medium and dark prints to create an eye-catching design. Complete your throw quilt with a simple border of pieced fabric strips.
Skill Level: Confident Beginner
Finished Size: ~50” x 50”
DESIGNER NOTE: Scant 1/4” seam allowance used throughout
Materials:
- One 42 piece Layer Cake of 10″ x 10″ squares
- ~58” square batting
- ~60” square backing
- Fabric pen
- Basic sewing and quilting notions
- Stippling pattern if desired
Instructions:
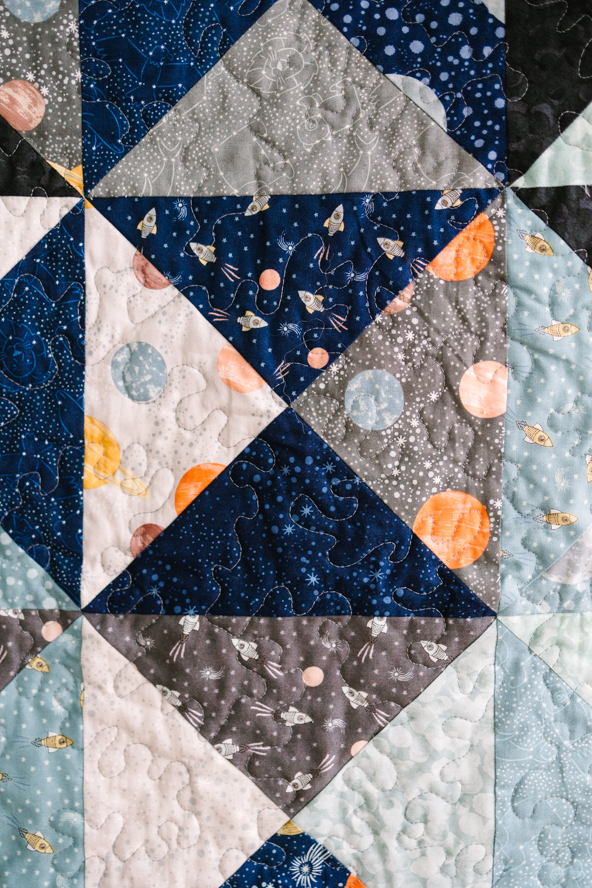
MAKING THE QUARTER SQUARE TRIANGLES (QST):
- Separate the layer cake into dark, medium and light fabrics.
- Choose thirteen dark and thirteen light or medium fabrics.
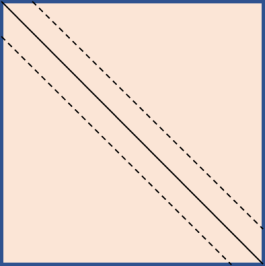
- Draw one line diagonally from corner to corner on the back of the thirteen lighter fabrics.
- With right sides together, place a light/medium fabric on a dark fabric lining up the raw edges. Pin in place and stitch either side of the drawn line using a scant 1/4” seam allowance.
- Cut through both layers on the drawn line to make two half square triangles (HST). Press open or to the darker fabric.
- Draw one line diagonally from corner to corner on the back of thirteen HSTs, crossing the stitched seam.
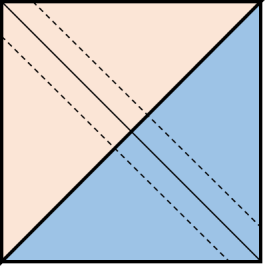
- With right sides together, place two HSTs together matching a dark fabric with a lighter fabric. Nest or line up the seam in the middle and pin in place. Stitch either side of the new drawn line using a scant 1/4” seam allowance.

- Cut through both layers on the drawn line to make two QST. Press open or to one side.
- Make 26 QSTs (25 will be used).
MAKING THE QUILT TOP:
- Check the sizes of the QSTs and trim them to the same size (~9 1/4” square).
- Using 25 of the QSTs, make five rows. Rotate the QSTs to make the rows random.
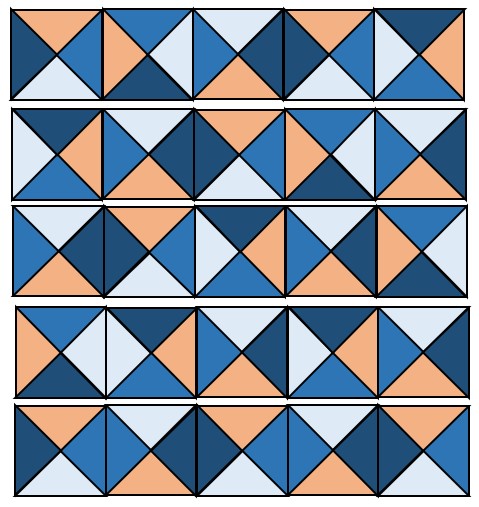
- Stitch the rows together, matching the points.
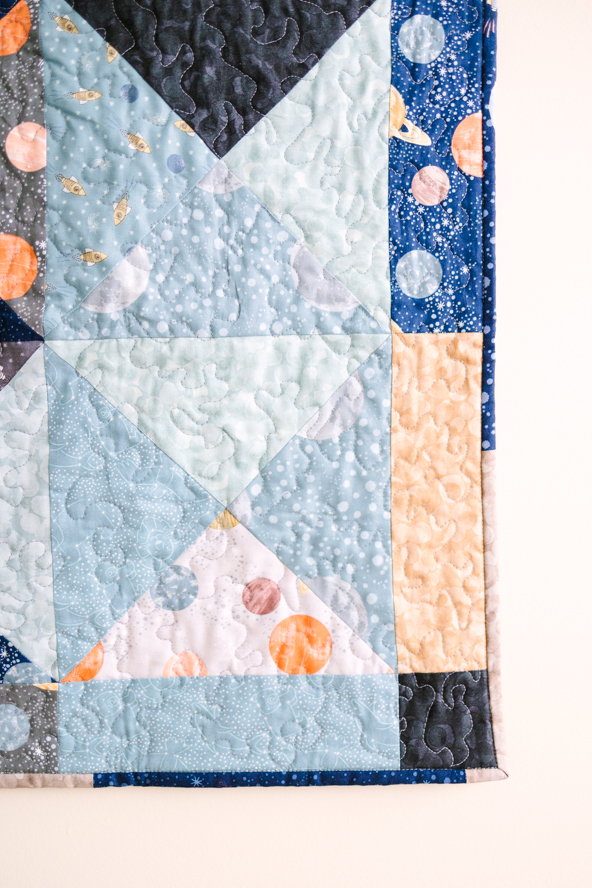
MAKING THE BORDERS:
- Using ten of the remaining 10” layer cake squares, cut twenty 3” x 9 1/4” strips and four 3” squares.
- With right sides together, stitch five random 3” x 9 1/4″ strips together along the short edges. Press the seams one way. Make four border strips.
- Stitch a 3” square to both ends of two of the border strips to make the long borders. Press seams towards the border.
FINISHING THE QUILT TOP:
- With right sides together, stitch the two short borders to the sides of the quilt top, matching the seams. Press seams towards the border.
- With right sides together, stitch the two long borders to the top and bottom of the quilt top, matching the seams. Press seams towards the border.
- Press the whole quilt top well.
QUILTING:
- Layer the backing, batting and quilt top and quilt as desired. The designer used Stippling on the whole quilt including the borders. Note: Stippling is a free motion pattern that meanders across a quilt. The meanders can be large and, if you are following the rules, the lines of quilting should not cross. Try to keep your stitches the same length, relax your shoulders and take regular breaks.
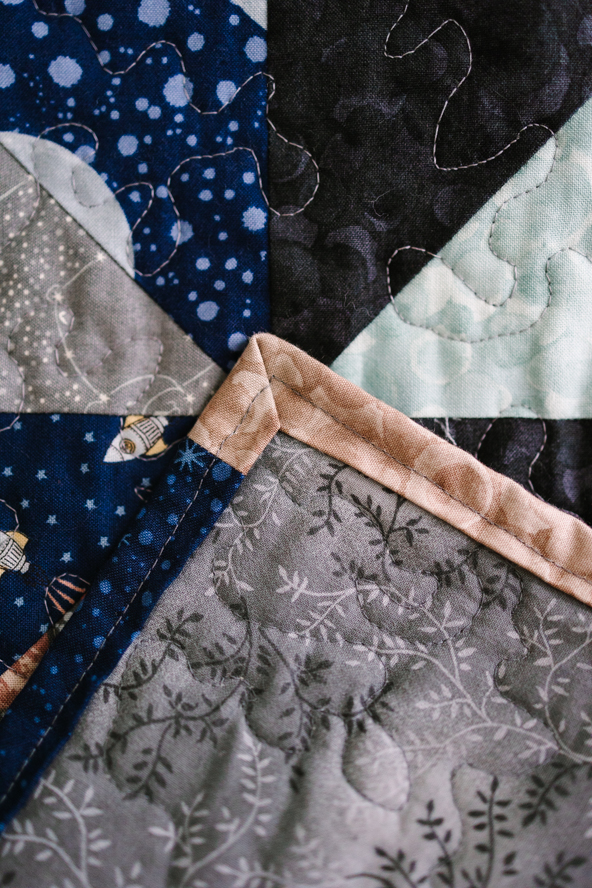
BINDING:
- Using six 10” layer cake squares, cut four 2 1/2” strips from each.
- With right sides together, stitch the strips together randomly along the short edges to make one long length.
- Use the long length to double bind the quilt.
LEFTOVERS:
- There will be a little fabric left over that could be used to make a matching cushion.