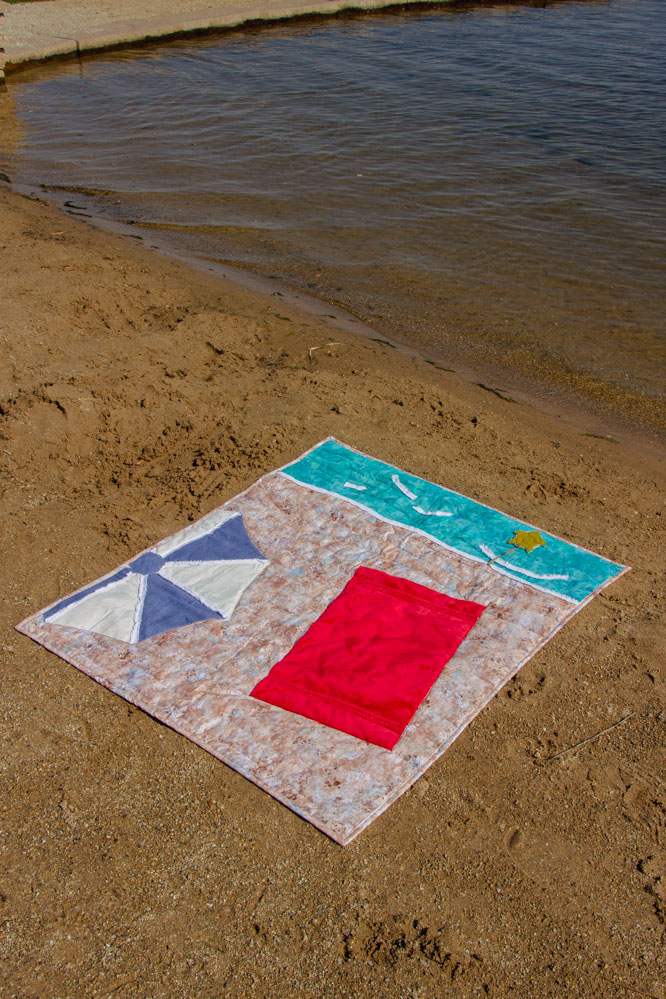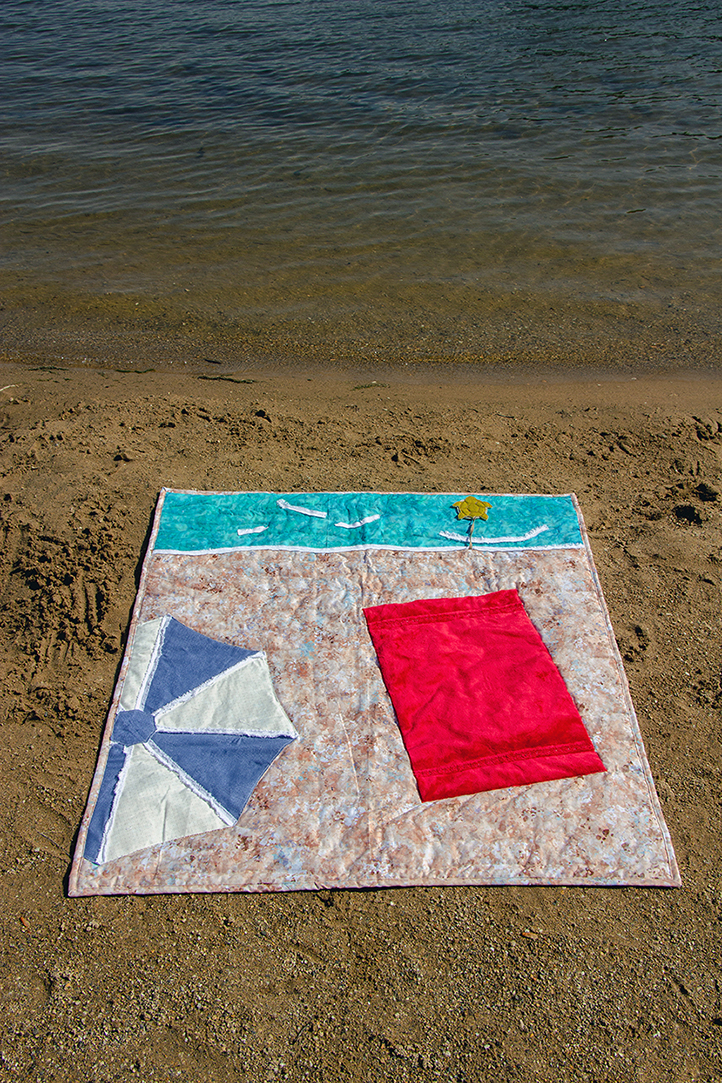
Bring the beach to your own backyard with this adorable playmat that’s perfect for summertime. A great gift idea for your newest grandbaby, this playmat tutorial shows you how to create a fun beach scene that features a tiny sea turtle! This baby sewing project finishes at 36” x 40” and is great to bring on family trips to the park, gatherings with friends, and of course, the beach. Let your little one enjoy sunny days and warm weather outside with this cheerful sewing project.
Skill Level: Easy
Finished Size: 36″ x 40”
Seam Allowances: 1/4” unless otherwise indicated
Materials:
- Fabric:
- Ocean cotton fabric – cut 1 – 9″ x 36”
- Beach and binding cotton fabric – cut 1 – 36″ x 40”, cut 4 – 2 1/2″ x WOF (WOF = Width of Fabric)
- Umbrella light blue cotton fabric – 1/4 yard
- Umbrella white cotton fabric – 1/4 yard
- Sea turtle body – cut 2 – 5″ x 5”
- Sea turtle shell – cut 2 – 5″ x 5”
- Towel (cuddle, stretch velvet, fleece, or terry cloth) – cut 1 – 13″ x 19”
- Backing: 40″ x WOF
- Cotton batting: 40″ x 44”
- Heat n Bond Feather Lite – 1 yard
- Heat n Bond Stretch – cut 1 – 13″ x 19”
- Chenille-It Blooming Bias 5/8” white
- Elastic 1/4 inch wide, cut to 9”
- Thread
- Fabric marking tool
- Pencil
- PDF Templates – These are located at the bottom of this page.
- Note: When downloading this pattern, we recommend opening your pattern download using Adobe Acrobat.
Instructions:
- Trace 6 umbrella pattern wedges and one center umbrella piece on paper side of Heat n’ Bond Lite with pencil. The pattern pieces need to be taped together to create a larger piece for the umbrella wedge, and the umbrella center should be cut as a separate piece. (Tip: Using a light board or well-lit window works well for transferring pattern to Heat n Bond and fabric.)
- Press 3 Heat n Bond traced umbrella wedge pieces and umbrella center to blue umbrella fabric and 3 Heat n Bond traced umbrella wedge to white fabric. Peel paper backing and set aside.
- Cut 13″ x 19” piece of Heat n Bond Stretch. Press to wrong side of towel fabric. Peel paper backing and aside.
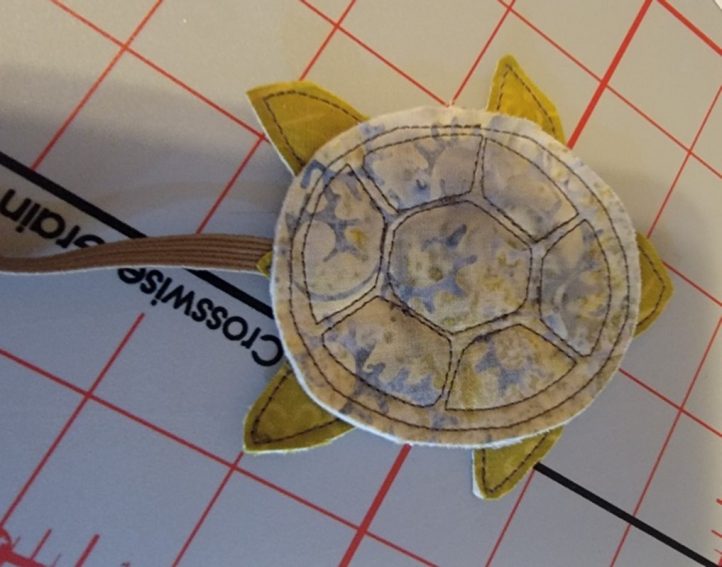
- Transfer pattern to right side of body and shell fabric with disappearing fabric marking tool.
- Layer fabric, batting, and fabric with pattern of sea turtle body on top.
- Stitch along marked lines of sea turtle body, leaving opening between back legs.

- Trim 1/8 inch from lines.
- Insert end of elastic in opening between legs. Stitch opening closed securing elastic in place.
- Repeat Steps 4 – 6 with sea turtle shell, minus the opening in shell unit.

- Stitch along outer shell template line to join layers, and trim 1/8 inch from stitched line.
- Place shell piece on body piece and secure by stitching along center shell design lines.
- Trim one long edge of ocean fabric to mimic ocean tide with soft curve.
- Align ocean piece at one end of sand, matching edges with curve side of ocean towards center of beach, and slide sea turtle elastic under ocean edge.
- Stitch curved ocean edge down to beach edge with zig zag stitch.
- Stitch blooming bias along ocean edge to create wave edge.
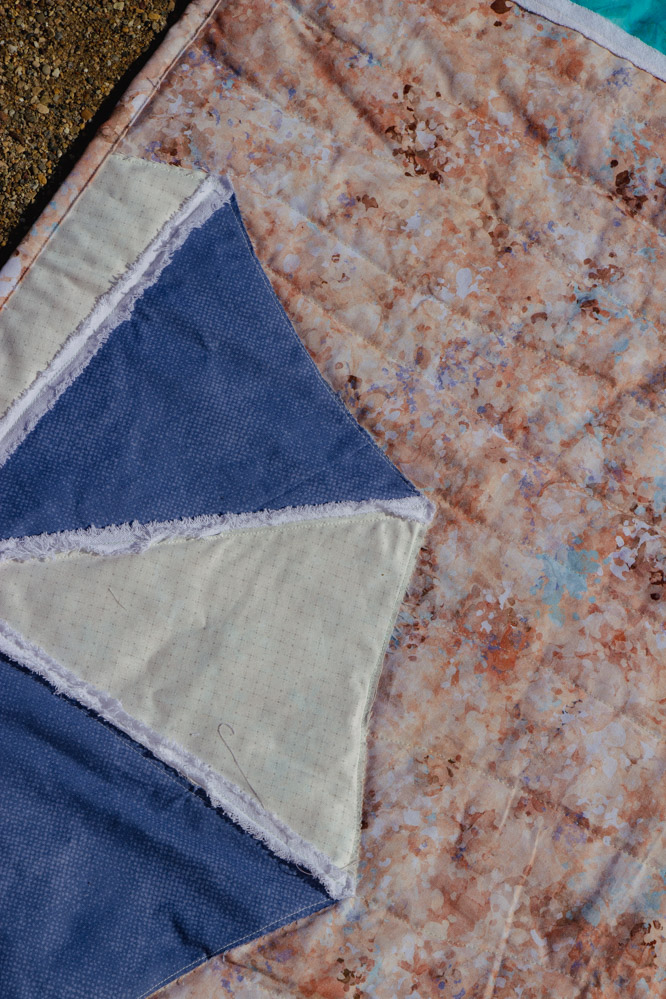
- Place umbrella wedges alternating light and dark. Press in place.
- Stitch 1/8 inch from each wedge piece to secure.
- Sew blooming bias along joints in umbrella wedges.
- Place umbrella center at center of umbrella wedges, press in place.
- Stitch 1/8 inch from raw edge of umbrella center.
- Place towel on beach, pin, and flip project over. Press from backside of beach fabric. (Because of the thicker nature of this fabric, pressing through the lighter weight beach fabric is more effective)
- Using decorative stitches, create band on towel 2 inches from either end of towel.
- Satin stitch around all four sides of towel.
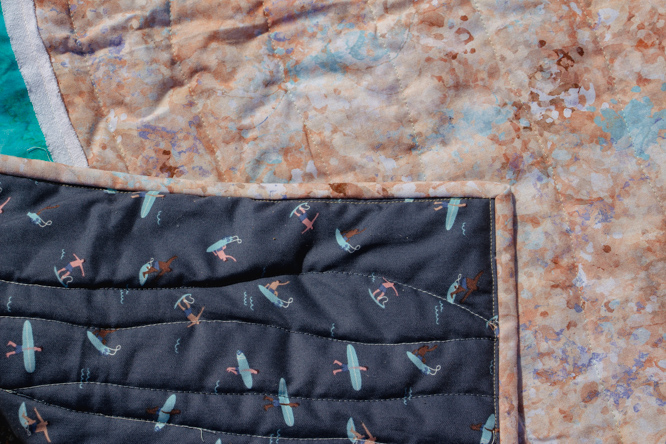
- Create quilt sandwich with backing, batting, and top, and quilt as desired, avoiding sea turtle and sea turtle elastic.
- Square up playmat and bind.
- Wash and dry to bloom the bias detail.
- Finish the edge with binding.