
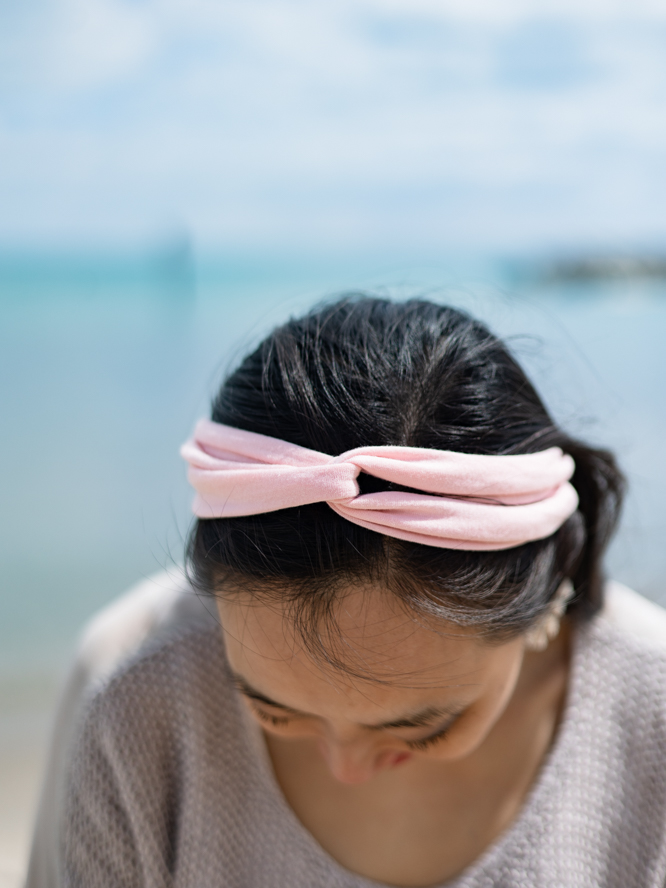
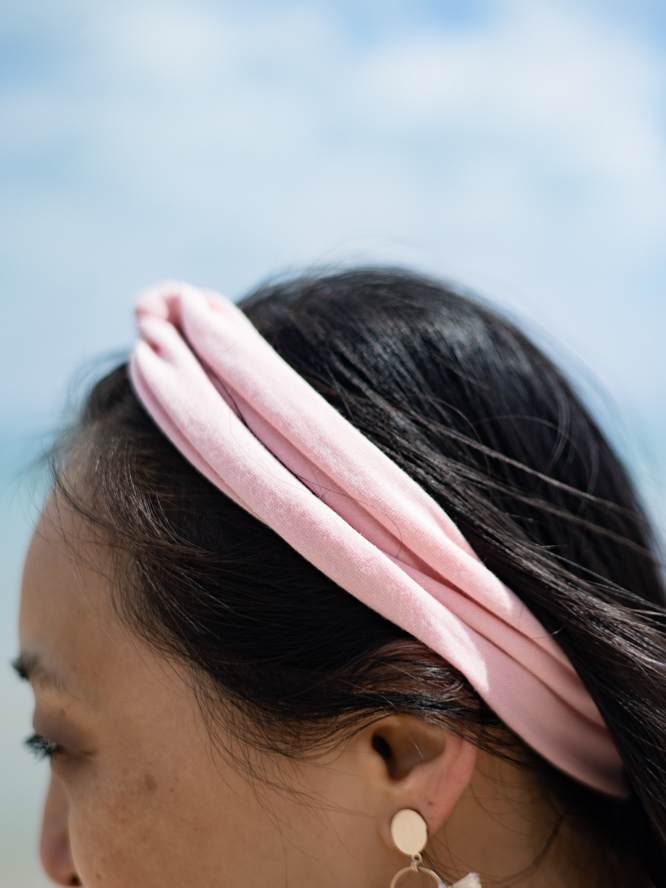
Hate dealing with frizzy, sweaty summer hair? Tame your tresses by creating this simple and quick fabric headband. Featuring a twisted top knot, this easy fabric headband is the perfect project for beginners and will help you gain experience working with knit fabrics. This versatile hair accessory can be made in no time at all, and you can create several to compliment your entire summer wardrobe. Design your headband in a bright eye-catching color or bold print to make this sewn accessory the focal point of any outfit!
Skill Level: Beginner
Seam Allowance: 1/4″
Materials:
- 1/8 yard of stretchy t-shirt weight knit fabric with good recovery, such as a cotton or polyester with 5% spandex (The example uses a peach colored rayon/spandex knit)
- Matching all-purpose thread
- Ball point size 14 needle (may also be called a “stretch” needle)
CUTTING YOUR FABRIC:
Cut an even strip of fabric on the crosswise grain that matches the desired size listed on the chart below. (Note: For new sewists, the crosswise grain is the threads that run perpendicular to the selvage of the fabric) These measurements are a general guideline, and will vary depending on the desired snugness of the headband and the stretchiness of the material that is being used.
For a more custom fit, cut the fabric one to two inches longer than the chart suggests. Follow sewing Steps 1 through 7, and try the headband on. If the fit is too loose, trim the two sewn ends of the tube off at the stitching line and repeat Step 7 until the fit is just right.
Instructions:
- Fold fabric in half, meeting the long edges together, with right sides facing each other. Pin if desired.
- Sew with a 1/4” seam allowance, using the widest zigzag stitch and a fairly short stitch length (approximately 10 stitches per inch, or 2.5 mm). Using a zigzag stitch will ensure that the seam will stretch along with the fabric and be comfortable to wear. A serger may be used instead, if desired.
- Pin a safety pin to one end of the tube, and thread the pin through the tube in order to turn the tube right side-out.
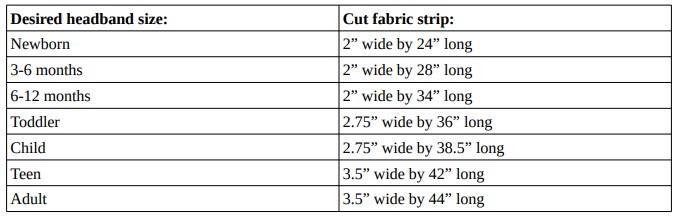
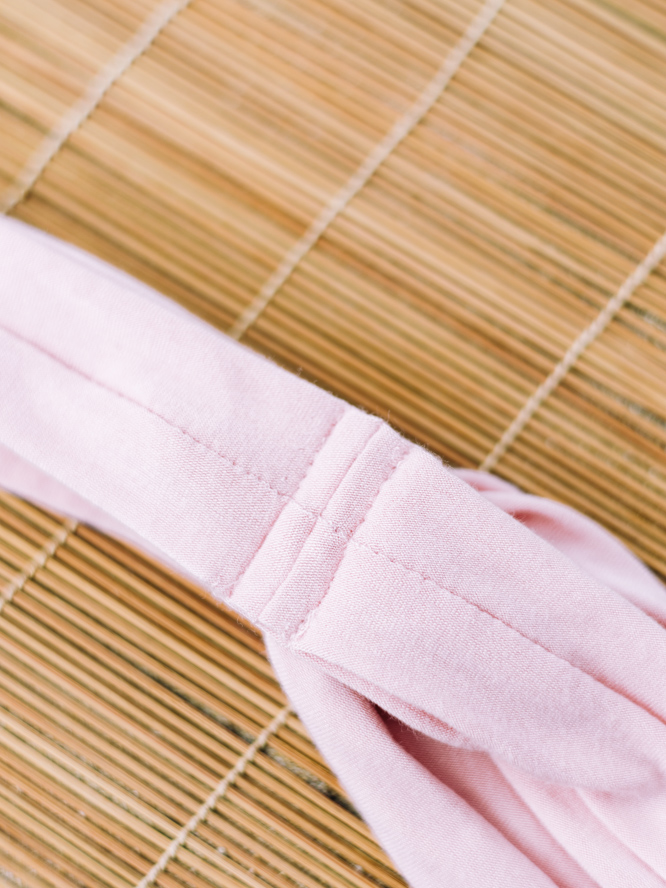
- Fold tube in half, and mark the center point of the tube near the seam with a pin or small line marking. Twist left and right halves of tube around each other as shown.
- Face seam allowances towards the inside of the headband, ensuring that the fabric is not overly twisted or rumpled.
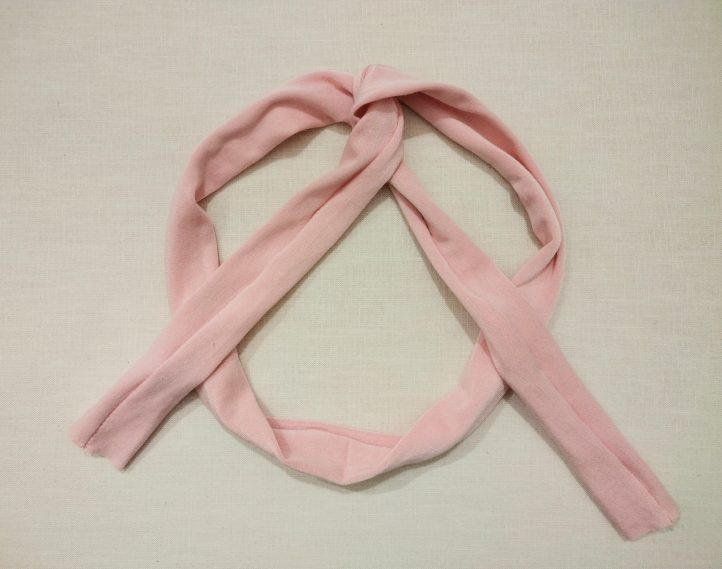
- Line up ends of tube, with seam allowances together. Pin.
- Sew ends of tubes together, using a 1/2” seam allowance.
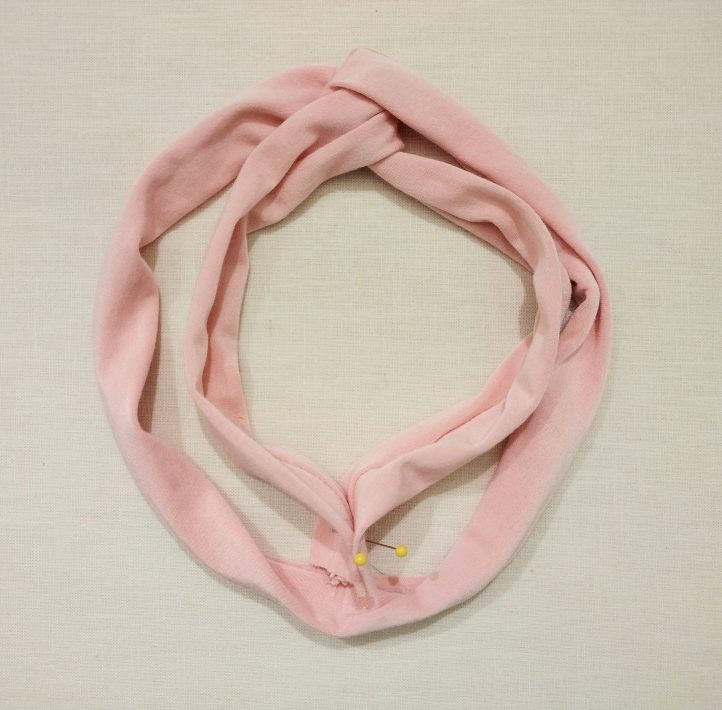
- Press seam allowances open.
- Match short seam on inner loop to center mark on outer loop, and pin.
- Sew 1/4” away from seam on each side of the short seam, attaching inner loop of headband to outer loop and securing seam allowances between layers.


How do I print these patterns?
Hi Mona! This project does not have a printable pattern. It is a tutorial for how to create the fabric headband. Our printable patterns in this issue have printing instructions located at the top of the page, usually before the sewing instructions. Have a great day! – Ashley, WeLikeSewing