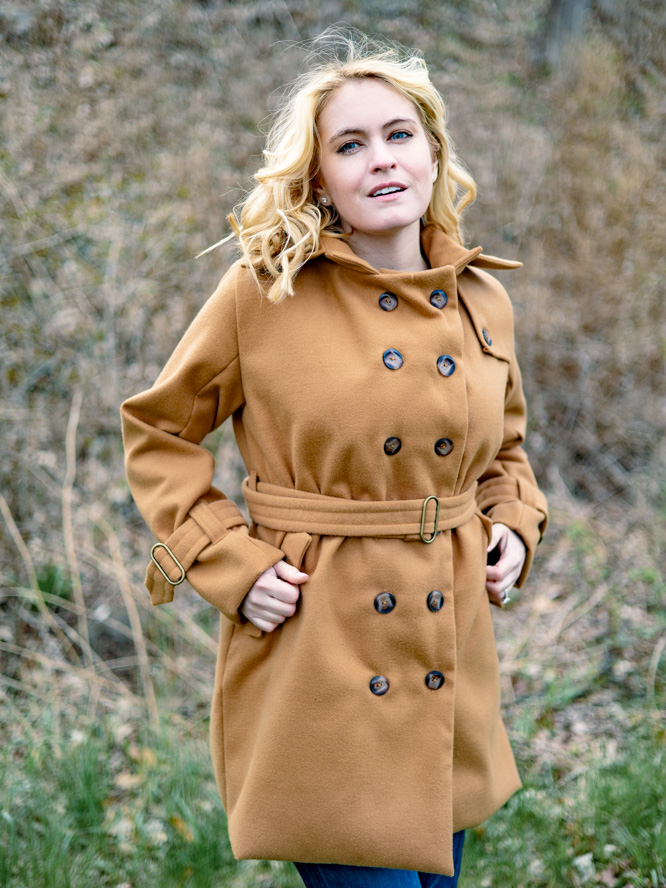
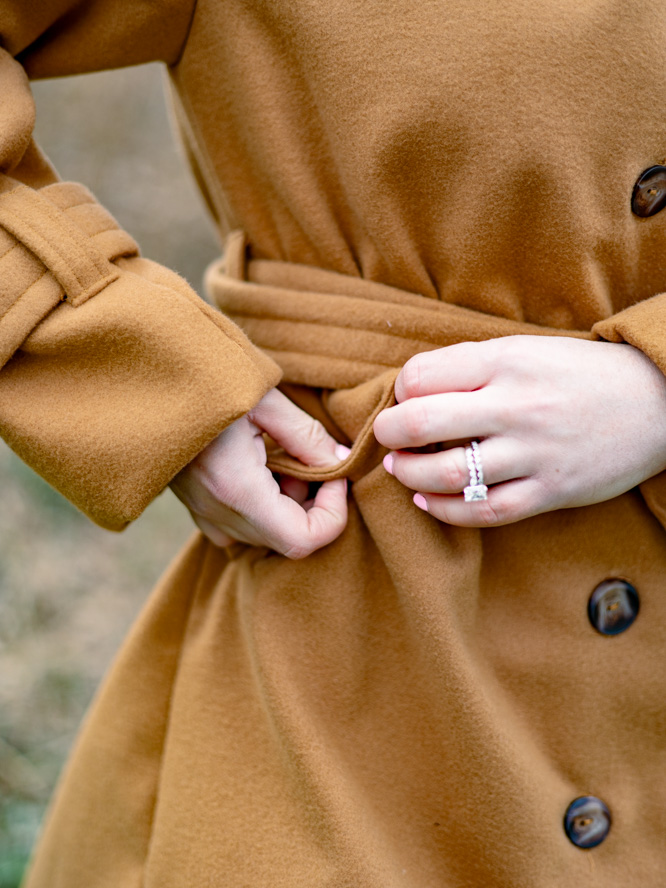
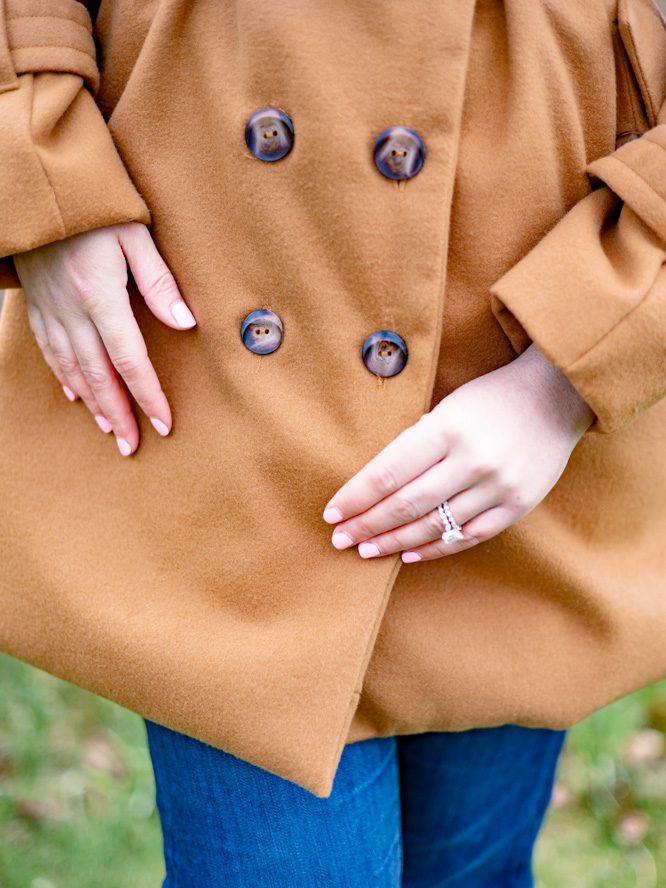
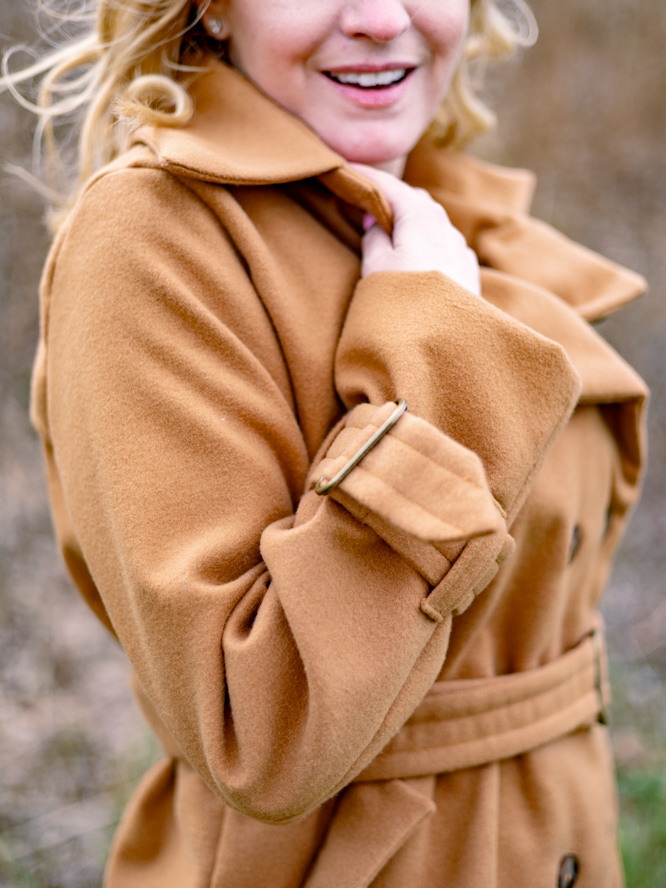
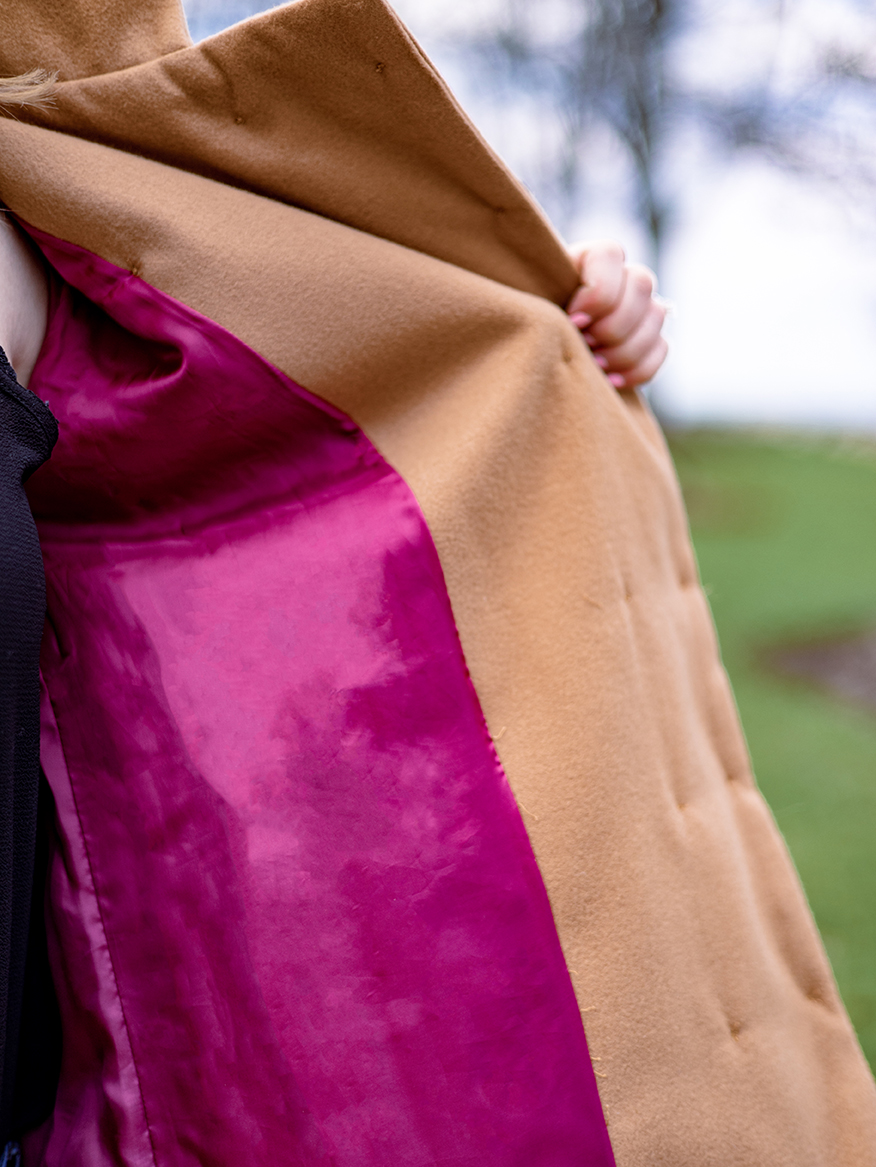
A classic trench coat is a necessity for every woman’s wardrobe, which is why we’re so excited to share this trench coat sewing pattern with you. Designed in timeless camel and lined in a stunning shade of magenta, this fall sewing pattern is a fun project for experienced sewists to try their hand at coat making. This beautiful trench coat features welt pockets, a double row of buttons, and stylish closures on the belt and wrists. Start creating a fashion-forward fall wardrobe ahead of cold weather with this elegant coat pattern.
Materials:
- Medium bottom weight or coating fabric
- Lining fabric
- Lightweight fusible interfacing
- 3 – 1 1/2″ Sliders
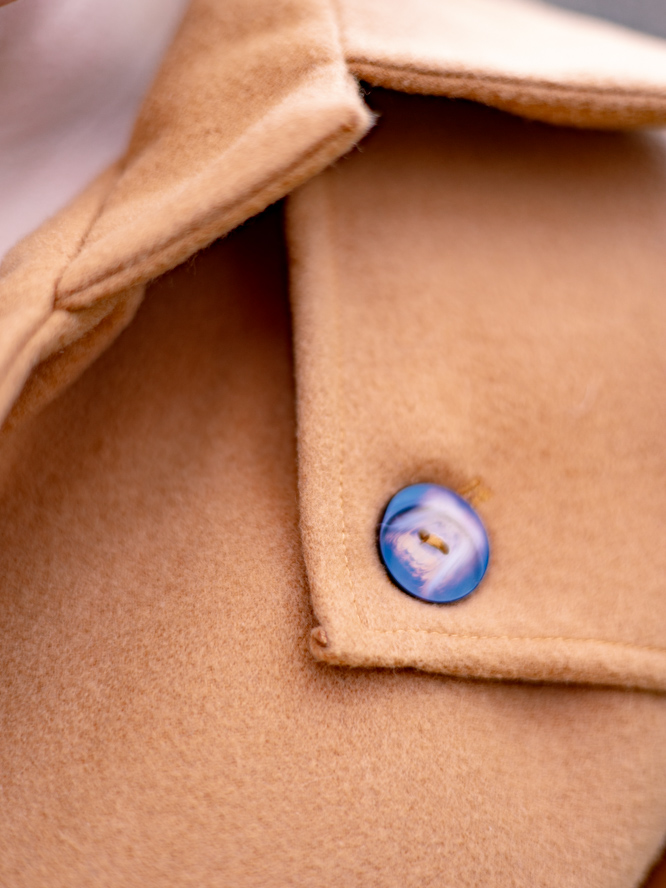
- 15 – 7/8″ Buttons
- PDF Pattern – This is located at the bottom of this page. See printing instructions below.
Finished Garment Measurements:


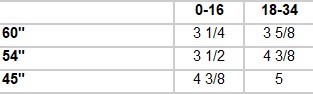
Fabric Requirements:
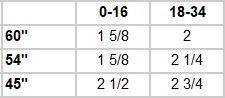
Lining Requirements:
PRINTING INSTRUCTIONS:
To download the PDF pattern, click on the download button at the bottom of the page. We recommend opening your download using Adobe Acrobat.
DESIGNER NOTES:
- All seams are 5/8” unless otherwise stated.
Instructions:
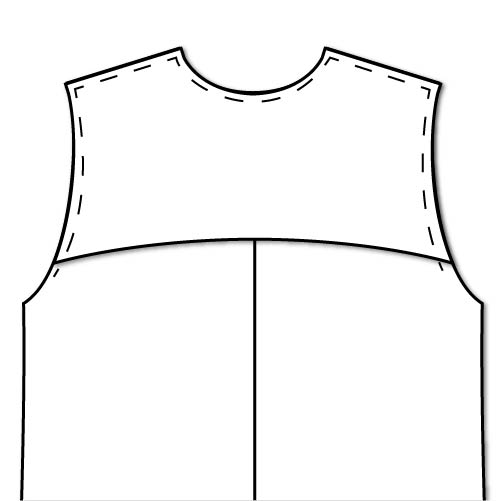
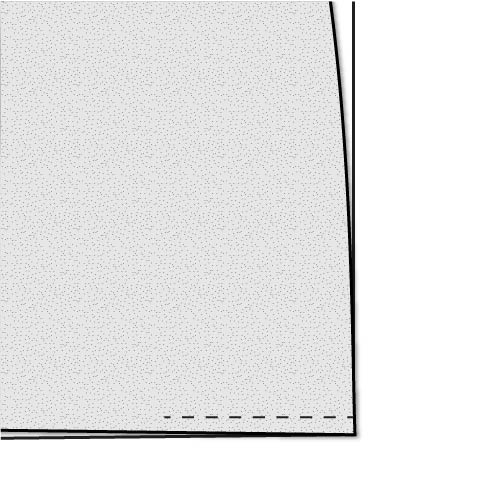
- Iron interfacing to the wrong side of both the back pieces along the back vent and bottom hem. The width of the interfacing is 2”.
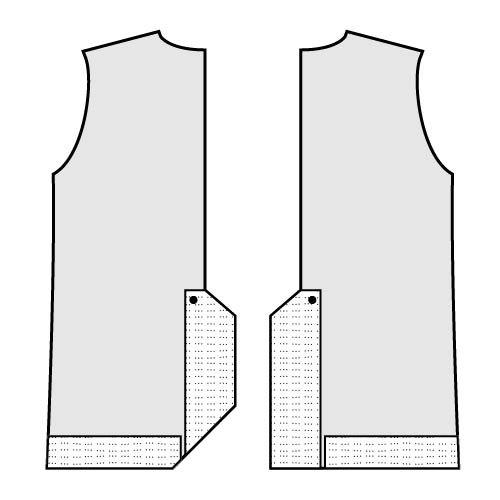
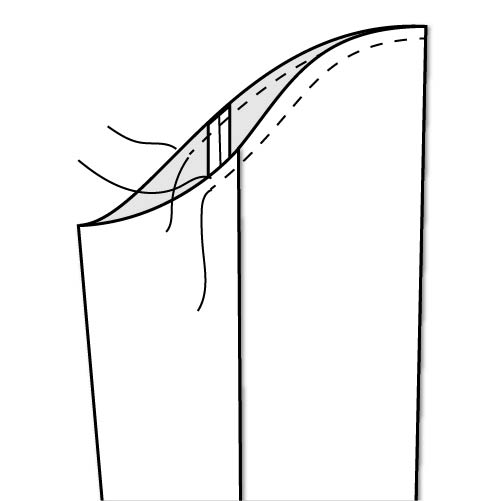
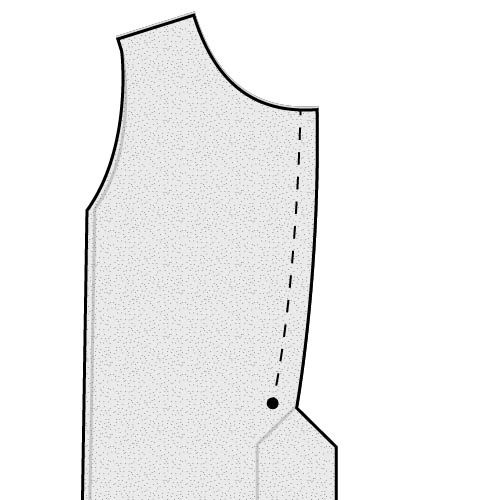
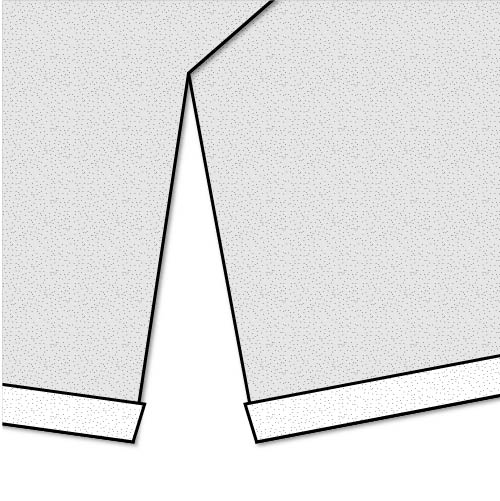
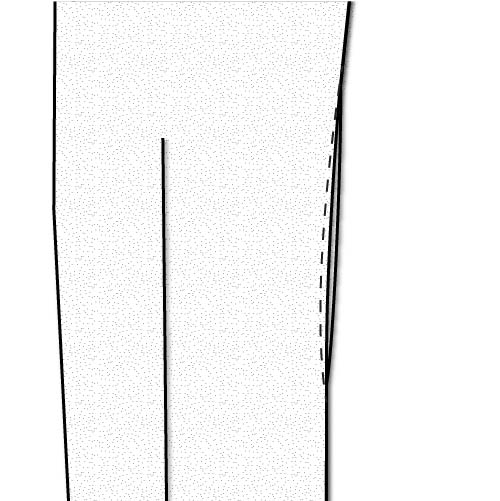
- With right sides together, sew the two back pieces together along the center back to the notch. With the needle down, lift the presser foot, rotate the fabric, and continue sewing down the diagonal edge of the vent. Stop sewing 5/8” from the edge and lock the stitches.
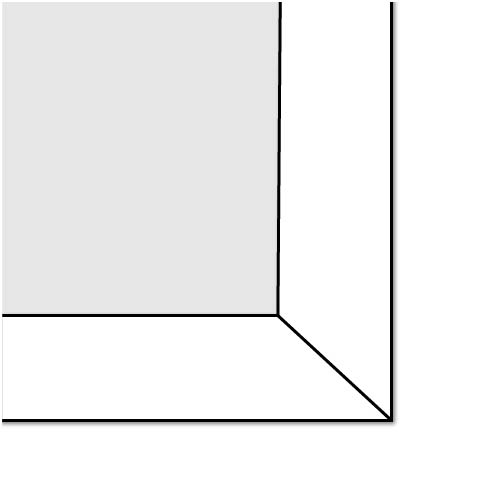
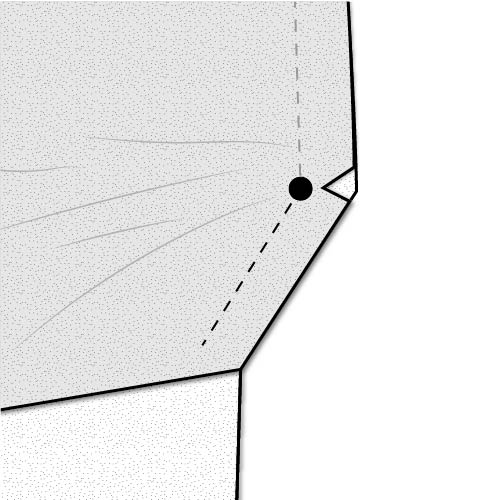
- The center back seam of the vent is finished with a mitered corner on the wearer’s right piece. With right sides together, fold the diagonal edge in half while keeping raw edges matching up along vent and hem. Sew folded edge together and trim seam allowance to 1/4″.
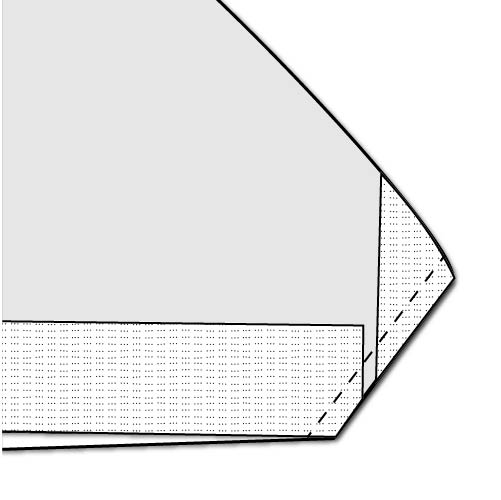
- Clip the corner and turn right sides out. Press well.
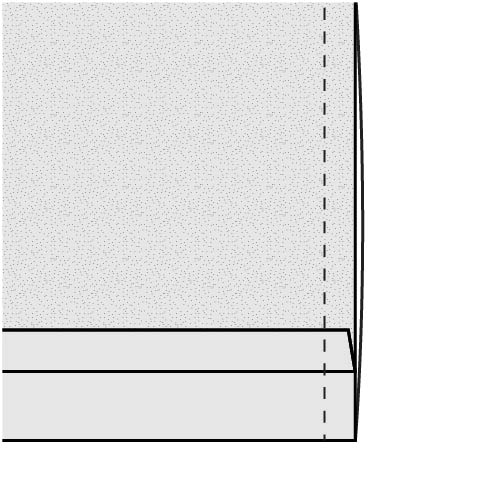
- Press the bottom edge of the wearer’s left towards the wrong side by 2 5/8”.
- Fold the bottom edge of the back flap 1/4” towards the wrong side and press. Fold an additional 1/4” and press well. Sew the hem down 1/8” from the inside folded edge.
- The bottom and left edge of front flap are finished in the same way.
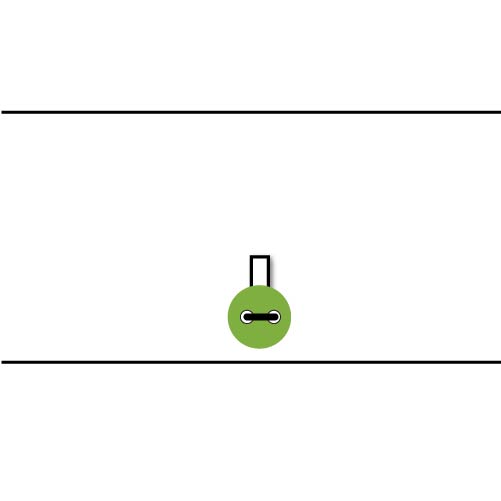
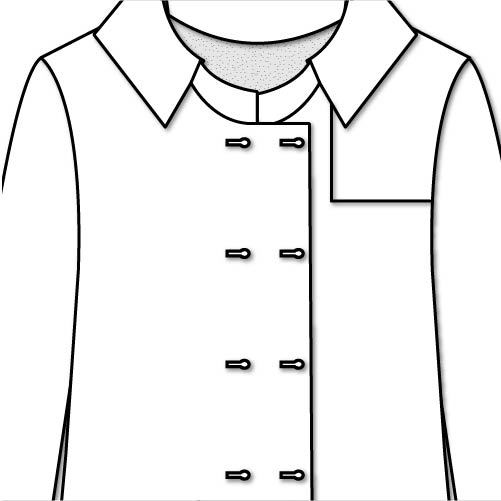
- Mark and sew the buttonhole on the front flap as indicated on the pattern.
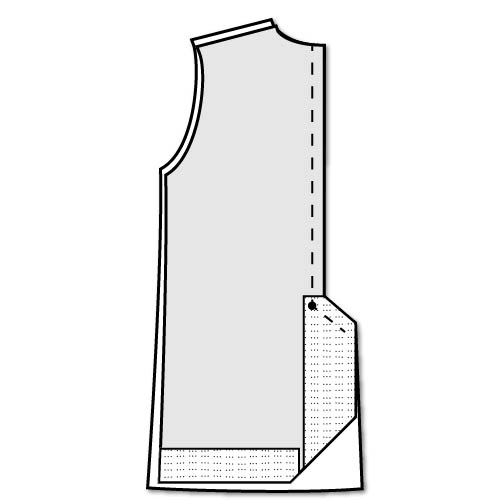
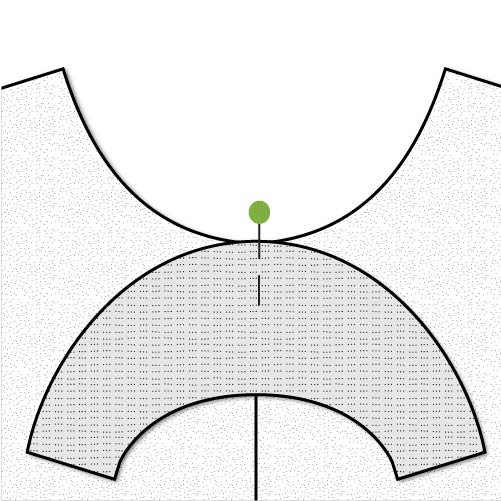
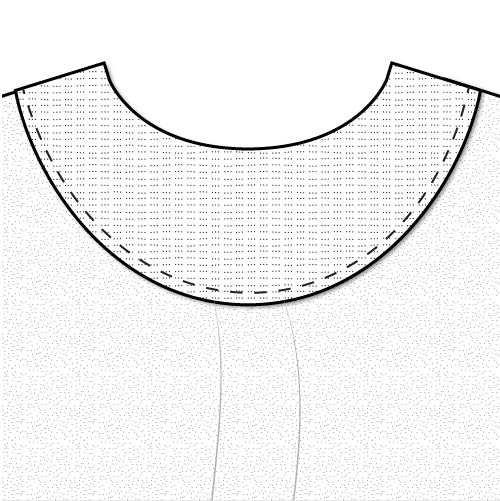
- With the wrong side of the back flap towards the right side of the back pieces, baste the flap to the coat along the armholes, shoulder seams, and back neck.
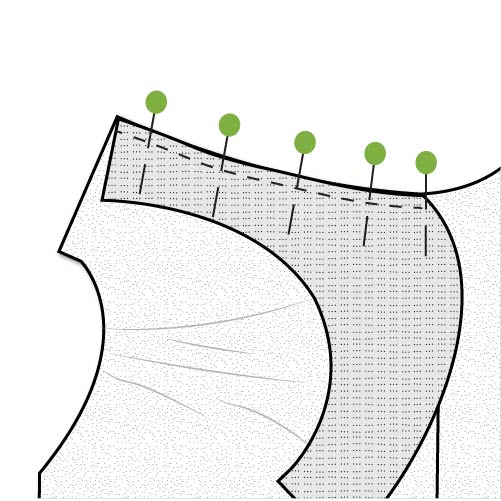
- With the wrong side of the front flap towards the right side of the wearer’s left front piece, baste the flap to the coat along the neckline, shoulder seam, and armhole. With the front flap basted in place, use the buttonhole as a guide to mark the button placement on the coat front. Sew the button in place.
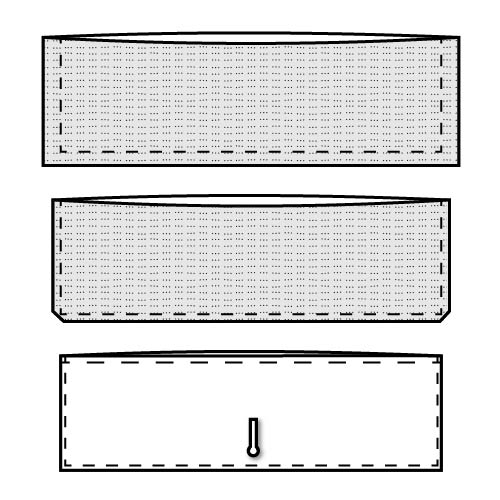
- With right sides together, sew the welt pocket and pocket together along the top edge.
- Fold the welt pocket top and seam allowance up and press well. Topstitch the seam allowance to the top piece.
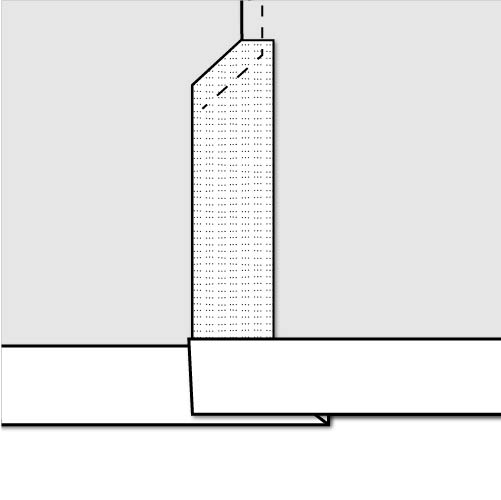
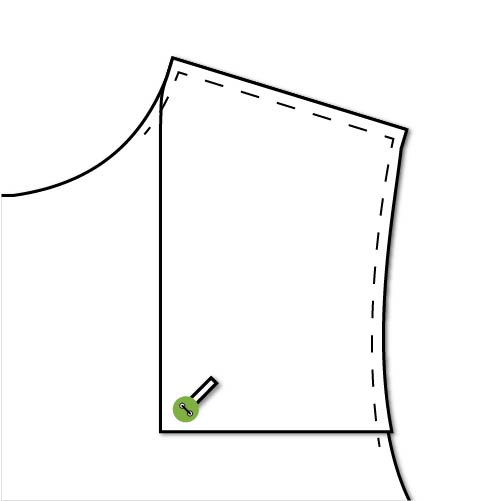
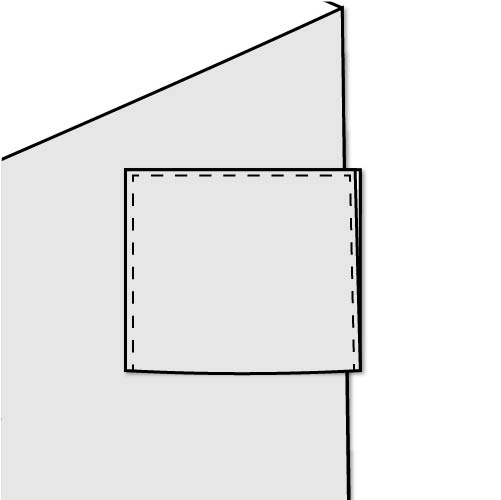
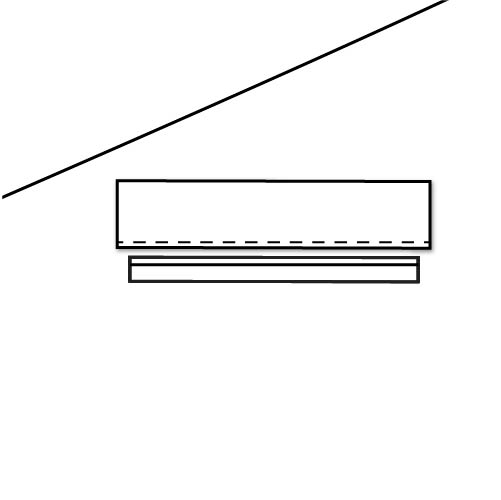
- To sew the welt pockets, place the right side of the pocket piece towards the right side of the coat front. Pin the pocket in place, making sure the rectangle welt opening on the pocket lines up with the opening on the coat front. Note: Please note that Figure 13 is slightly rotated so that the pocket instructions are illustrated straight on and not at an angle. The diagonal line in the top left corner of the image is the side seam.
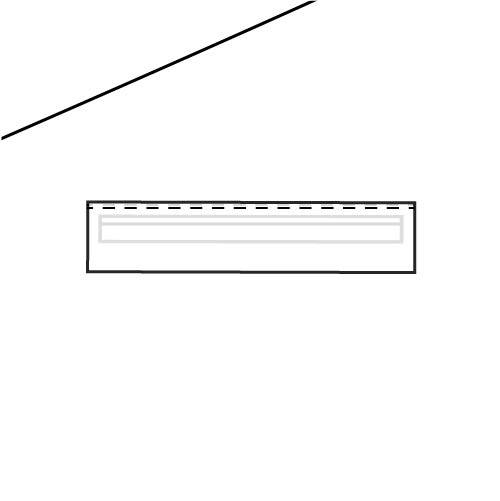
- Sew the pocket to the coat front along the top and bottom of the welt opening, locking stitches at both ends.
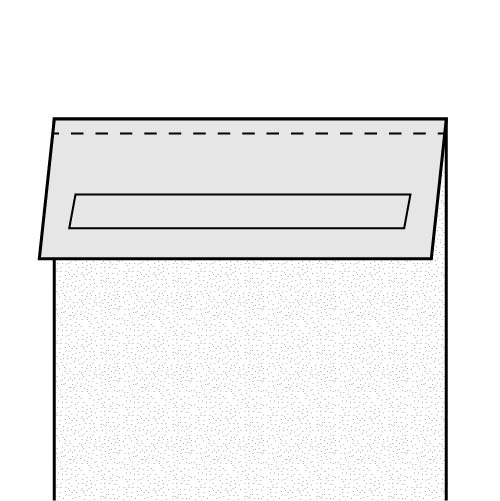
- Carefully cut through both layers parallel to the two stitched lines. Stop 1/2” from both ends and clip an angled cut towards the end of the sewn lines but not through.
- Push the pocket through the welt opening towards the wrong side of the coat front. Press the opening well.
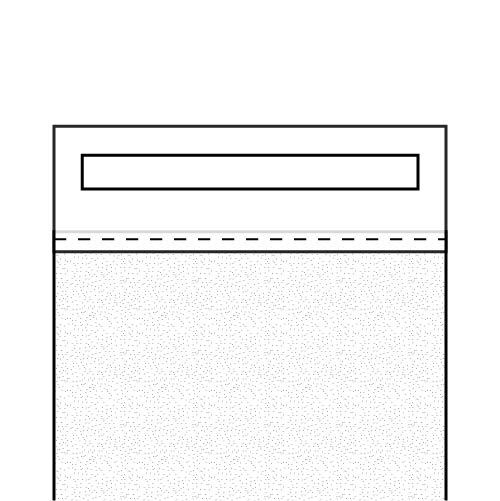
- Fold the pocket piece up towards the opening so that it lines up with the top edge of the opening. Press well.
- From the right side of the coat front, pin the fold in place.
- Fold the coat front towards the right side along the end of the welt opening. Sew the triangle created in Step 15 to the two layers of the pocket as close to the folded edge of the coat front. Repeat with the other side of welt opening.
- Working from the wrong side, fold the bottom edge of the pocket up towards the top edge of the pocket piece with right sides together. Sew the pocket pieces together along the sides and top, making sure the coat front is folded out of the way to not be caught in the stitches.
- Repeat Steps 13-20 with the other welt pocket. Iron interfacing to the wrong side of one pocket flap piece; this is now the pocket facing. With right sides together, sew the pocket and pocket facing along the sides and bottom edge. Trim the seam allowance and clip the corners. Turn the pocket flap right sides out, making sure to push the corners out. Press the pocket flap well. Topstitch along both sides and bottom edge 1/4” from outside edge. Change the stitch length to 4 and baste the pocket flap and pocket facing together along the top edge. Mark and sew the buttonhole on the pocket flap.
- With the non-interfaced side of the pocket flap towards the coat front, line up the top basted edge of the pocket flap 1/2″ from the top of the welt pocket. The pocket flap will be pointing towards the side seam of the coat. Sew the pocket flap to the coat 1/4” from the raw edge. Trim the seam allowance to 1/8” and press towards the welt pocket.
- With the pocket flap covering the welt pocket, sew the pocket flap along the same edge as the previous step 1/4” from the top edge. This stitch line will enclose the raw edge of the pocket flap.
- Using the buttonhole on the pocket flap as a guide, mark the button placement on the coat front and sew the button in place.
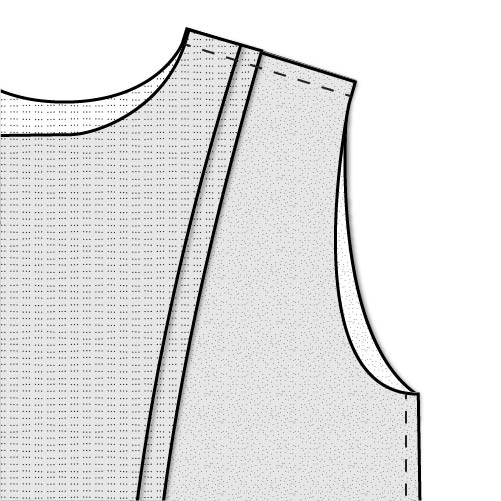
- Repeat Steps 21-24 with the other welt pocket. With right sides together, sew the front and back pieces together along the shoulder and side seams.

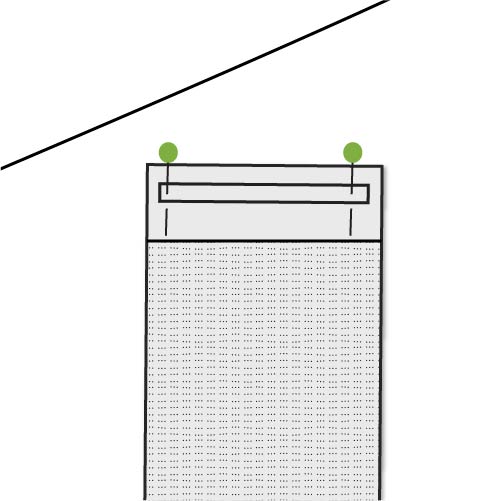
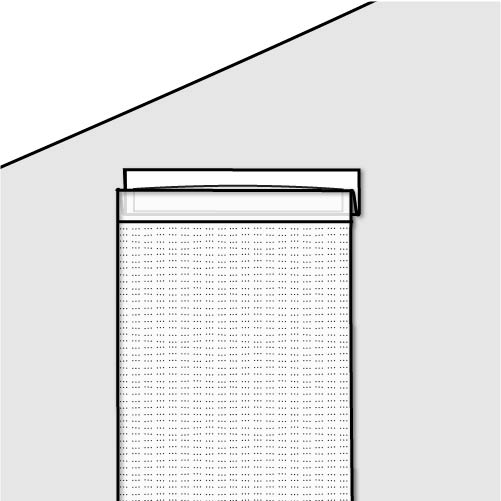
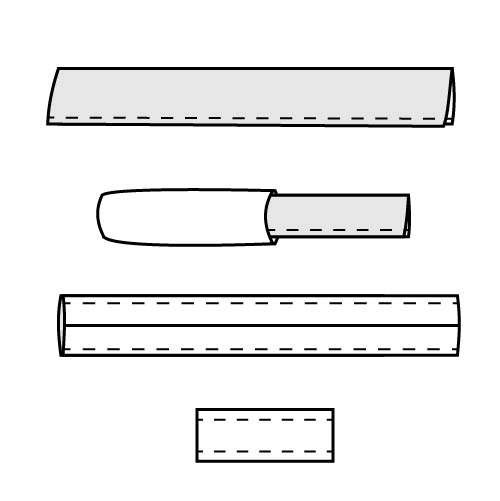
- Fold the belt loop right sides together along the length of the piece. Sew the two long raw edges together with 1/4” seam allowance. Trim the seam allowance to 1/8”. Turn the strap right sides out and press with the seam down the center of the piece. Topstitch the belt loop 1/4” from the outside edge on both sides. Cut the belt loop into six pieces that are 3” length.
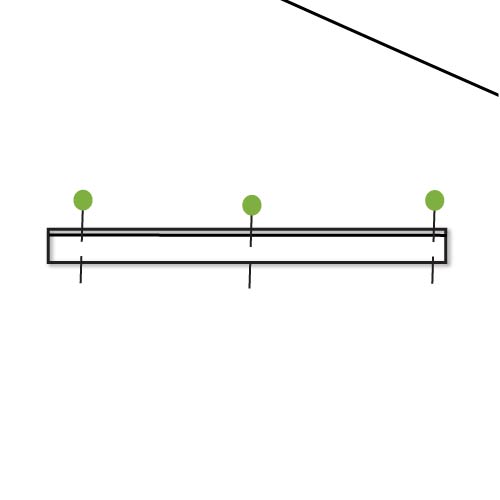
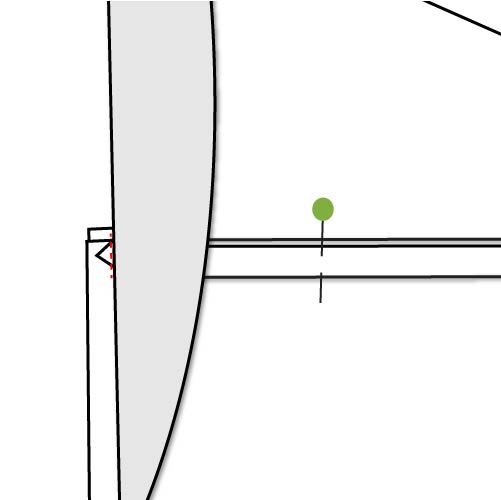
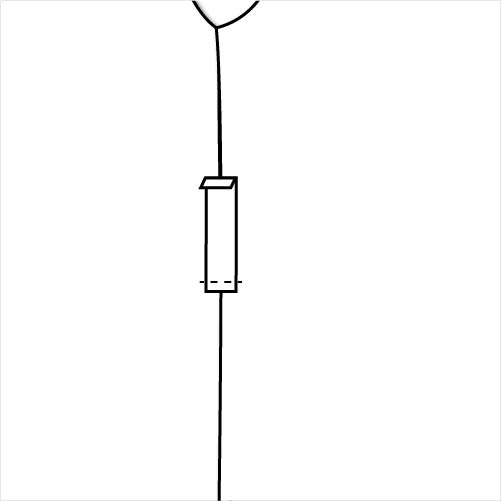
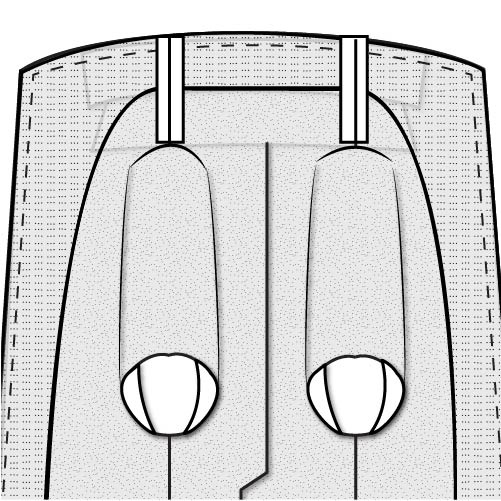
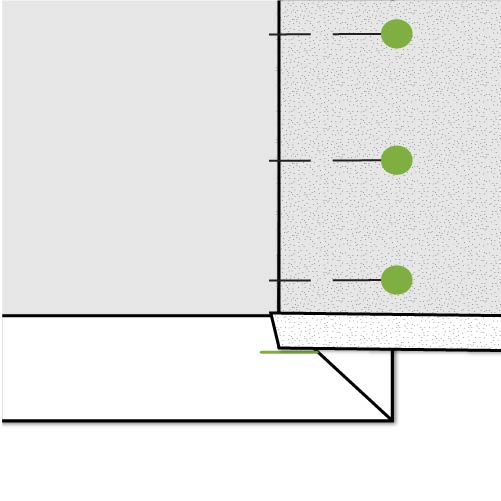
- Line up a raw edge of the belt loop with the top notch marked at the side seam. Sew the belt loop to the coat 1/4” from the raw edge. Before folding the belt loop down, fold the other raw edge 1/4” towards the wrong side of the loop and press.
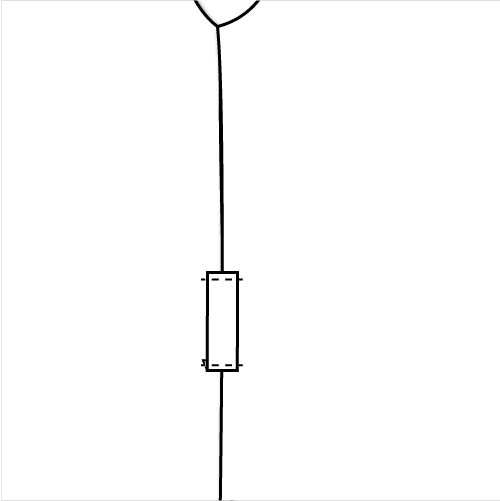
- With the fold intact, bring the belt loop down lining up the folded edge with the bottom notch. Sew the belt loop 1/8” from both the top and bottom edge of the belt loop.
- Repeat Steps 27-28 with remaining belt loops. With right sides together, sew the upper and lower sleeve together along the side seams.
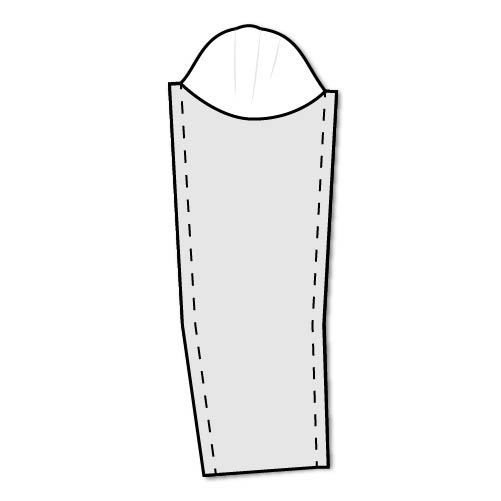
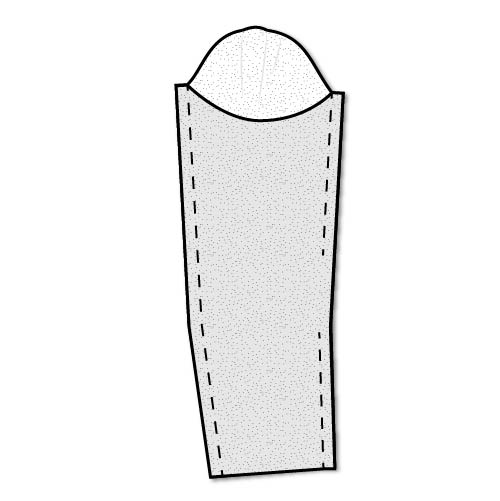
- Turn the sleeve right sides out and sew a gathering stitch between the front and back notch. Make sure to leave long tails on both ends.
- With the coat wrong sides out, insert the sleeve into the coat so that right sides are together. Line up the shoulder seam and underarm seam of the coat with the notch on the center of the upper and lower sleeve. Line up the remaining notches with those on the front and back armhole. Pulling the bobbin thread slightly to ease the sleeve into the armhole between the notches and the shoulder seam. Make sure there are no folds in the fabric and then sew the sleeve to the armhole. Note: Please note that while there are not notches on the line drawings, all notches appear on the pattern pieces.
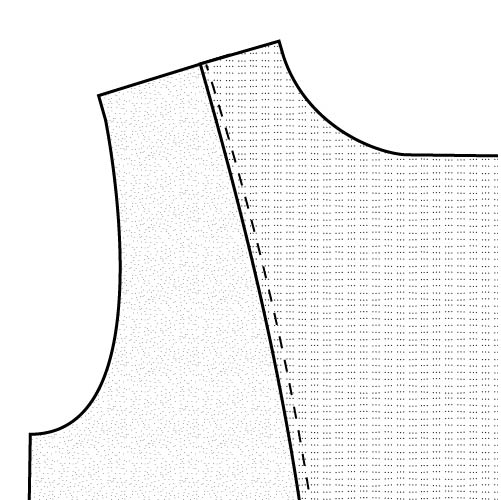
- Repeat Steps 29-31 with second sleeve. The lining is sewn similar to the outside of the coat with the difference of a few steps. With right sides together, pin the front facing to the front lining piece from the shoulder to the first notch.

- Sew the facing to the front lining.
- Press the seam allowance towards the facing and topstitch the facing 1/8” from the edge.
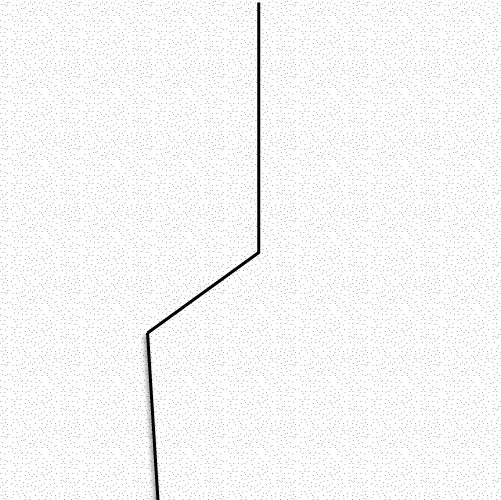
- With right sides together, sew the left and right back pieces along the center back seam to dot.
- With the needle down, lift the presser foot and rotate the fabric to line up the two diagonal edges of the vent lining. Clip towards the dot to allow the fabric to lay flat. Sew together making sure to stop 5/8” from the end.
- From the right side of the fabric, press the vent opening well.
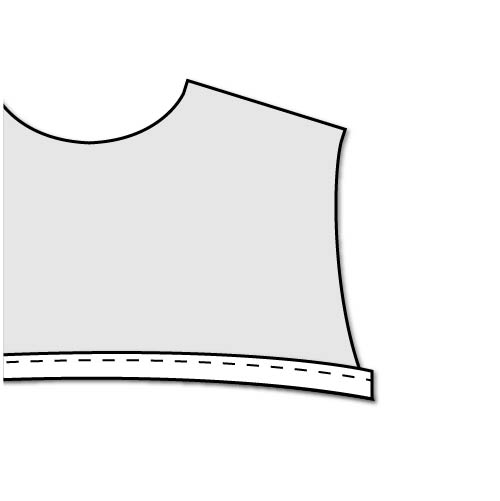
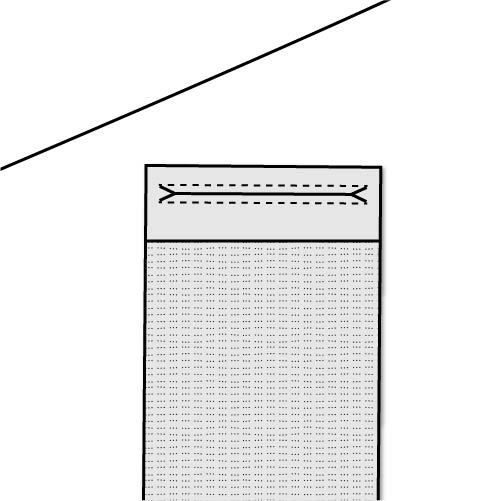
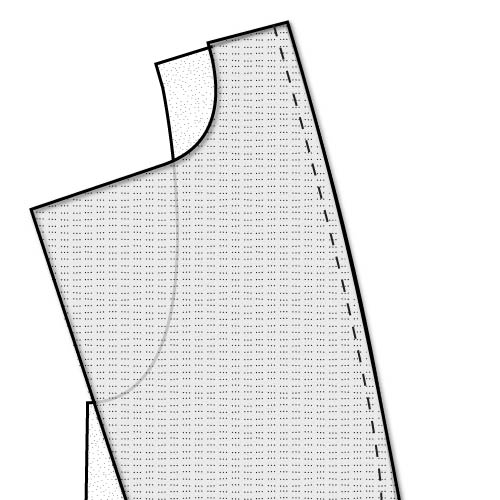
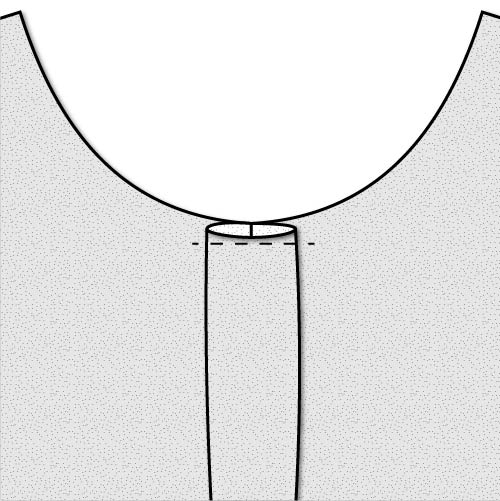
- The center back of the lining has a pleat at the top to allow for movement across the shoulders. Match the pleat notches with right sides together and pin in place. Baste the top edge of the pleat together.
- With right sides together, match the notch on the bottom edge of the back facing with the center back of the coat lining.
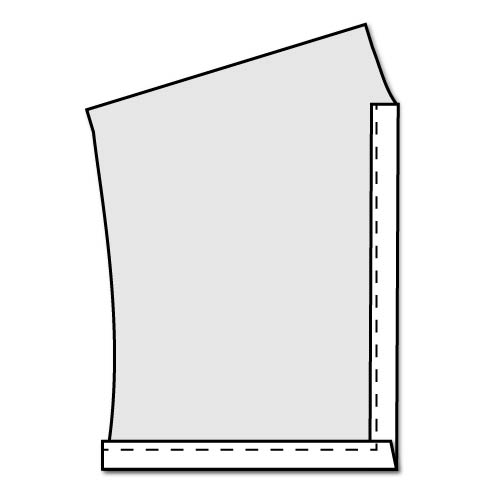
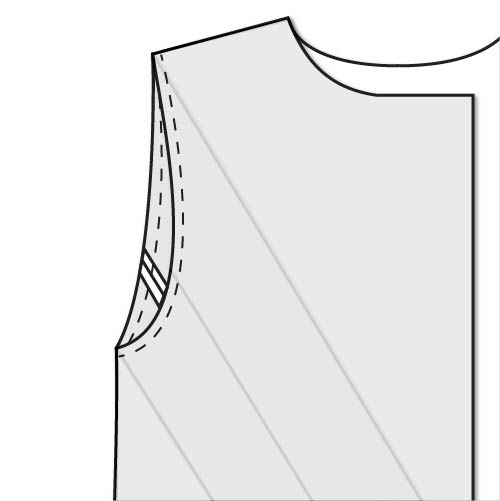
- Since the shape of the back facing and back lining are different, it requires manipulating the fabric to fit. Working slowly from the shoulder point, pin the facing to the back lining avoiding any folds in the fabric. Sew the facing to the back lining.
- Clip the seam allowance along the curve and press the facing and seam allowance up. Topstitch the seam allowance to the facing 1/8” from the edge.
- With right sides together, sew the front and back lining pieces together along the shoulder and side seams.
- With right sides together, sew the upper and lower sleeve together along the side seams. Leave a 3” opening along one of the side seams to allow for turning the coat right sides out in a later step.
- Repeat Steps 29 – 31 to sew the sleeve into the lining. Apply interfacing to the wrong side of one collar piece; this is now the facing of the collar. With right sides together, sew the collar together along the side and flat top edge. Clip the corners and grade the seam allowance of the facing. Turn the collar right sides out pushing out the corners and pressing the collar well. Topstitch the collar along the sides and top 1/8” from the outside edge.
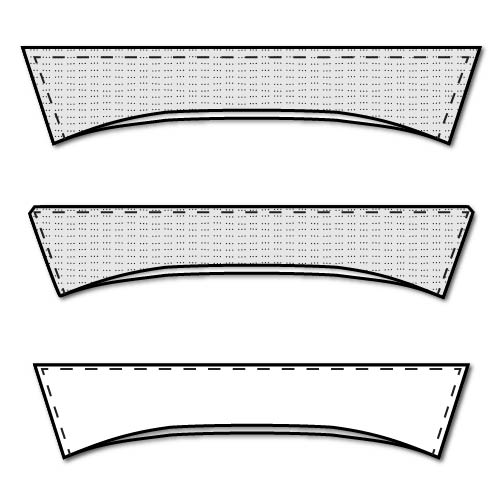
- Apply interfacing to the wrong side of one collar stand piece; this is now the collar stand facing. With the collar stand right sides up, place the interfaced side of the collar down, lining up the notches. Pin in place. With right sides together, place the collar stand with right side down sandwiching the collar between the two layers. Sew the collar stand together along the side and bottom. Clip the corners, grade the seam allowance of the interfaced pieces, and clip the curve. Turn the collar stand and collar right sides out, pushing the corners out. Press well. Note: The collar pattern piece can be found on page 72 and 73 of the pattern tiles.
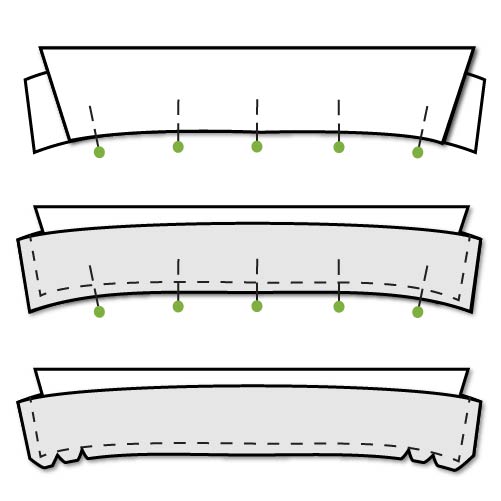
- Place the collar and collar stand on the right side of the coat back, lining up the center with the center back of the coat. Baste the collar and collar stand to the coat.

- Place the coat and lining right sides together with the collar and collar stand between the layers Sew the two layers together along the sides and top of the coat, making sure to sew the collar stand into the seam. Do not sew across the bottom yet.
- Press the bottom hem of the coat lining 5/8” towards the wrong side.
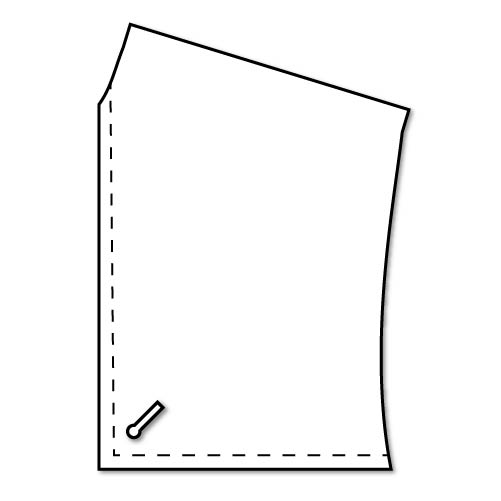
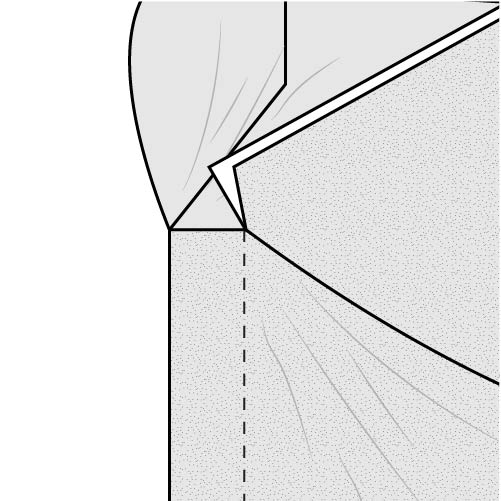
- When sewing the lining to the coat, remember that the coat and lining will be wrong sides together for the finished coat. This is good to remember when sewing the next few steps. Using Step 47 as a reference, take the right side of the lining vent opening and align the folded bottom edge with the notch on the mitered corner. The vertical edge of the lining will align with the inside raw edge of the coat. Pin the lining to the inside edge of the vent, but not through to the coat front. When reaching the top of the vent, line up the edge of the jacket and lining seam edge. This is the seam created in Step 36.
- Sew the lining to the coat vent from the bottom folded edge up to the point where the seams all meet.
- With the needle still down, lift the presser foot and rotate the fabric so that you are now sewing down the other side of the vent. Stop sewing 4 inches from the bottom edge as the lining is shorter than the coat and needs to be secured to the bottom hem before finishing the vent.
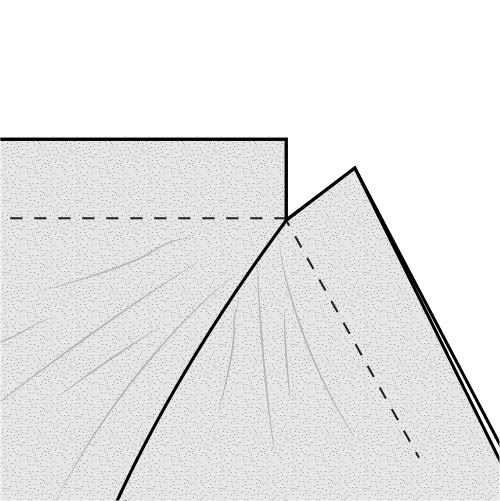
- With the right sides still together, line up the bottom corner of the lining and coat. Sew the lining to the coat along the bottom hem for 2 inches, as the rest of the hem will be sewn in a later step.
- Since the lining is 2” shorter than the coat front, when lining up the rest of the raw edge from Step 49, the bottom edge of the coat front will wrap around towards the wrong side. Return to the stitch line from Step 49 and sew down to the bottom hem locking the stitches.
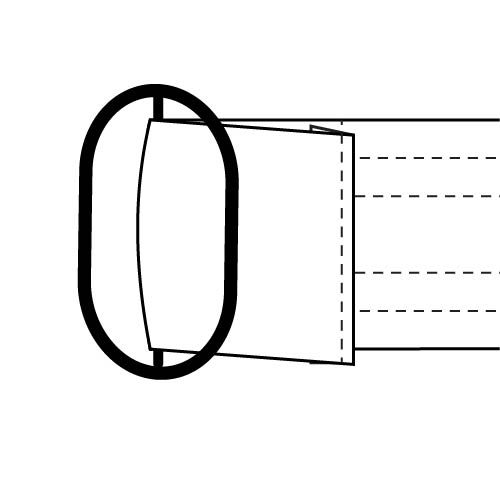
- With both sides of the vent sewn to the lining, finish sewing the bottom hem of the coat to the lining all the way around. Now that the coat and lining are sewn together, the sleeves and lining will be sewn. With the coat still wrong sides out, make sure the sleeves are pulled out so they are outside the coat and lining. Fold the bottom edge of the sleeve lining to the wrong side 2 inches.
- Making sure not to twist either, bring the sleeve and lining together over the top of the coat. Slip the folded edge of the lining into the coat sleeve, lining up the seams of the sleeve with the lining as well as the raw edge of both sleeve hems. Sew around the circumference of the sleeve securing the lining to the sleeve.
- Repeat Steps 54 and 55 with other sleeves. Go around the coat and clip the corners and grade any thick seams before turning the coat right sides out. Using the opening in the sleeve lining, turn the coat right sides out. Make sure to push out all corners for crisp edges and then press the coat well. Sew the opening in the sleeve lining either by hand or a machine stitch close to the edge.
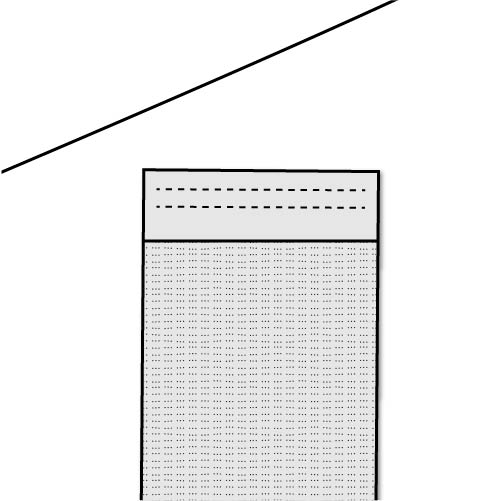
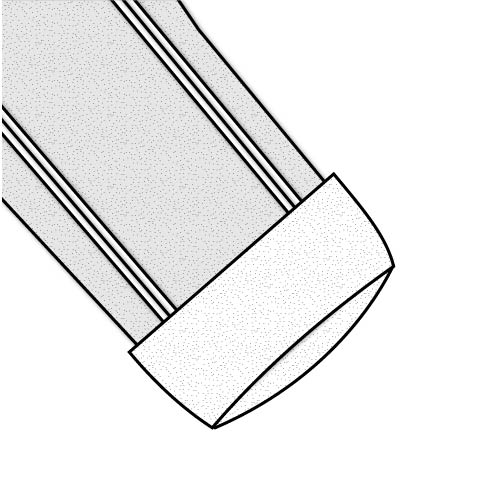
- Iron interfacing onto the wrong side of one belt pieces; these are now the facing pieces. With right sides together, sew the two belt pieces together along both long edges and the pointed end, making sure to leave the short end open. Trim the seam allowance of the interfaced side and clip the corners of the pointed end of the belt. Turn the belt right sides and press all edges well. Topstitch the belt 1/2” from the outside edge and then another line of stitches 1/2” from the first line. Repeat on the other long edge of the belt.
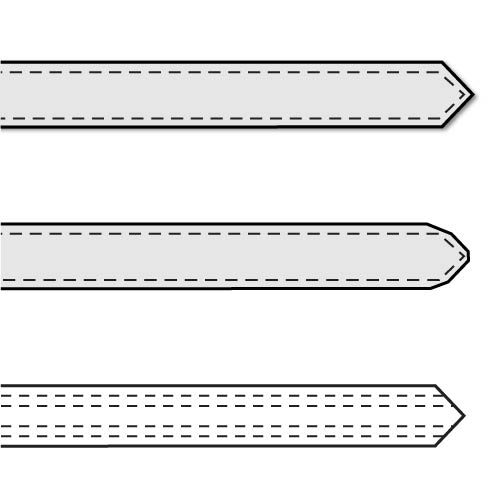
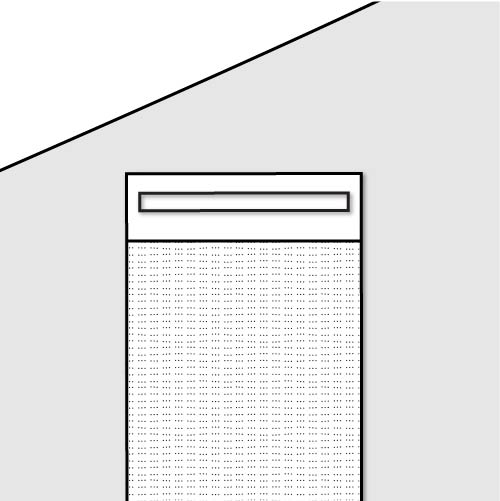
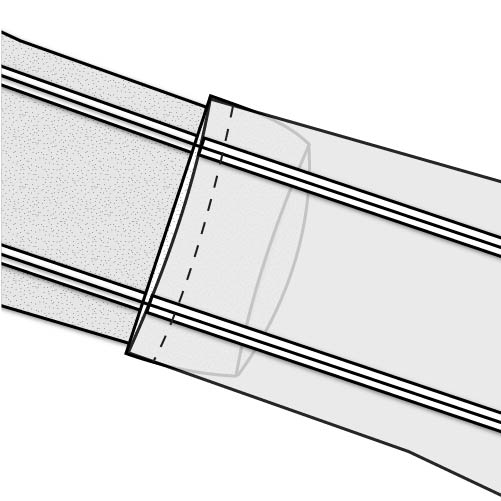
- Fold the straight end of the belt to the wrong side by 1/4” and press well. Feed the end of the belt through the center of the slider. Align the folded edge with the belt and sew in place. Note: Detail stitches have been removed to avoid confusion.
- Repeat Steps 57 and 58 for both wrist loops. The final step in the coat is to sew the buttonholes and buttons. Transfer the buttonholes from the pattern pieces to the coat front and sew the buttonholes to the wearers right side. Using the buttonholes as a reference, mark the button placement on the wearer’s left and sew the buttons in place.

I love Kimberly’s patterns, but I wish the set stylist would press these garments before photographing. It makes for a nicer crisper finish to highlight the details of the garments.