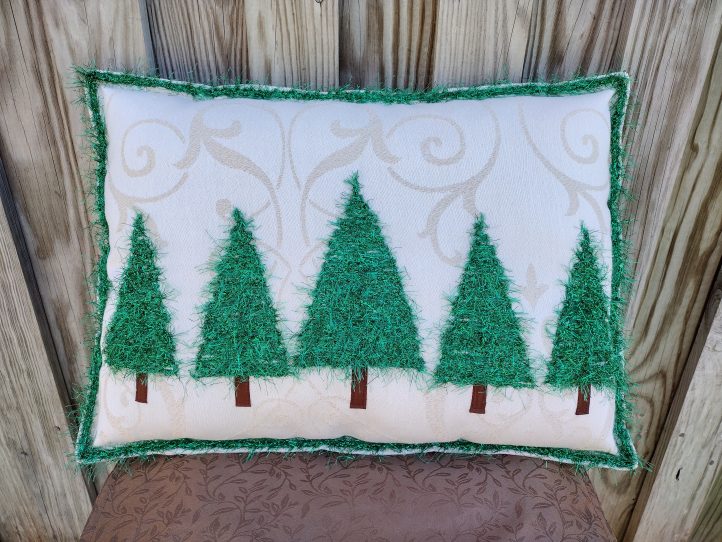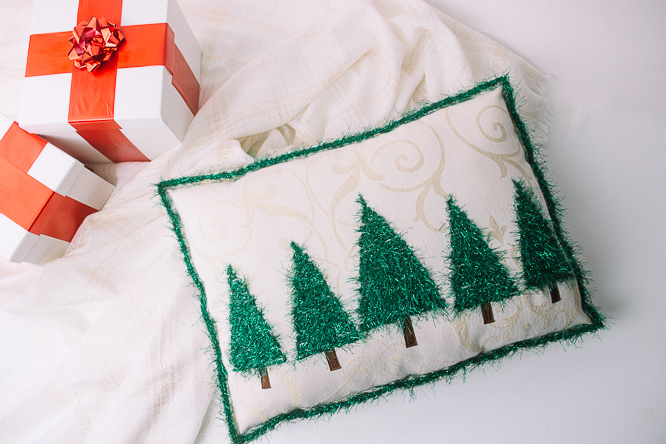
Create an adorable Christmas throw pillow and learn a new fiber art technique in the process with this home décor project. This colorful, festive pillow showcases a technique called couching, and is surprisingly easy to make! Fuzzy eyelash yarn is used to form the evergreen trees, which results in an impressive textured finish that looks like it took hours to achieve. Impress your guests this holiday season with this Christmas sewing pattern.
Skill Level: Intermediate
Finished Size: 18” x 24”
Materials:
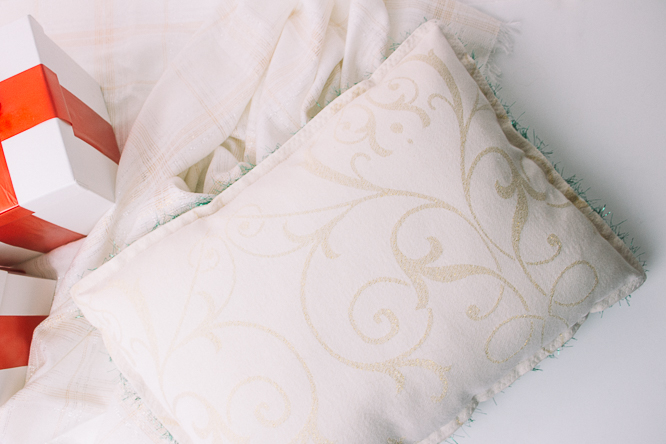
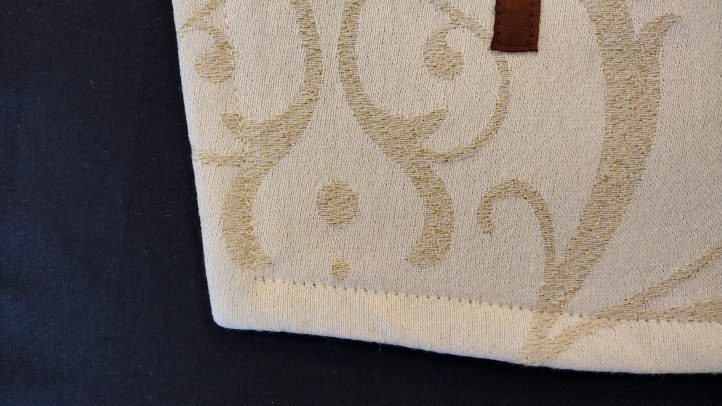
- 2 18” x 24” pieces of light-colored medium to heavyweight home décor fabric (the example uses an ivory and gold fabric that is a blend of polyester, linen, cotton, and metallic fibers)
- Fusible stabilizer that is compatible with the chosen fabric
- 1 skein of green eyelash yarn (65% polyester, 35% metallic kelly green yarn was used for the example)
- 1 yard of 1/2” wide dark brown ribbon (such as grosgrain ribbon or rayon seam binding)
- 1 1/2” long piece of drinking straw (the section of drinking straw ought to be at least as long as the eyelashes on the yarn)
- Painter’s tape
- Nylon or polyester “invisible” monofilament thread
- All-purpose thread that matches the chosen fabric
- Sharp machine needles in sizes 11 and 14
- 12 ozs. non-bunching polyester fiberfill
- PDF Pattern – This is located at the bottom of this page. See printing instructions below.
PRINTING INSTRUCTIONS:
To download the PDF pattern, click on the download button at the bottom of the page. We recommend opening your download using Adobe Acrobat.
Instructions:
CUT, STABILIZE, AND MARK FABRIC:
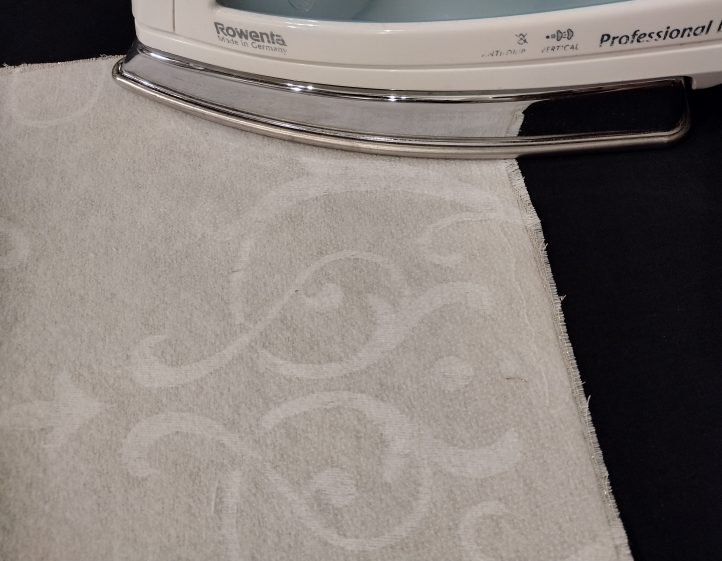
- Cut out 2 18” x 24” pieces of fabric, and 2 17 3/4” x 23 3/4” pieces of stabilizer. Fuse stabilizer to the wrong side of fabric according to package directions.
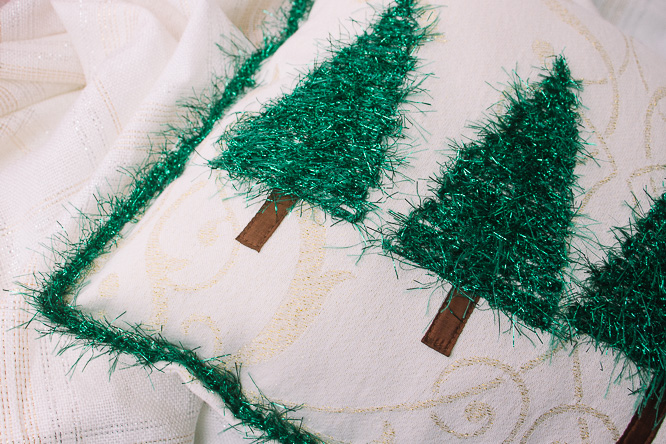
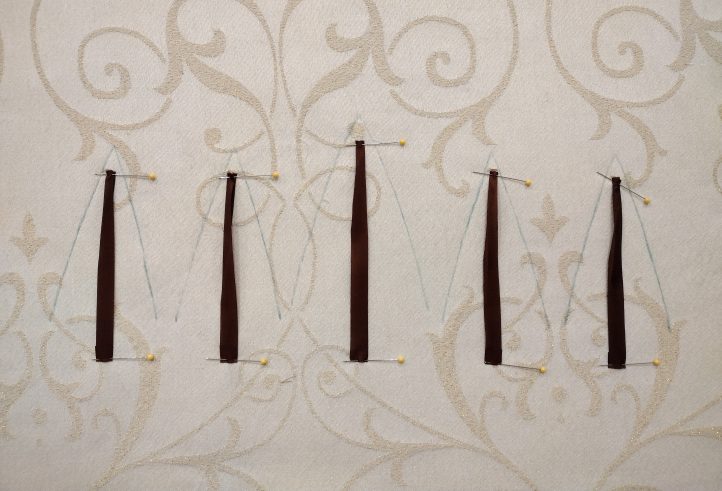
- Cut out the tree guides from the pattern sheet (4 small trees and 1 large tree). Fold the two 18” sides of one piece of fabric to meet each other in order to locate the center, and place the larger tree guide onto the right side of the fabric in the center, approximately 4 1/2” from the bottom. Using an air- or water-erasable fabric pen, mark dots for the beginning and ending points of the tree trunks, and mark along the two solid diagonal lines that represent the edges of the tree branches. Use the smaller tree template to mark two trees on each side of the center tree.
CREATE TREES:
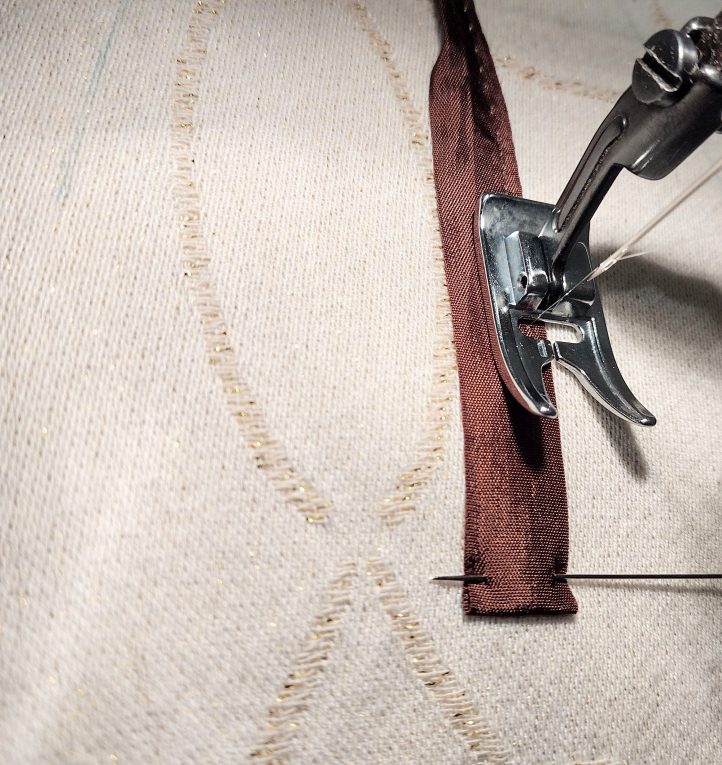
- Place lengths of dark brown ribbon onto the pillow fabric, in between the “tree trunk” and “tree dots” that were transferred from the tree guide. Fold under the raw edge of the ribbons at the base of each tree, and fold the ribbons into a tapered shape near the top of the trunks. Pin the ribbons in place.
- Install a size 11 sharp needle in the sewing machine. Thread the machine using a monofilament “invisible” thread in the needle, and a thread that matches the fabric in the bobbin. Test the machine’s tension on a scrap of stabilized fabric, as monofilament threads often require careful tension adjustment. Ensure that the bobbin thread is not showing on the right side of the fabric, and that the fabric is not being drawn up or puckered by the lines of stitching. Reduce presser foot pressure, if needed. It is a good idea to make one “practice tree” on a scrap of stabilized fabric in order to thoroughly check and adjust all machine settings.
- Sew close to each edge of the ribbons with a straight stitch, in order to attach them to the fabric.
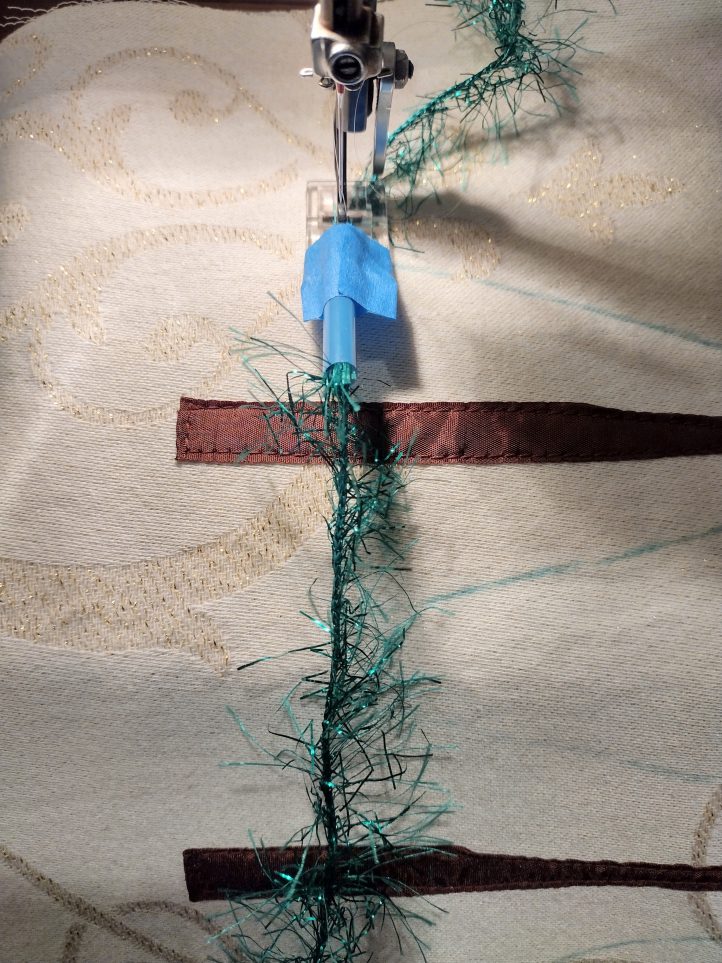
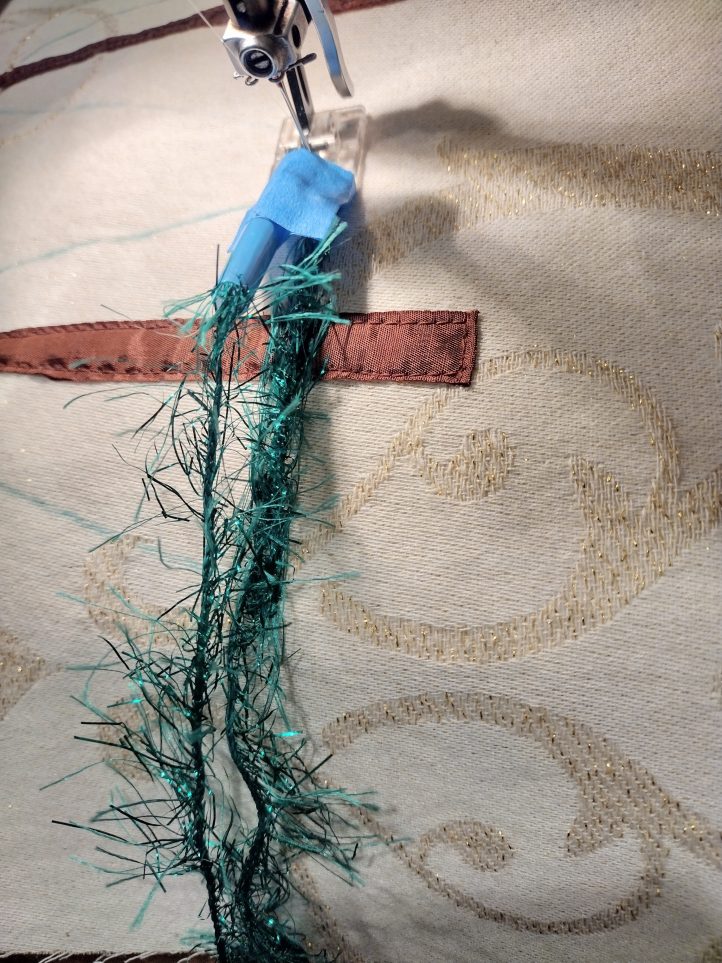
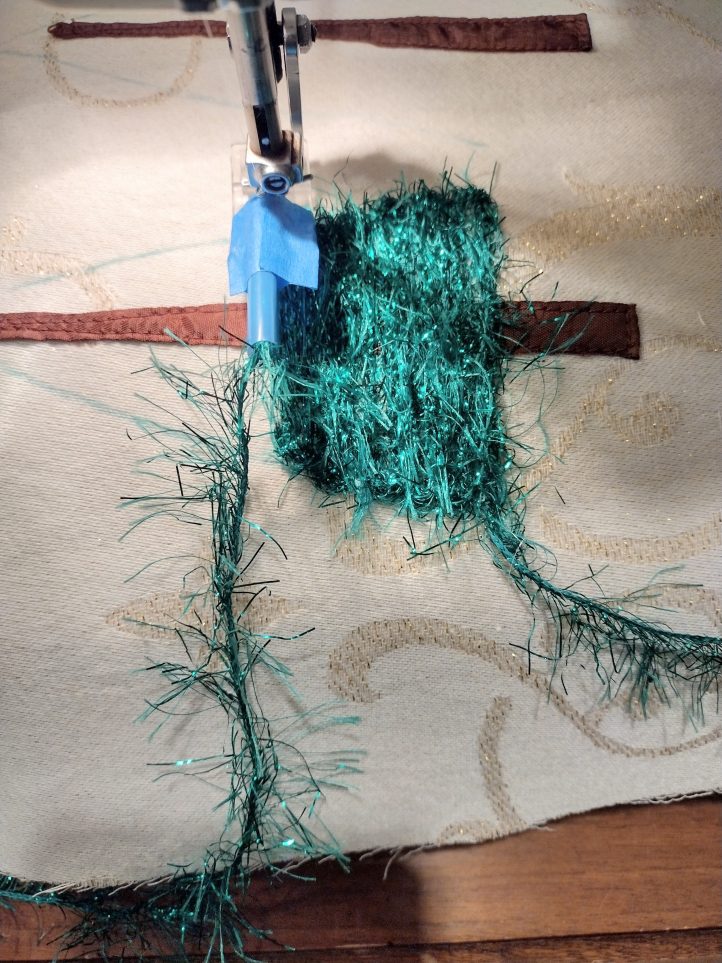
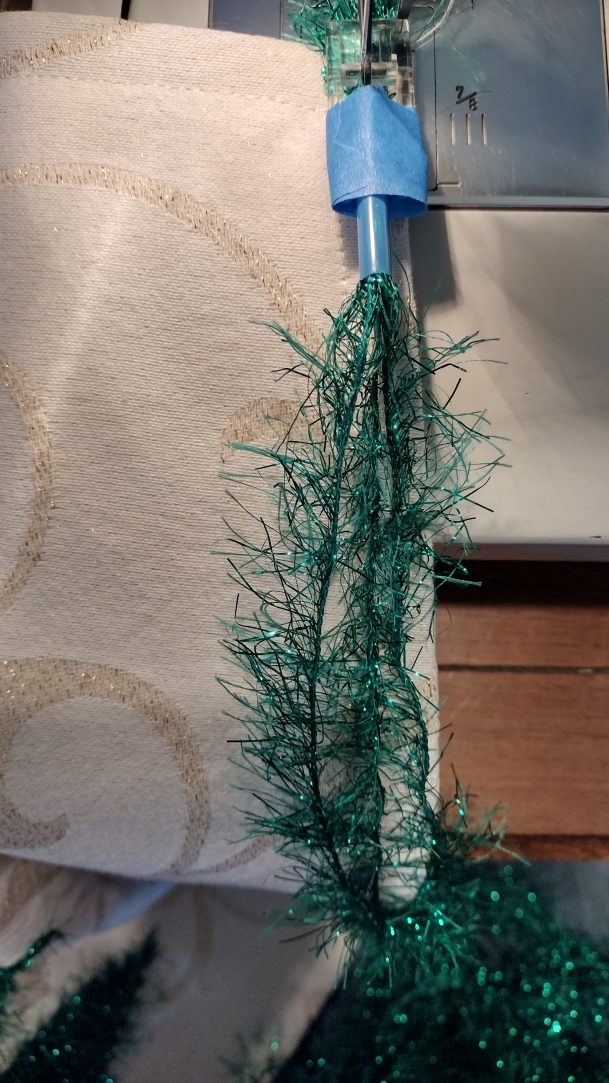
- Tape the piece of drinking straw to the toes of a zigzag presser foot, so that the straw is on top of the foot and directly in front of (but not touching) the needle. Wrap ends of tape around straw and press firmly to secure exposed adhesive that could grab on to the yarn or fabric. Thread one end of the eyelash yarn through the drinking straw and presser foot.
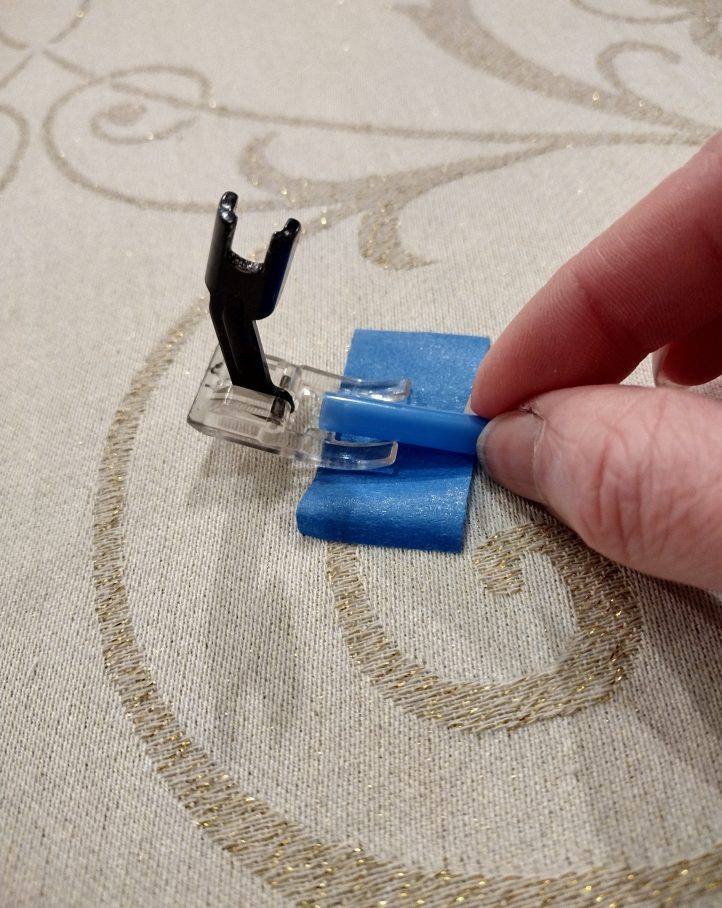
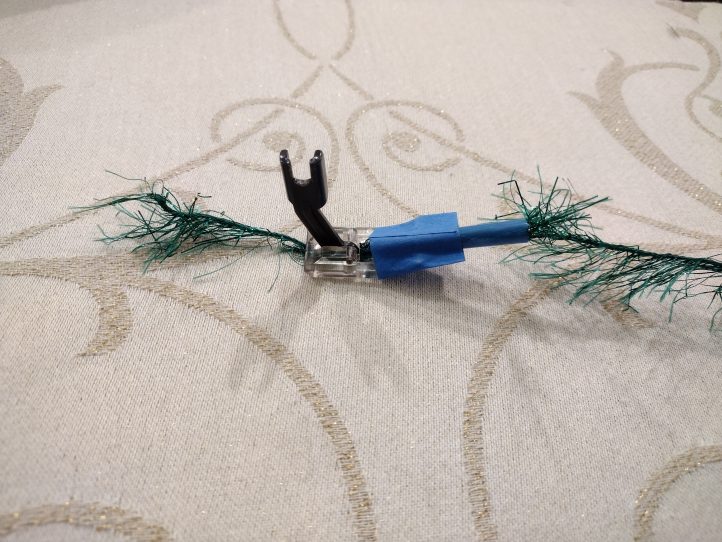
Designer Notes: A few notes about couching: A couching foot for a sewing machine may be used instead of the piece of drinking straw. However, the eyelashes on the textured yarn may get pinched in the slot of the foot, or be drawn along towards the needle and attached to the fabric before passing under the foot. If either issue occurs, use a drinking straw instead. When couching, the working end of the yarn will not allow sewing in reverse, so it is important to pivot at the beginning and end of each stitching line instead of sewing backwards. In addition, it will not be possible to backtack thoroughly at the beginning and end of the stitching lines. Instead, sew a few stitches in place, and then later pull both threads to the wrong side, knot them together, and trim. - Line the yarn up with the lowest end of one of the “tree branch” lines that are marked on the fabric. Pull the end of the yarn several inches behind the presser foot, and lower the presser foot to hold the yarn in place. Use a long stitch length (6 stitches per inch is a good setting, or 4 mm) and a narrow zigzag (2 1/2 mm wide, or just wide enough for the stitches to land on either side of the yarn). Sew several stitches in place to lock thread. Zigzag over the yarn, sewing in a straight line, until the needle reaches the bottom of the opposite tree branch line. With the needle down, raise the presser foot and pivot the fabric to align the yarn alongside the line that was just sewn. When the needle reaches the right side of the tree, pivot with the needle on the right. When the needle reaches the left edge of the tree, pivot with the needle on the left. Repeat this process, following the marked lines to create shorter and shorter branches towards the top of the tree. At the top of the tree, sew a very short line of yarn pointing straight up, and lock stitches again by sewing a few stitches in place. Trim yarn at beginning and end of stitching line. Pull thread tails to the wrong side, knot them together, and trim.
ASSEMBLE PILLOW:
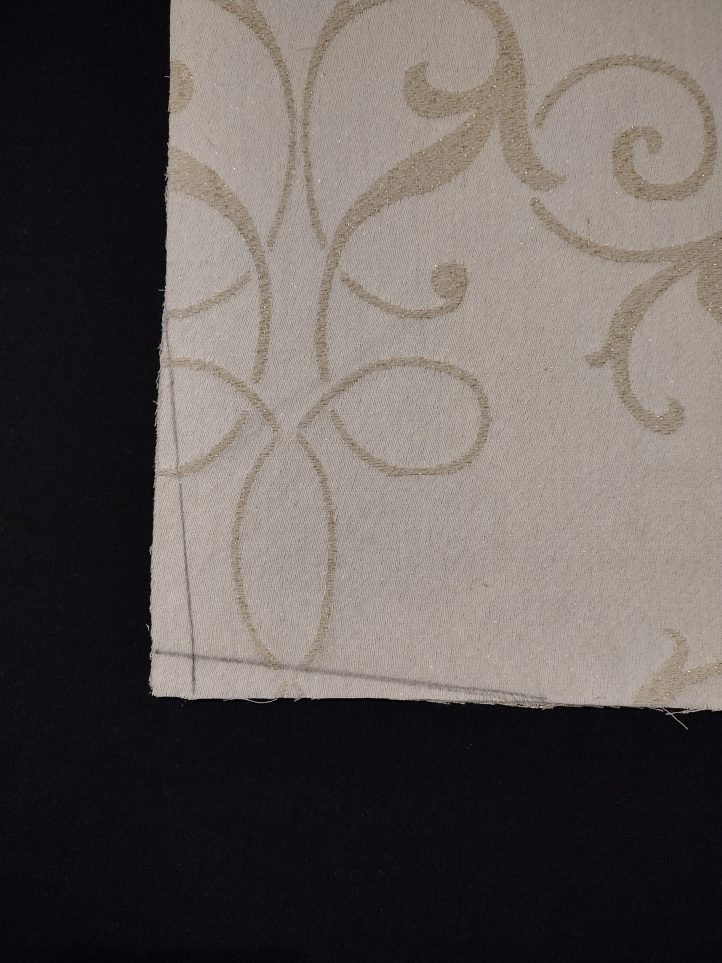
- When all trees are completed, use pillow corner trimming guide on pattern sheet to trim all 4 corners of each fabric rectangle. Or, instead of using guide, mark two points 1/2” and 5” from each corner of the fabric. Connect points as shown in the image, and then cut along the marked lines in order to trim a 1/2” by 5” wedge from each corner of the fabric rectangles.
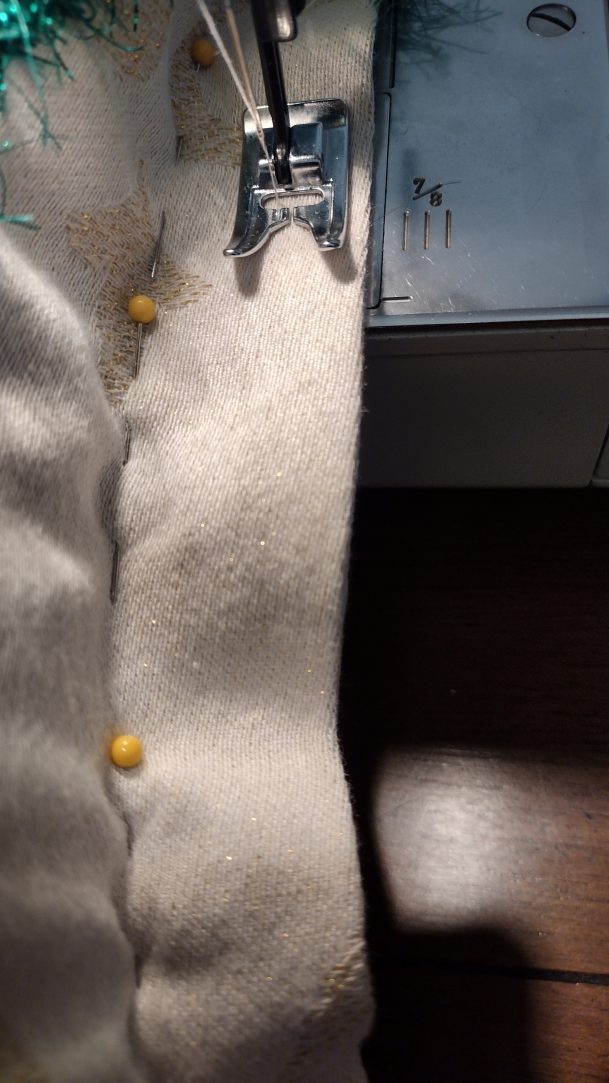
- Install a size 14 sharp needle in place of the size 11, and select a straight stitch with a length of 8 stitches per inch (3 mm). It is recommended to use all-purpose thread that matches the fabric in both the needle and the bobbin for this step and Step 5 in this section. Place fabric pieces right sides together, and sew using a 7/8” seam allowance, leaving a 6” opening in the middle of one 18” side for turning.
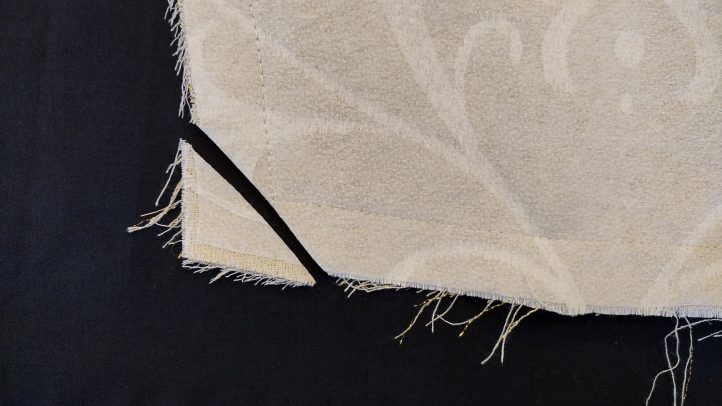
- Trim fabric at corners, cutting close to stitching lines as shown.
- Press seam allowances open, including the seam allowances at the 6” section that is not yet sewn. Turn pillow right-side out.
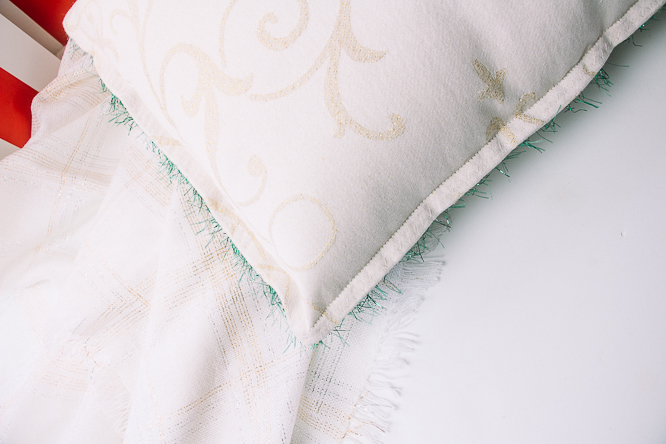
- Excluding the 6” opening, sew on the right side of the pillow 1/2” from the edge, to create a narrow flange.
- Reinstall the monofilament invisible thread in the needle. Cut 3 pieces of eyelash yarn that are each 7 feet long. Thread all 3 pieces through the straw or cording foot at once and zigzag them onto the pillow flange, beginning and ending at the opening in the pillow. Leave yarn tails attached, but wrap them around a safety pin to keep them away from the open edge.
- Stuff the pillow with fiberfill, filling evenly and then packing the fiberfill away from the open side of the pillow.
- Carefully align the edges of the pillow at the 6” opening, and place pins 1 1/4” away from the edge as shown to keep the stuffing out of the way as the opening is sewn shut. The free-arm function of the sewing machine, if available, will be useful here. Stitch 1/2” away from the edge to seal the opening and complete the flange.
- Use the straw to finish attaching the 3 strands of eyelash yarn to the last side of the pillow.
- Remove pins, and fluff pillow to distribute stuffing evenly towards the section that was sewn last.
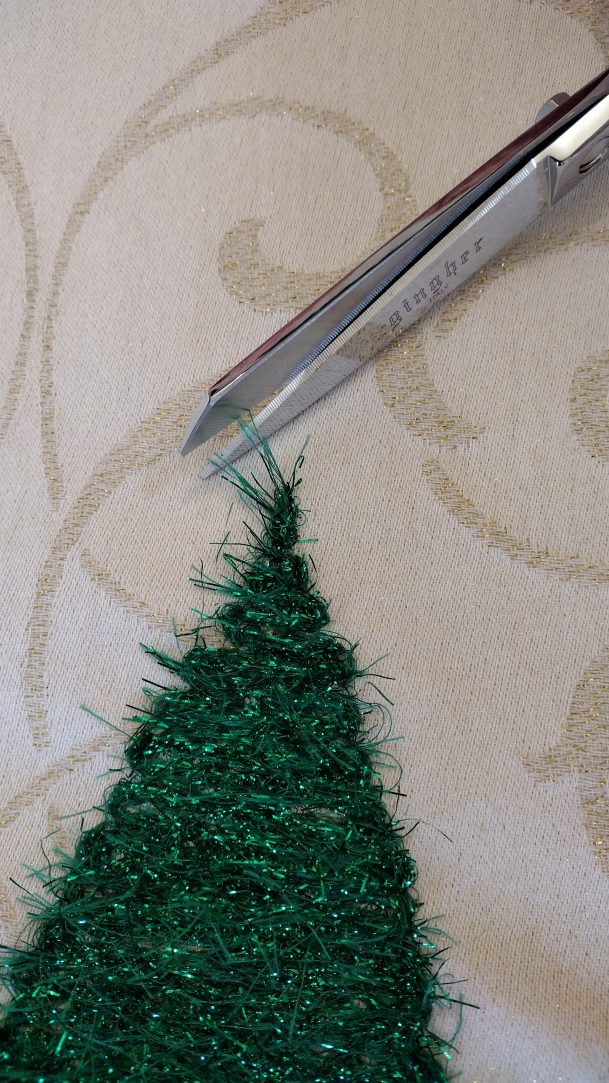
- If more texture is desired, scratch eyelash yarn with a fingernail to lift more fibers from the stitching. To decrease texture, trim stray eyelashes (particularly at the tops of the trees) with scissors.