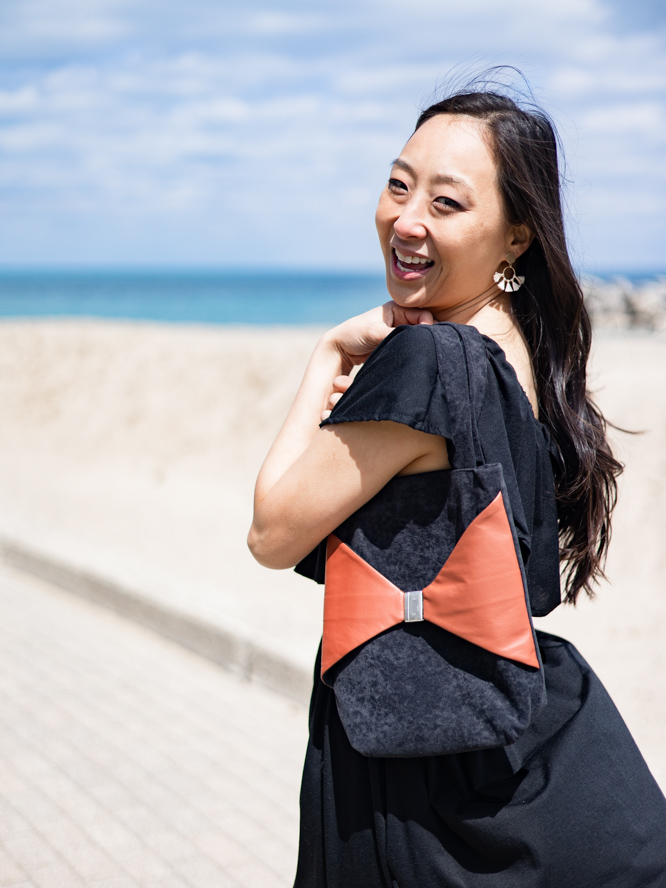
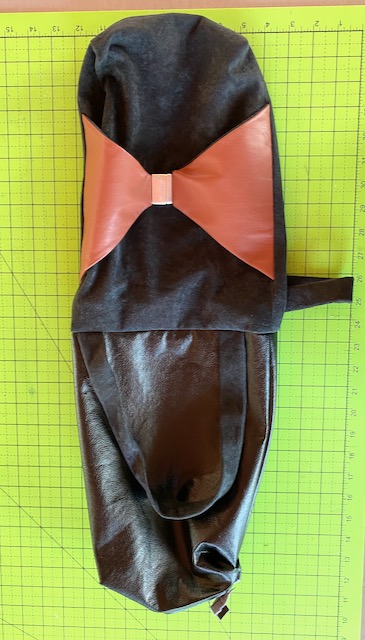
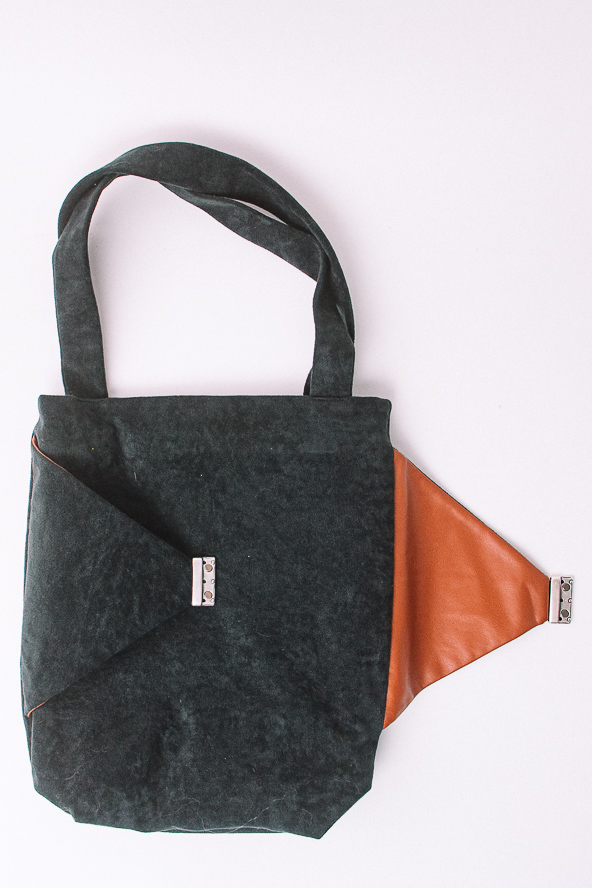
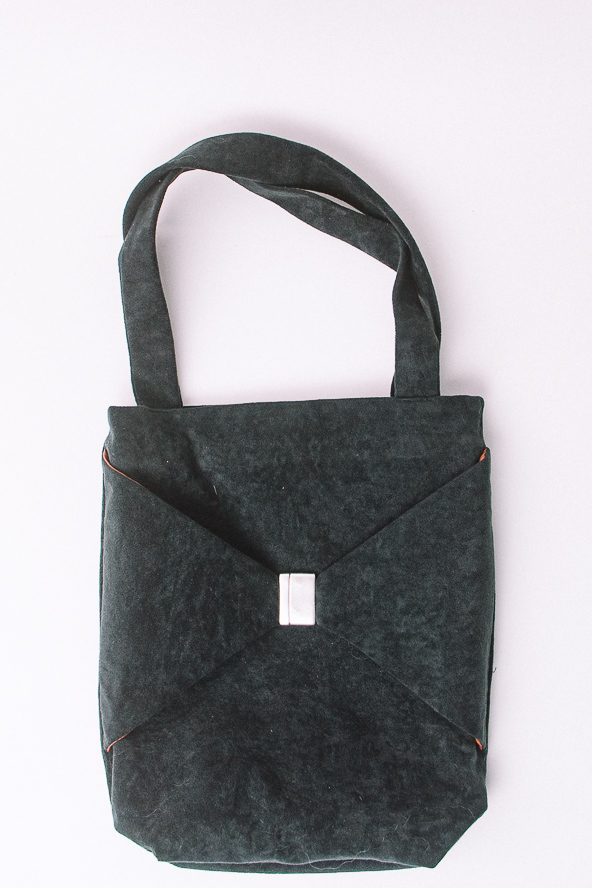
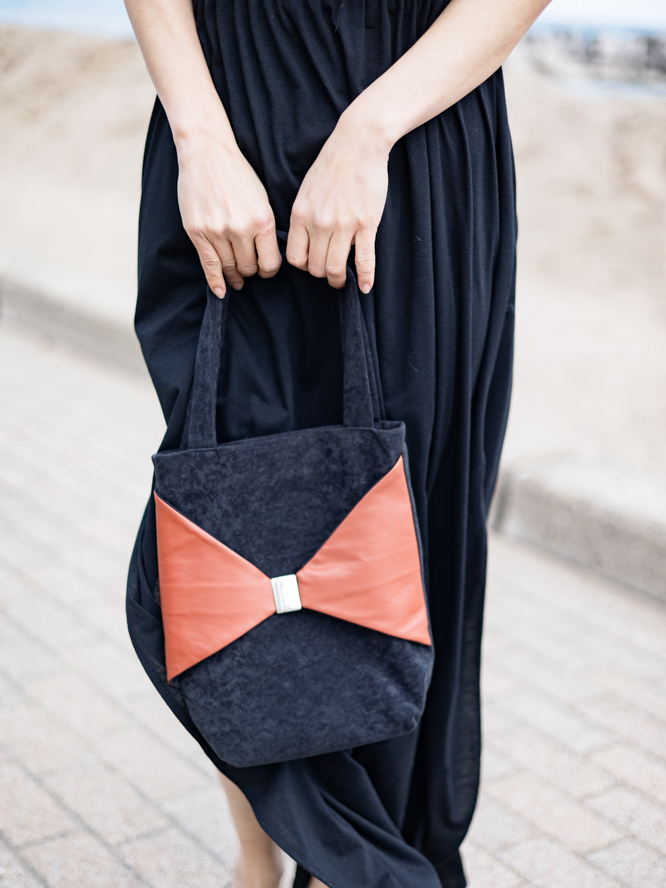
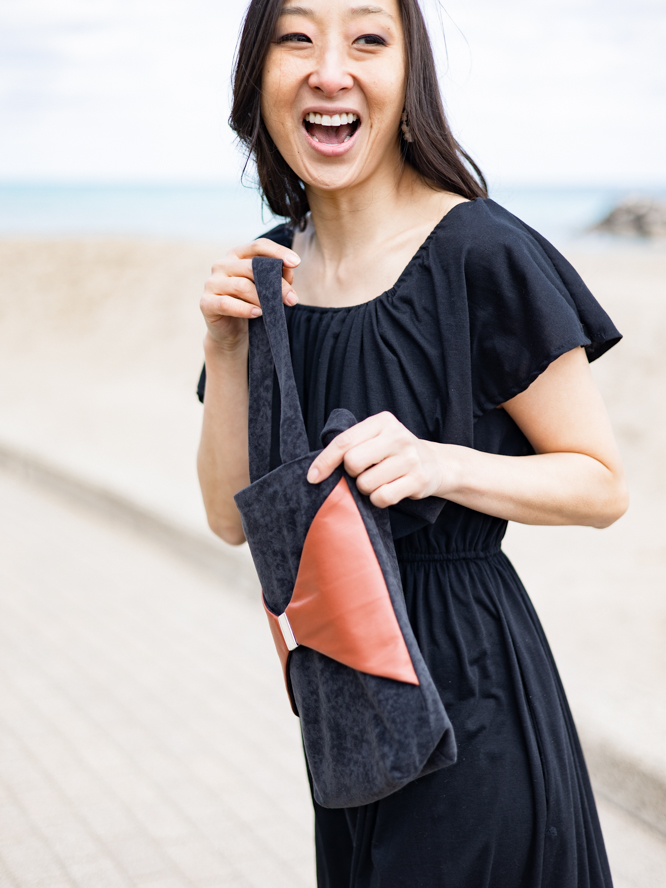
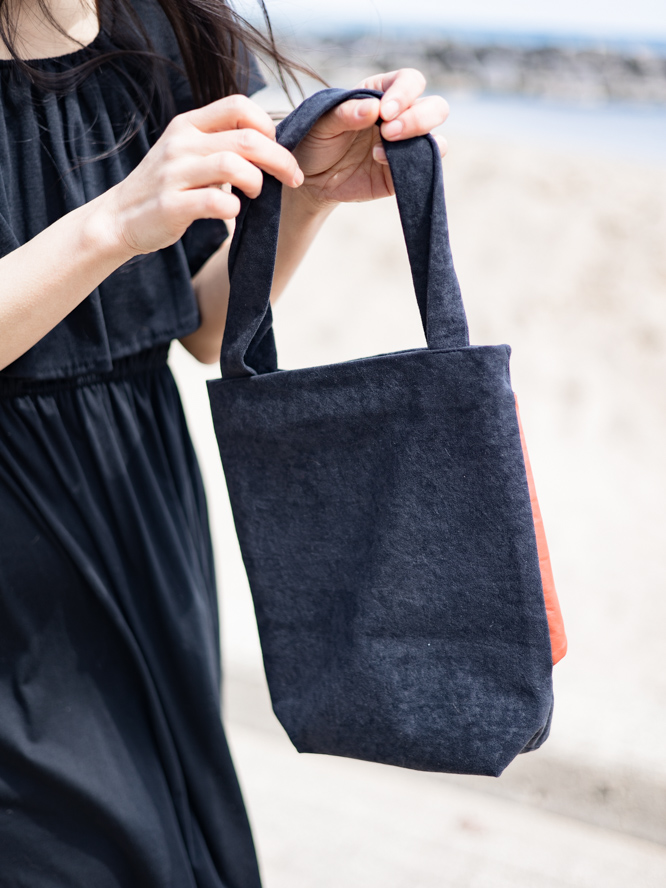
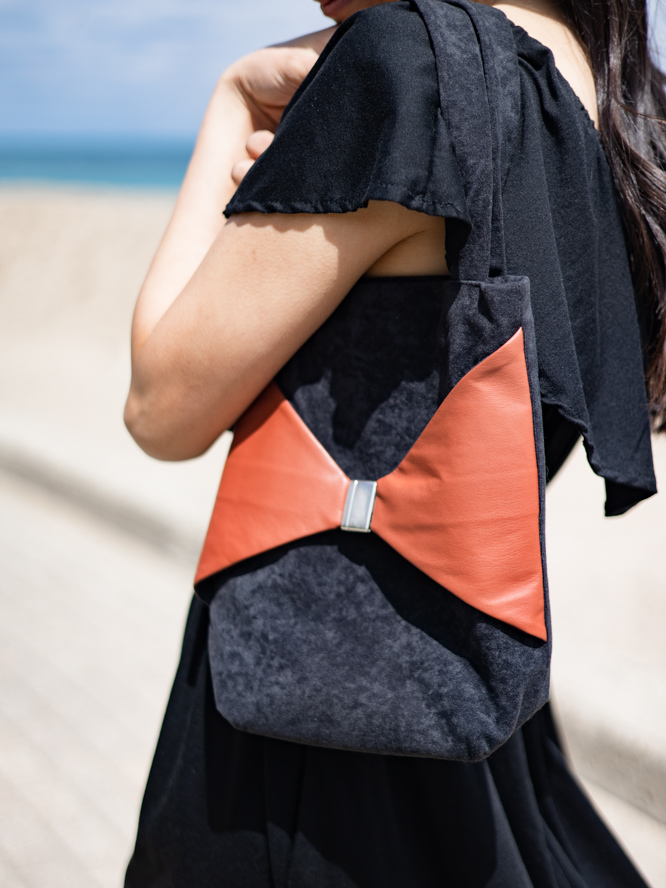
Don’t be afraid to mix things up with this playful duo tote bag from designer Gloria Uhler! This tote bag lets you experiment with different looks and fabrics with its reversible bow detail, so that you can keep it casual for day wear and dress up your tote on evenings out. Aimed at intermediate sewists, this project uses faux leather and suede, so if you’ve always wanted to work more with specialty fabrics, this is the pattern for you. Add this chic and sleek tote to your purse collection with this bag sewing pattern.
Skill Level: Intermediate
Materials:
- 1 yard black faux leather x 11” wide
- 1 yard spice faux suede x 11” wide
- 3/4 yard lining of your choice x 11” wide
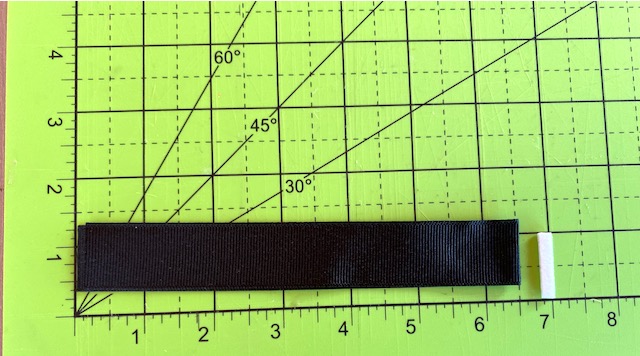
- 57” x 1” black grosgrain ribbon
- 12” X 24” heavy fusible interfacing
- Sewing notions
- Magnetic clasp 1.25” x 7/8” (Tip: Search Etsy with bracelet/endcaps/rectangle/magnetic)
- E6000 adhesive
- PDF Template – This is located at the bottom of this page. Please see the printing instructions below.
PRINTING INSTRUCTIONS:
To download the PDF template, click on the download button at the bottom of the page. We recommend opening your download using Adobe Acrobat.
Designer Notes:
- All seams are 1/2” except where noted.
- Faux suede and leather are available in different weights. Heavy weight fabric needs only a satin lining. Lighter weight fabric might require thin foam, buckram, canvas, or other material if you want the bag to have structure.
Cutting Instructions:
- Bag Body = 1 each of black and spice to measure 11” X 27” long
- Triangles = 2 each black and spice, 2 interfacing
- Straps = 2 each to measure 3”X 21”
- Lining = 11” X 25”
Sewing Instructions:
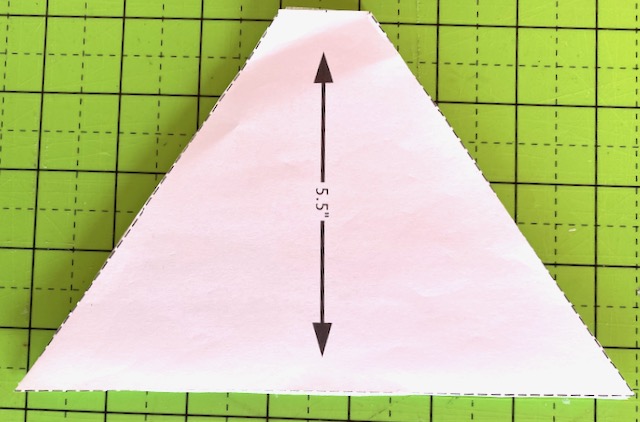
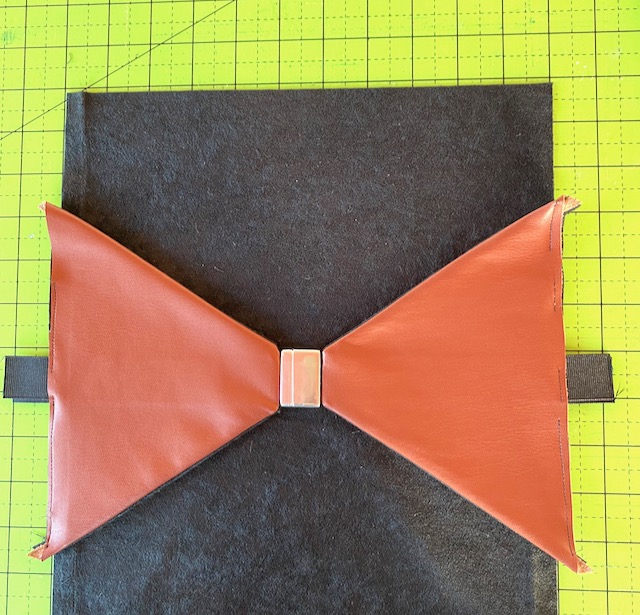
- TRIANGLES – Download and print out the triangle template (This is located at the bottom of this page). Cut two triangles from suede and two from leather.
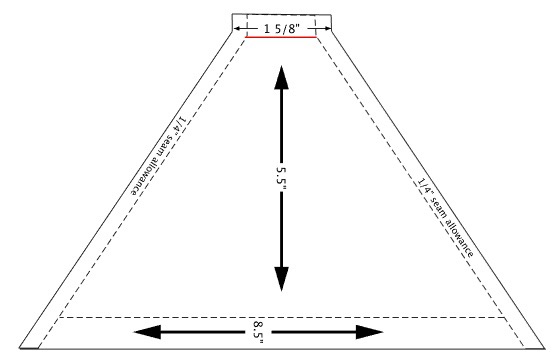
- Remove all the seam allowances from the template. Use this to cut two interfacings.
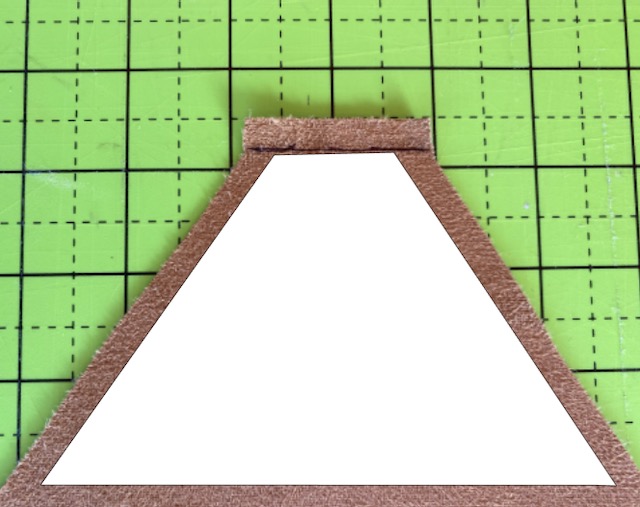
- Bond the interfacings to the wrong side of the triangles using a low setting on your iron. The designer used the wool setting on their iron. With a pen, transfer the red line on the template to the fabric.
- Cut two pieces of grosgrain ribbon to measure 12”. Fold each ribbon in half. Cut two filler pieces from card stock or heavy interfacing to measure 3/8” x 1”. Press the filler into the fold of each ribbon.
- Insert the folded ribbon end into the openings in the clasp to be sure it fits snugly. If it is too loose, add another piece of filler.
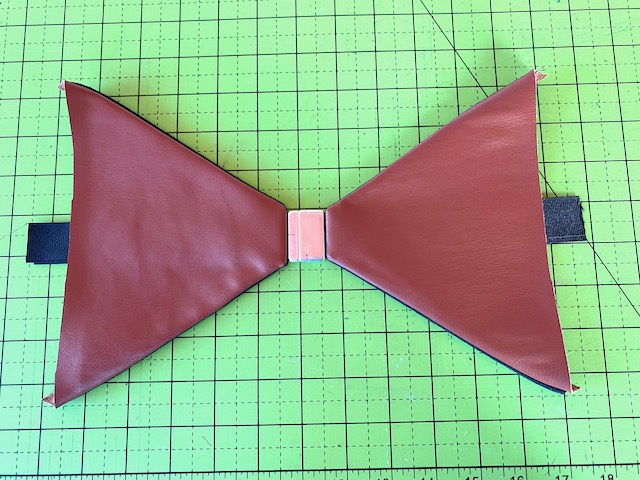
- Remove the ribbon from the clasp. Align a suede and leather triangle with right sides together. Insert the folded ribbon into the triangle 3/8” beyond the pen line. Sew across the line. Stitch the .25” seams of the triangle.
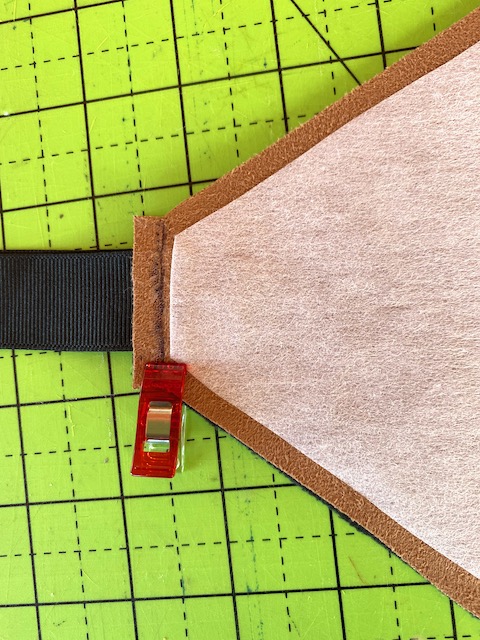
- Reach into the triangle and pull the ribbon edge to turn the piece right side out. Pin the ribbon ends to the center of the triangle in the seam allowance.
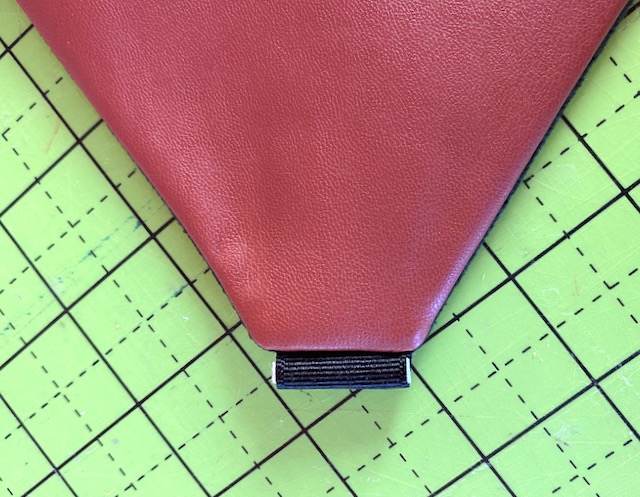
- Using a toothpick, transfer a generous amount of adhesive from the tube to the inside of the clasp opening.
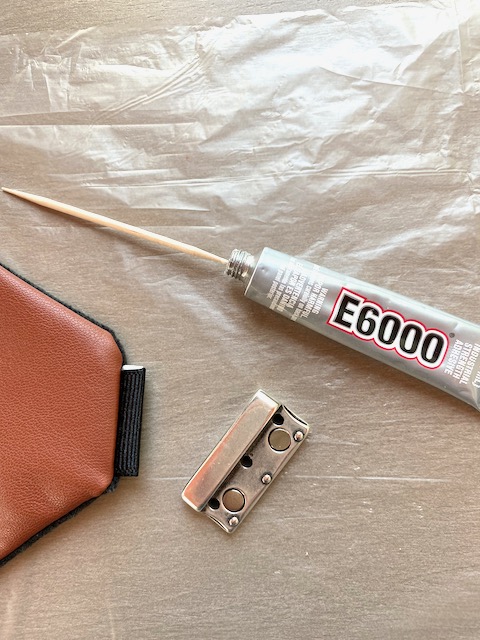
- Insert the ribbon ends into the clasp openings. Be sure the triangles align vertically, and the ribbon is seated as deep as possible into the clasp. Allow the adhesive to set for at least eight hours.
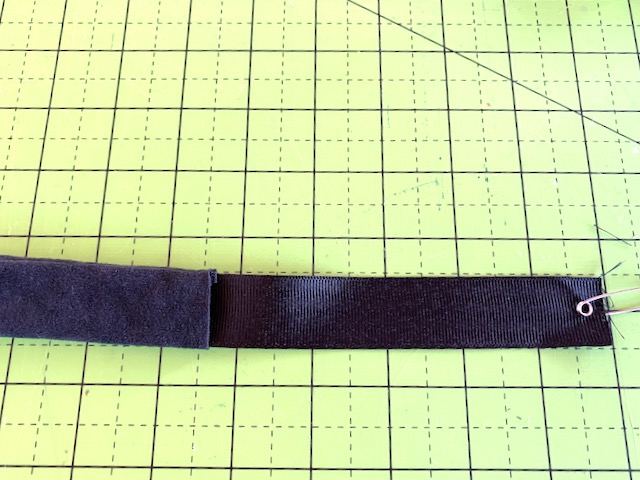
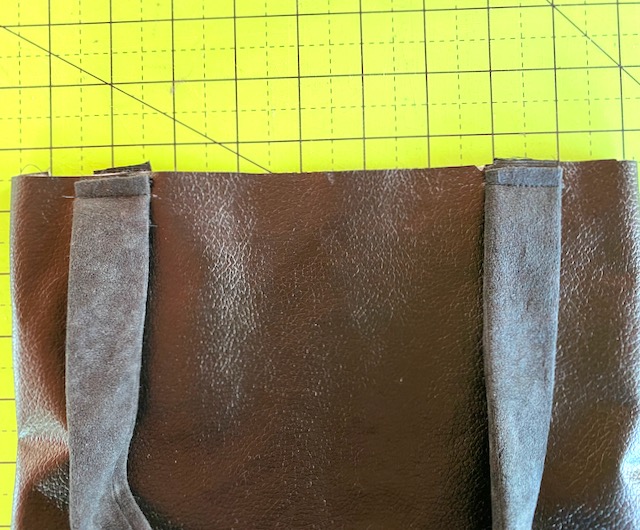
- STRAPS – Fold each strap in half lengthwise and sew the long edges with the right sides together, stitching a generous 1” from the fold. Trim the seam. Attach a safety pin to the top edge and feed it into the fabric to turn it right side out.
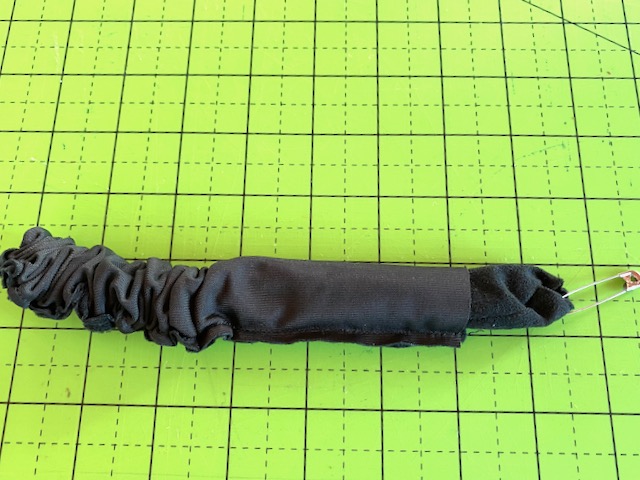
- Attach the pin to the end of a 21” length of ribbon. Feed it into the fabric strap to provide body. Set aside.
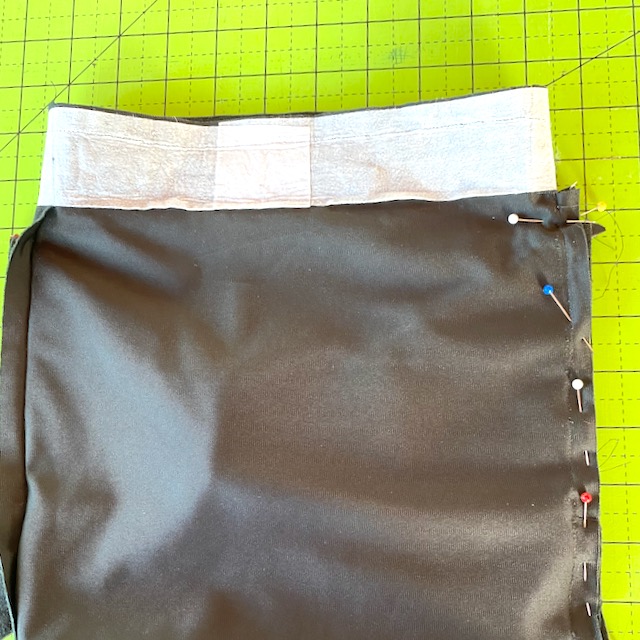
- LINING – Fold with right sides together. Stitch the lining side seams. Sew across the bottom only at the outside edges, leaving a 7” opening in the center bottom. Slit the fold open across the entire bottom.
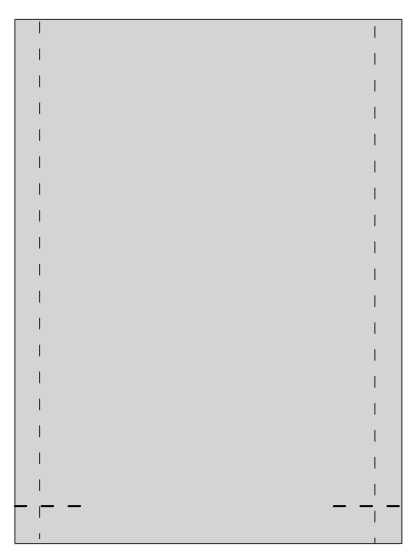
- Fold the bottom corners of the lining into a triangle having the side seam aligned with the seam in the bottom of the bag. Mark a line across the fabric with 1.50” to the left and right of the seam. Sew across the line and trim the excess.

- Turn the lining right side out.
- Sew the straps to the top edge 1.25” from the side seams with the edges of the straps against the lining edge.
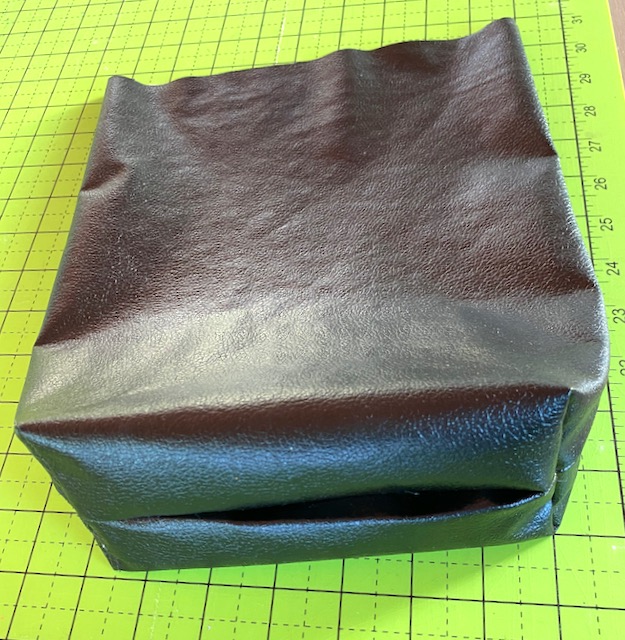
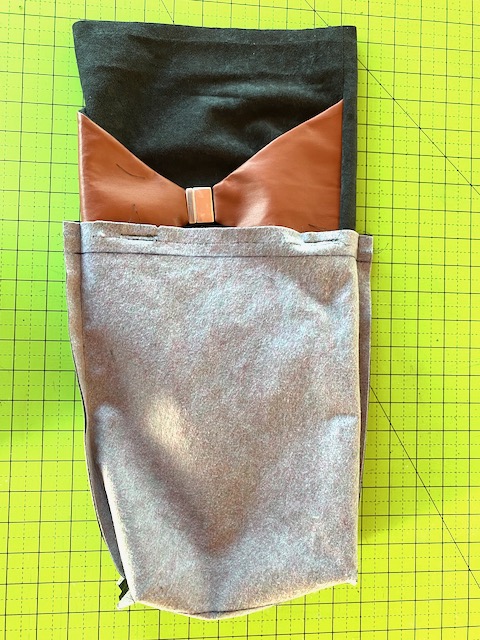
- THE BAG – Arrange the leather triangles on the front side of the bag with the top of the triangles 2.50” from the top of the bag. Pin or clip the triangles to the fabric.
- Iron the interfacing to wrong side of the top edges of the suede fabric.
- Fold the suede in half with right sides together and matching the top edges. Pin the long sides together through all layers of the bag and triangles. Create the bottom corners in the suede as you did for the lining in Step 13.
- Turn the bag right side out. With the lining wrong side out, slip the suede bag into the lining. The right sides of the layers will be facing each other.
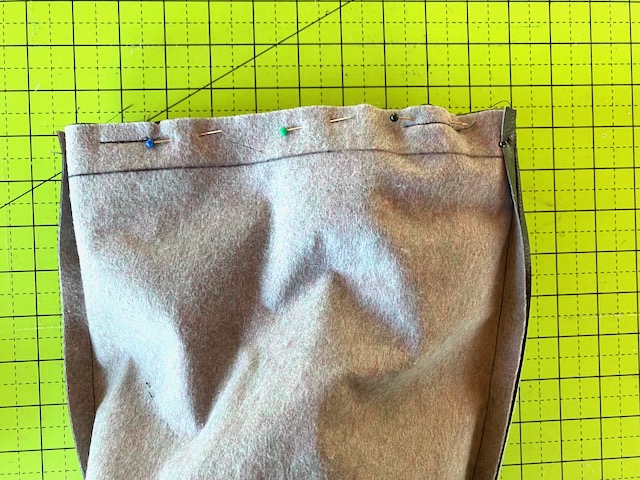
- Pin the top edges of the lining to the bag with the side seams matching. Stitch together.
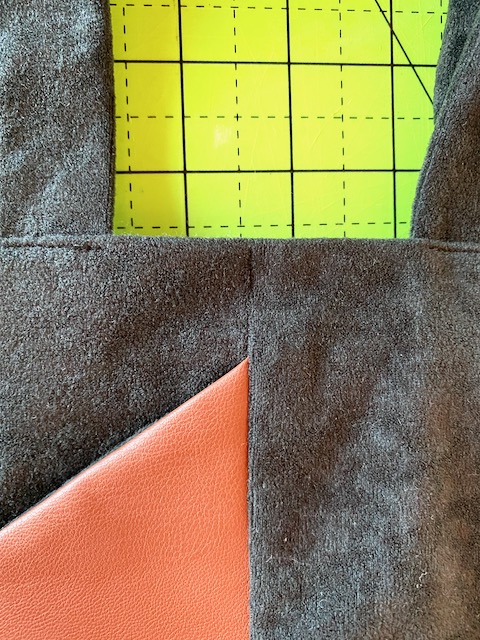
- Reach into the opening of the lining and pull out the suede bag. Close the opening with hand stitching. Stuff the lining into the suede bag.
- Pin the top edge to create a 1″ facing of suede. Top stitch close to the edge of the bag to secure the straps. Stitch a 3/4” line in the ditch of the side seams. This will keep the facing in place.


Really cute bag.. I plan on making a couple with different colors of suede for the bow.
So glad you like this project, Marcia! Have a great day! – Ashley, WeLikeSewing