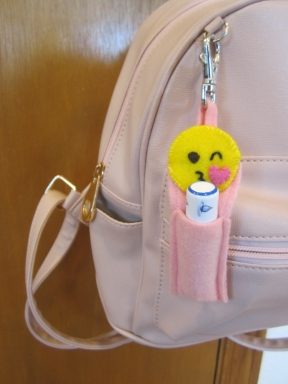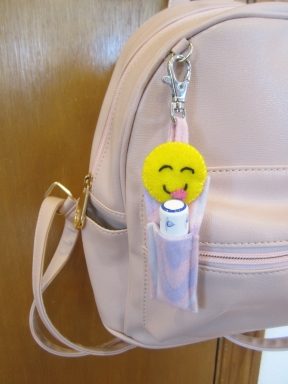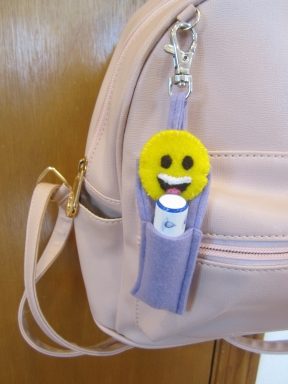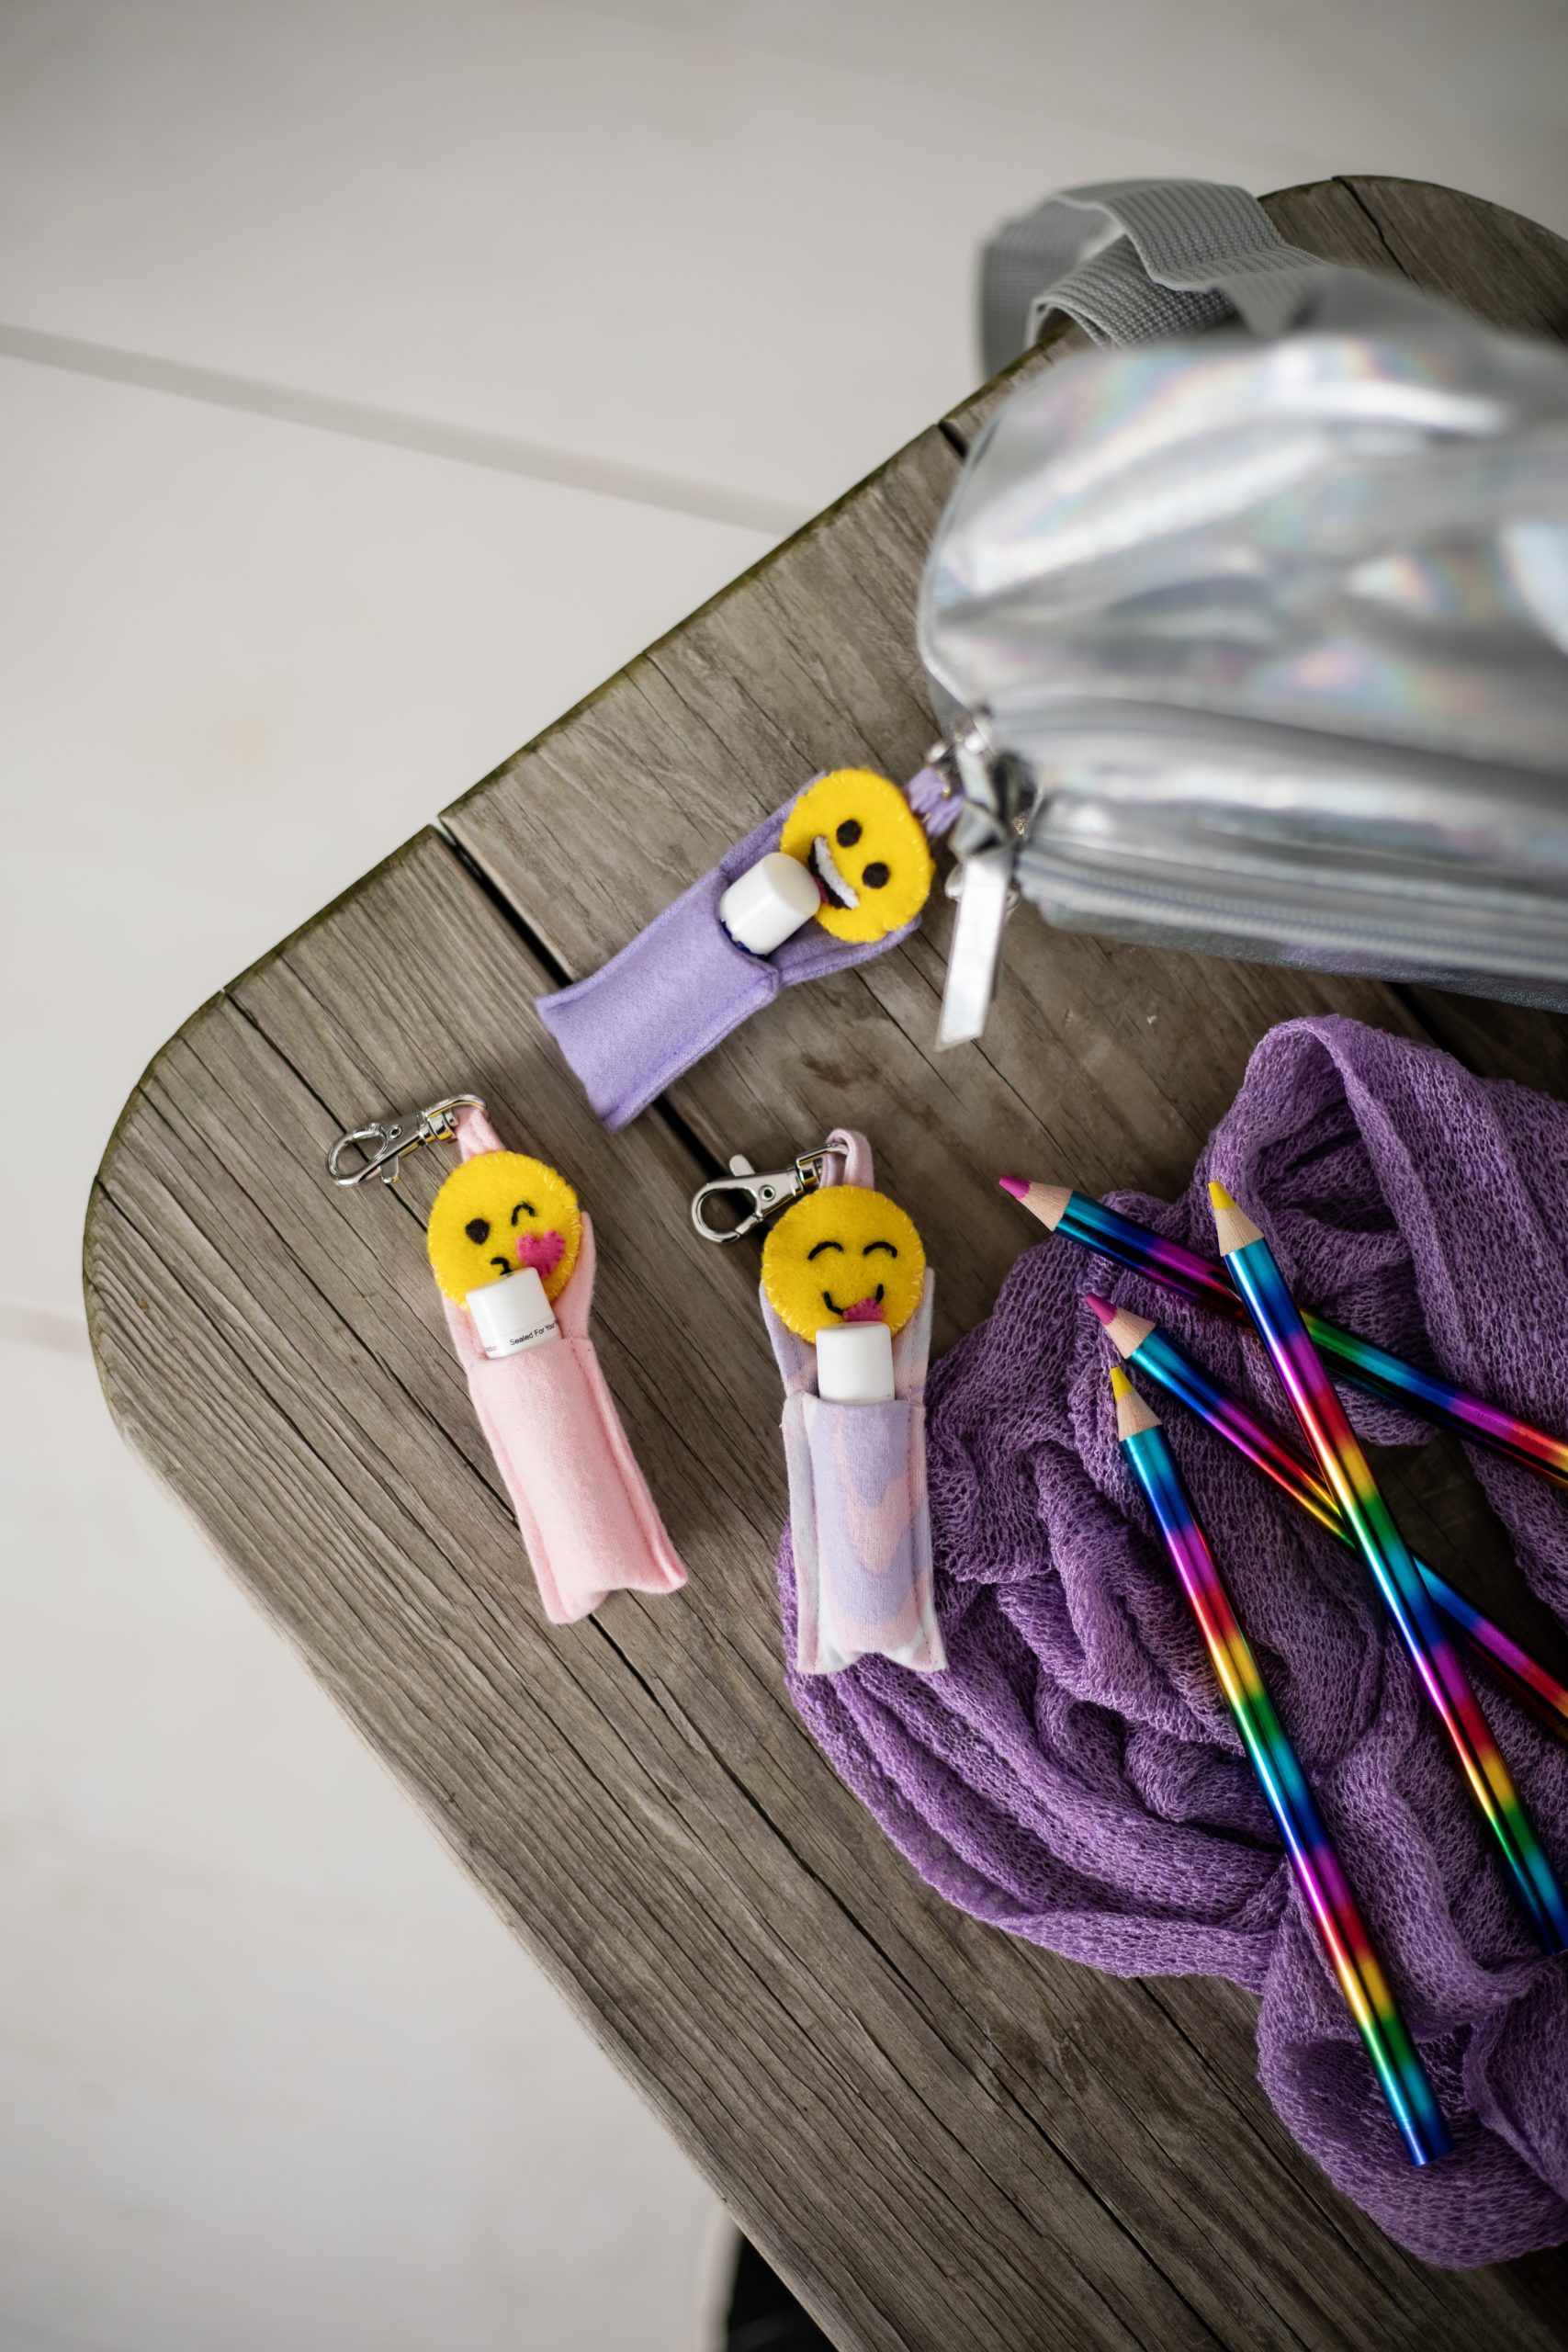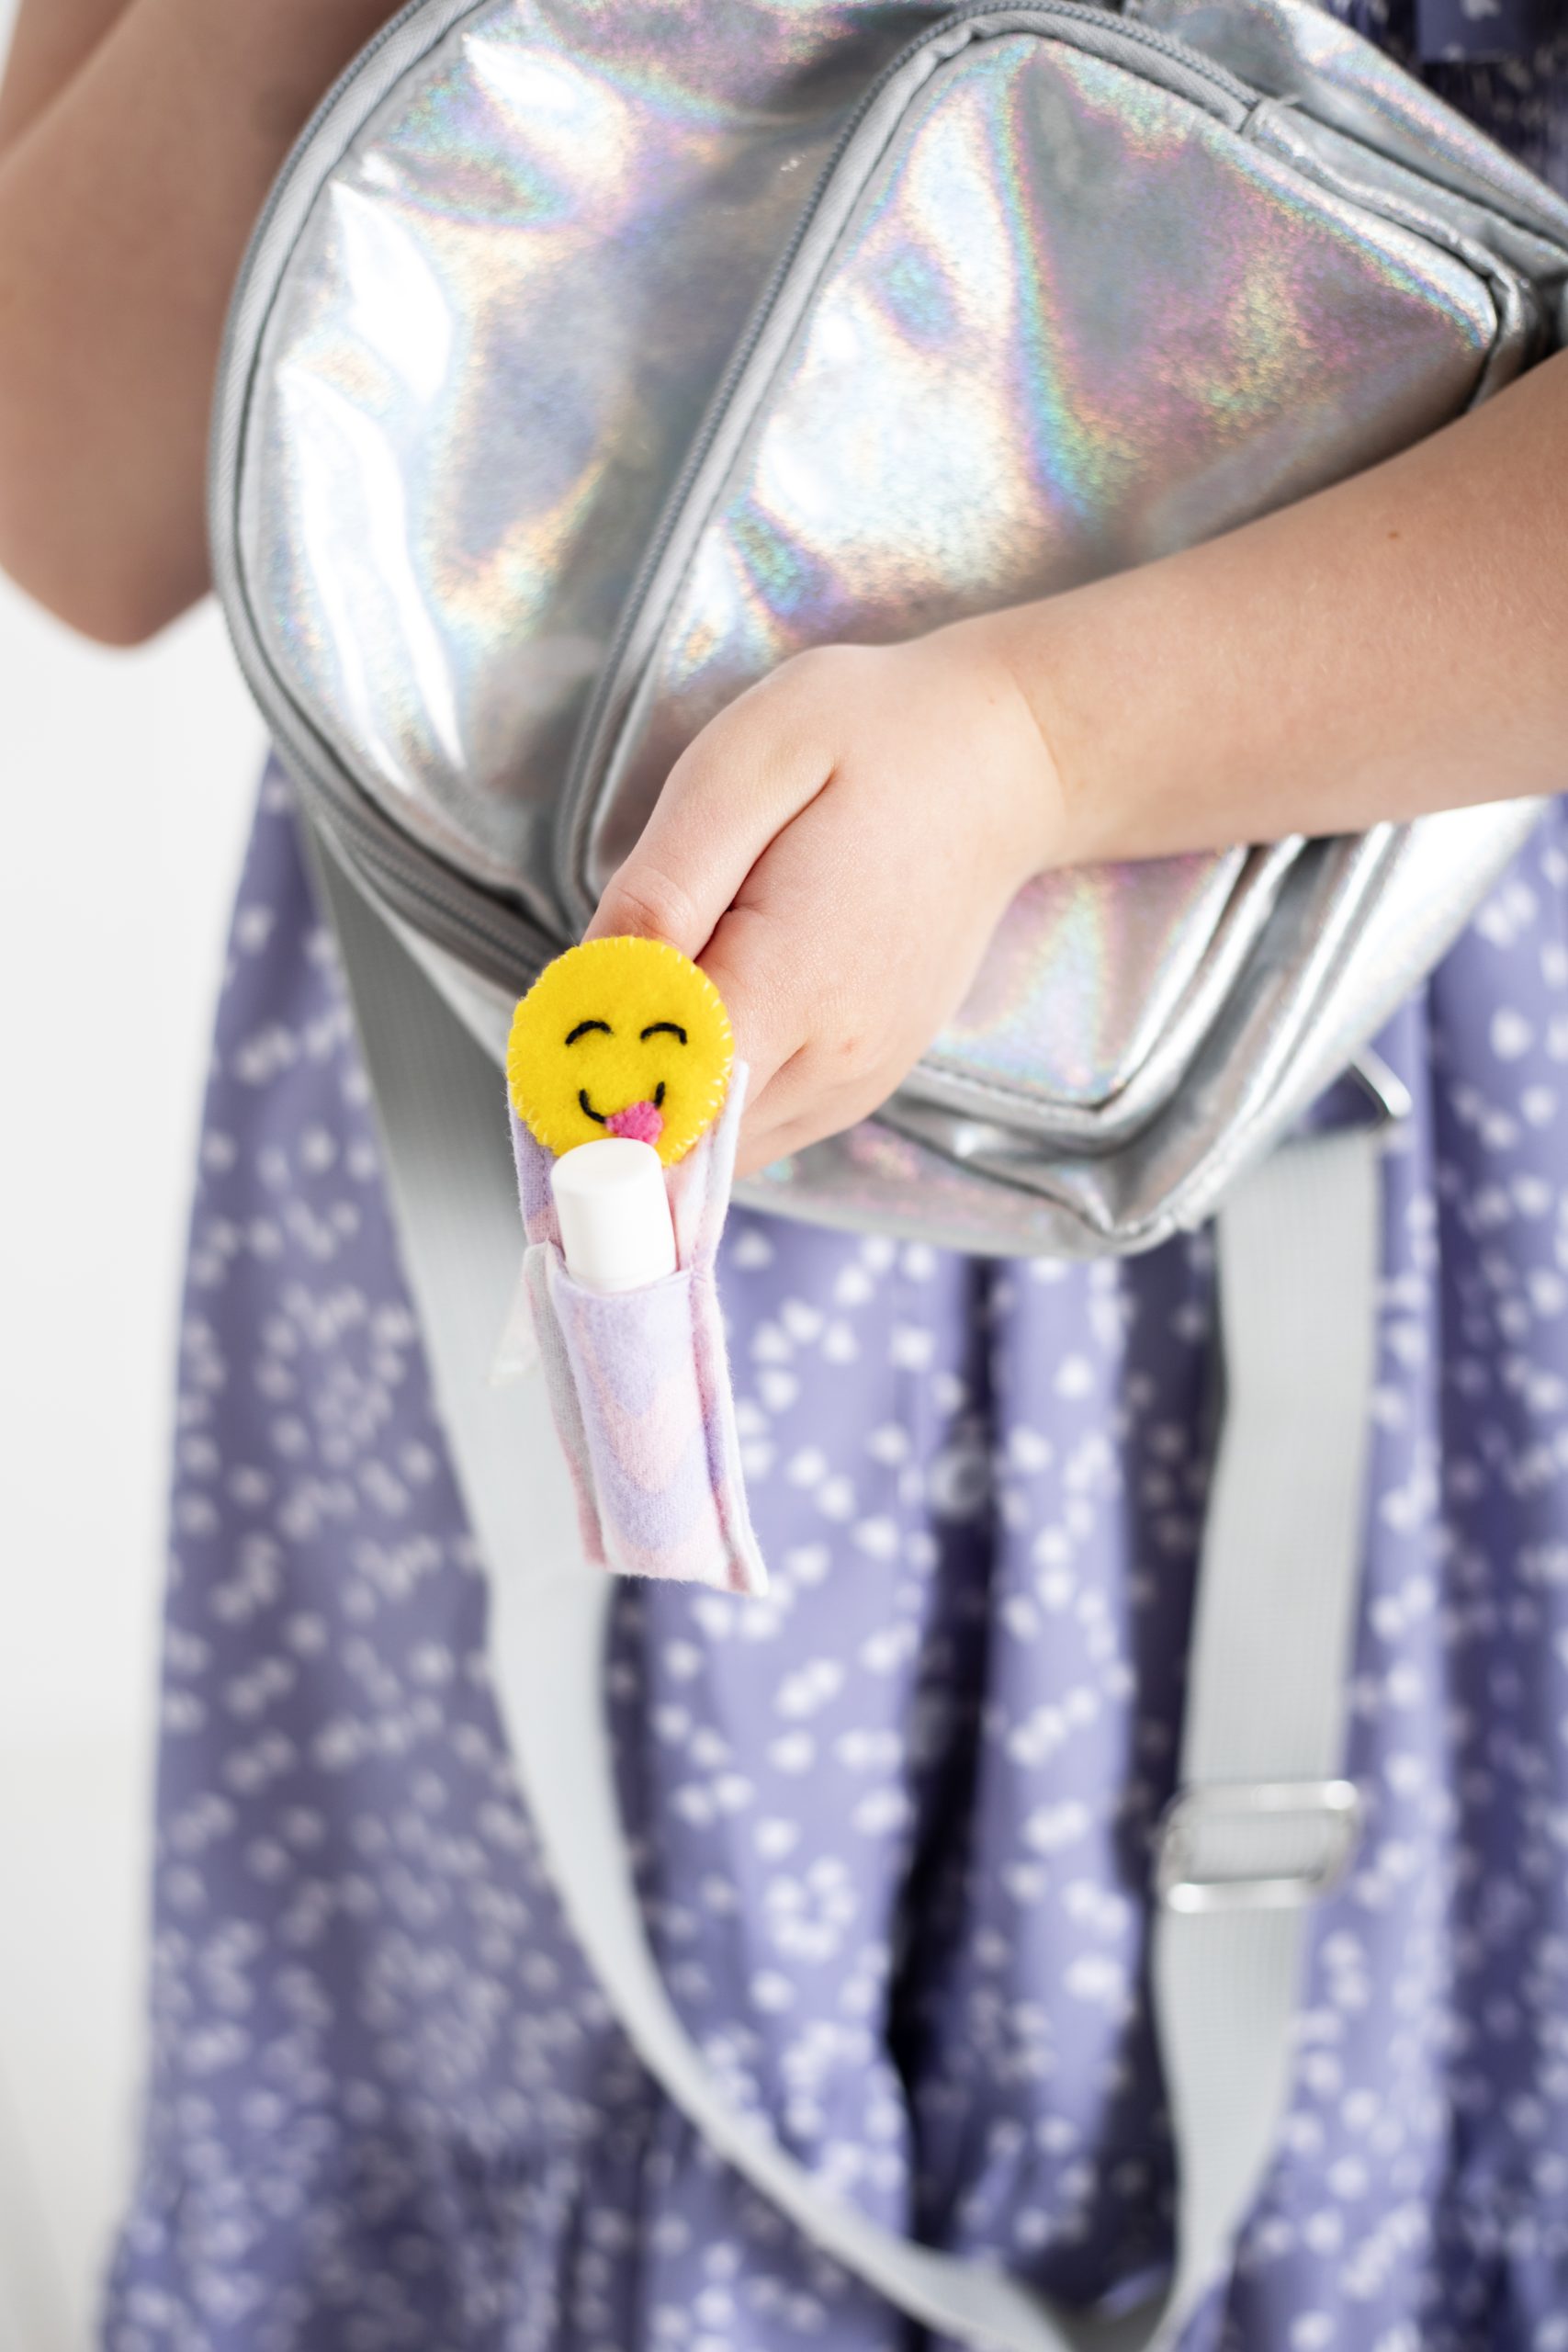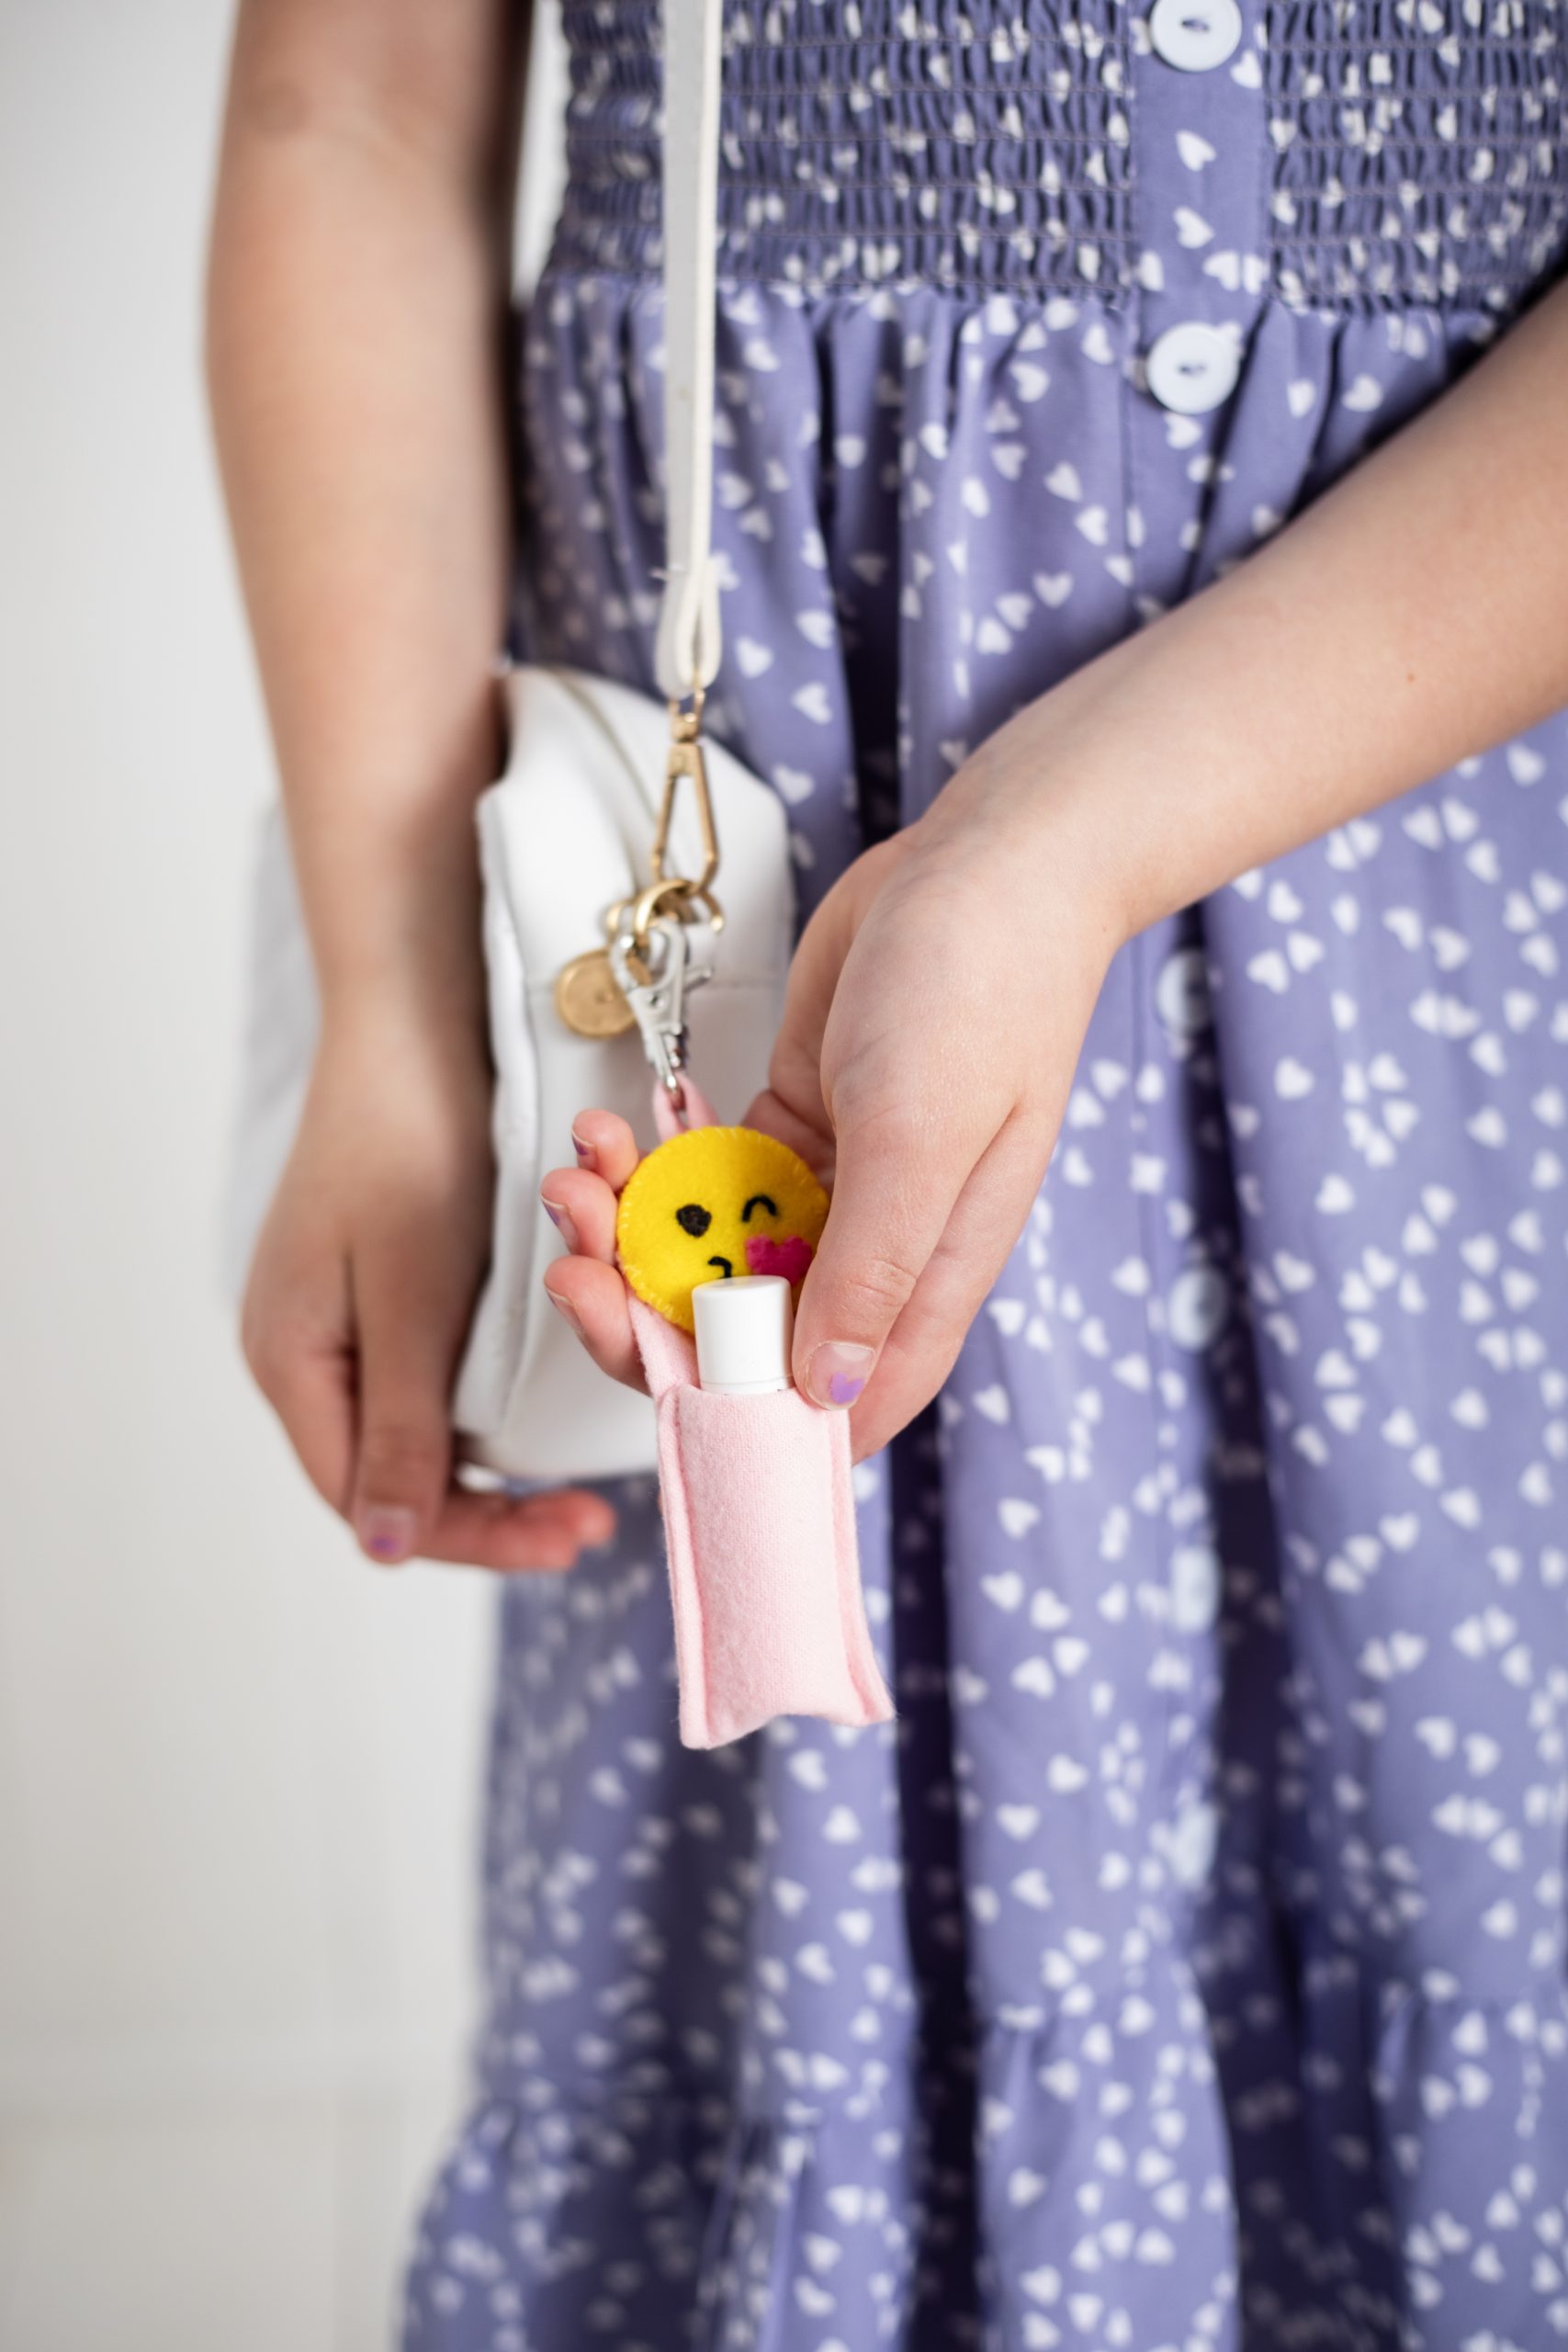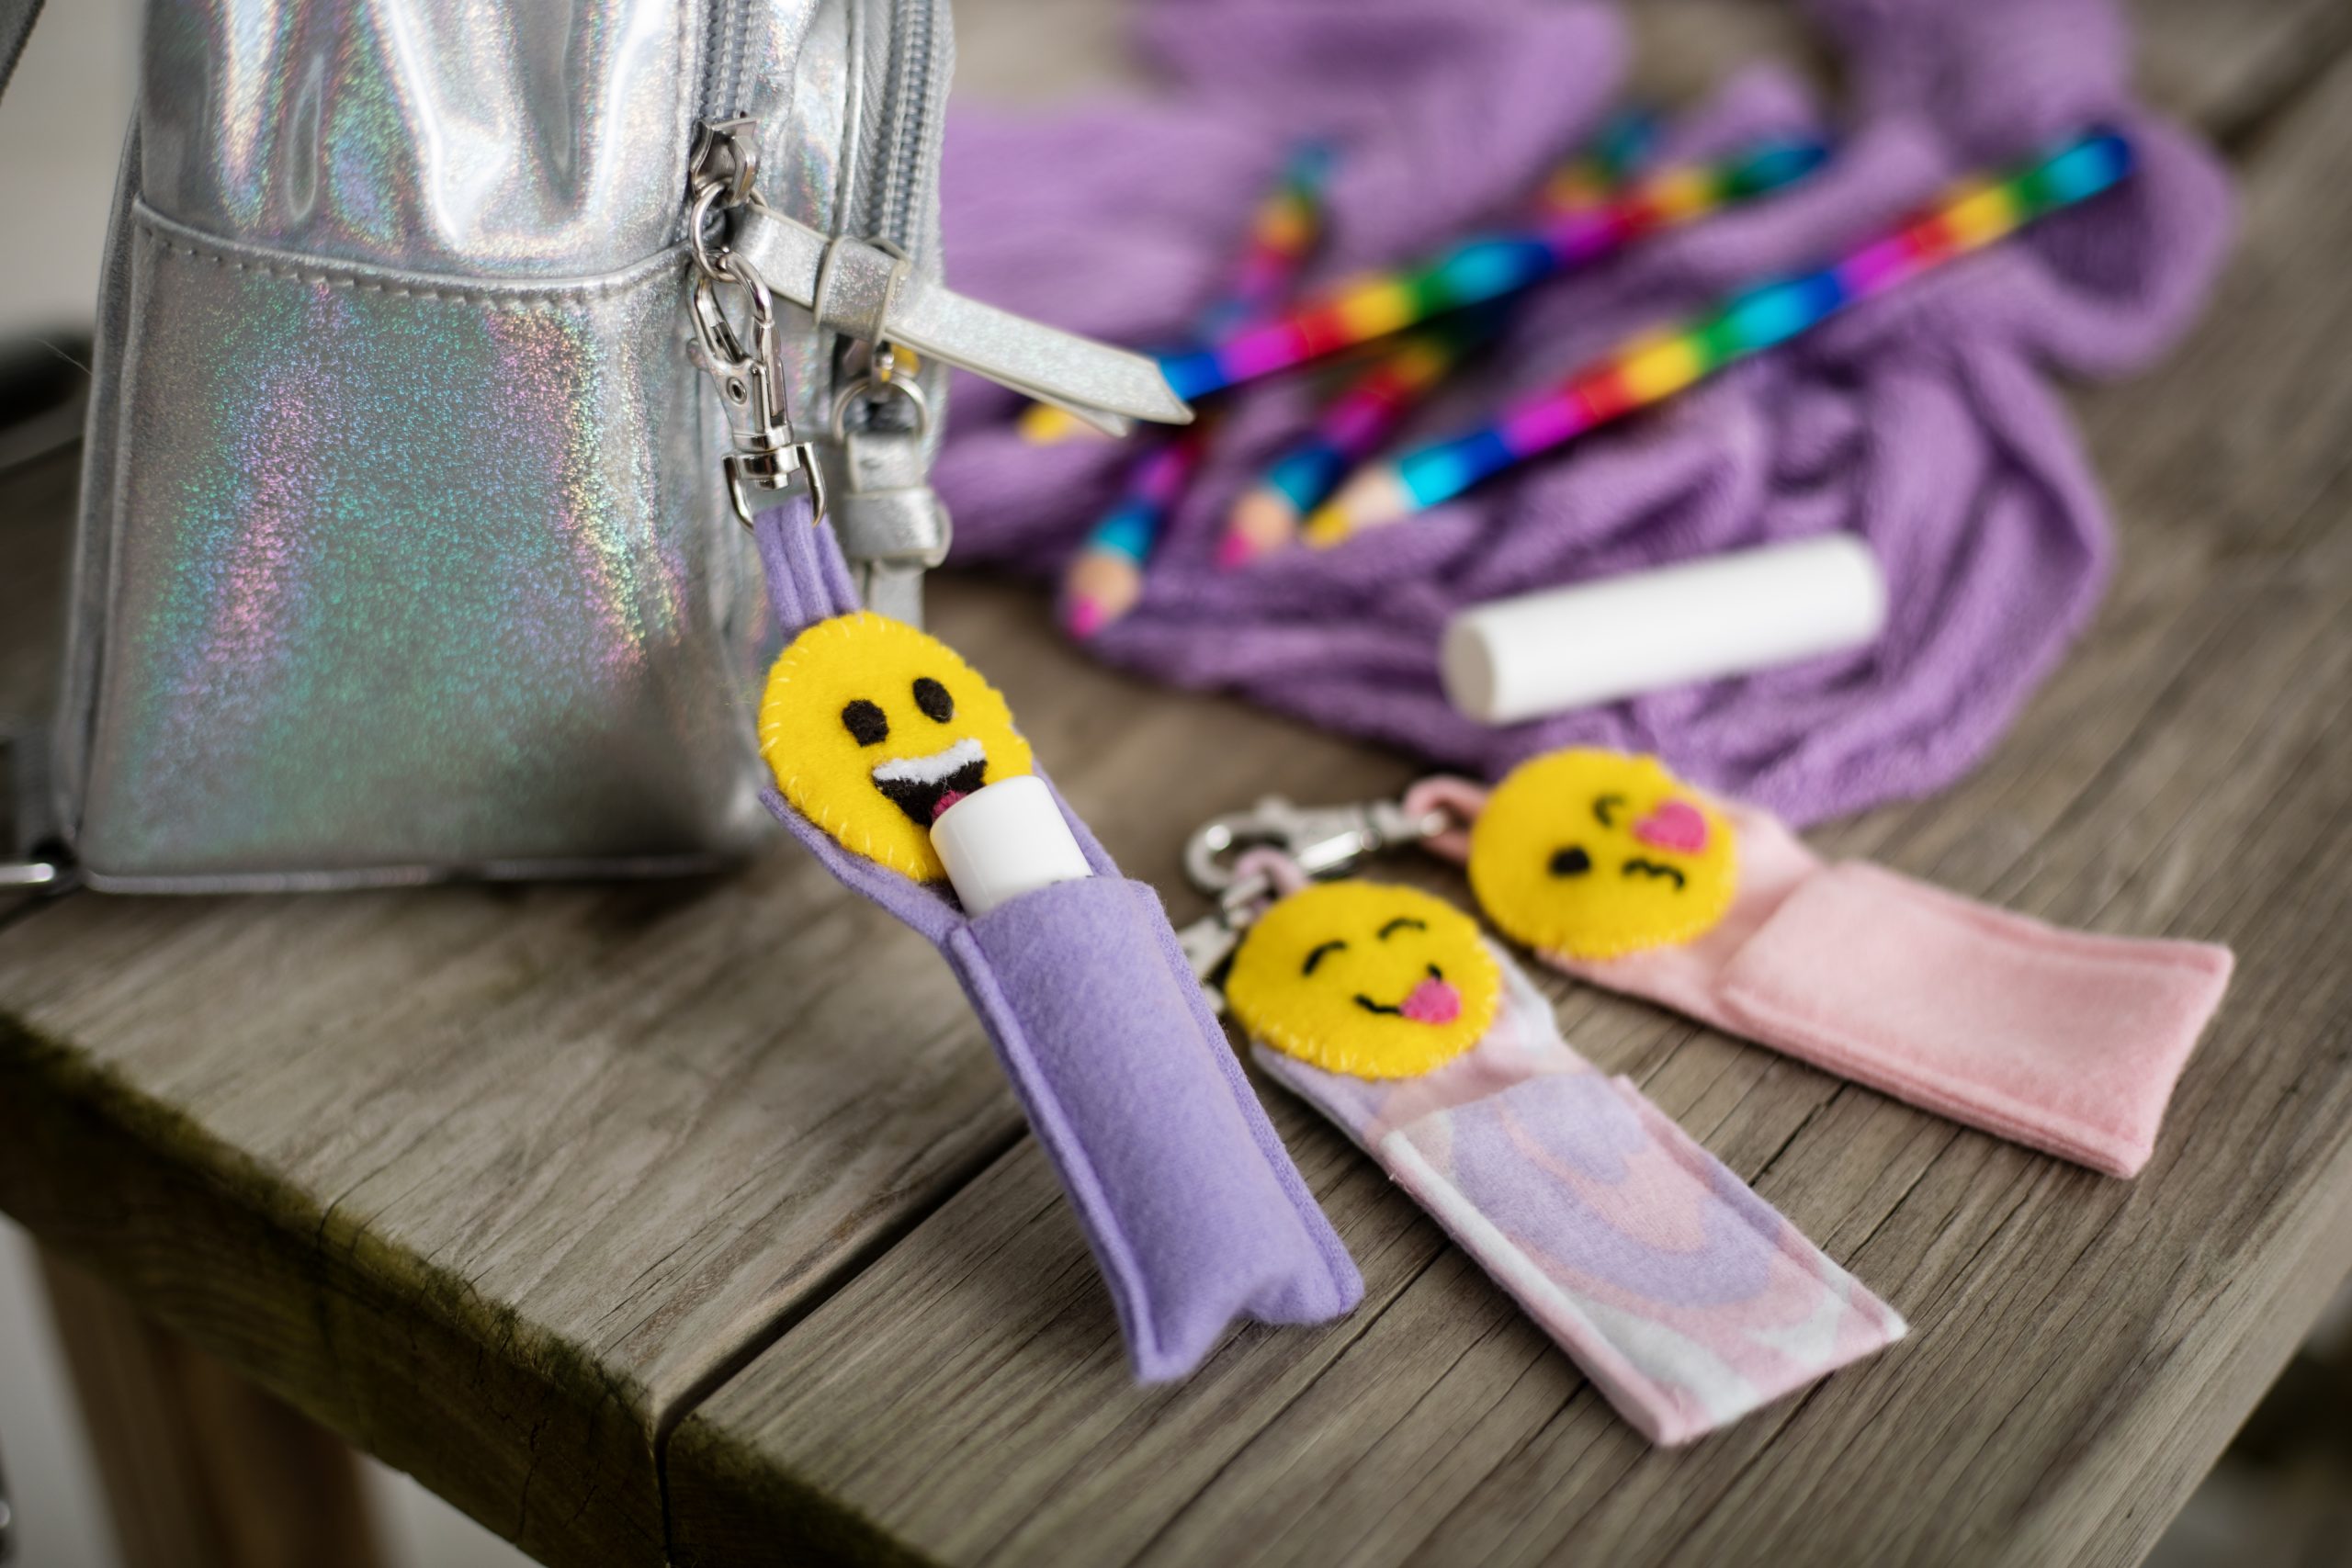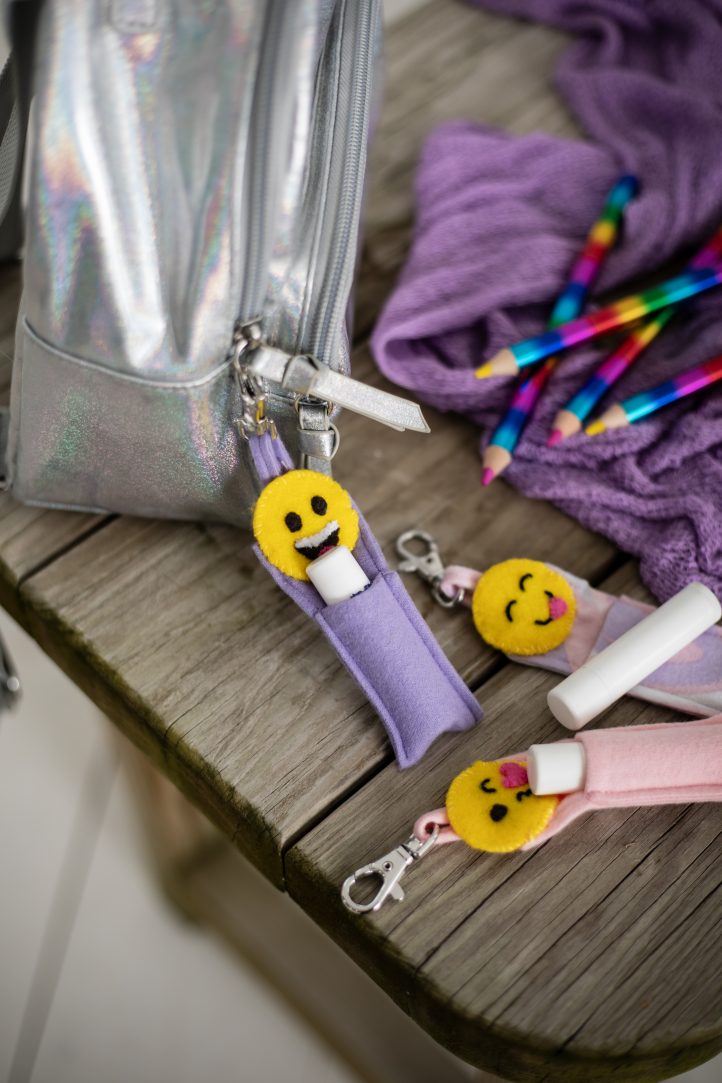
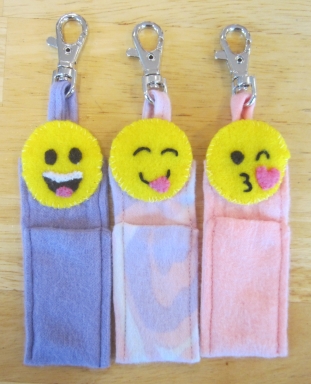
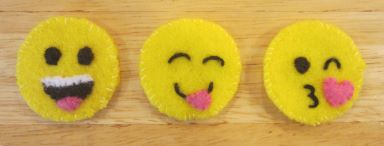
Back-to-school season is just around the corner, and your little ones will be fighting over these adorable lip balm cases. Featuring three emoji designs, these DIY lip balm cases from Christy Jones are a fun, felt back-to-school pattern that you can whip up in no time. These kid-friendly sewing projects easily attach to backpacks and lunch boxes with swivel hooks or lobster clasps, and fit standard lip balm tubes.
Skill Level: Easy
Time: 1 hour per case
Materials:
Designer Note: This yardage provides enough fabric for at least three lip balm cases.
- 1/8 yard flannel, prewashed and ironed
- Square of yellow felt (6 x 6 inches or larger)
- Small scraps of black, white, and bright pink felt
- Matching threads
- Black fine-tipped washable fabric marker
- Black embroidery floss
- Embroidery needle
- Small, sharp scissors
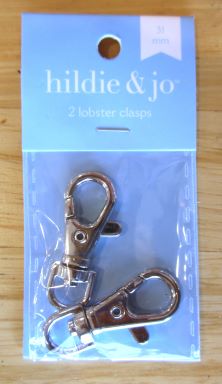
- 1 lobster clasp or swivel hook (with D-ring), each approx. inches long, per case 31 mm or 1 1/4
- PDF Templates – These are located at the bottom of this page. Please see printing instructions below.
PRINTING INSTRUCTIONS:
Note: To download the templates, click on the pattern download button at the bottom of the page. We recommend opening your pattern download using Adobe Acrobat.
Sewing Instructions:
PREPARE THE PATTERNS:
- Print 1 copy of template and cut out all the pieces.
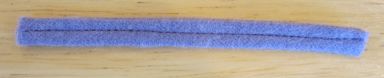
MAKE THE STRAP:
Note: Use 1/4” seam allowance. Topstitch 1/8” from the edge of the fabric.
- Cut 1 lip balm strap from flannel.
- Fold a long edge over 1/4” toward the center. Press.
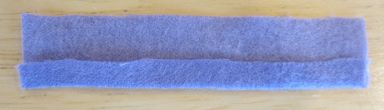
- Fold the other long edge over 1/4” toward the center. Press.
- Fold the strap in half, so that the raw edges are on the inside. Press.

- Topstitch the strap down the center.
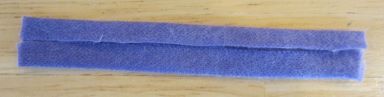
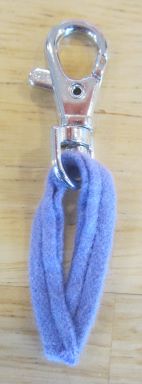
- Insert the end of the strap through the D-ring of the clasp.

- Overlap the ends of the strap and hand sew them together with a few stitches. (These stitches will hold the strap together when it is inserted in the case, but will not show in the finished project.)
MAKE THE CASE:
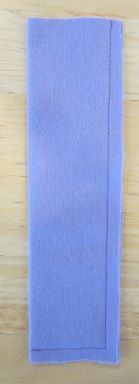
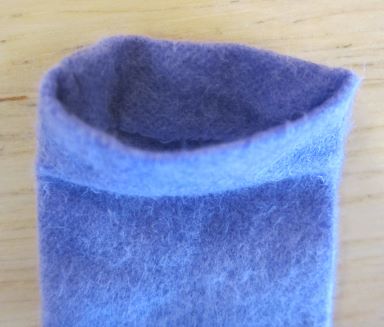
- Cut 1 lip balm case from flannel.
- Fold the case in half vertically, right sides together.
- Stitch along the edge opposite the fold and the lower edge, leaving the top open.
- Clip the corner to eliminate excess bulk in the seam.
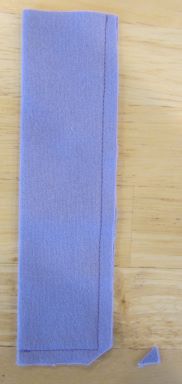
- Turn the case right side out. Press.
- Fold the upper edges 1/2” toward the inside of the case. Press.
- Insert the strap ends into the top of the case, about 1/2” deep and centered on the case. Pin upper edge closed, catching the strap.
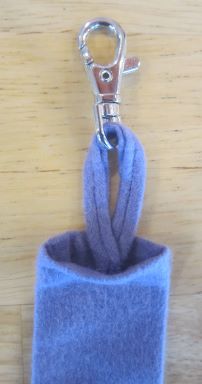
- Fold the lower edge of the case up 2 1/4” and pin in place.

- Topstitch along the left side, top, and right side of the case.
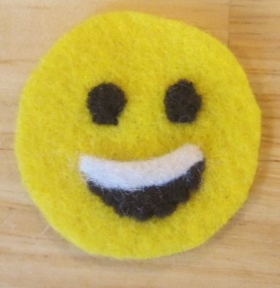
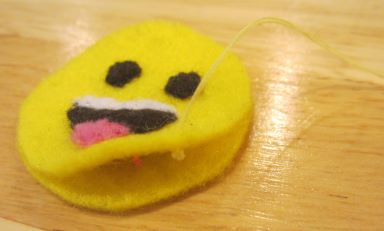
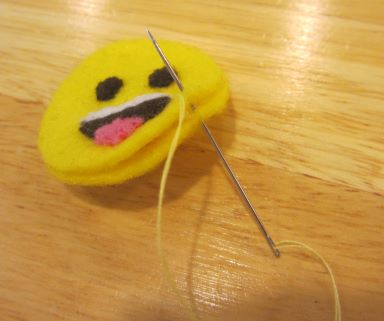
MAKE THE SMILEY EMOJI:
- Cut 2 smiley emoji heads from yellow felt. One will be the face, the other will be the backing. Set the backing aside.
- Cut 1 smiley emoji mouth and 2 eyes from black felt.
- Cut 1 smiley emoji teeth piece from white felt.
- Cut 1 smiley emoji tongue from pink felt.
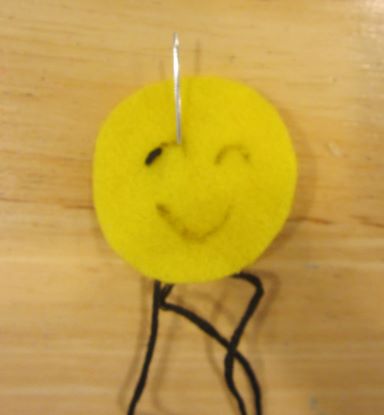
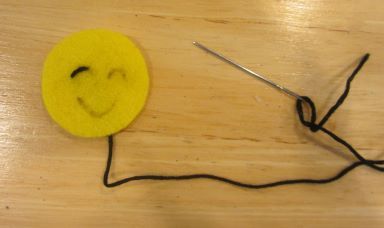
- Position the eyes on one of the yellow felt circles, then whipstitch the eyes in place using black thread.
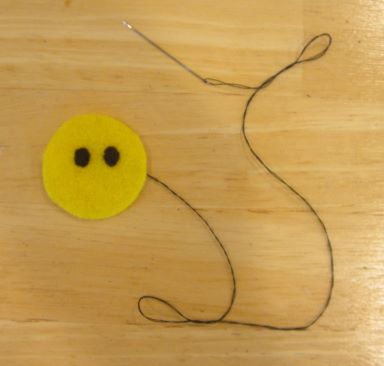
- Position the smiley mouth on the emoji face and whipstitch it in place using black thread.
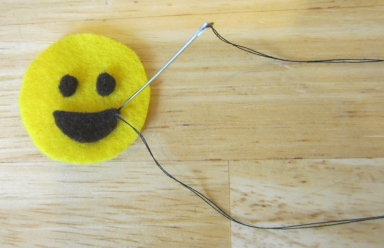
- Center the teeth piece along the top edge of the mouth, then whipstitch it in place using white thread.
- Center the tongue along the lower edge of the mouth, then whipstitch it in place using pink thread.

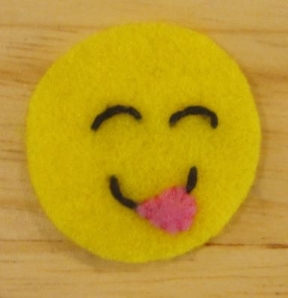
MAKE THE YUM EMOJI:
- Cut 2 yum emoji heads from yellow felt. One will be the face, and the other will be the backing. Set the backing aside.
- Cut 1 yum emoji tongue from pink felt.
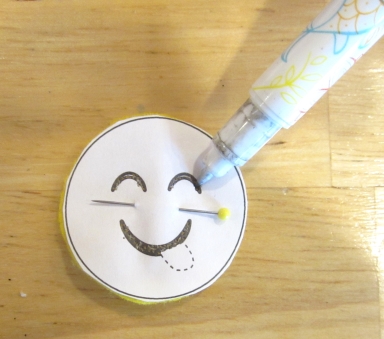
- Using the yum emoji head pattern as a reference, draw the emoji eyes and smile on one of the yellow felt circles using a fine-tipped washable marker or make the pattern into a stencil by pinning the pattern to the face, then using a pin to poke holes all along the eye and smile lines. The holes should form nearly continuous lines. Then press a fine-tipped washable marker through the punched areas to draw the lines on the face.


- Thread the embroidery needle with black floss (all six strands) and knot the end. Poke the needle up through the end of one of the eye lines.
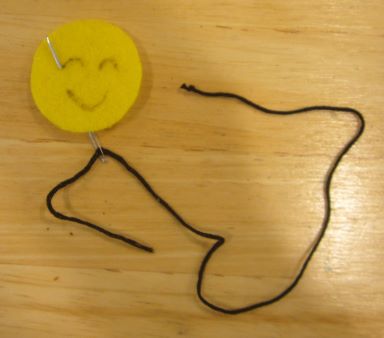
- Insert the needle down through the felt, about 1/3 of the way across the eye line.
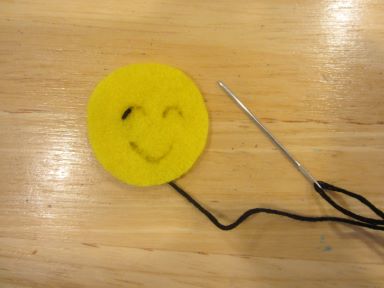
- Poke the needle up through the eye line again, about 2/3 of the way across.
- Insert the needle down through the felt, slightly overlapping the end of the first stitch. This forms a “backstitch” and helps smoothly connect the stitches.
- Poke the needle up through the felt at the end of the eye line.
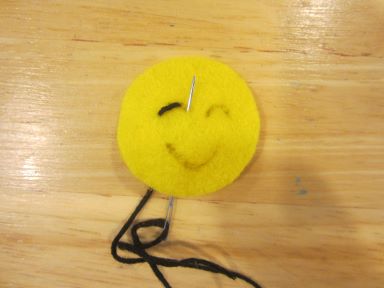
- Insert the needle down through the felt, just overlapping the end of the previous stitch.

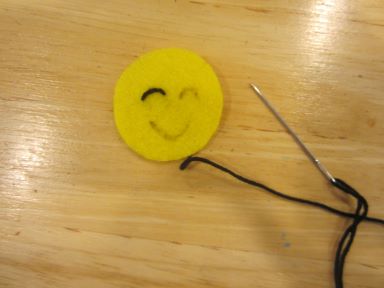
- Backstitch the other eye and the smile using black embroidery floss and the same technique.
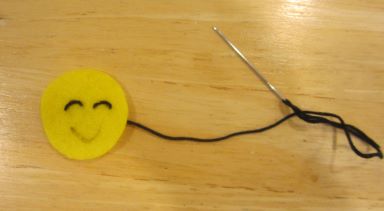
- Position the tongue on top of the smile, then whipstitch it in place using pink thread.
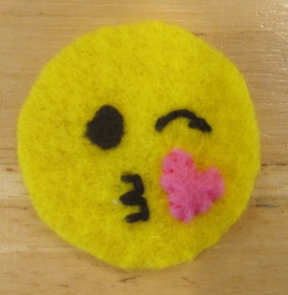
MAKE THE KISS EMOJI:
- Cut 2 kiss emoji heads from yellow felt. One will be the face, the other will be the backing. Set the backing aside.
- Cut 1 kiss emoji eye from black felt.
- Cut 1 kiss emoji heart from pink felt.
- Using the head pattern as a reference, position the eye and heart on one of the yellow felt circles. Use a fine-tipped fabric marker to draw the winking eye and the lips on the felt. Or transfer the markings using the pin technique described for the “yum” emoji.
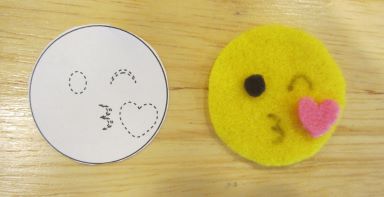
- Backstitch along the eye and lip lines with black embroidery floss, using the same technique shown for the yum emoji.
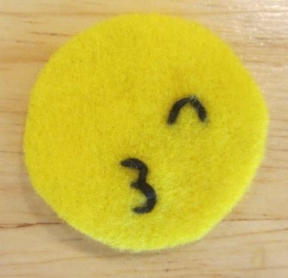
- Whipstitch the eye and heart in place using matching threads.
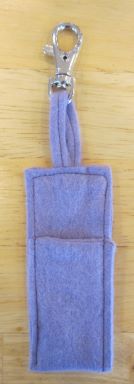
ADD AN EMOJI TO THE LIP BALM CASE:
- Place each emoji face and head backing together, lining them up along the edges. Whipstitch the emoji face and back together.
- Position an emoji on the lip balm case so that the top of the case is even with the emoji eyes. The lips or tongue should show just above the lip balm.

- Using yellow thread, whipstitch the edges of the emoji that overlap the case to the top layer of the flannel only, without poking all the way through the back of the case.

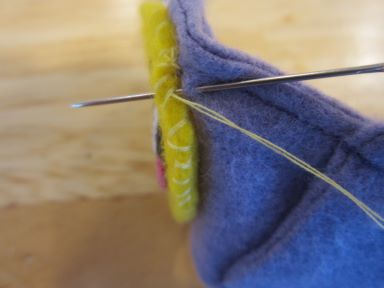
- Let the strap hang downward so it’s out the way. Whipstitch the back of the emoji to the top of the lip balm case, stitching through the layer of flannel closest to the emoji only.

The cases are finished, ready to clip on, and sure to bring a smile!