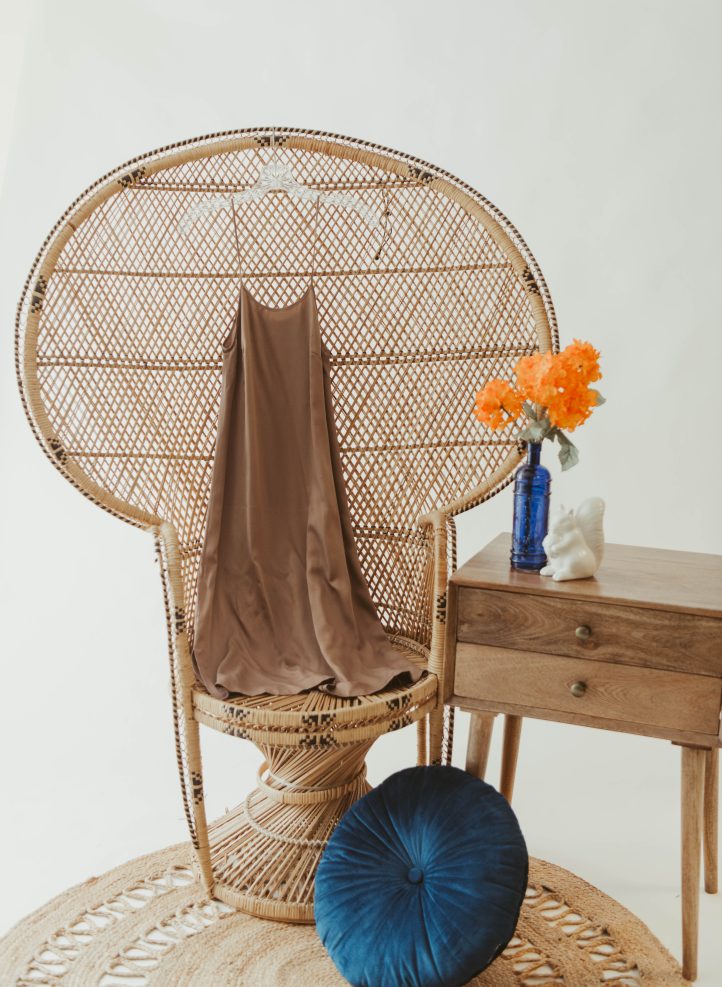
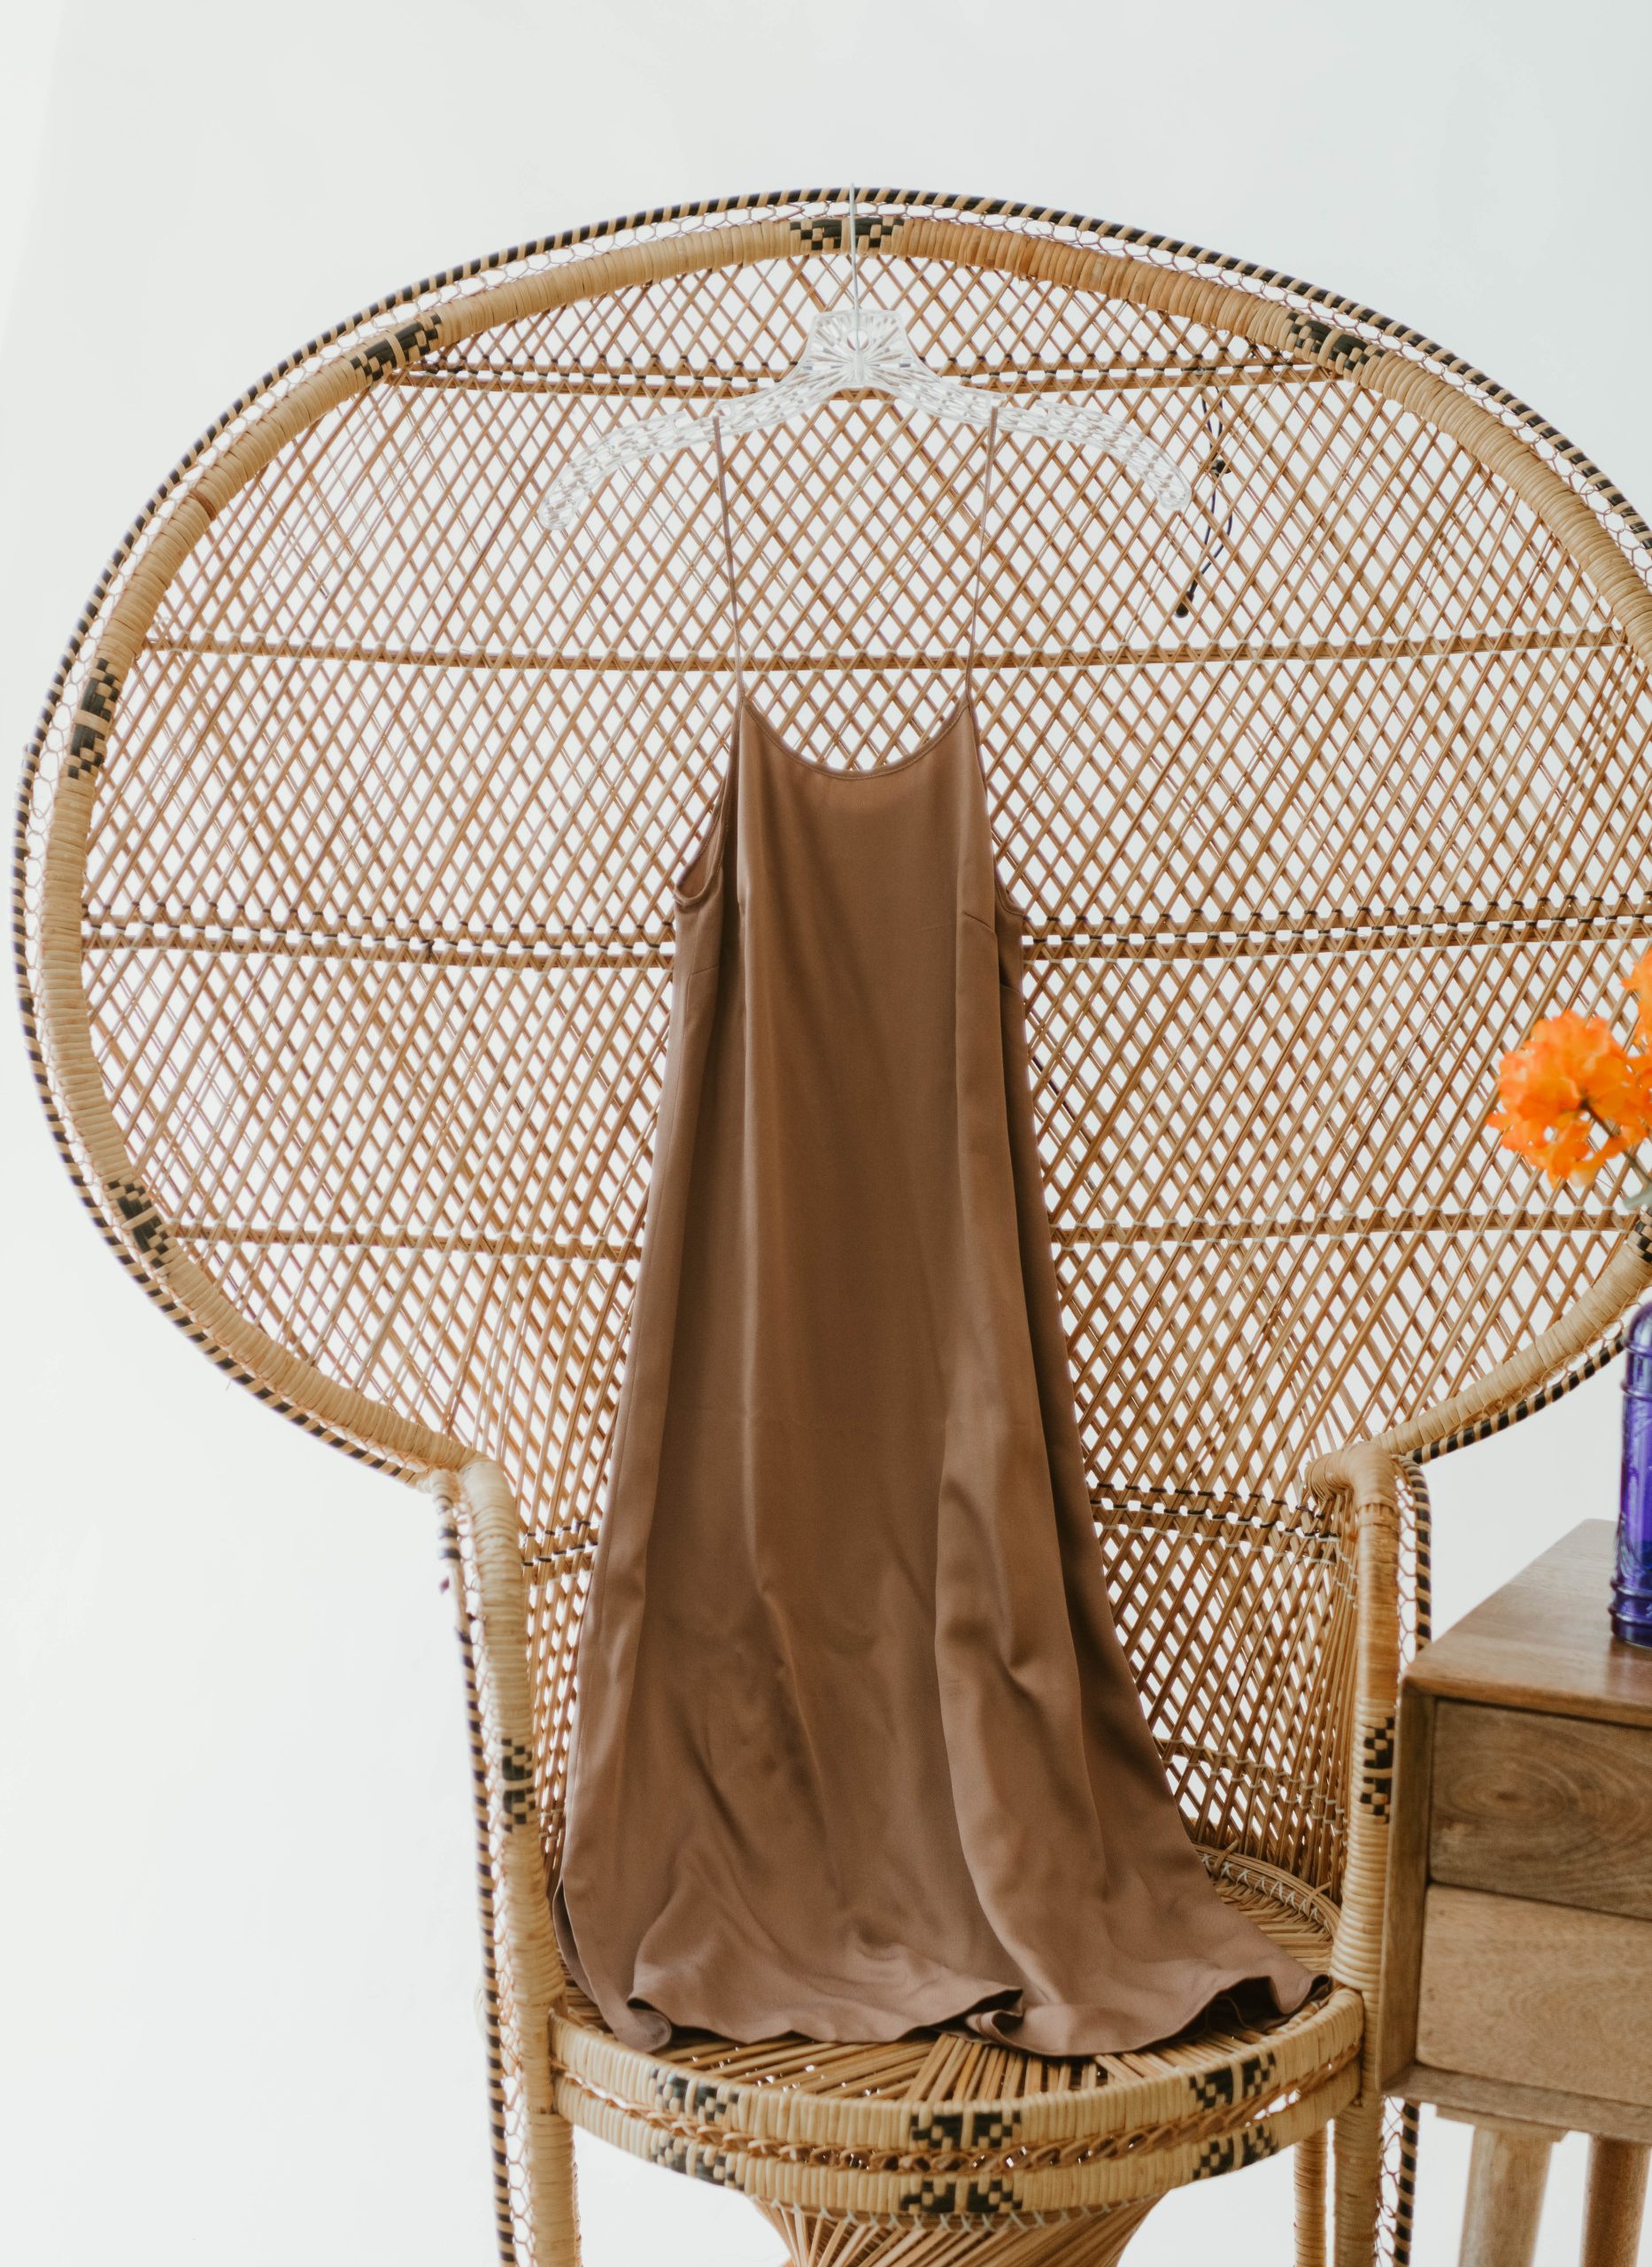
Elegant slip dresses as daywear have been spotted both on and off the runway for fall and winter, and this versatile slip dress pattern from Lauren Merciris is both on-trend and timeless. Made in smooth, sleek non-stretch fabrics, this slip dress pattern can be made in either a flattering v-neck or rounded neck with bias straps and a flirty side slit. Keep things casual by pairing your dress sewing pattern with boots or layered under a graphic tee or pile on your favorite wrap and heels for a sophisticated evening look.
Designer Notes:
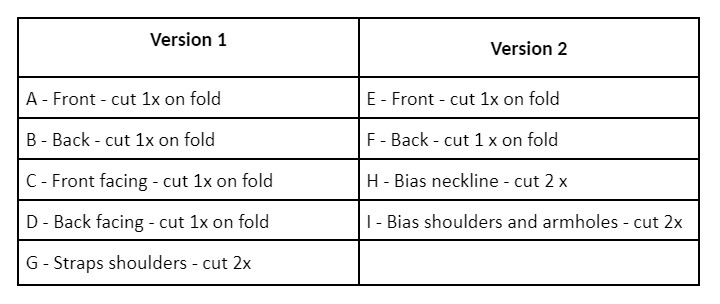
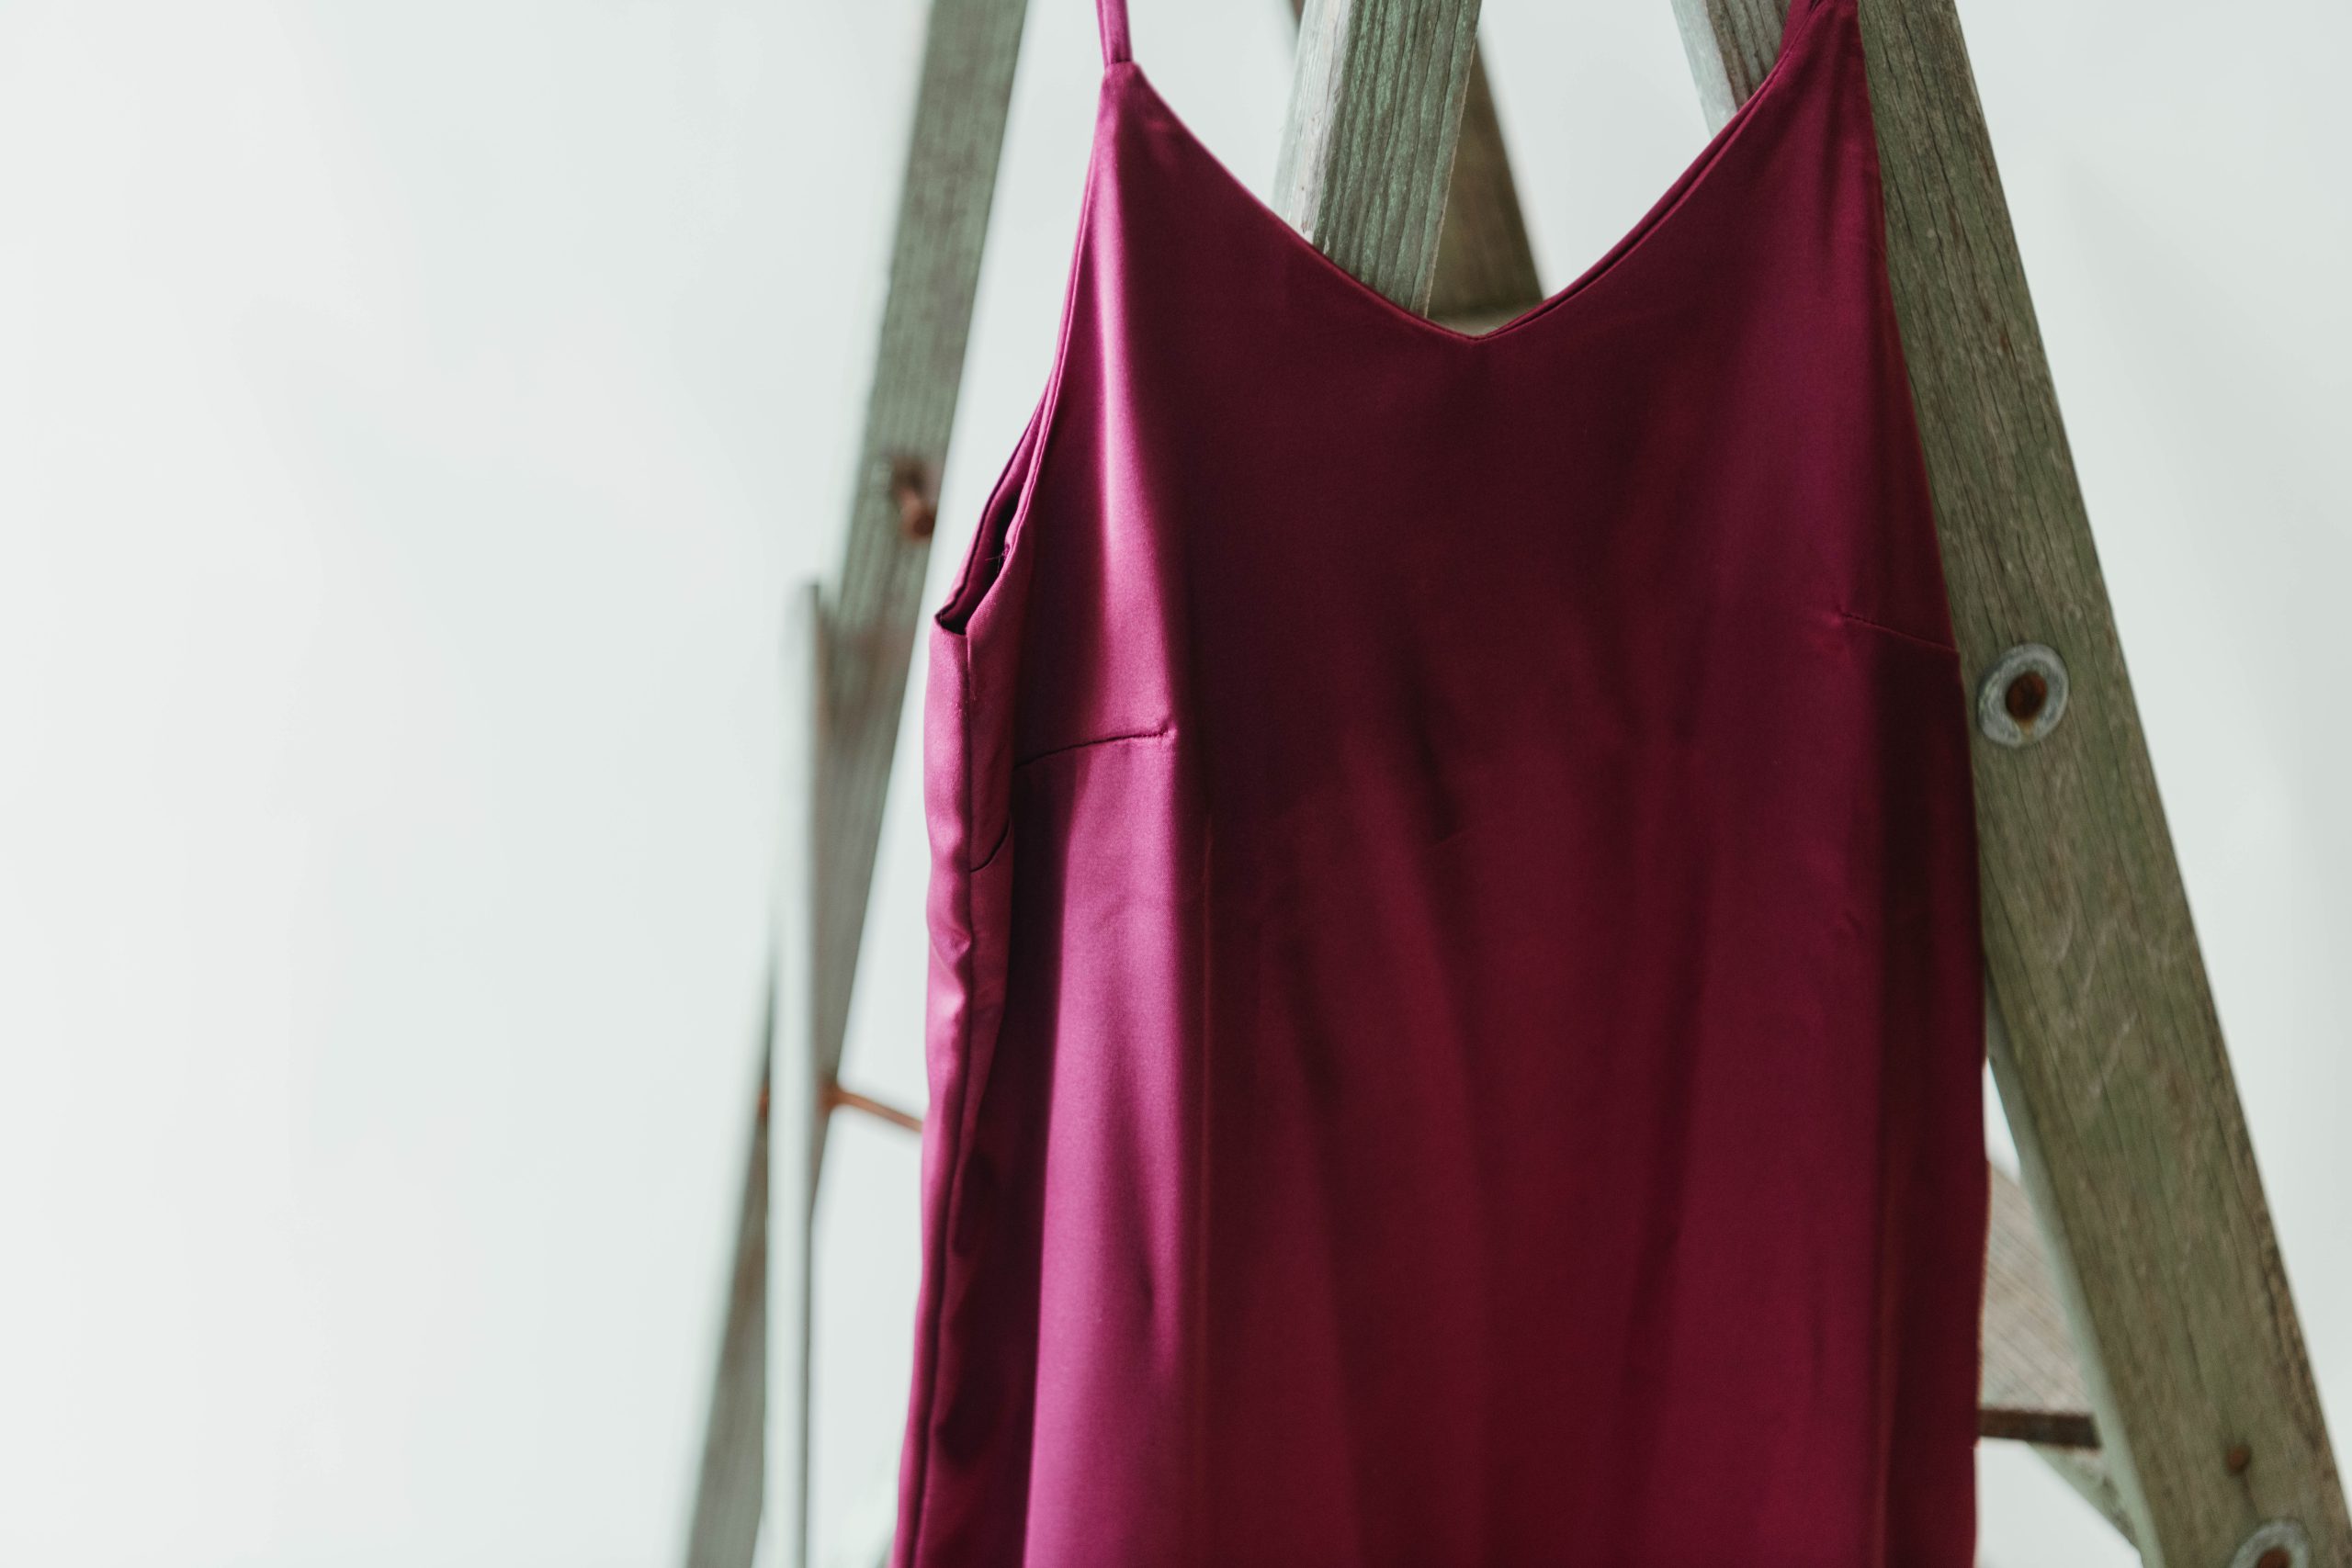
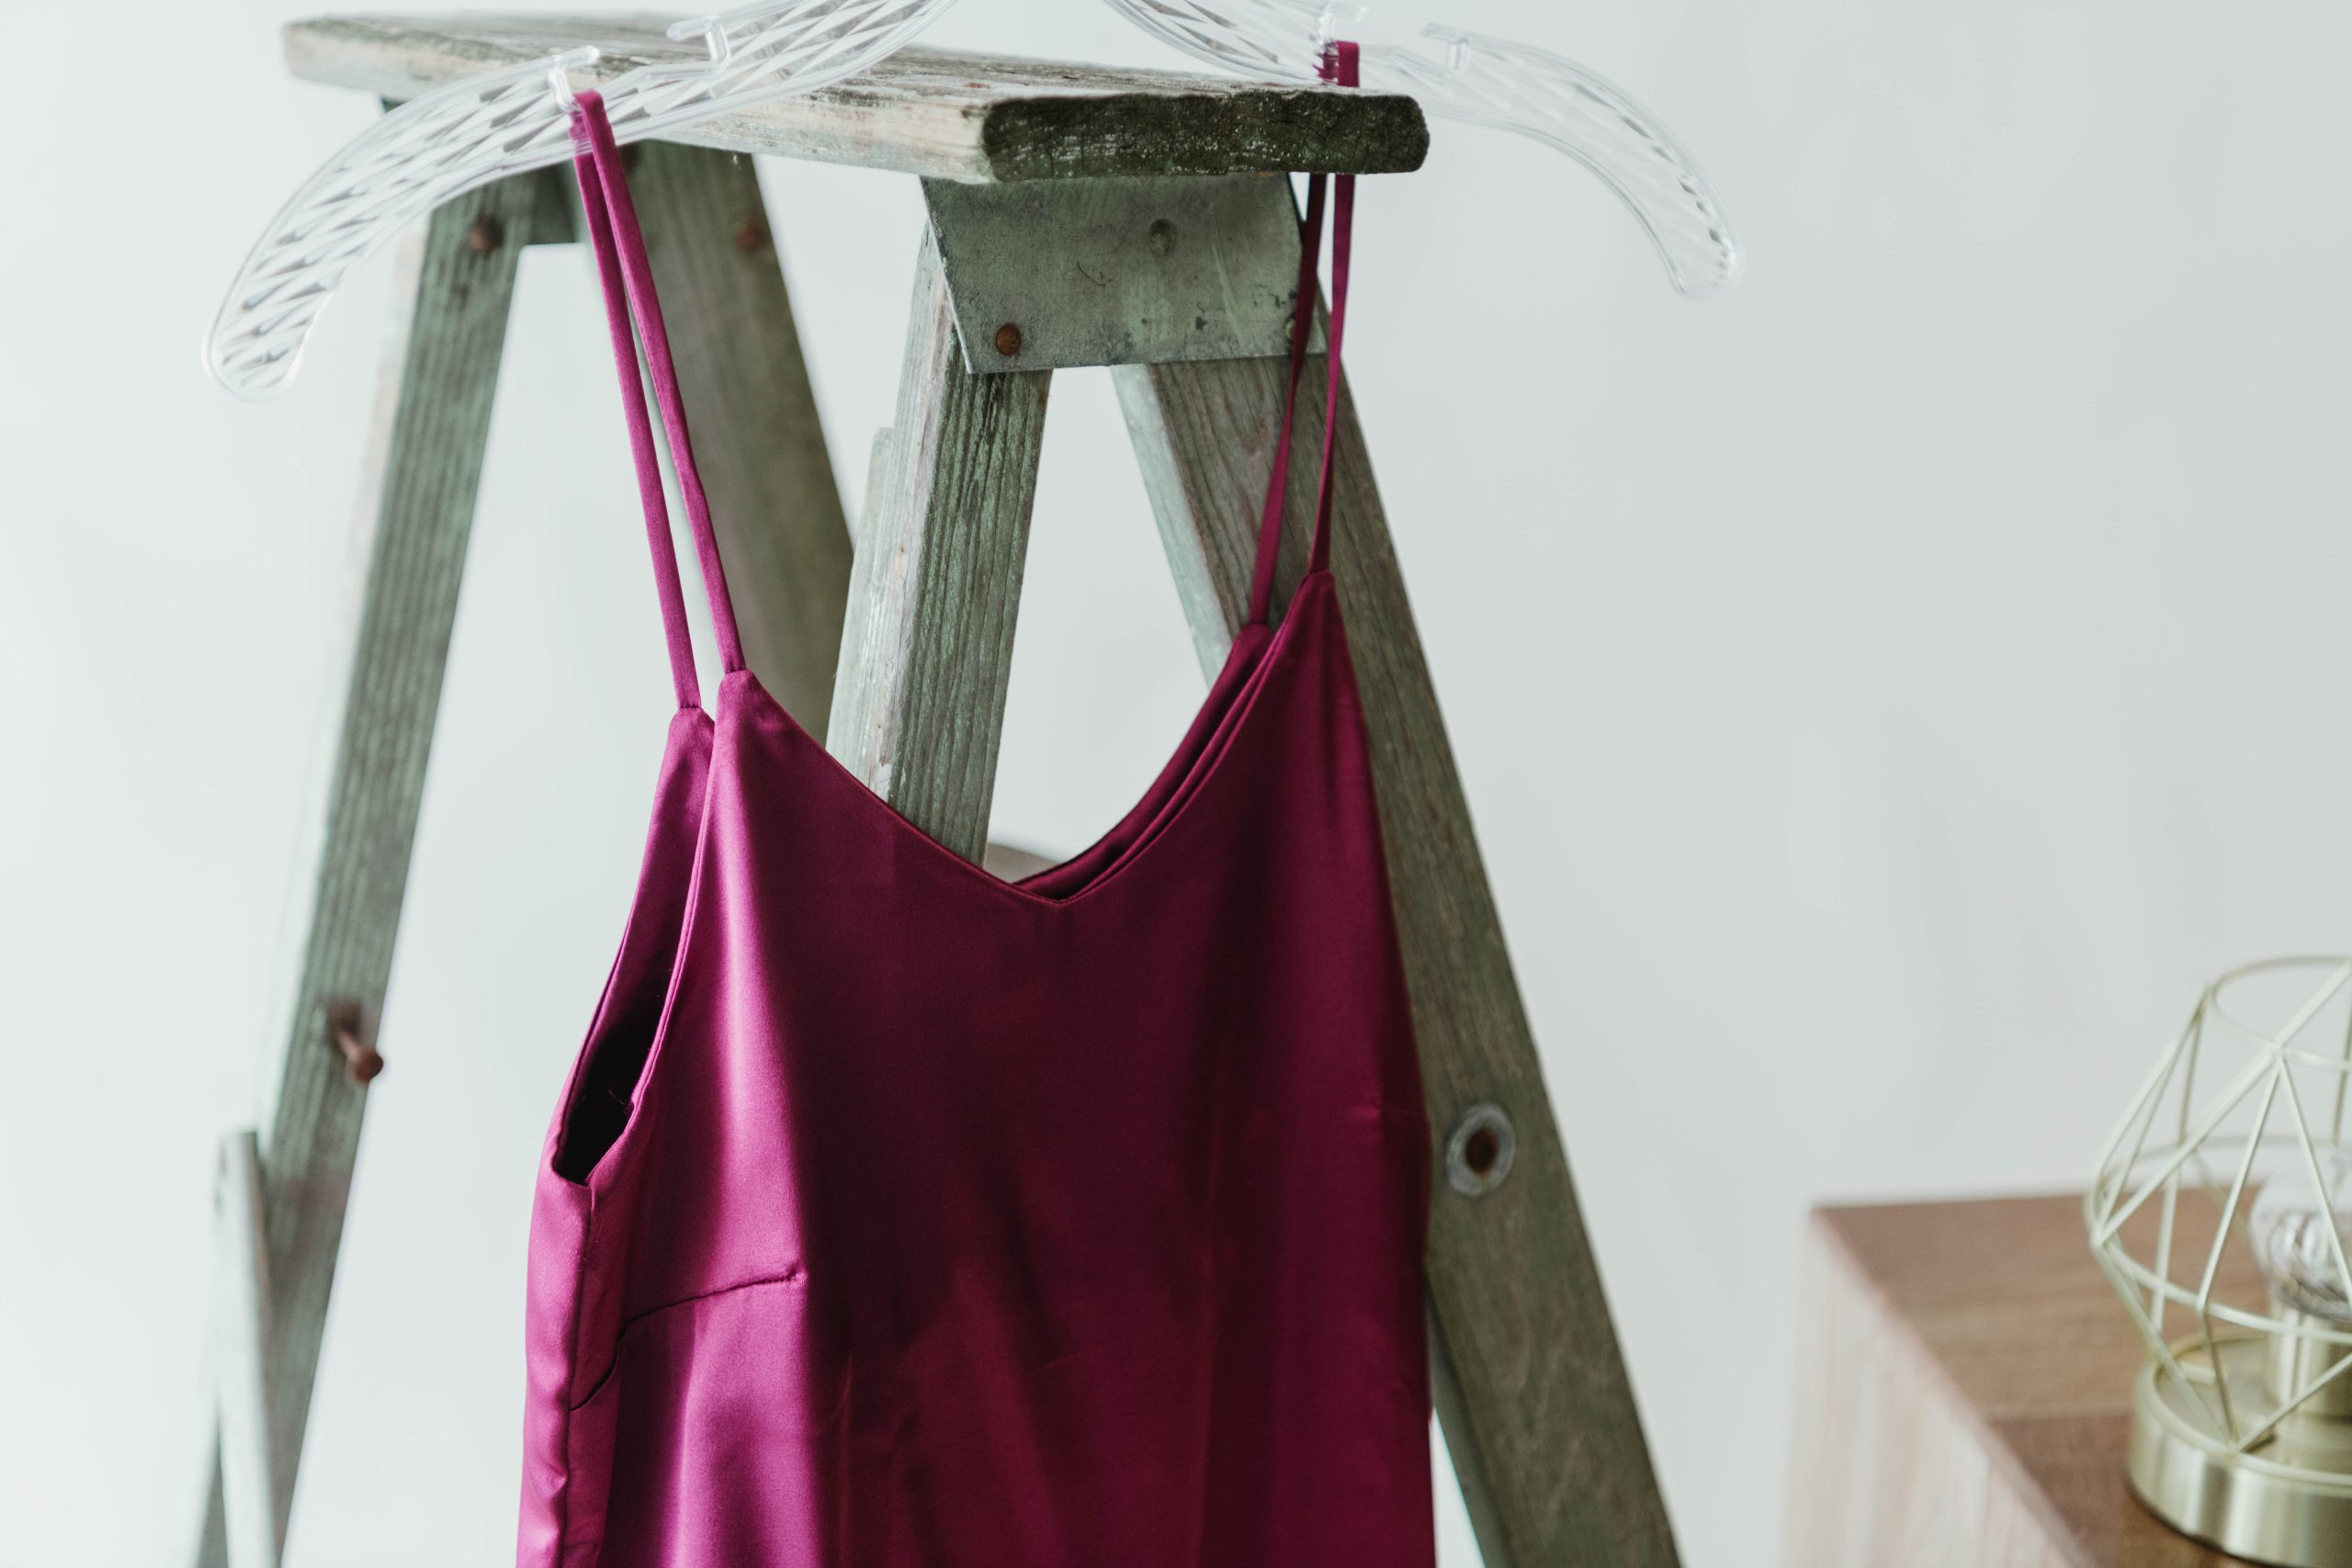
- Version 1 : V-neck with lining and straps
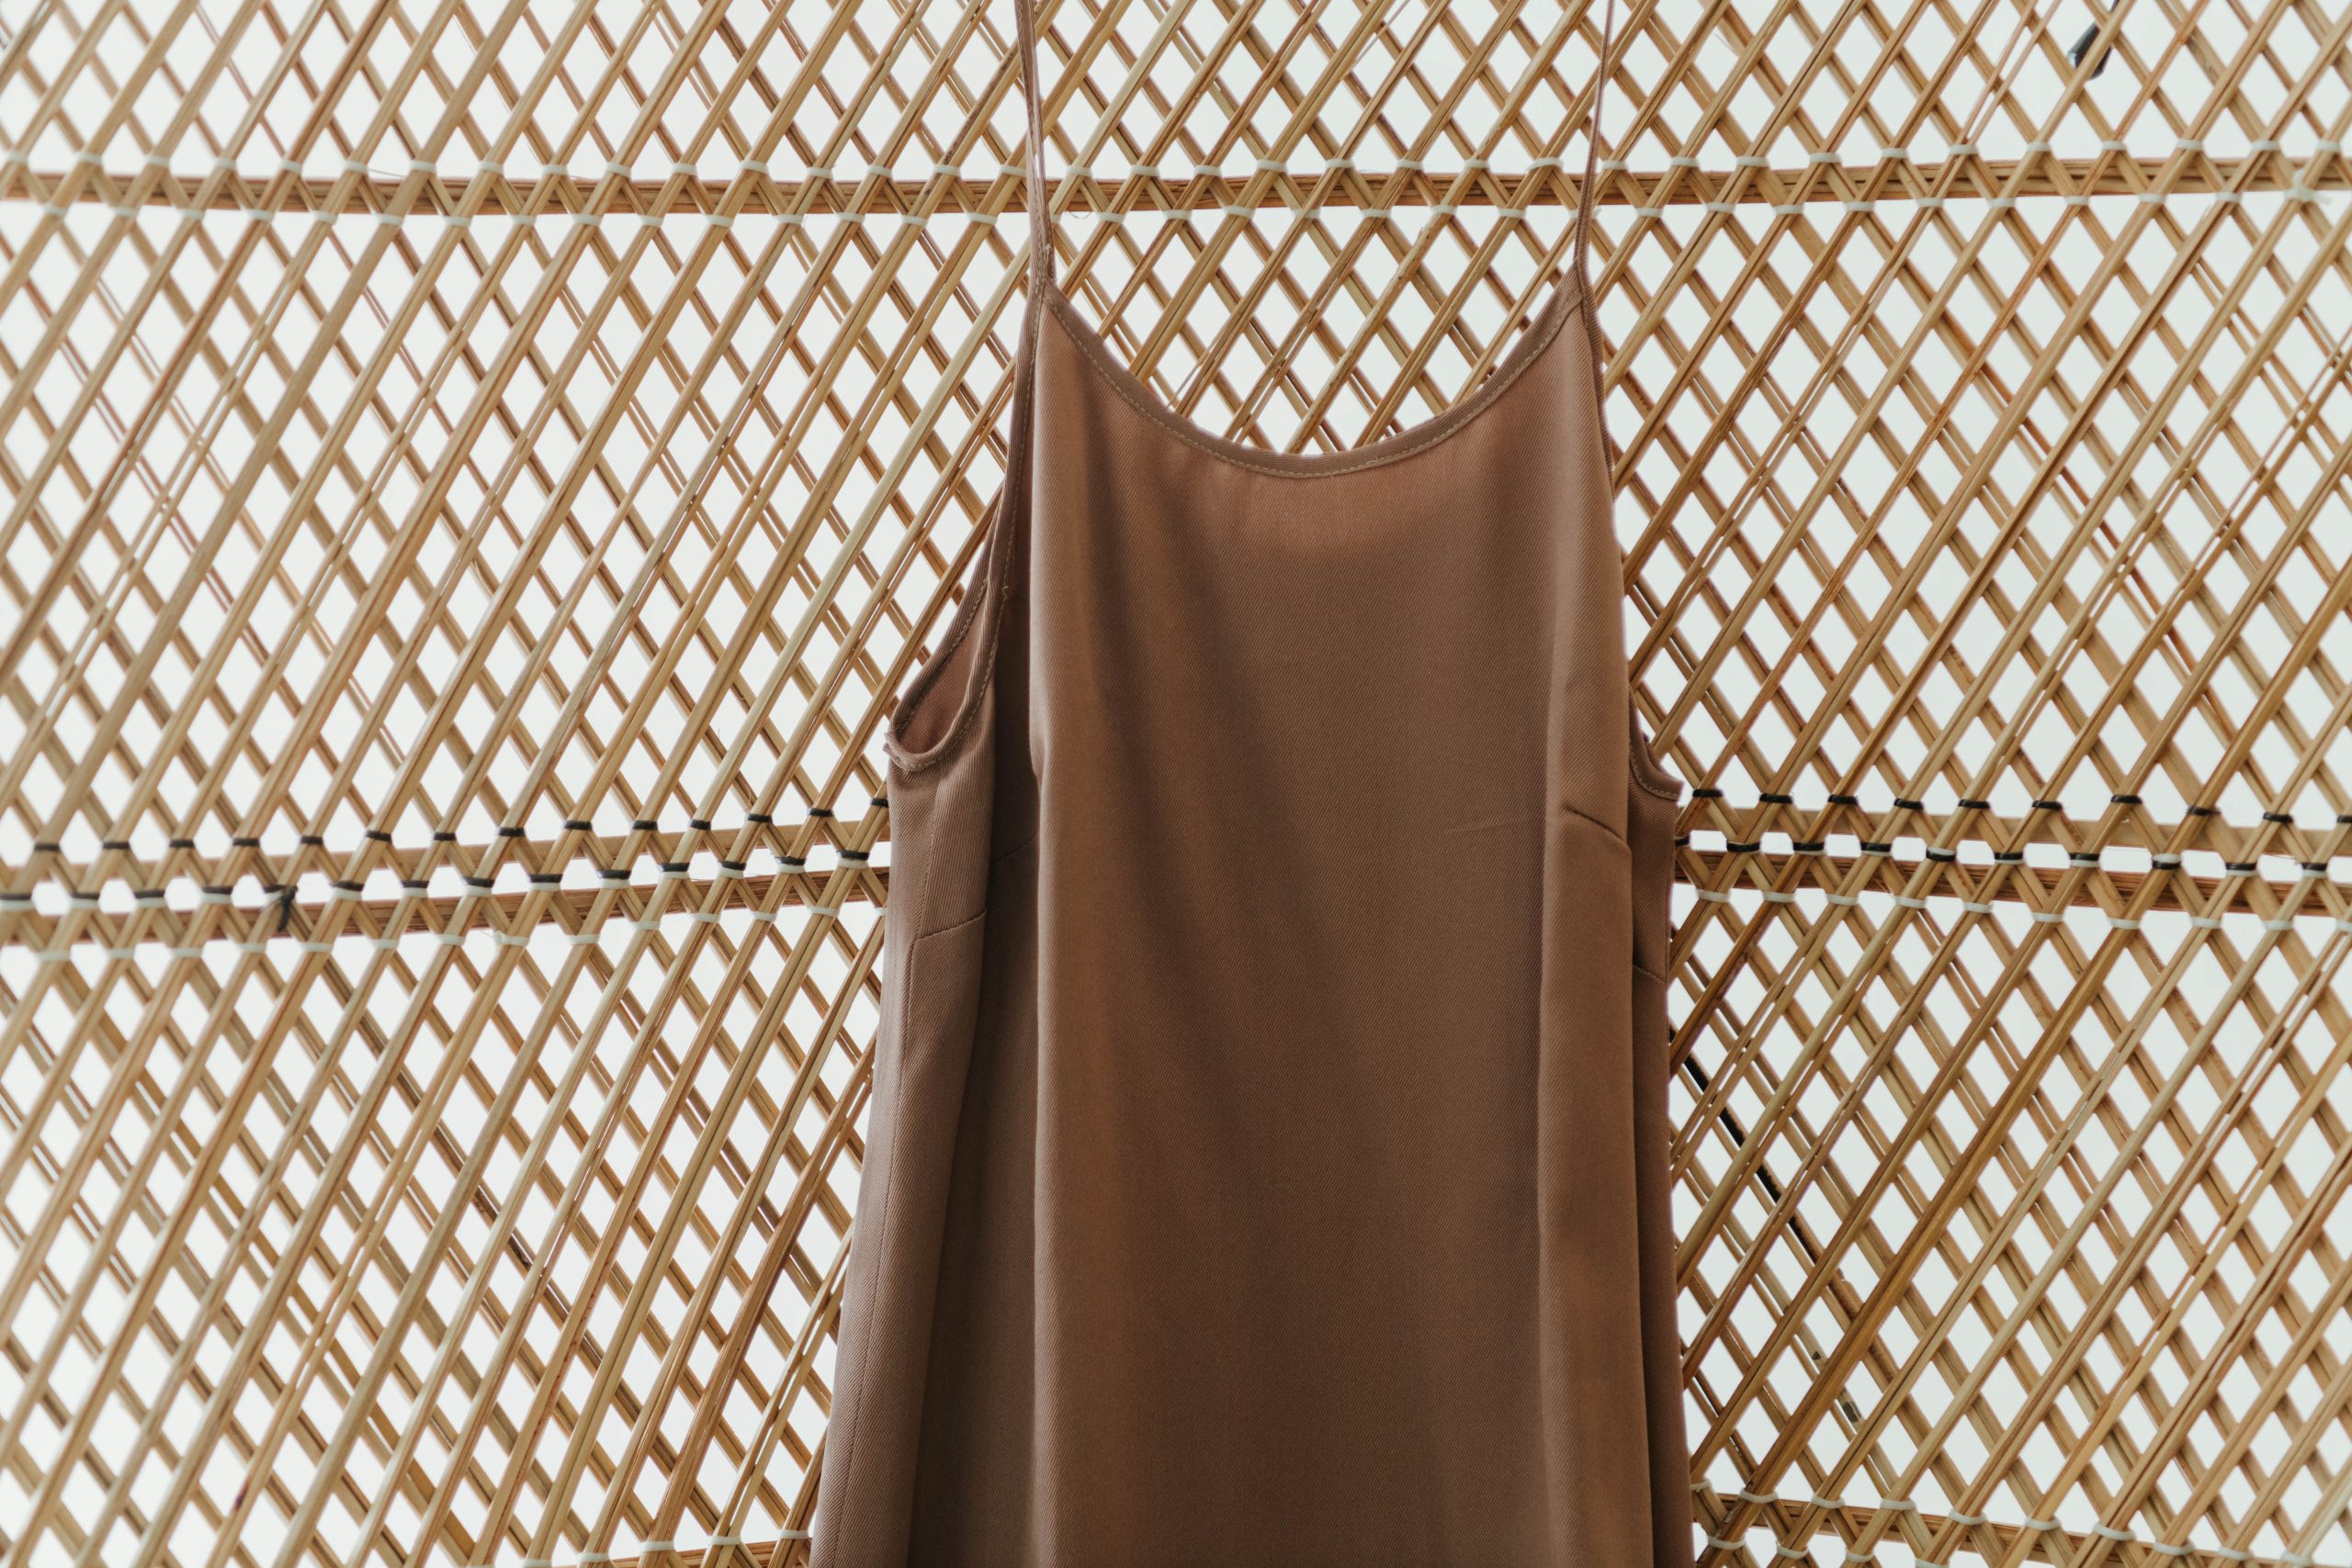
- Version 2 : Round neck with bias straps and a side slit
- All the seam allowances are included: 1 cm/ 0.4 in. and 1.5 cm / 0.6 in.
Materials:
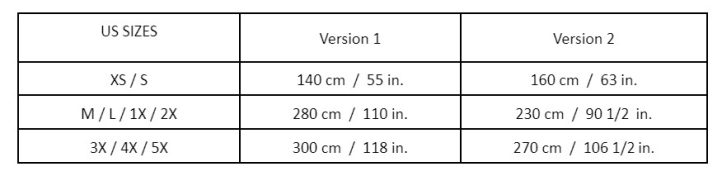
- Fabric and material requirements (fabric width 150 cm / 59 in.)
- Satin, polyester or smooth fabric (no stretch)
- PDF Pattern – This is located at the bottom of this page. Please see printing instructions below.
PRINTING INSTRUCTIONS:
Note: To download the pattern, click on the pattern download button at the bottom of the page. We recommend opening your pattern download using Adobe Acrobat.
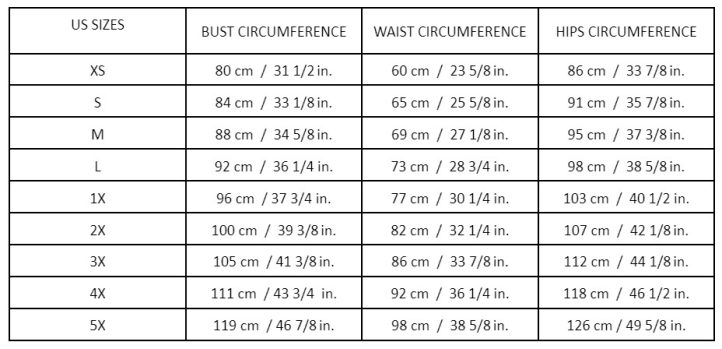
SIZE CHART: (cms / inches)
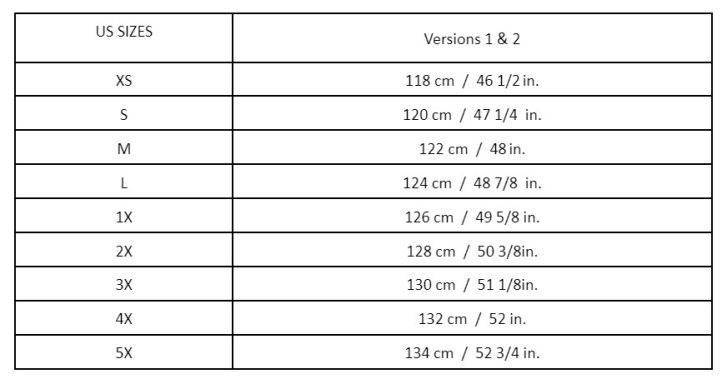
FINISHED GARMENT LENGTH:
Note: (from shoulders to hemline in cm/inches)
PATTERN PIECES:
*Print Tutorial Pattern Slip Dress Sewing Pattern
Cutting Instructions:
- Choose the version you prefer and lay the fabric.
- For sizes XS and S:
- Fold the two selvage edges back to the middle of the fabric, edge to edge to obtain 1 fold on the left and 1 fold on the right (right sides together).
- For sizes M to 5X:
- Fold the fabric along the selvage edges (rights sides together).
- For sizes XS and S:
- Lay out the patterns pieces on the fabric as mentioned, following respecting the grainline, and cut out each piece as many times as the pattern indicates.
- Mark the bust darts and slide slit on the reverse side of the parts.
Sewing Instructions:
ASSEMBLING THE DRESS:
Version 1:
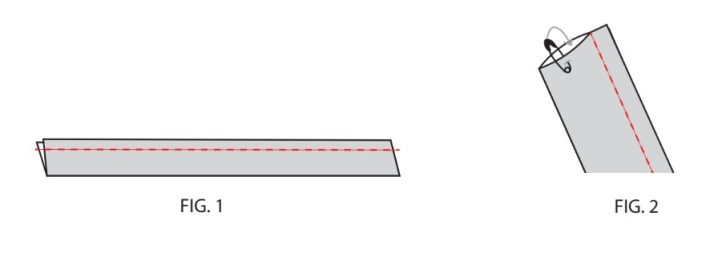
- Create the straps by folding lengthwise (right side inside) each piece G (Straps Version 1). Pin and sew at 0.5 cm / 0.2 in. from the edge.
- Turn the strap over to the right side by sliding a small safety pin over it. This step can be a bit tedious, but you just have to take your time. Iron carefully.
- On the front dress (piece A), match the two exterior lines that form the darts, one on top of the other, right sides together.
- Pin the darts together.
- Sew each dart, starting from the side and ending at the stop mark (where the lines meet).
- To avoid marking the dart, close the dart by making a double hand knot with the remaining threads on the wrong side.
- Place the formed piece on the wrong side down and iron to flatten.
- Do the same with the piece C – the facing front Version 1.
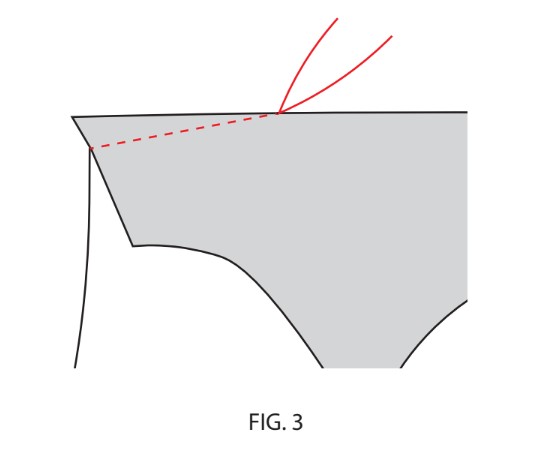
- Place the beginning of the straps on the front dress in the right place, on the right side. Pin.
- Place piece C over the – front facing right sides together, and pin the armholes, and the neckline.
- Sew the armholes and the neckline 1 cm / 0.4 in. from edge, taking all 3 layers together (front + facing + straps).
- Trim and notch the seam allowance.
- Turn the facing on the wrong side of the front, pull slightly on the straps, and iron to maintain the facing.
- Place the right side of the back dress (piece B – Back Version 1) in front of you.
- Place the wrong side of the front also in front of you (you can see the wrong side of the dress and the right side of the facing).
- Place the other end of the straps on the back dress (on the right side). Be careful not to twist the straps, and pin to maintain.
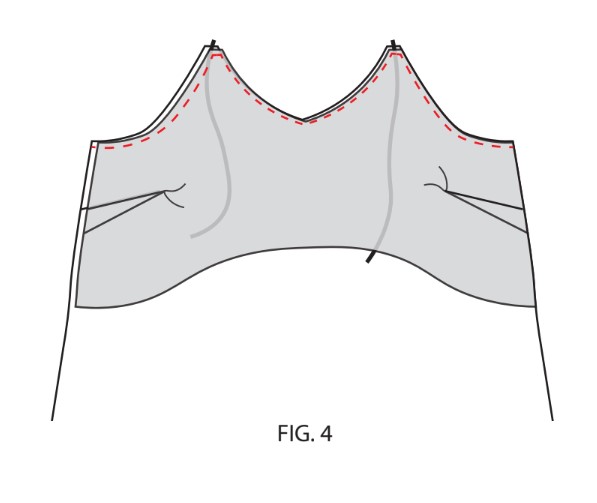
- Place piece D – Back facing Version 1 (right sides together) on top of the Back, and pin the armholes and the neckline together.
- Sew armholes and neckline, 1 cm / 0.4 in. from the edge, taking all 3 layers together (front + facing + straps).
- Trim and notch.
- Turn the back facing on the wrong side of the back, pull slightly on the straps, and iron to maintain the facing.

- To close the dress, put the front and back right sides together. Pin the sides of the dress, from the bottom of the facing to the bottom of the dress. Take care to match the seams.
- Sew 1 cm / 0.4 in. from the edge.
- Overlock the seam allowances and iron to flatten the seams. (If you don’t have an overlock machine, you can stitch with the stretch stitch on your sewing machine and using a zig-zag stitch to enclose the seam allowances).
- Overlook all around the bottom of the facing.
- Hand-sew 2 small stitches in the side seams to maintain the facing.
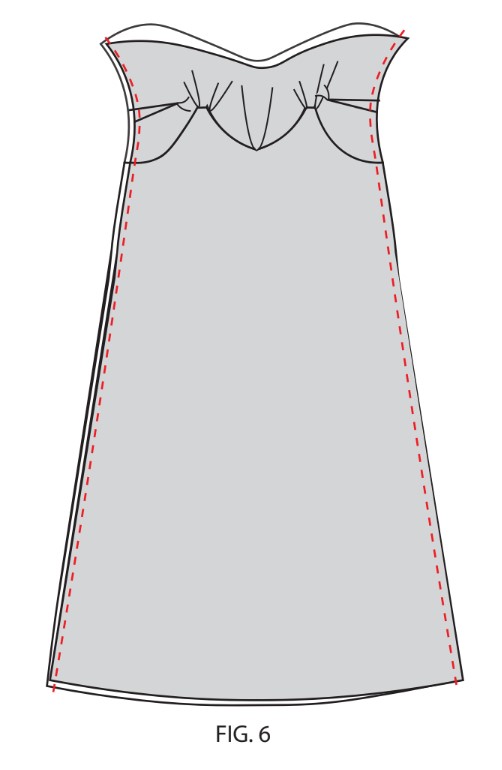
Version 2:
Bust Darts
- On the Front dress (piece E), match the two exterior lines that form the darts, one on top of the other, right sides together. Pin the darts together.
- Sew each dart, starting from the side and ending at the stop mark (where the lines meet).
- To avoid marking the dart, close the dart by making a double hand knot with the remaining threads on the wrong side.
- Place the formed piece on the wrong side down and iron to flatten.
- Keep the slit marker only on the left side.
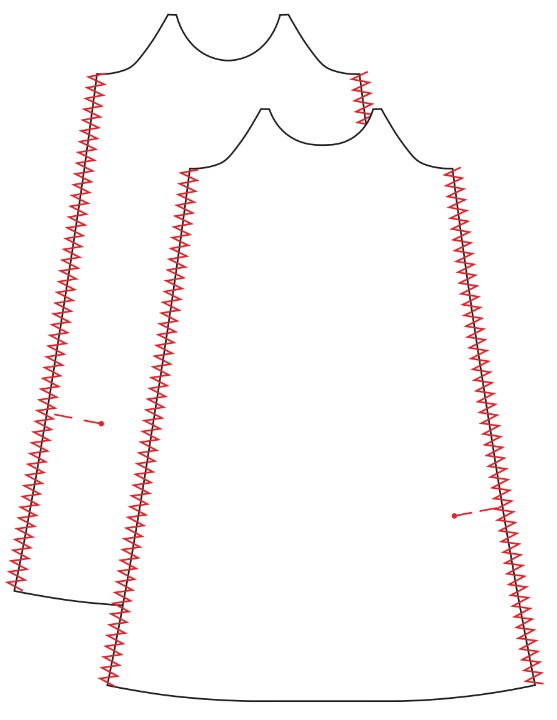
- Overlock the sides of the Front dress (piece E) and the sides of the Back dress (piece F) (edge of the seams allowances, even beyond the slit mark).
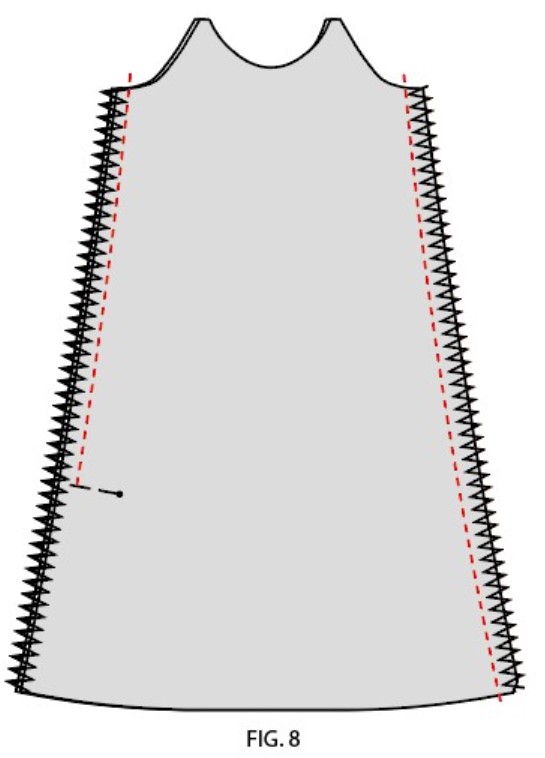
- Place the front and the back right sides matching the side seams.
- Pin the sides together (stop pinning to the slit mark, only on the left side of the dress).
- Sew at 1.5 cm / 0.6 in. to the edge (except the slit).
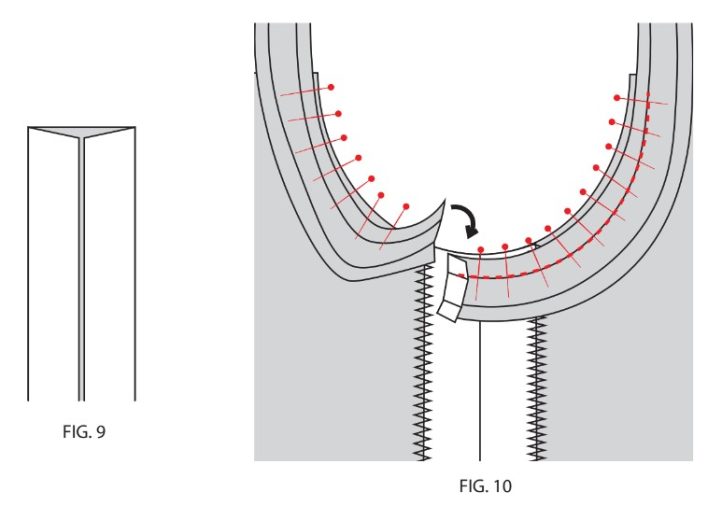
- Press the seam allowances open on both sides and iron the slit folding over the seam allowance (1.5 cm / 0.6 in.).
- Create the bias (pieces H and I) by folding lengthwise (wrong side inside) the two edges to the middle of the ribbon, edge to edge to obtain 1 fold on the left and 1 fold on the right (or using a tape maker set). Width of folded bias: 2 cm / O.8 in.
- Press to flatten.
- Position the right side of the neckline bias fold (piece H) against the wrong side of the neckline from the front (between the two strap ends), pin and sew in the fold at 1 cm / 0.4 in. from the edge.
- Turn it over on the front of the dress. Pin, and sew again to maintain the bias 0.3 cm/ 0.09 in. from the bias edge. Trim excess at the ends.
- Do the same for the Back neckline bias.
- Now place the first fold of your strap bias (piece I) facing up on the wrong side of the dress at the armhole. Pin all the way along the armhole to the straps and bring the bias back over the armhole to cover the beginning of the pinned bias. This bias will cover the armhole and the ends of the neckline bias, as well as creating the straps.
- Sew along the armhole 1 cm / 0.4 in. from bias edge (in the fold of the bias).
- Turn it over the right side of the dress. On the straps, close the bias and pin. Sew 0.8 cm / 0.3 in. from edge along the armholes to maintain the bias and carry on sewing together the folded bias not affixed to the dress, to create the straps.
- Do the same for the second armhole.
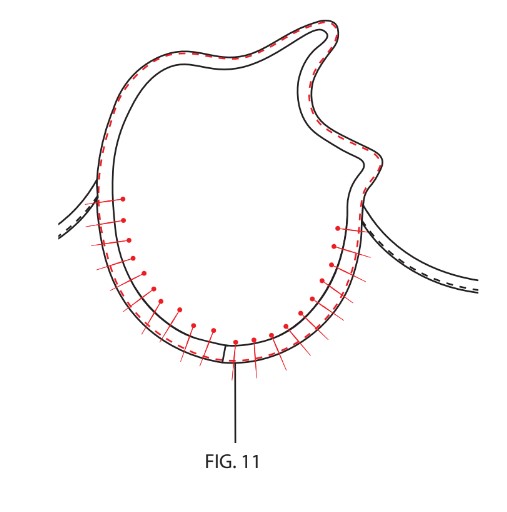
HEMMING:
Version 1:
- At the bottom of the dress, fold over 7 mm /.25 in, then again 7 mm /.25 in. Pin and sew at 5 mm /.20 in of the edge. (Or use a narrow hem foot with your sewing machine).
- Iron to flatten.
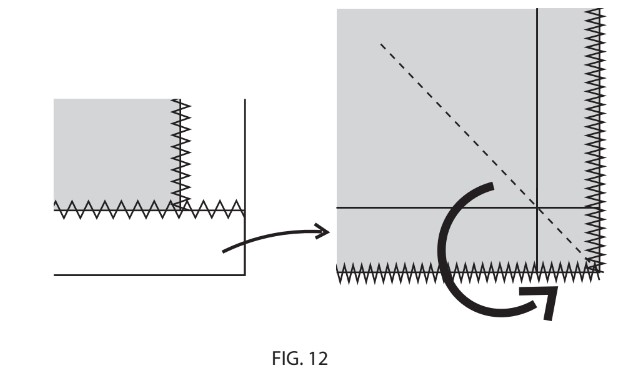
Version 2:
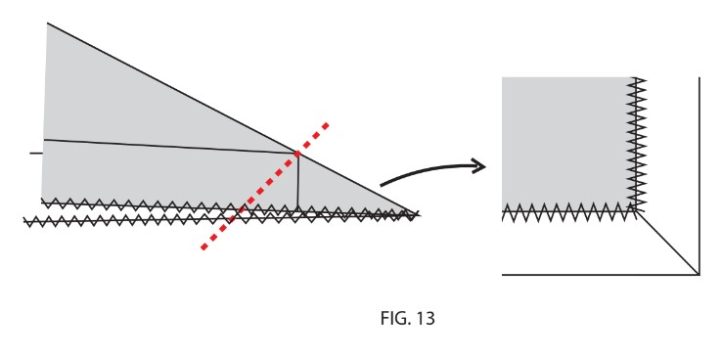
- Overlock all the bottom of the dress. Fold over 15 mm / 0.6 in, pin and iron. Create a nice angle at the start of the slit. Pin.
- Sew 1.3 cm / 0.5 in. to the edge all around the bottom and all around the slit to maintain the hem. Iron to flatten (or hand-stitch on reverse side with invisible stitches).
- Iron to flatten.

hi there! on version 1 you measure in cm. On version 2 you measure in mm???? but this does not equal the inches you put in the directions – please verify if we measure in mm or cm I need inches since I live in the USA
Hi Carol! Thanks so much for your comment. We will reach out to the designer to see if they can provide Version 2 measurements in inches. Have a great day! – Ashley, We Like Sewing