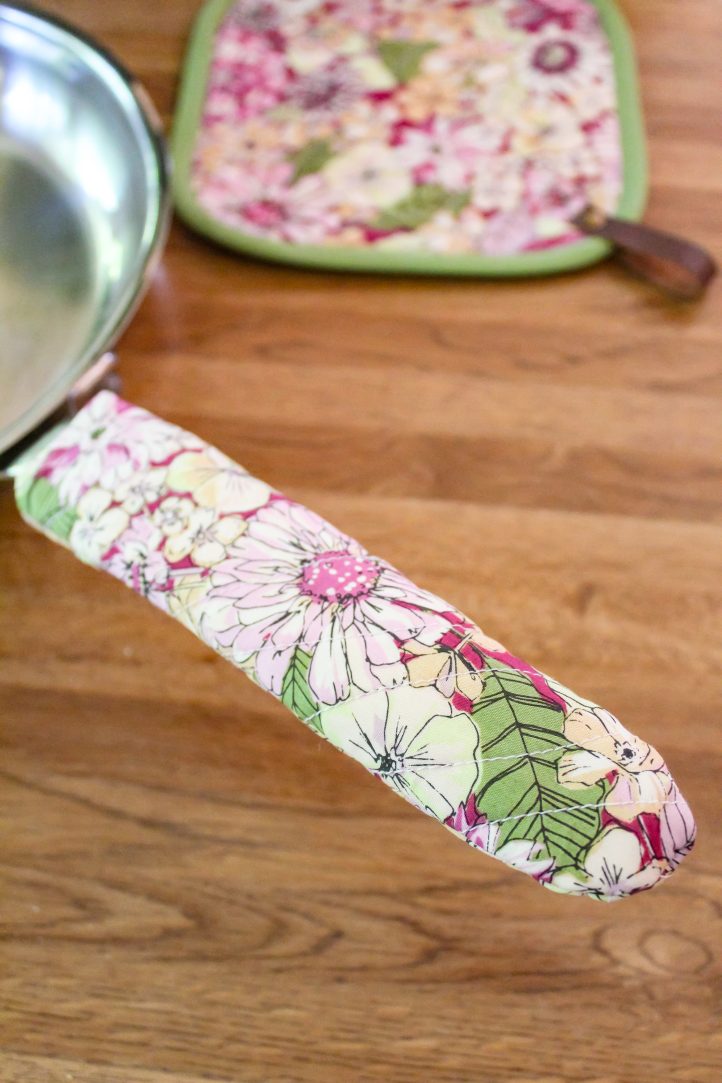
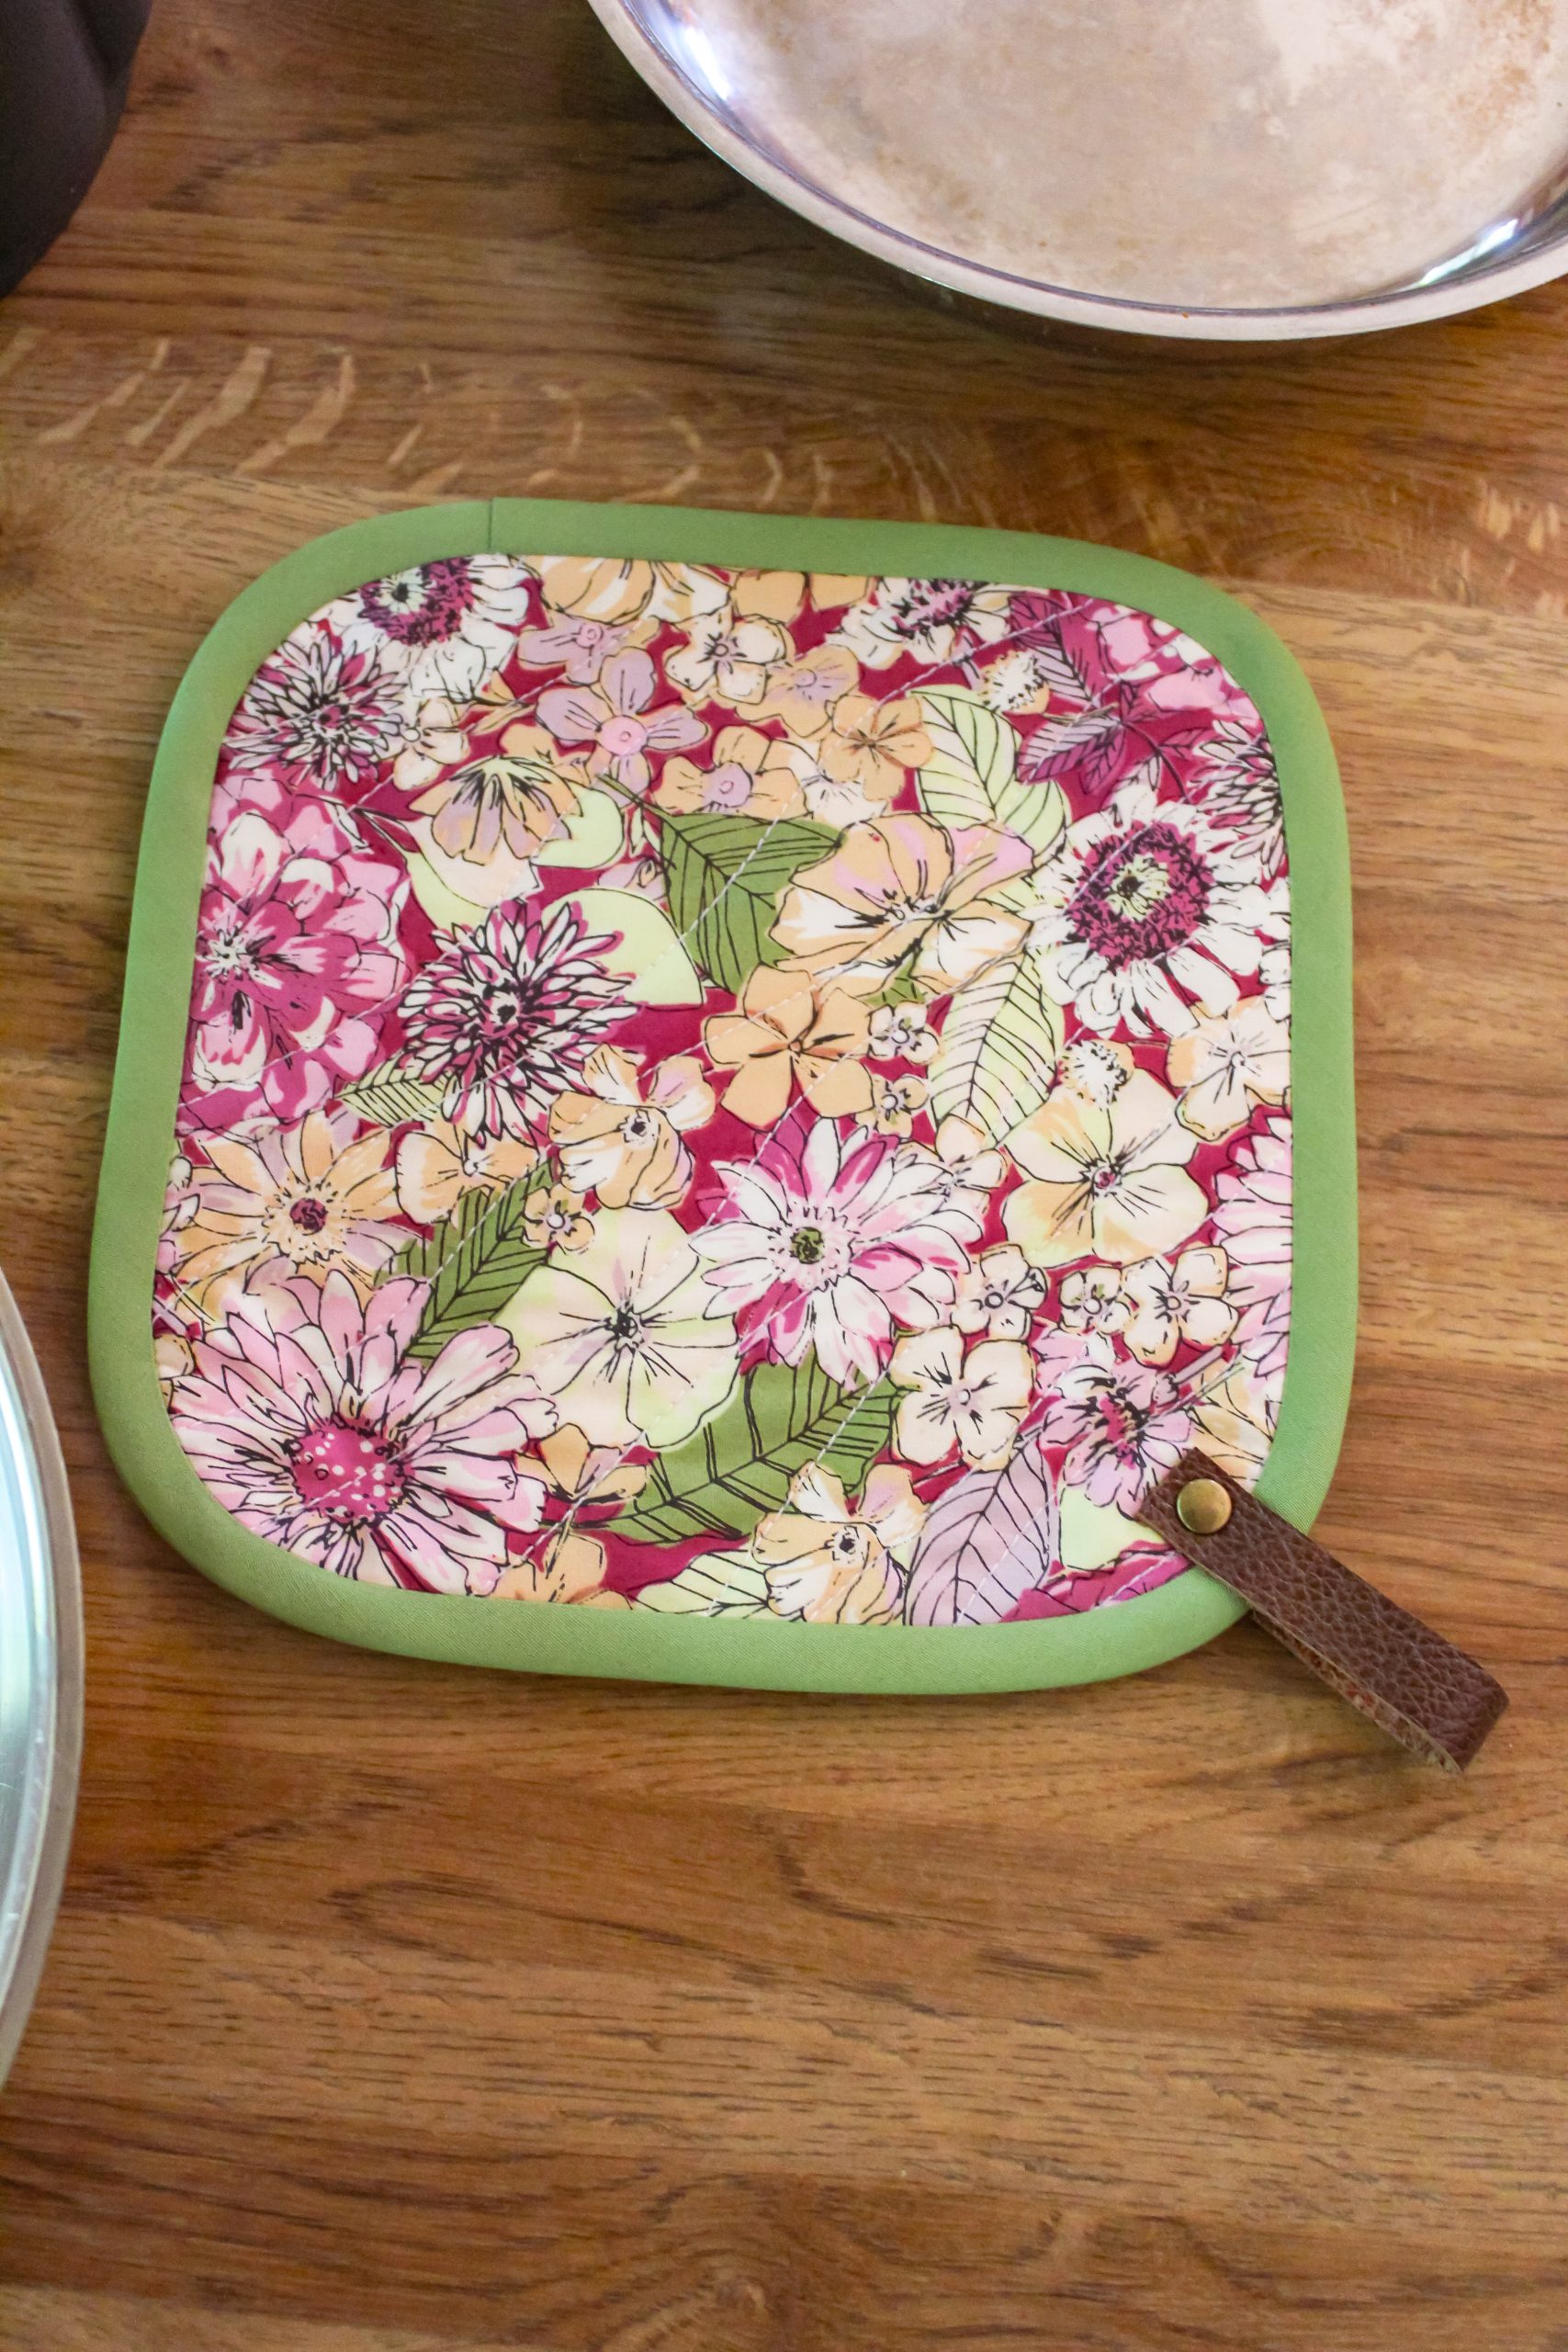
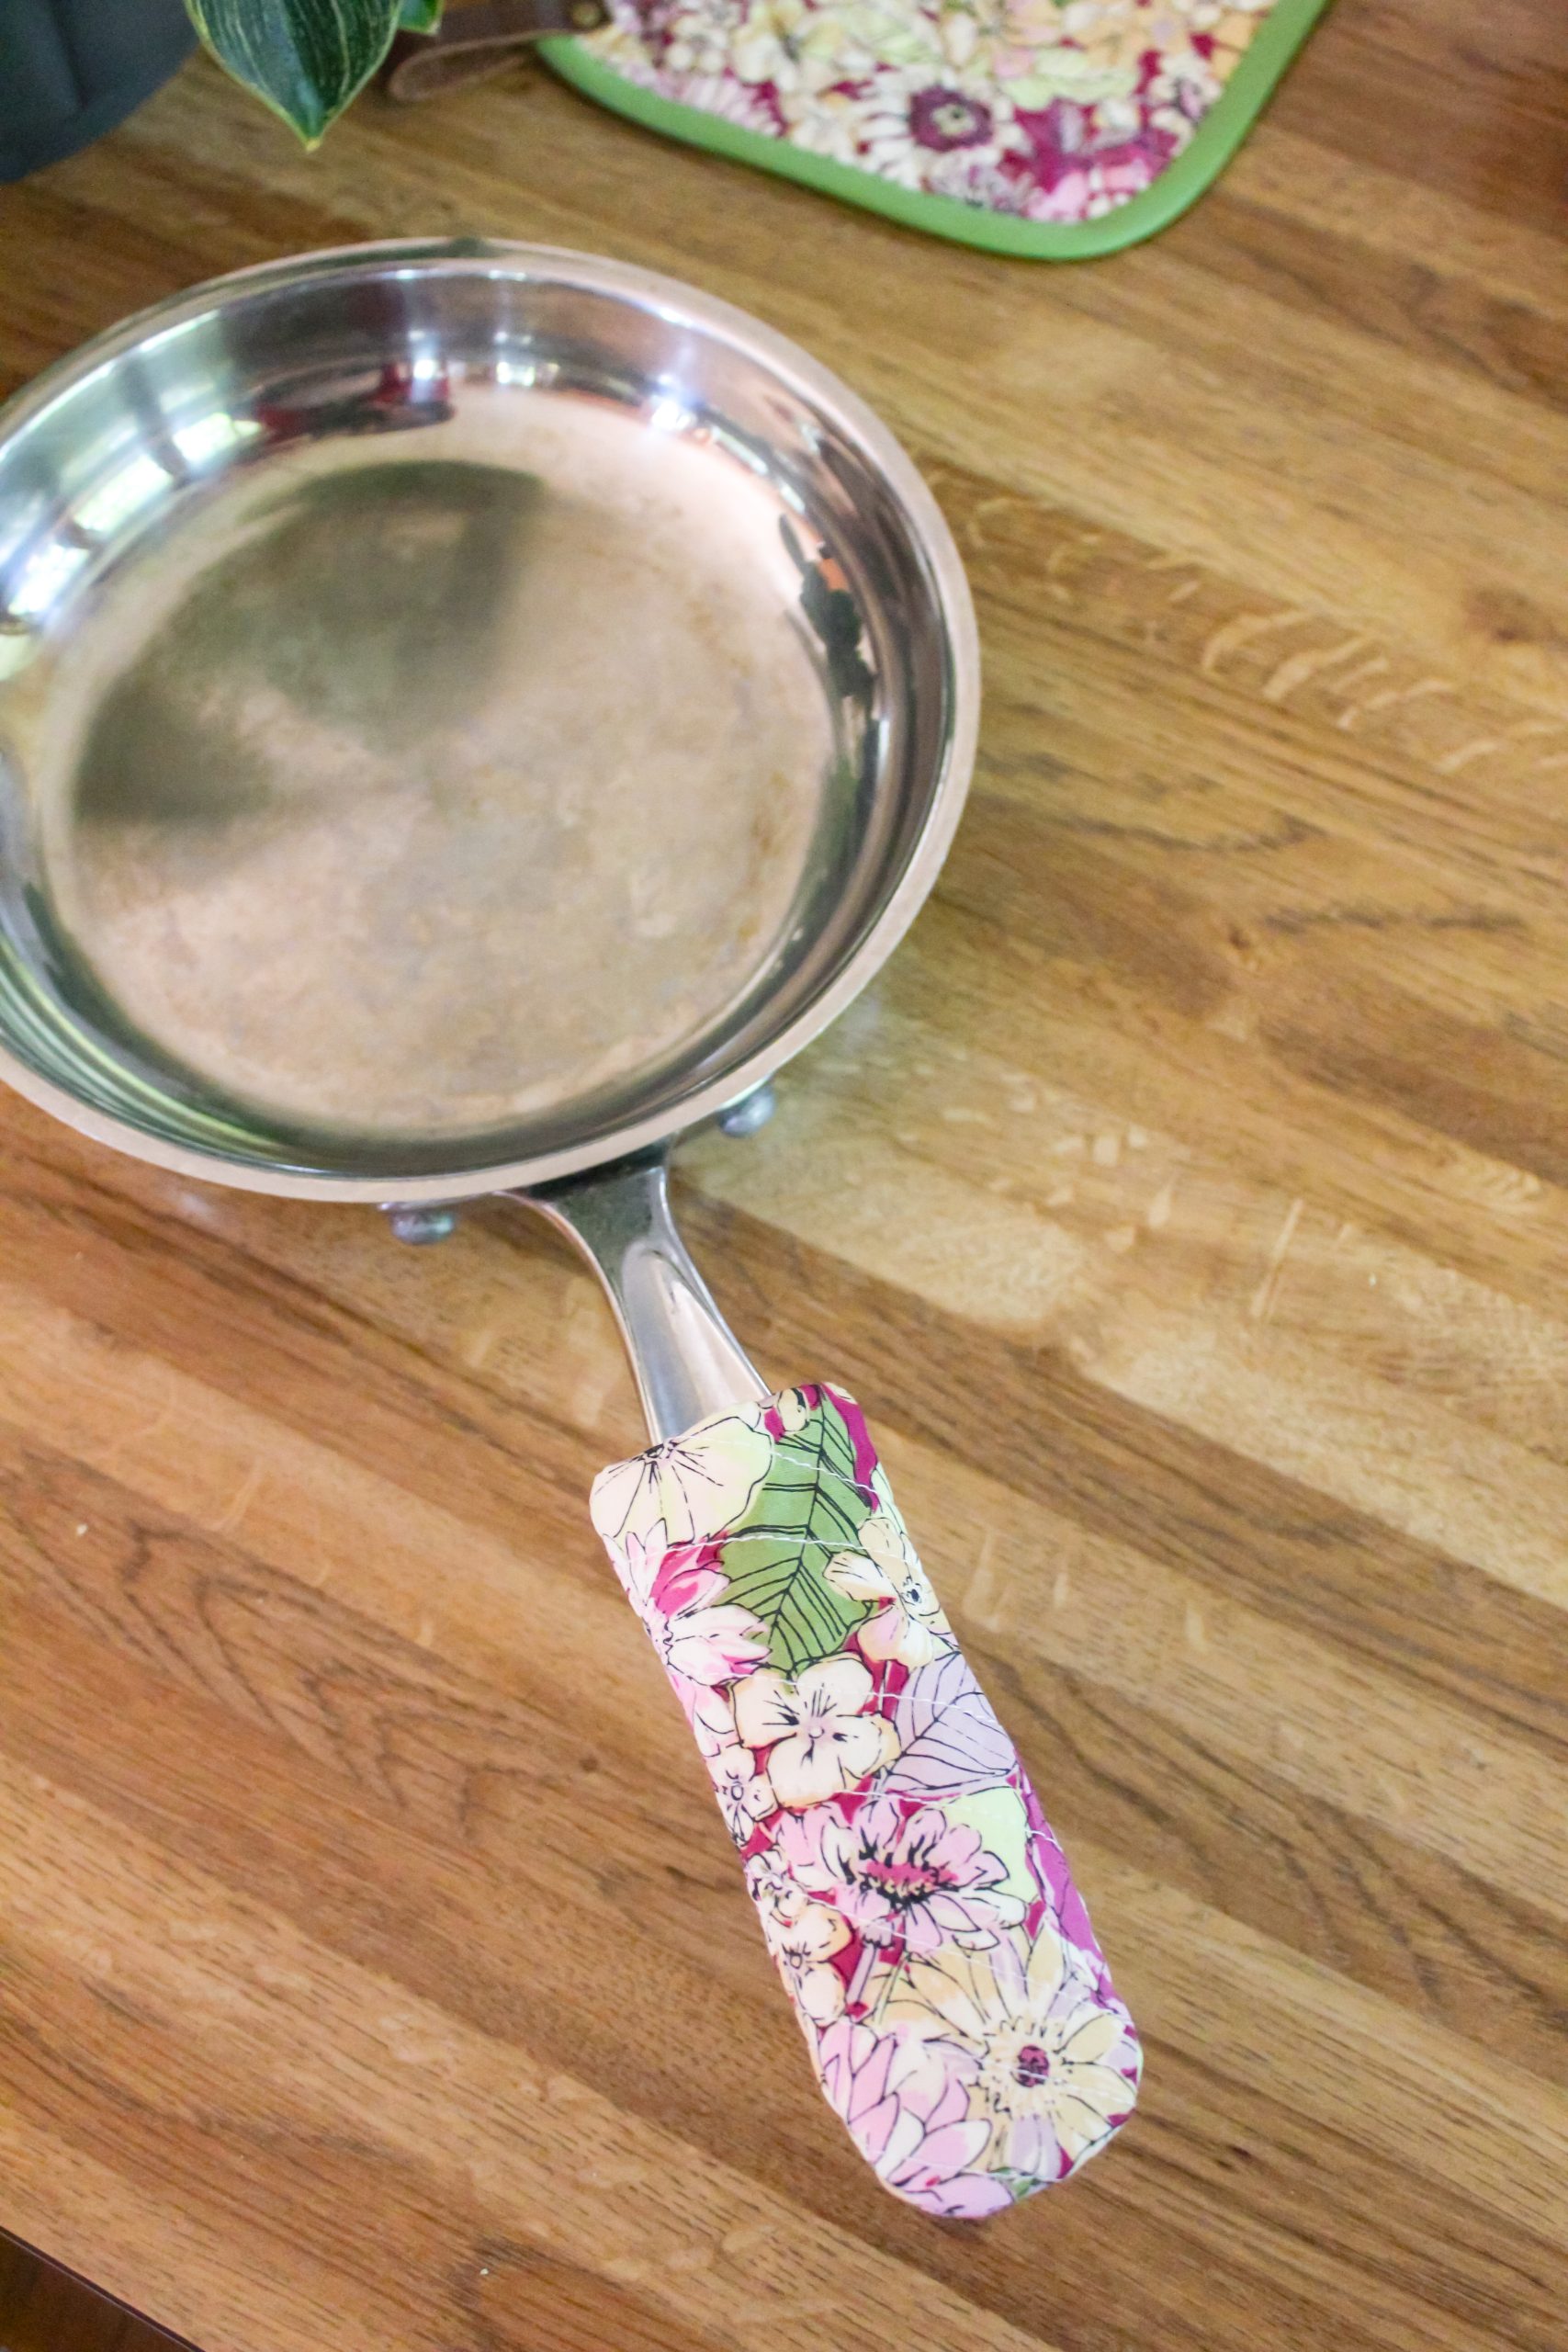
If there’s one thing our readers love, it’s sewing patterns that are cute and practical! Save your hands from hot handles while cooking with these pan handle covers. This pan handle cover set, designed by Debbie von Grabler-Crozier, features patterns for both pan handles and a classic potholder, made in August’s birthstone peridot. Make these kitchen sewing patterns for yourself or as a thoughtful housewarming gift for the newlyweds in your life.
Designer Note: Seam allowances are all 1/4” and have already been added.
Materials:
- Fabric: All fabrics are from Art Gallery Fabrics.
- Fat Quarter floral fabric. The designer adores Fleuron Soul from the Soul Fusion collection by AGF.
- Fat Quarter coordinating blender. It had to be Kelp Sunshine from the Sirena collection by AGF.
- Fat Quarter solid to work with the florals. Debbie used Asparagus from the Pure Elements collection by AGF.
- Interfacing: Fat Quarter #279 80/ 20 cotton mix batting (Vlieseline) or similar thin cotton mix quilt batting.
- Small piece of leather or vegan leather (about 3/4” wide x 5 1/2” long) to form a hanging loop for the pot holder
- 1x rivet and the tools needed to set it
- Coordinating threads for all fabrics and trims
- Hand sewing needles
- Thimble
- Walking (dual feed) foot for your sewing machine
- PDF Templates – These are located at the bottom of this page. Please see printing instructions below.
PRINTING INSTRUCTIONS:
Note: To download the templates, click on the pattern download button at the bottom of the page. We recommend opening your pattern download using Adobe Acrobat.
Cutting Instructions:
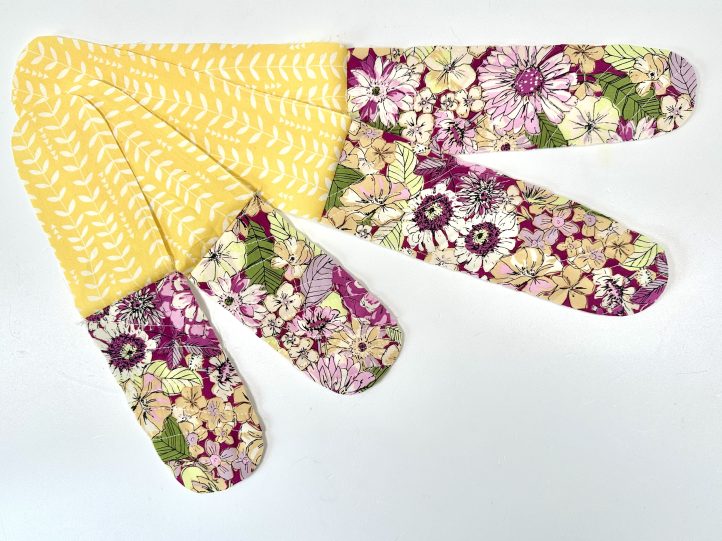
From the hero print:
- 1 piece 7 1/2” sq. for the pot holder ‘right side’
- 1 piece 7” wide x 16” long for the handle cover exteriors
From the coordinating second floral:
- 1 piece 9” sq. for the pot holder lining
- 4 pieces cut using the handle cover template (2 medium and 2 large) for the handle cover lining
From the solid:
- 31” bias tape cut 1 1/2” wide and joined to make a continuous strip
From the interfacing:
- 1 piece 8” sq. for the pot holder interfacing
- 1 piece 8” wide x 17 long for the handle cover interfacing
From the leather:
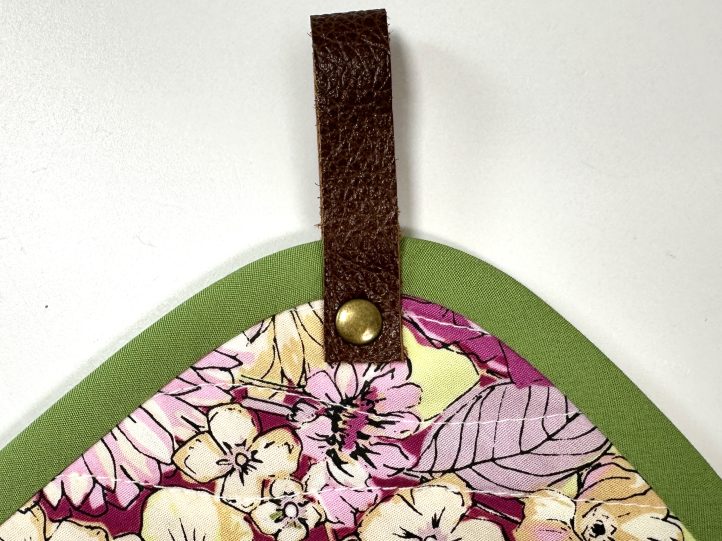
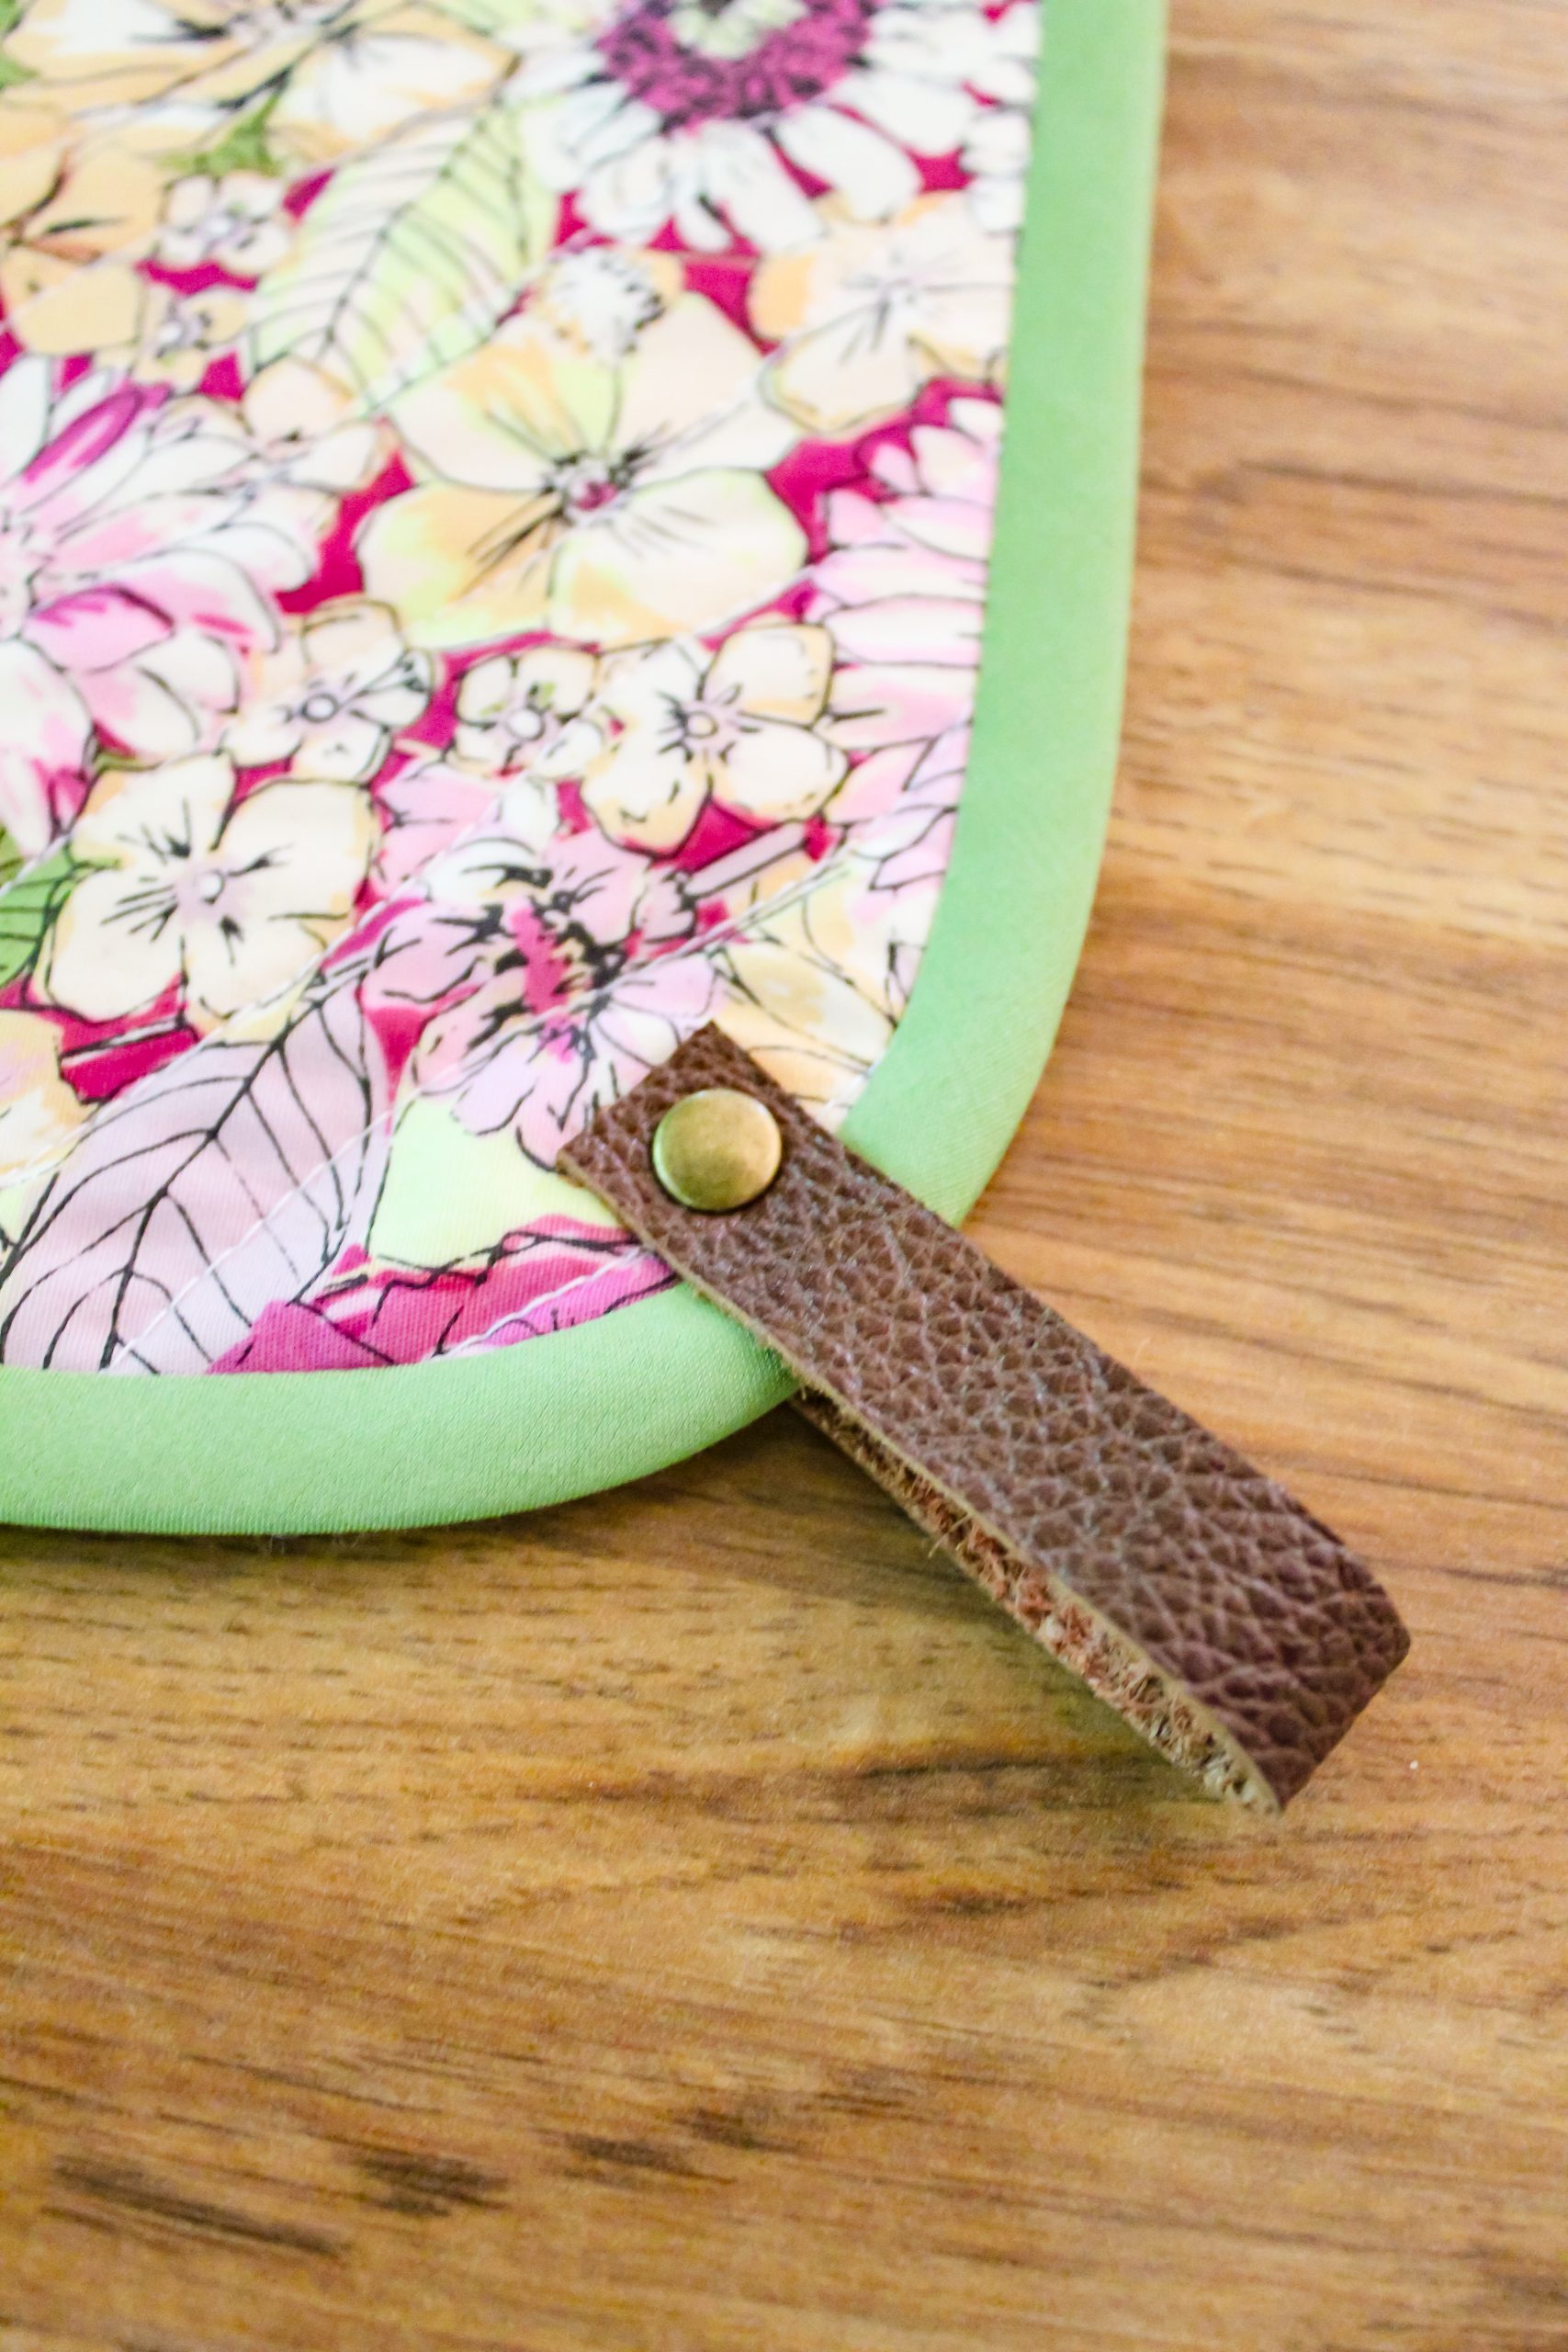
- 1 piece 1/2” wide x 5” long for the pot holder hanging loop
Sewing Instructions:
PREPARATION:
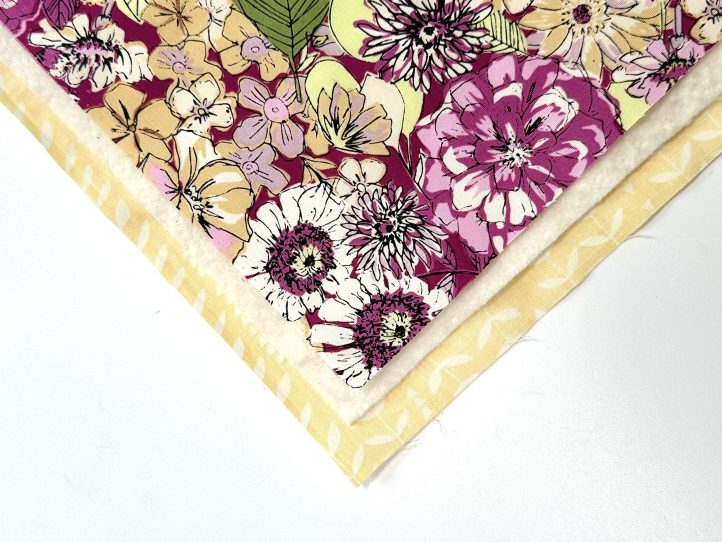
TIP: This set is made in two parts. The pot holder is made using a traditional quilt sandwich method with three layers and then quilted. The handle covers are quilted almost the same way but missing the backing layer of the sandwich. They have, instead, a lining layer, which hides any ugly edges. This reduces the bulk that we might have if they were both quilted the same way and then bound inside to get rid of all the raw edges.
Make the Bias Tape:
- Fold the continuous strip of bias tape along the length with the wrong sides facing and press to obtain a center crease. Open the strip out and fold the long raw edges to the center crease and press again.
- Re-fold along all of the creases so that the raw edges are enclosed and roll until needed.
Prepare the Pot Holder Quilt Sandwich:
- Lay the backing fabric right side down and place the square of batting on top of it. The hero print goes on top of that.
- Pin so that no movement is possible.
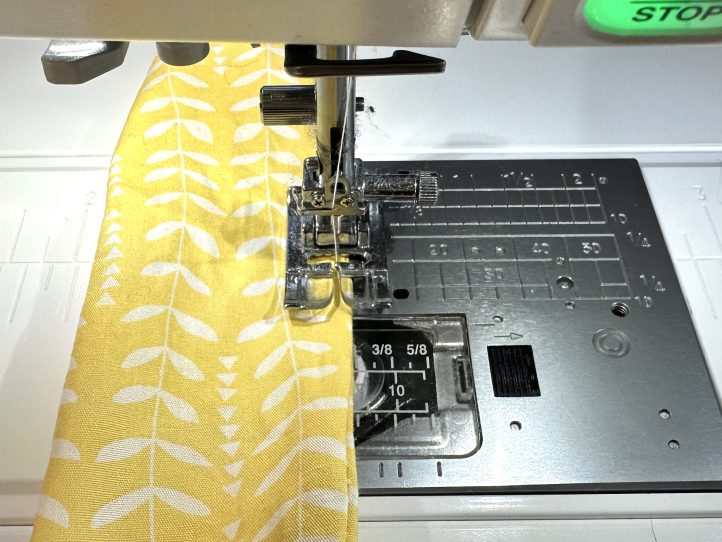
- Quilt with your favorite pattern. The designer has opted for a wavy pattern this time, which is really easy and suitable for almost all home sewing machines.
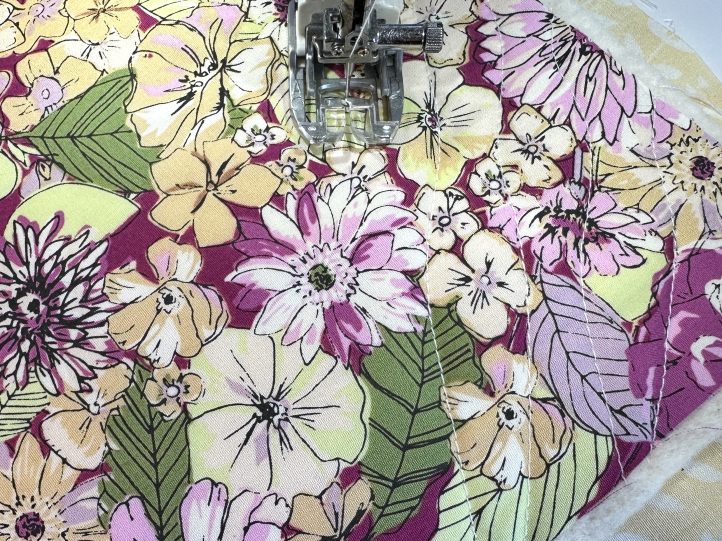
- TIP: Use your Walking (Dual Feed) Foot to make the quilting easier.
Prepare the Handle Covers:
- This time, there is no backing fabric so you only have two layers. Lay the batting down and center the hero print on top. Pin.
- Quilt in your favorite pattern.
MAKING:
- Trim the pot holder to 7 1/4” sq. and round the corners. To round the corners, the designer simply drew around a coffee cup or similar and then cut the rounded corners out.
- TIP: The pot holder only needs to be bound to finish it so put it aside for the time being and let’s concentrate on the handle covers.
- Use the Pot Holder Set Template to draw four handle covers and four pieces of lining. You need two medium and two large. Cut them out.

- Sew a handle cover exterior to a piece of lining, right sides together, across the short end only.
- Repeat for the other pieces.
- With the right sides together, pin lining to lining and exterior to exterior. Sew around the edge, leaving a turning gap in the lining along one long side.

- Repeat for the other pieces.
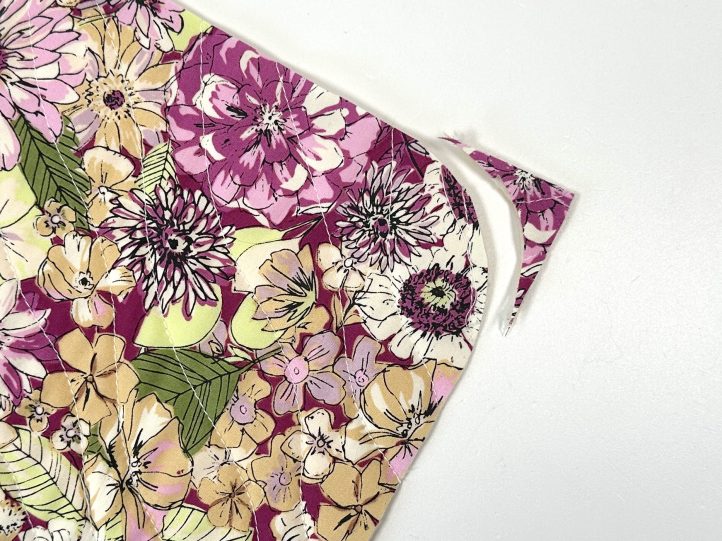
- Notch the curves to reduce bulk and make them a little more streamlined.

- Turn the covers the right way out and stitch closed the turning gaps.
- Push the lining into the exteriors so that the wrong sides are together.
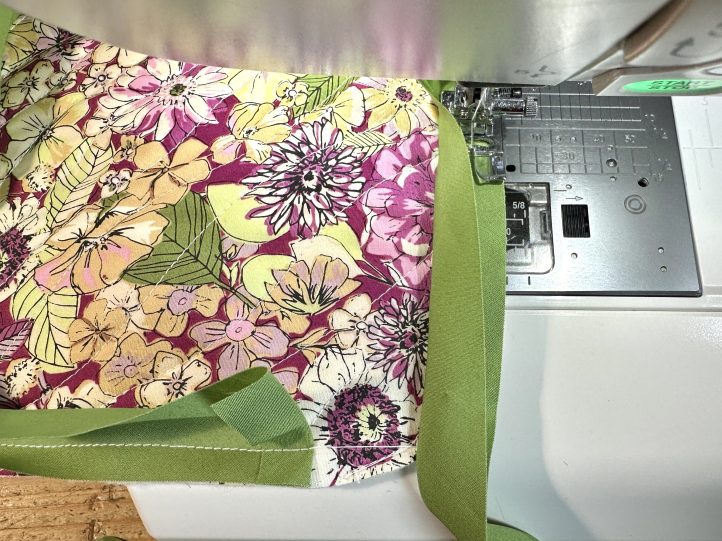
- Back to the pot holder. Bind the edge with your bias tape with your preferred method.
- Make the hanging loop for the pot holder by folding the leather strip over and lightly gluing it onto one corner.
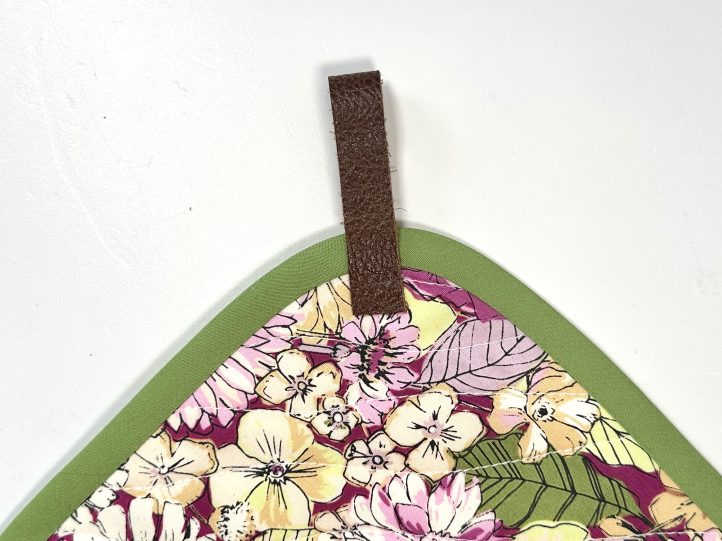
- Make a small hole through the leather and your potholder and attach a rivet to secure the hanging loop.

Where is the link to the pdf download pattern that was supposed to be at “the bottom of the page”? There’s NO LINK to the pattern in this article!
Hi there! The PDF download is available at the bottom of the page for our Gold Club members only (below the additional project photos). If you have issues downloading the PDF, please let us know and provide additional details so that we may troubleshoot the issue. Thanks! – Ashley, We Like Sewing