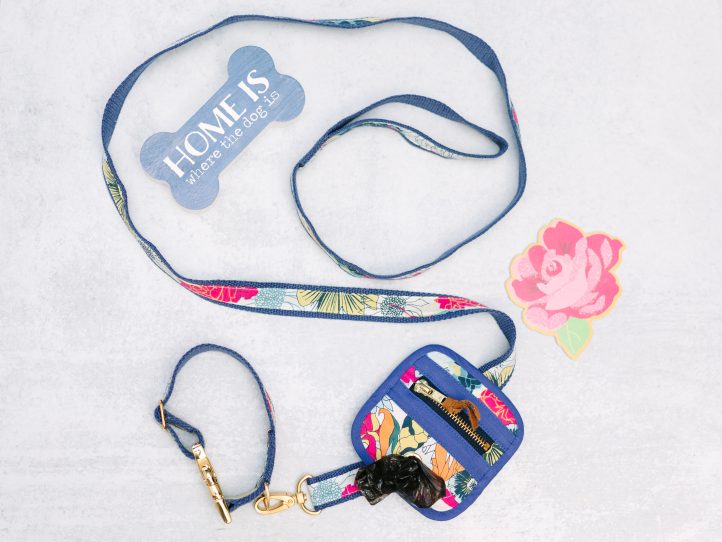
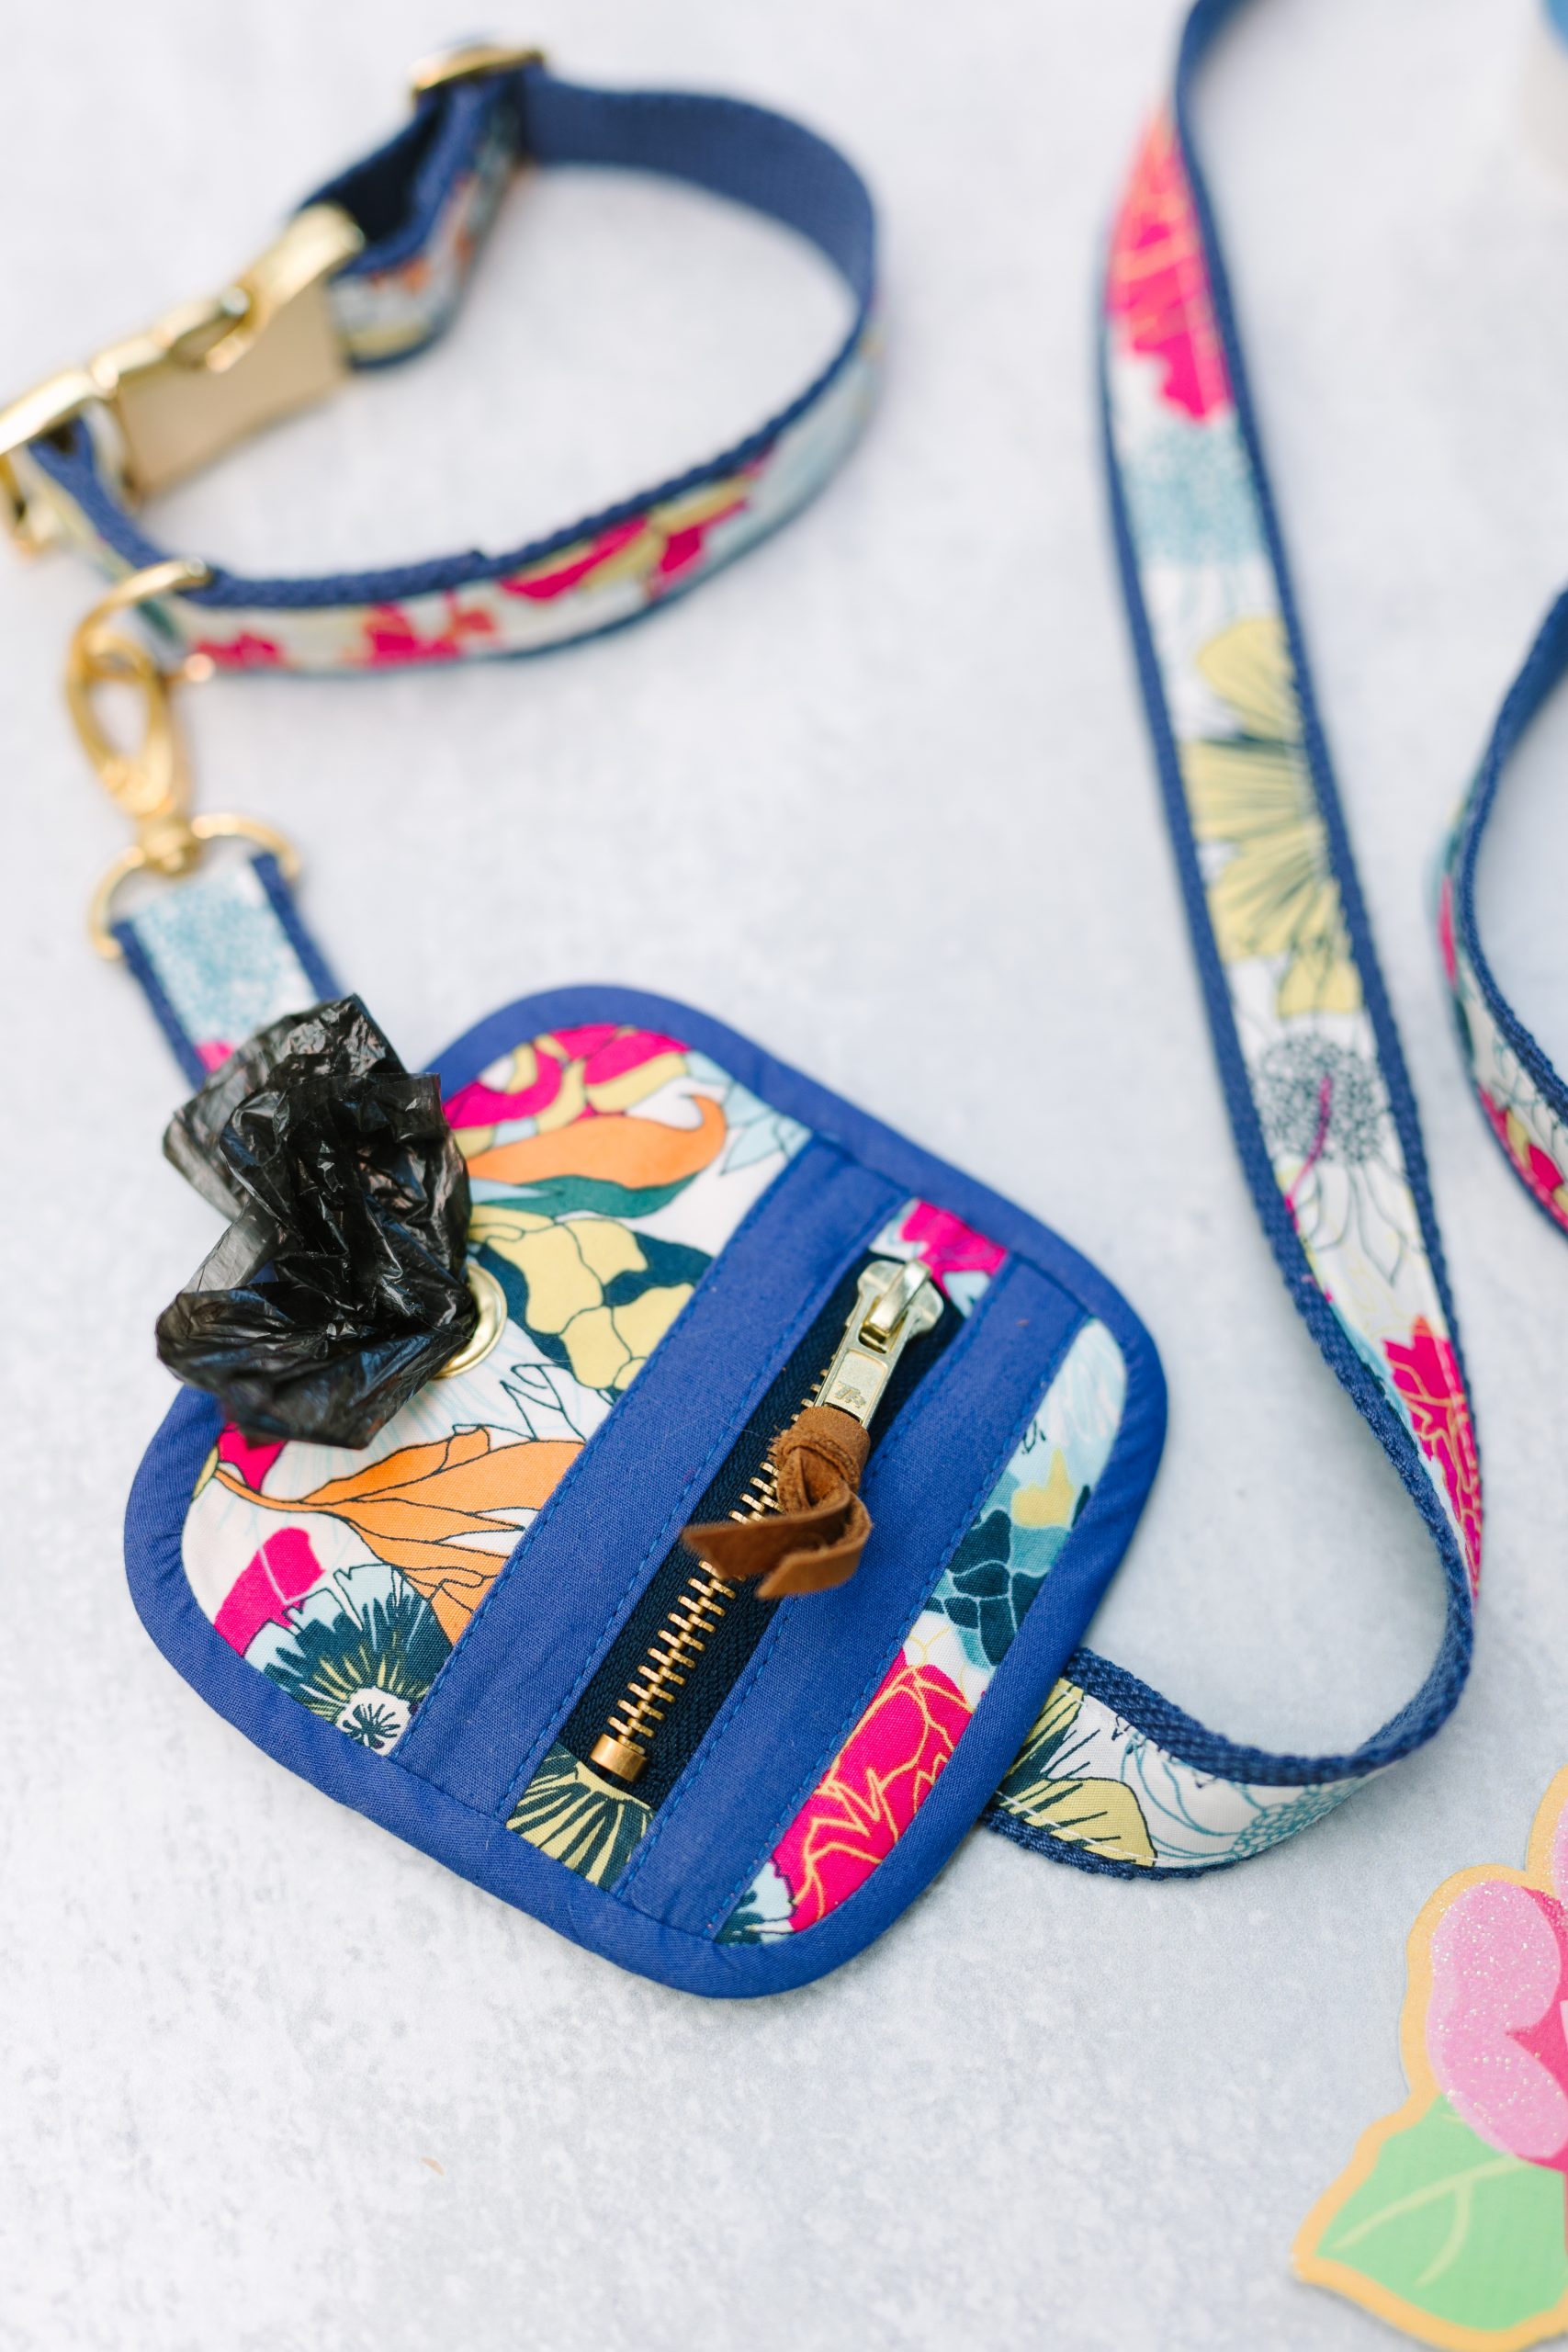
Treat your furry friends to some new duds by making them a custom dog collar set! This playful set includes a leash, collar and carrier for dog waste bags. This fun sewing project is aimed at medium-sized dogs, but can be adjusted for smaller or larger dogs if needed. Play with bright prints and colorful webbing for your designs and complete your dog’s look with some beautiful hardware. Get ready to get showered with compliments on your next trip to the dog park with this pet sewing project.
Materials:
- Fabric:
- 12” strip floral fabric. The designer used Abundant Meadow from the Pollinate collection by Katarina Roccella for Art Gallery Fabrics.
- 10” sq. coordinating fabric for the waste bag lining. The designer loved Planted Perfection from the Pollinate collection by Katarina Roccella for Art Gallery Fabrics.
- 10” sq. solid fabric to coordinate beautifully with your floral. The designer used Blueberry Zest from the Pure Elements collection by Art Gallery Fabrics.
- Interfacing:
- 10” sq. G740 fusible interfacing or similar, light weight fusible for the waste bag. G740 is a Vlieseline product and it has a similar weight to cheesecloth with glue on one side.
- 97” of 1” wide soft cotton webbing for the collar and leash
- 1” side clip for the collar: gold
- 1” D ring for the collar: gold
- 1” slider (tri-glide) for the collar: gold
- 1” swivel clip for the leash: gold
- 11mm eyelet for the waste bag: gold
- 3” metal zipper (#5): gold and navy
- Small piece of leather, ribbon, or cord to decorate the zipper pull
- Clear drying glue suitable for fabric
- Double sided tape (optional but very handy)
- Coordinating threads for all fabrics and trims
- Tip: Always coordinate all of your threads to fabrics. Sometimes this means a different color thread in the top of the machine to the bobbin. It is a bit of extra work but well worth it in terms of style.
- Basic sewing notions
Cutting Instructions:
Note: Please read all instructions and assembly requirements before beginning the pattern. Seam allowances are all 1/4” and have already been added.
FOR THE COLLAR:
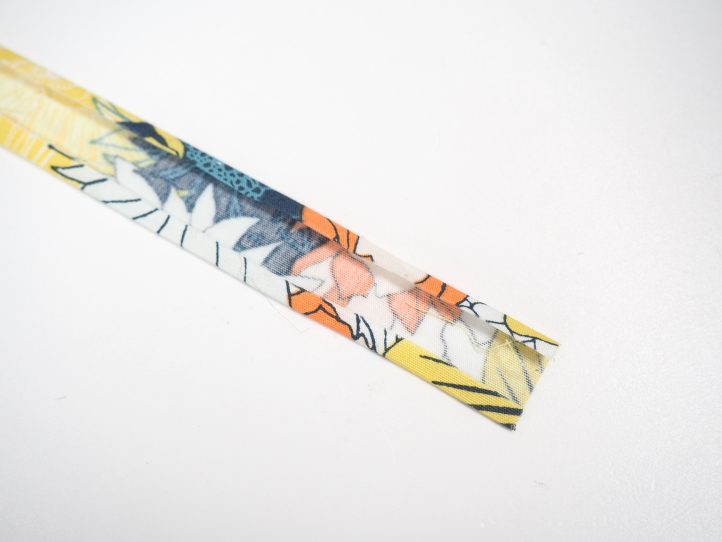
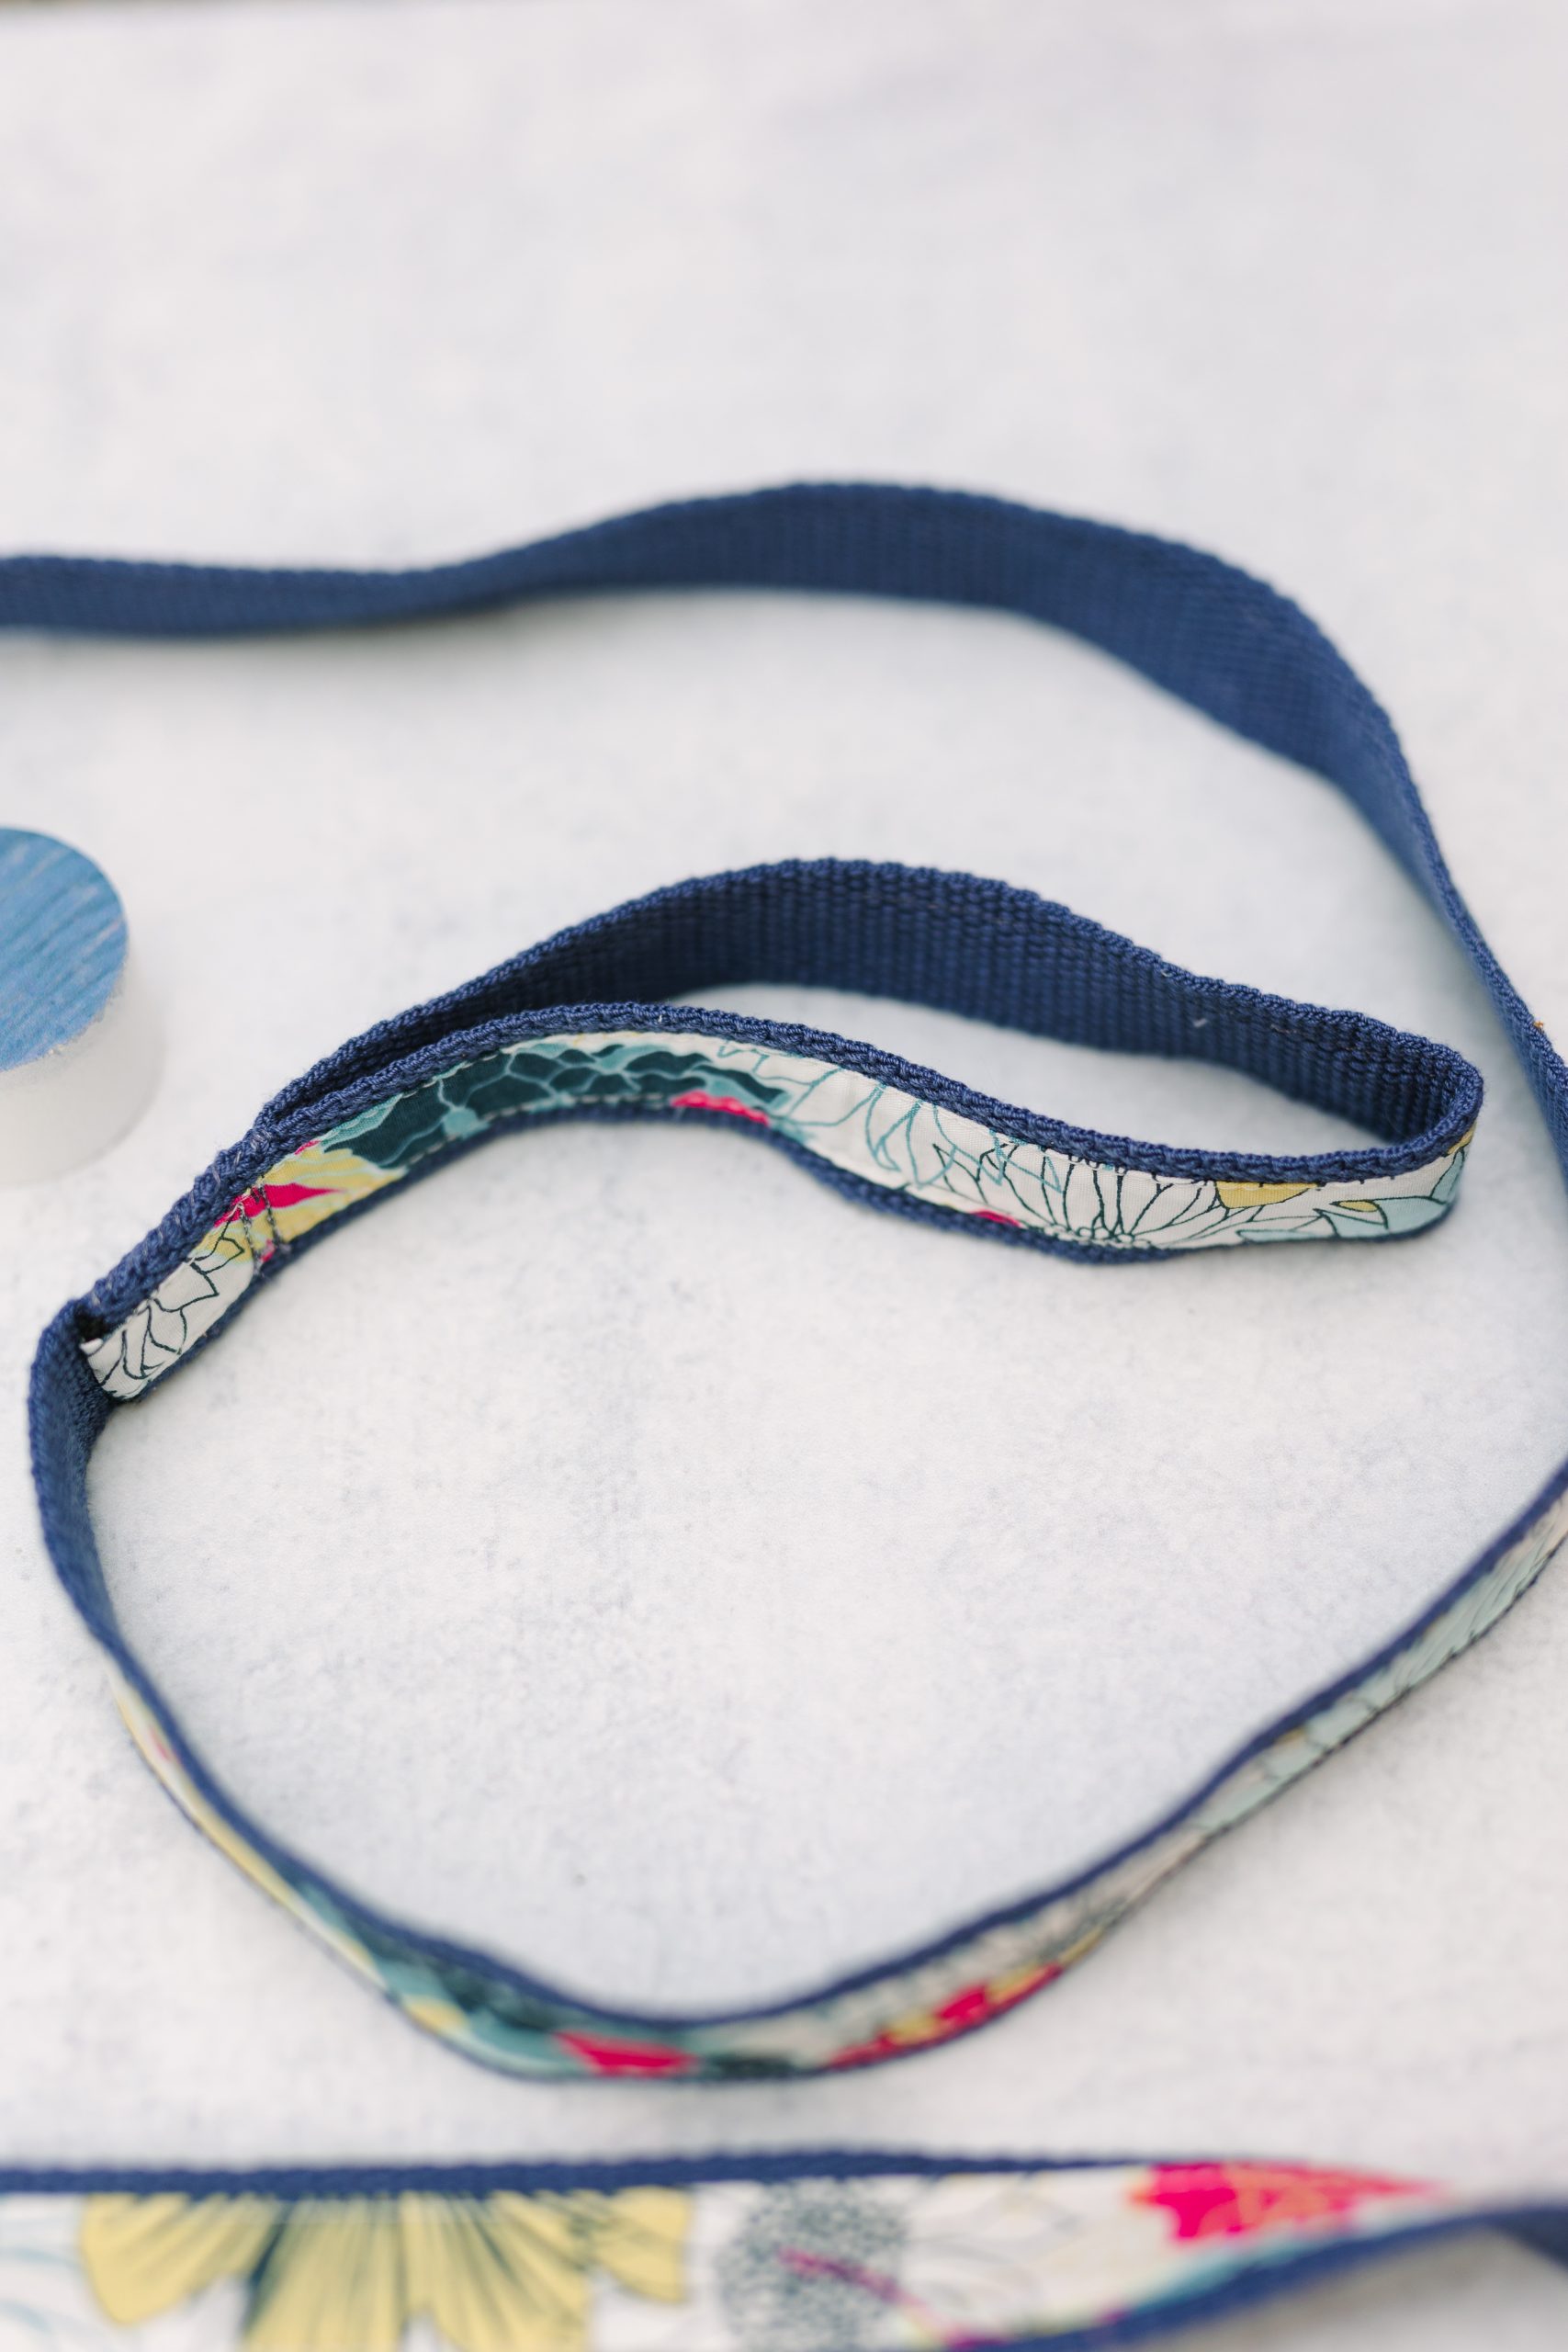
- 1 piece of floral fabric 1” wide x 23” long*
- Note: A word about sizing. This collar fits a medium dog. The designer has an English Cocker Spaniel and her neck measures comfortably 12 3/4”. You can enlarge or reduce the size of the collar at about 1” at a time but be aware that for very small or very large dogs, you will also have to either narrow or enlarge the width too as need dictates. This will alter the size of the hardware. However, it is perfectly possible and the collar will be constructed exactly the same way whatever the size.
- 1 piece of cotton webbing 20” long
FOR THE LEASH:
- 1 piece of floral fabric 1” wide x 75” long*
- Note: Here again, you can make the leash shorter for a smaller dog or longer for a larger one.
- 1 piece cotton webbing 2 yds. long
FOR THE WASTE BAG:
- From the floral outer fabric:
- 1 piece 4 1/2” sq. for the back panel
- 1 piece 4 1/2” wide x 1” tall for the front top panel
- 1 piece 4 1/2” wide x 2 1/4” tall for the front lower panel
- 2 pieces 1 1/2” sq. for the zipper end panel outers
- From the lining fabric:
- 1 piece 4 1/2” sq. for the back panel
- 1 piece 4 1/2” wide x 1 1/2” tall for the front top panel
- 1 piece 4 1/2” wide x 2 3/4” tall for the front lower panel
- 2 pieces 1 1/2” sq. for the zipper end panel linings
- From the solid fabric:
- 2 pieces 1 1/4” wide x 4 1/2” long for the upper and lower zipper trims
- Bias binding 18” long and cut 1 1/4” wide from your floral fabric or the solid as you prefer (you can also use store bought)
ADDITIONAL CUTTING INSTRUCTIONS:
- 1 piece of cotton webbing 4 1/2” long for the sleeve on the back panel
- 1 piece G740 4 1/2” sq. for the back interfacing
- 1 piece G740 4 1/2” wide x 1 1/2” tall for the front top panel interfacing
- 1 piece G740 4 1/2” wide x 2 3/4” tall for the front lower panel interfacing
Sewing Instructions:
The collar and the leash are basically decorated webbing straps with hardware added and are both quite simple in principle.
- Treat both trimmed ends of the cotton webbing with either clear drying glue or Fray Stopper and allow to dry.
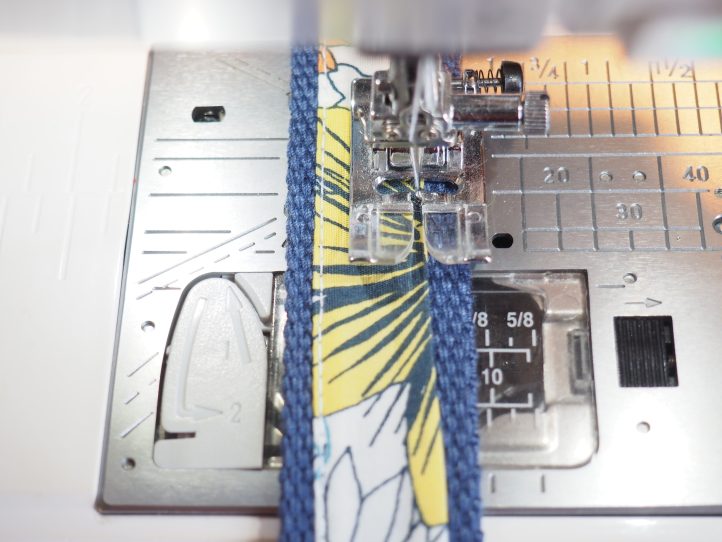
- Iron both long ends of the fabric strip under by 1/4” on both long sides.
- Attach a piece of double sided tape (if using) to the webbing and center the fabric trim over the top perfectly.
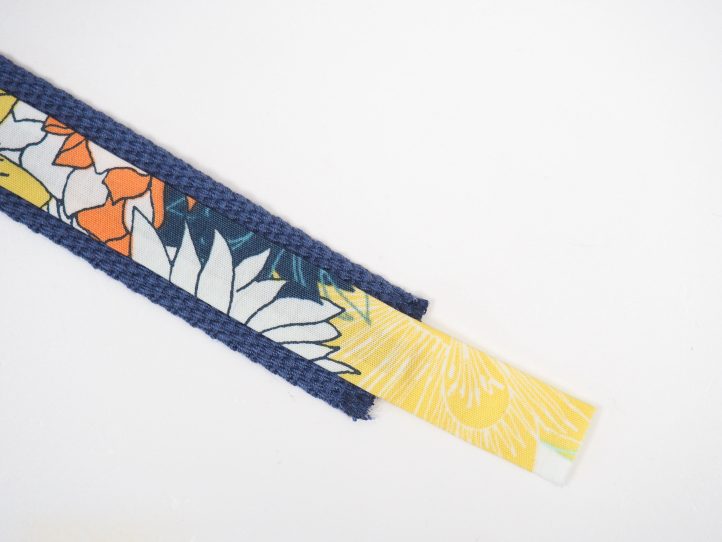
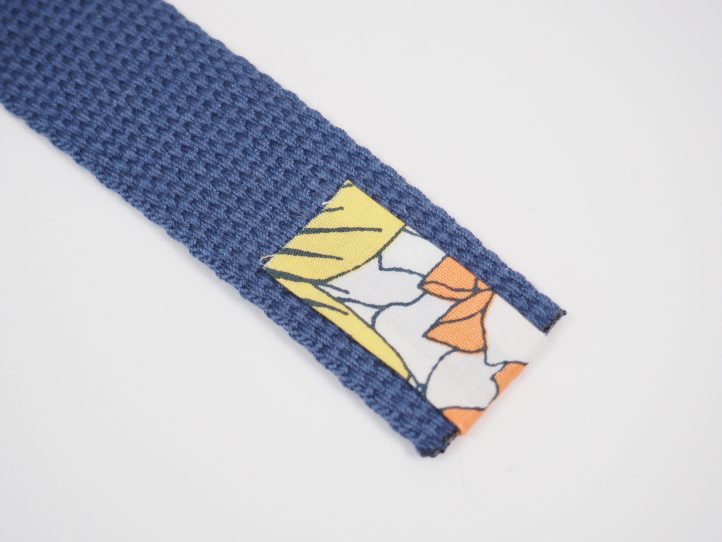
- TIP: You will see that the trim is about 3” longer than the webbing strap. Don’t trim this off. Tuck half of it each end under the ends of the webbing strap and either glue it lightly to keep it there or use a small piece of tape. You need about an inch on each end so trim it if it is over long.
- Topstitch narrowly (about 1/8”) along both long outer sides of the fabric trim.
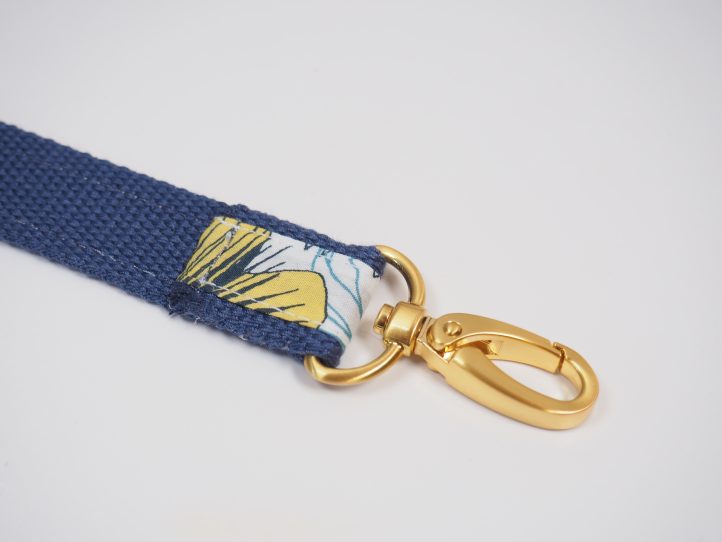
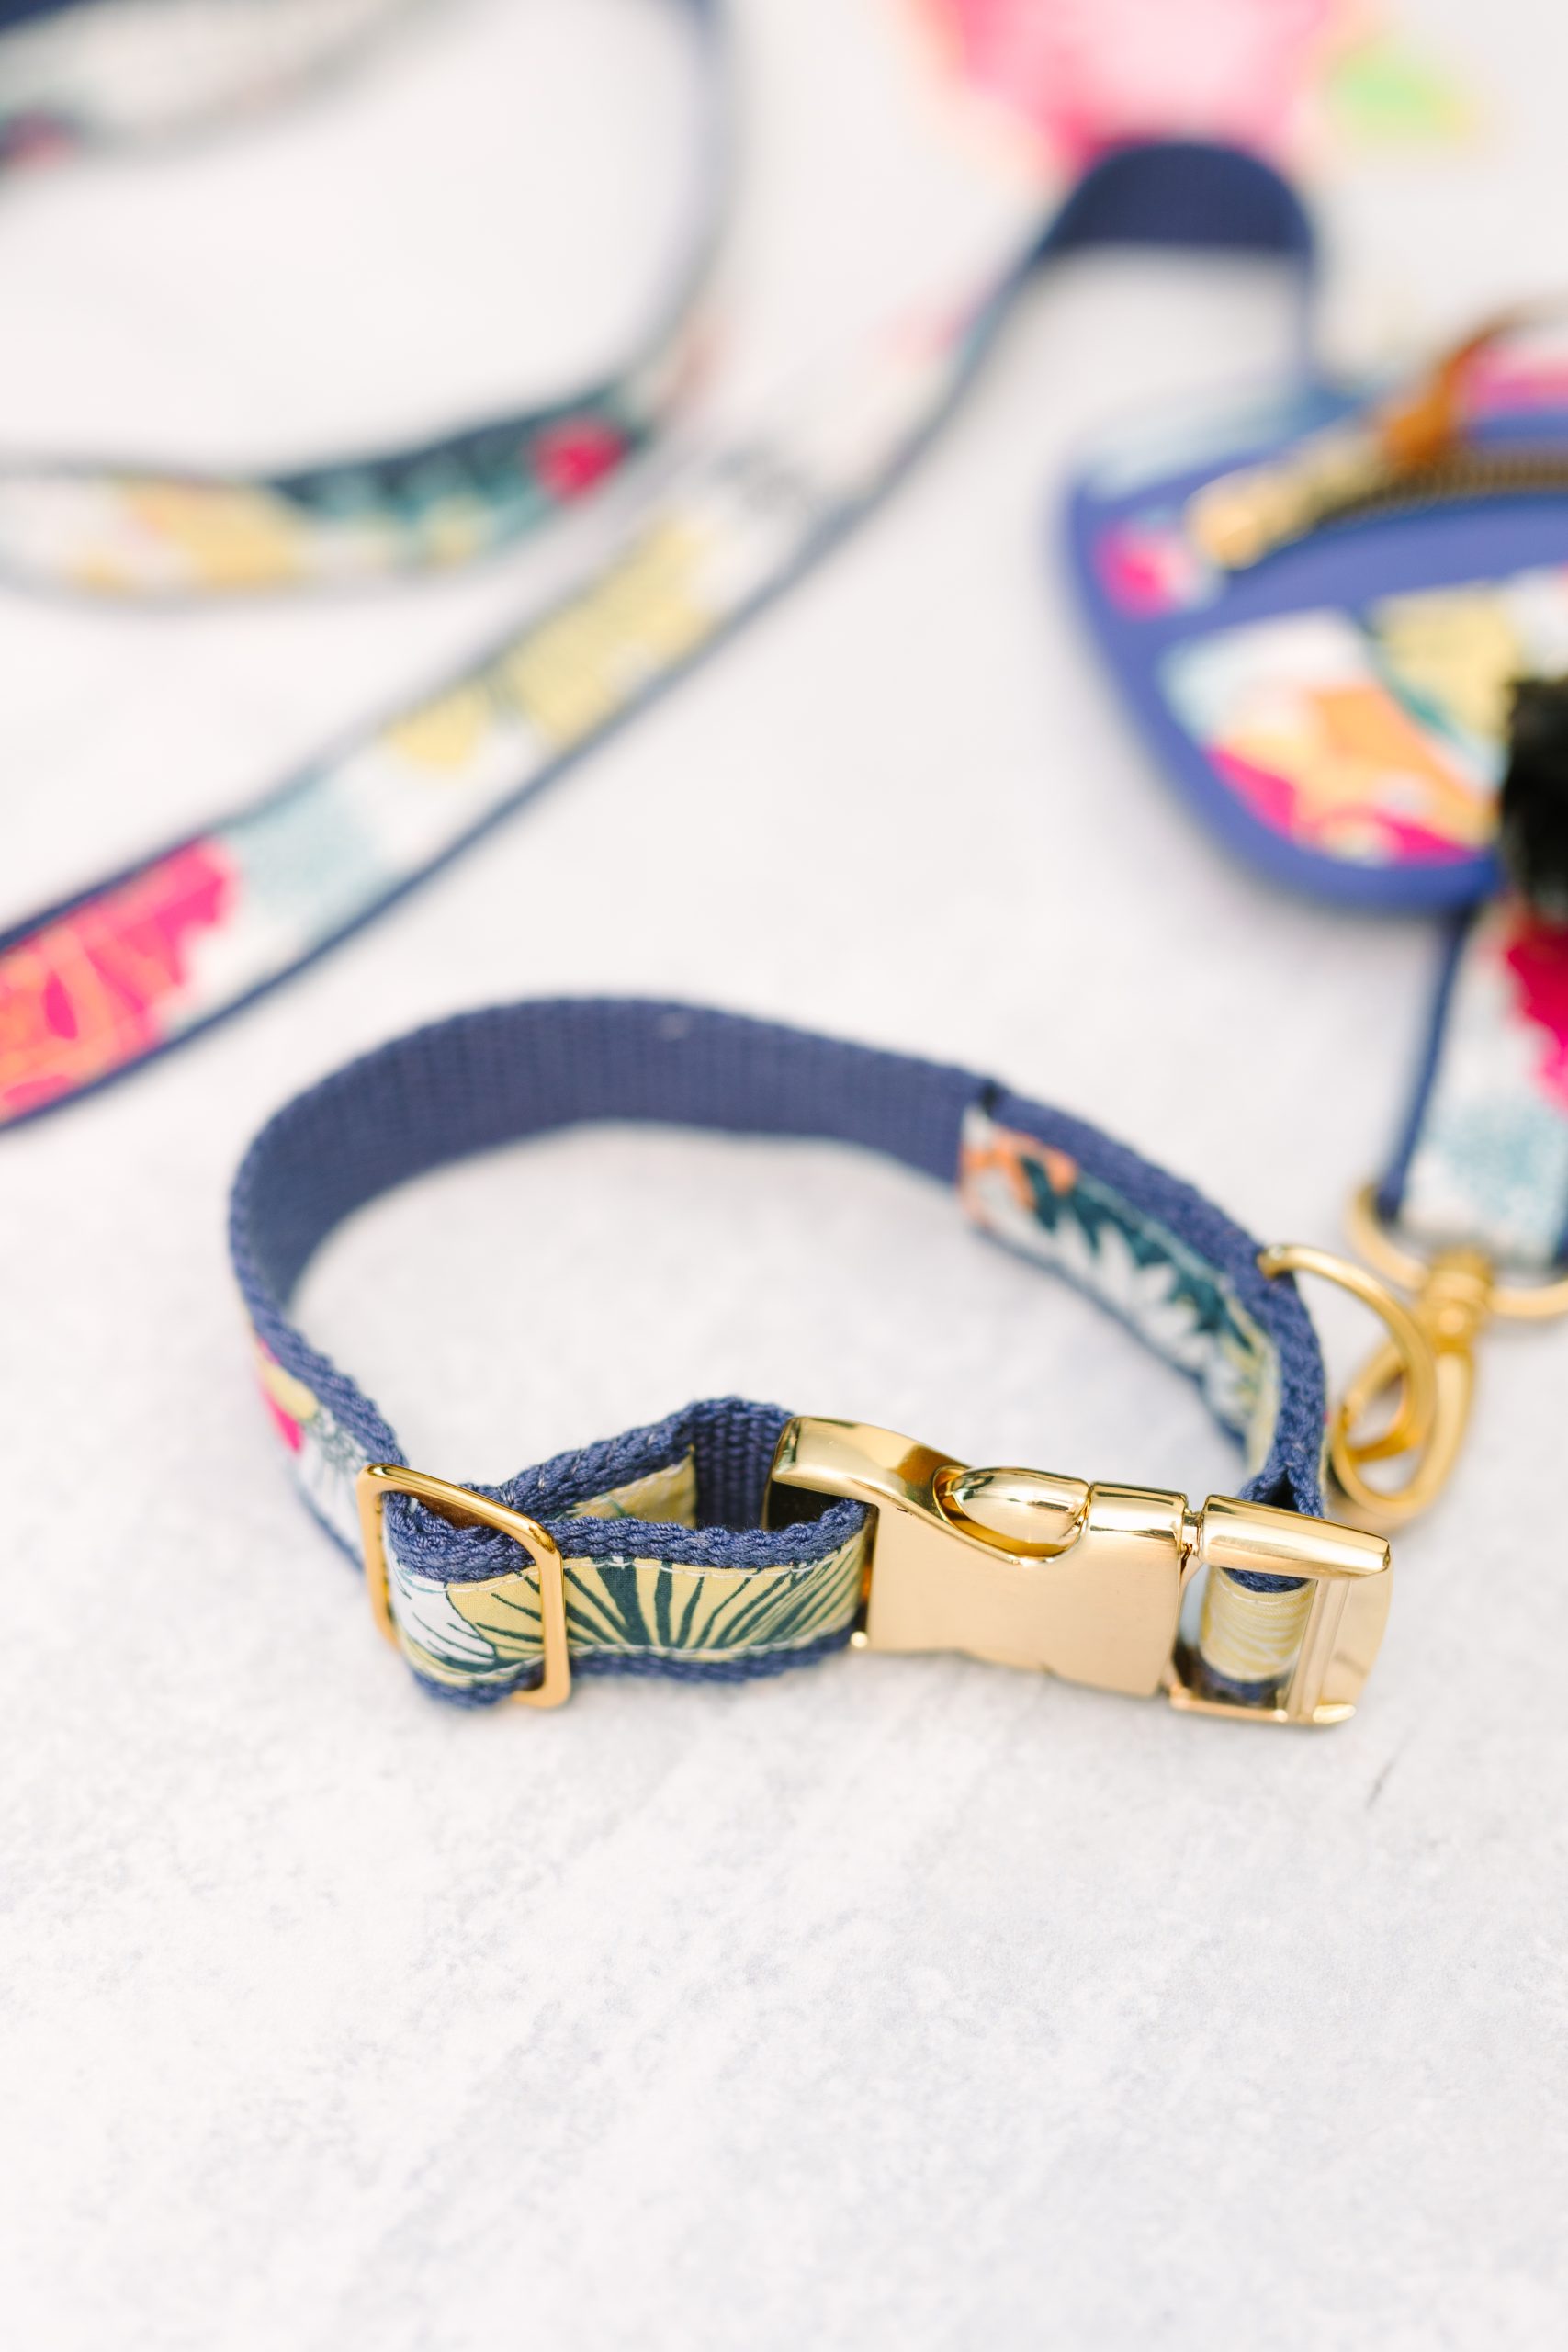
- Time to add the hardware. You need the side buckle, the D ring, and the slider. Attach one end of the collar strap to the middle bar of the slider folding the end over by 1”.
- TIP: You can either sew this by hand or machine. As you can see, the tucked under fabric trim hides most of the end of the webbing strap and makes it less likely to fray.
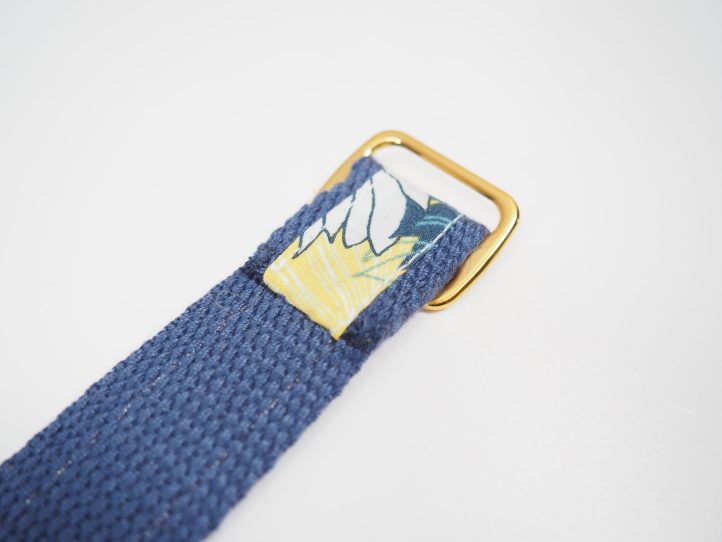
- Bring the free end of the collar up and over, through the side of the side buckle without the prongs.
- TIP: To be honest, there is a little bit of variation in side buckles, so go with the manufacturer’s instructions for yours. This assembly is only a guide. Now take the free end back through the slider.
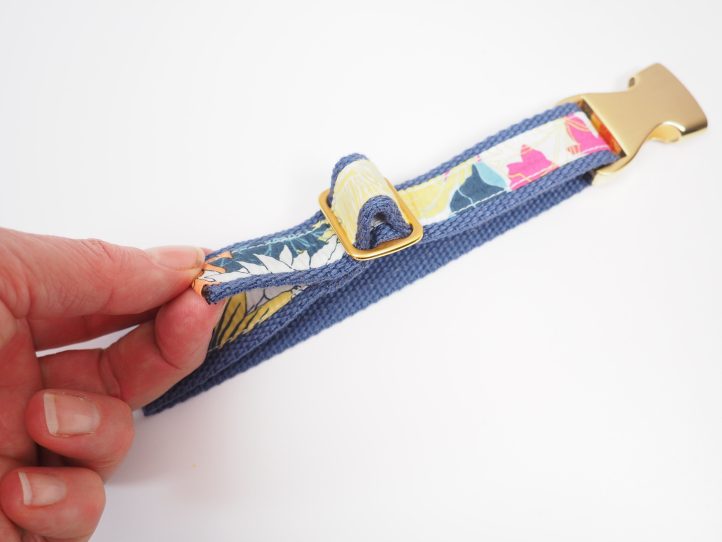
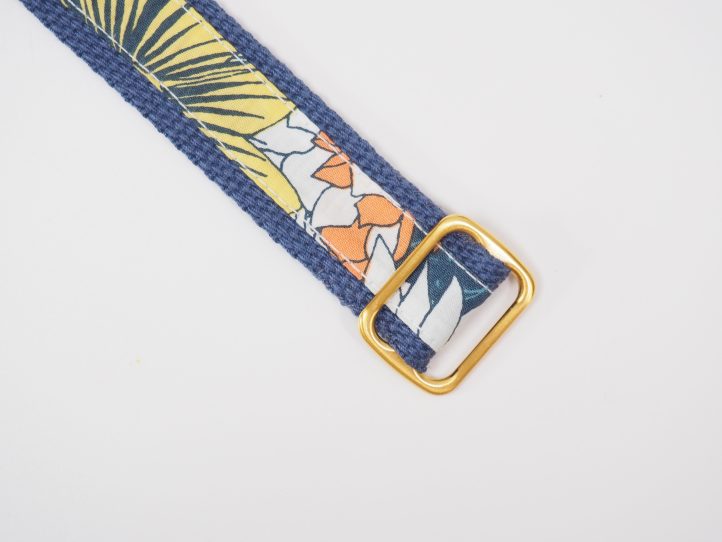
- On the other end, slide the D ring onto the strap and then attach the other half of the buckle. Pull about 3” of end through the buckle.
- TIP: The end of the collar strap will enclose the D ring and give you somewhere to attach the leash. The D ring should be about 1 1/2” from the buckle. The designer preferred to hand baste the D ring into place, so that it stayed put. You won’t see these stitches.
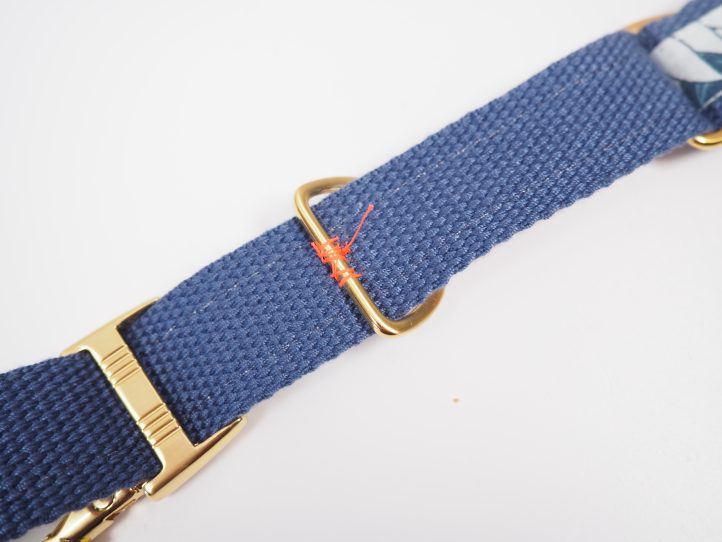
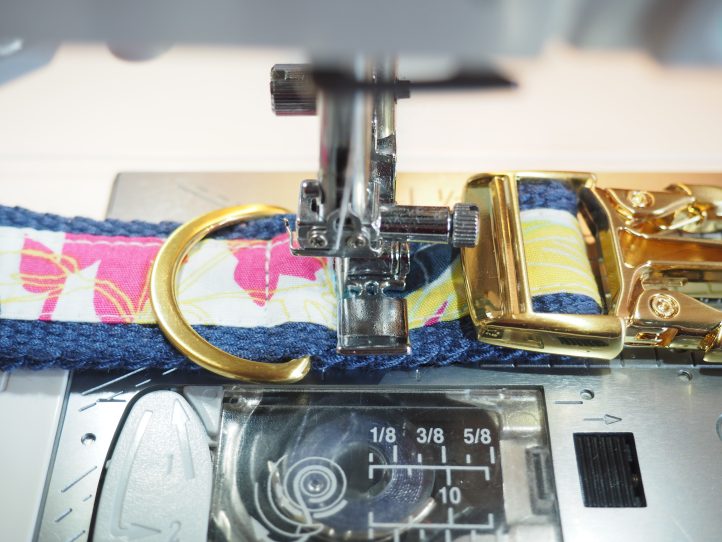
- Lay the strap over the D ring and stitch either side of the ring. The designer swapped to a zipper foot so that she could get in nice and close.
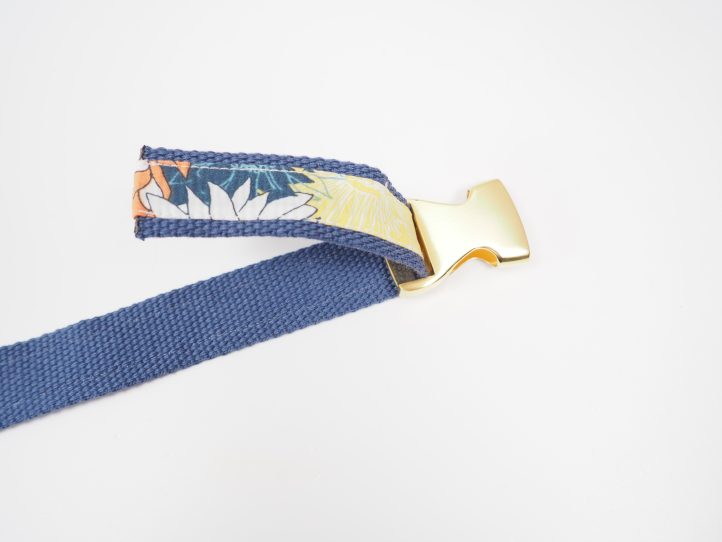
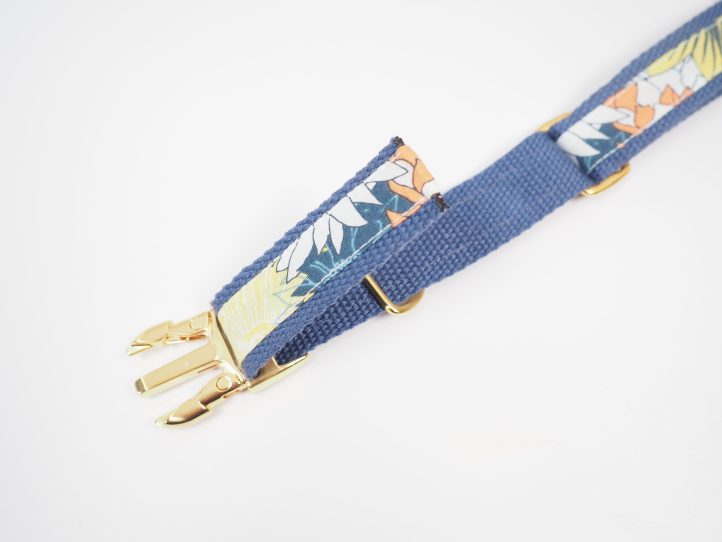
- Stitch the webbing together so that it does not flap about. Fit the collar onto your dog and adjust the size so that it is comfortable to wear. The leash is made exactly the same as the collar to begin with and then you attach the swivel clip on one end with a 1” fold over.
- To finish the leash, fold over 15” on the other end to make a handle and secure the strap end in place.

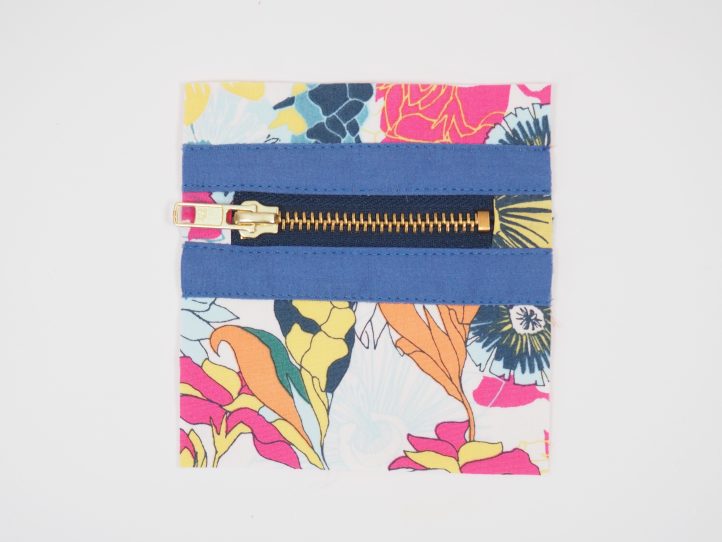
- The bag is designed to take a few waste bags and it slides over the leash to sit near the collar. To begin with, attach the thin trim to the bottom edge of the upper front panel and the top edge of the lower one.
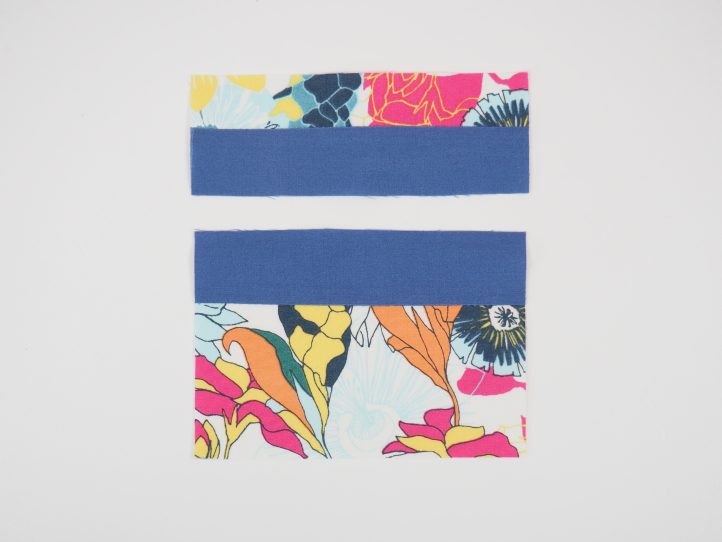
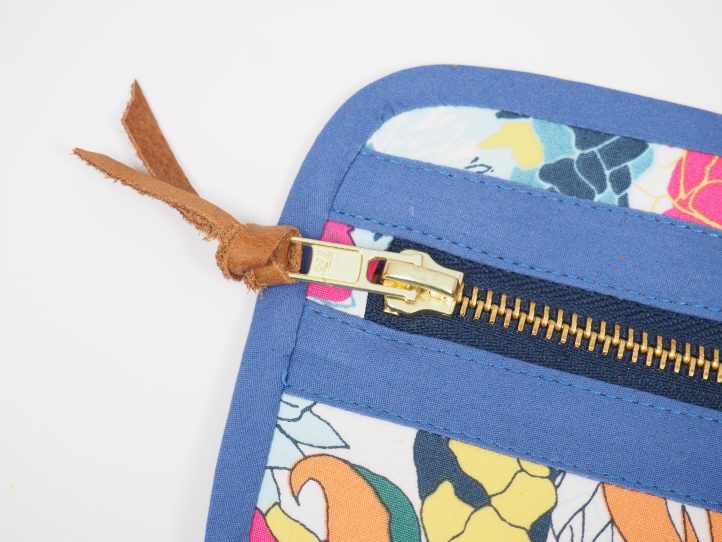
- Iron to make it neater and then treat these panels as one piece. Next, fuse the G740 interfacing to the wrong sides of the outer panels. Trim the interfacing, which can stretch slightly if needed. Prepare the zipper by attaching the end tabs. Fold one side of the tabs over by 1/4” and press. Take an outer tab and a lining tab and lightly glue them wrong sides together to the zipper ends.

- The folded ends of both tabs will be facing the zipper. TIP: Glue them, did you say?? Absolutely! The designer always glues them because it is neater by far and the glue will be backed up by plenty of stitching and topstitching. Your sewing machine will thank you too.
- Trim the tabs when the glue is dry to the same width as the zipper and an overall zipper length of 4 1/2”.
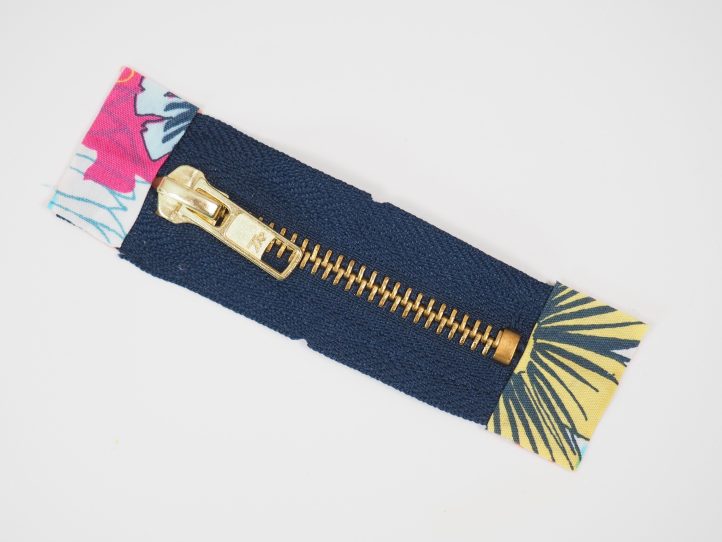
- Now you need the lower front panel (lining and outer). Place them right sides together with the zipper sandwiched in between and sew along the zipper.
- Flip the layers the right way out and then topstitch narrowly (1/8”) along the zip and on the lower edge of the solid trim (also 1/8”).
- Repeat for the upper panels. Fold the lower front panel in half vertically to find the center and make a mark. Measure up 1” from the bottom edge and make another mark. Attach the eyelet using the hardware that came with your eyelets.
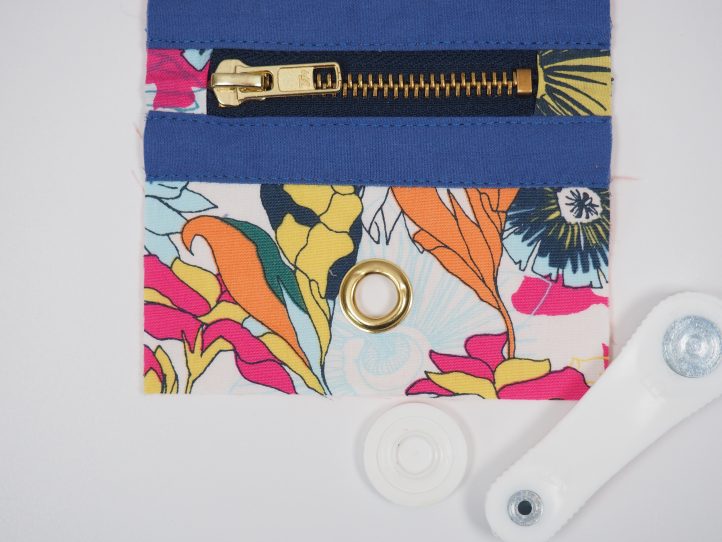
- TIP: Eyelets come with all sorts of hardware to attach them and usually all you need to find is a hammer. You can get quite fancy attachment tools but they are not absolutely necessary unless you are putting a lot of eyelets in. Just check when you buy your eyelets that they are a fairly decent brand and that there are some tools included.
- On the back panel, attach the webbing ‘sleeve’ in the middle by basting the ends. Find the center of the webbing, mark it and then measure 1/2” either side of the center mark. On both the left and the right sides, stitch along the top of the webbing, down the 1/2” mark and then back along the bottom, leaving a 1” channel in the center. This creates a channel the same width as the leash.
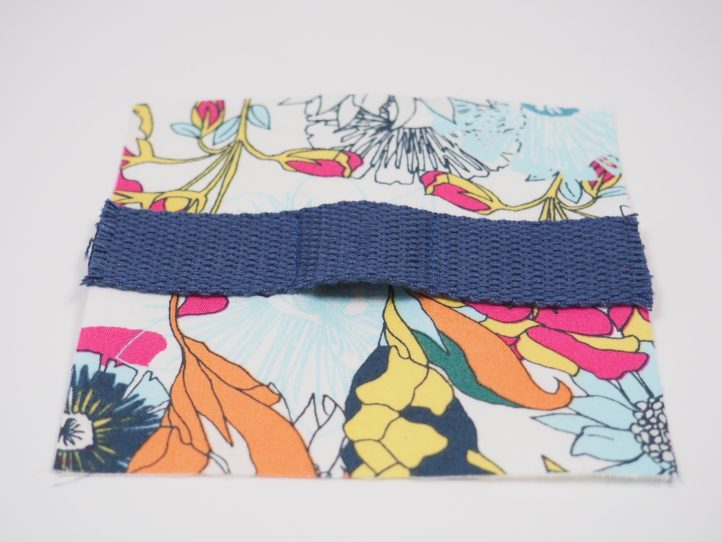
- TIP: You can see the process better from the back of the panel.
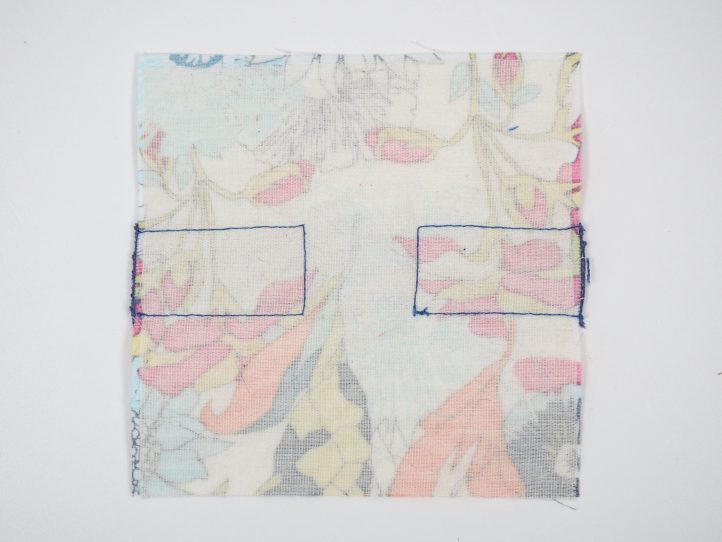
- Lay the back panel wrong sides together onto the lining and machine baste it right around. Trim the front and back panels to 4 1/2” sq. and round all four corners on both pieces. TIP: You do not need ‘fancy’ equipment to round the corners. Just draw around something round (the designer used a roll of washi tape) and then cut out.
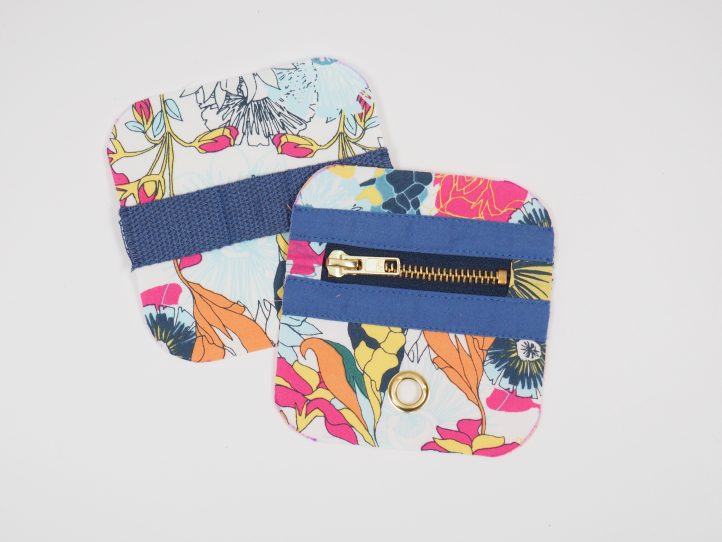
- Place the front and back panels wrong (lining) sides together and sew around the edge. TIP: The webbing on the back panel will be parallel with the zipper on the front. Bind the edge with your bias binding and decorate the zipper pull.
What a great project – useful and pretty. Thanks.
can’t wait to try this – looks great for those that like to coordinate colors