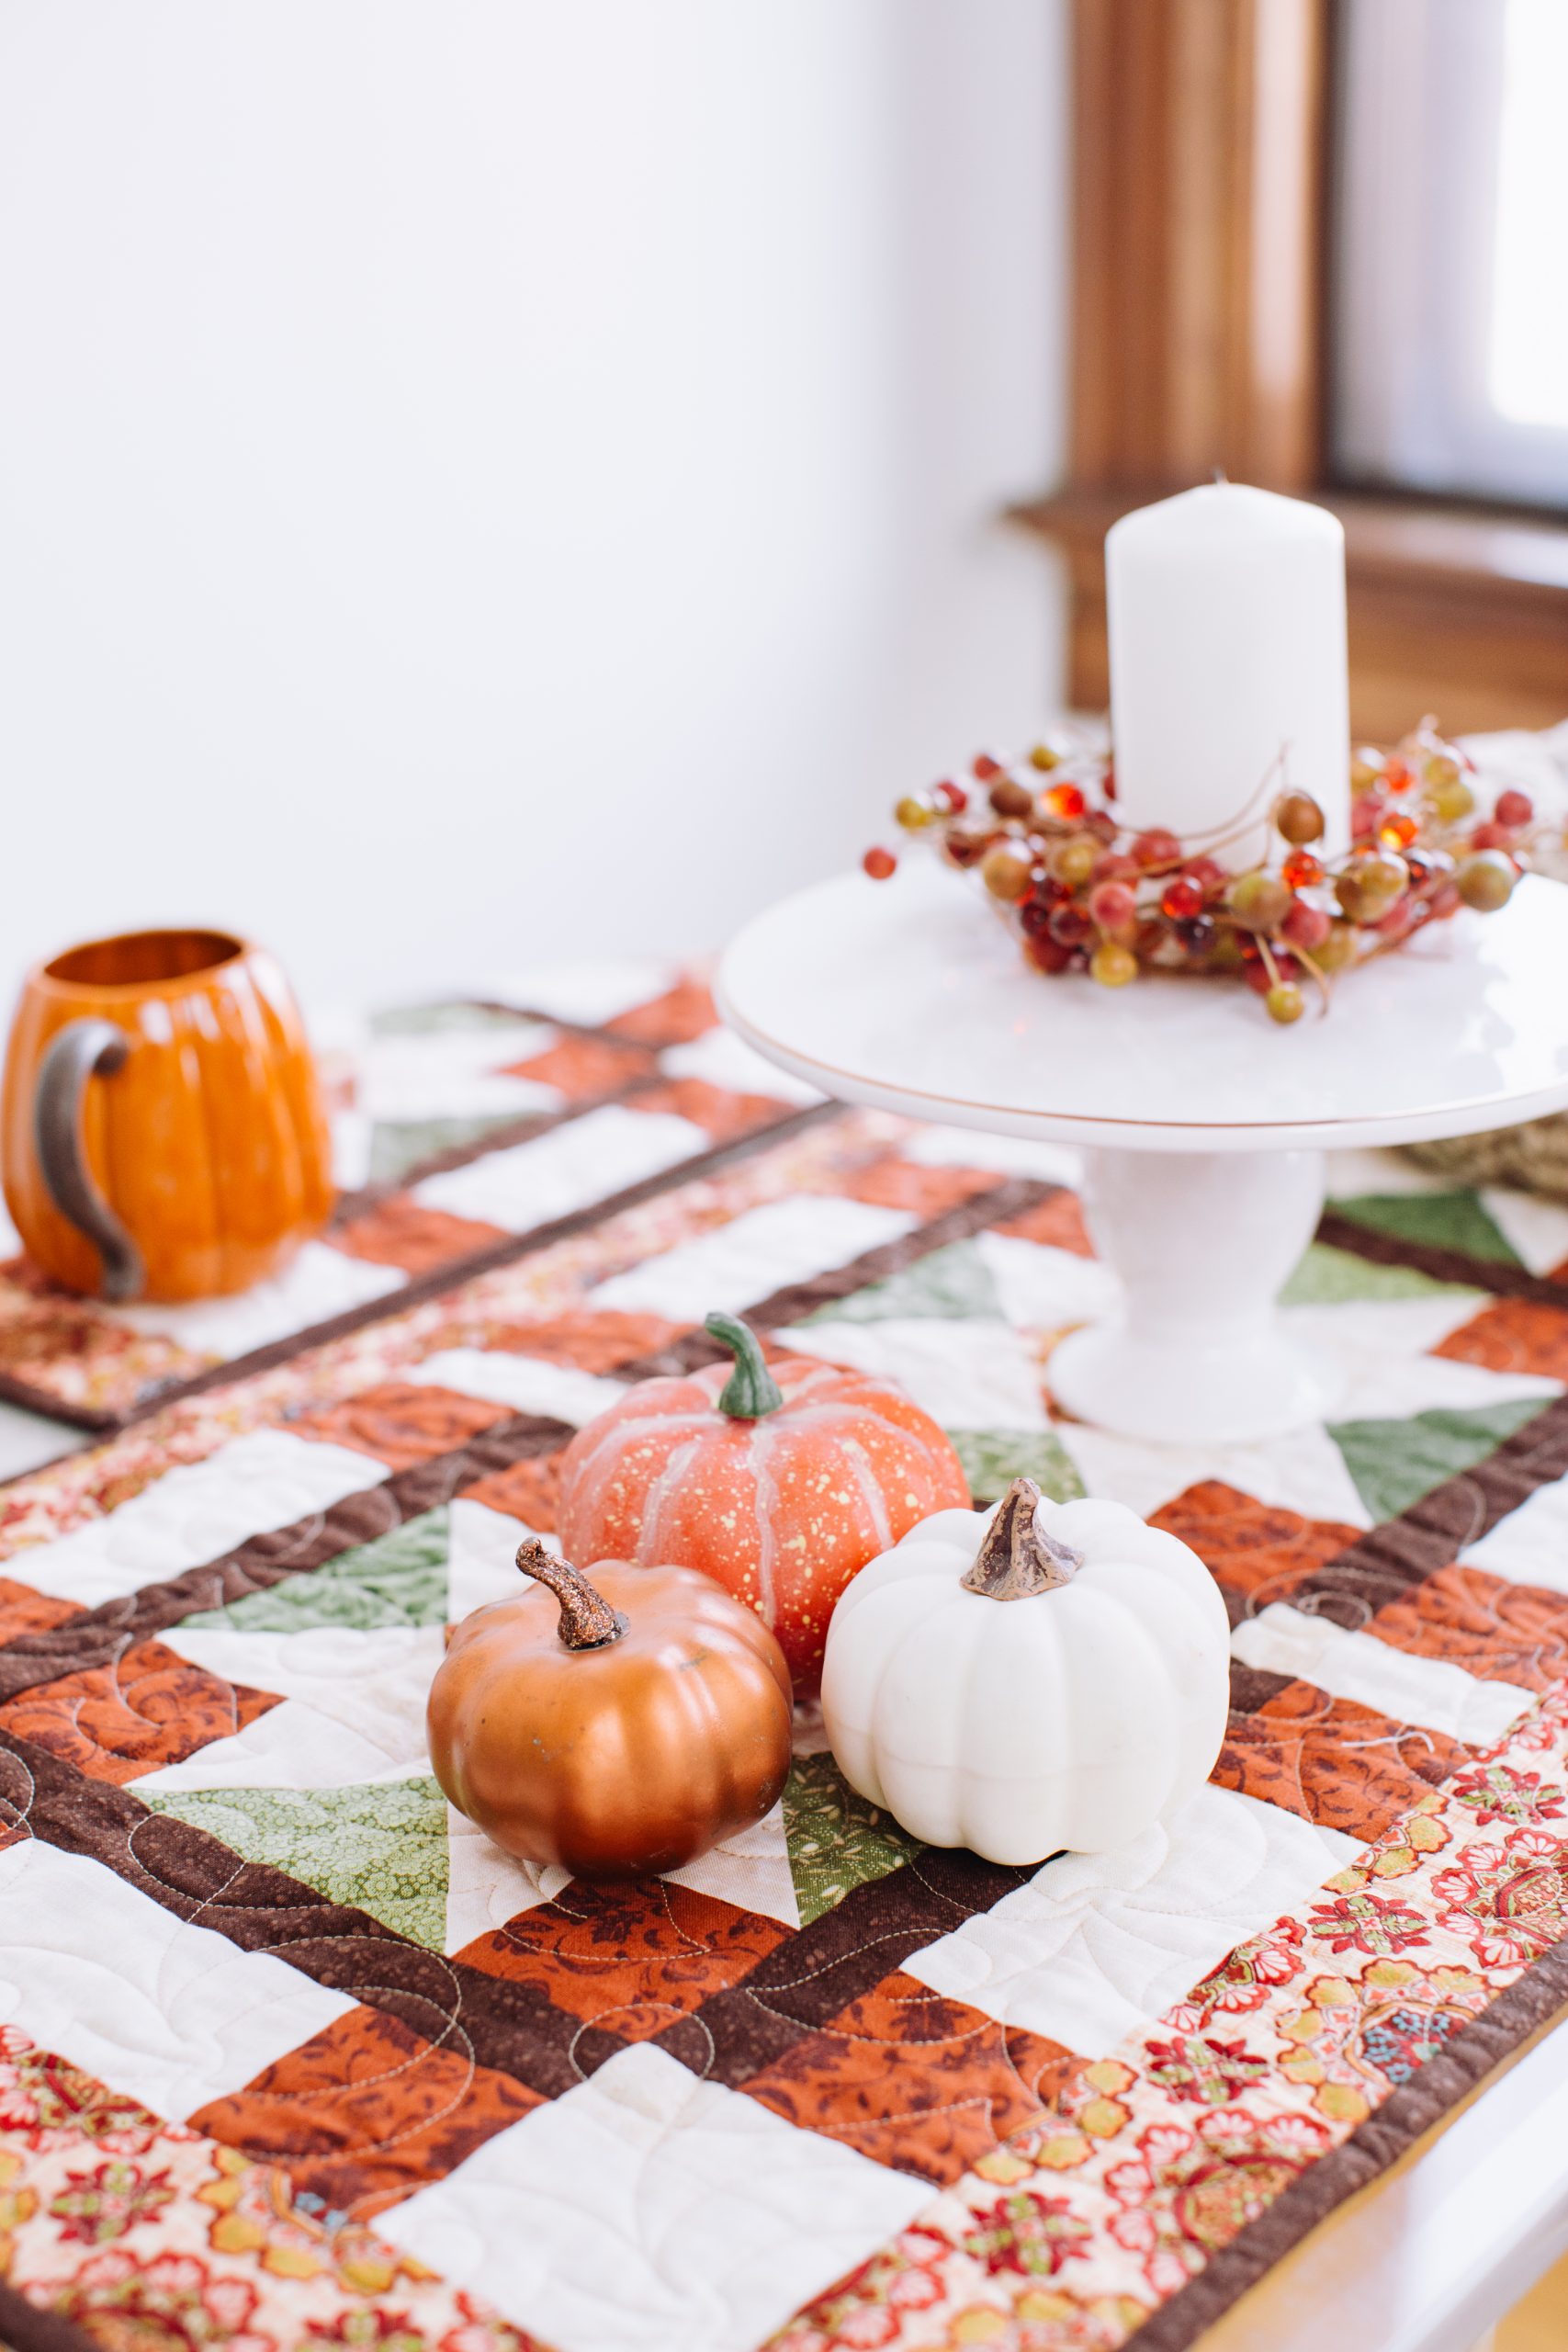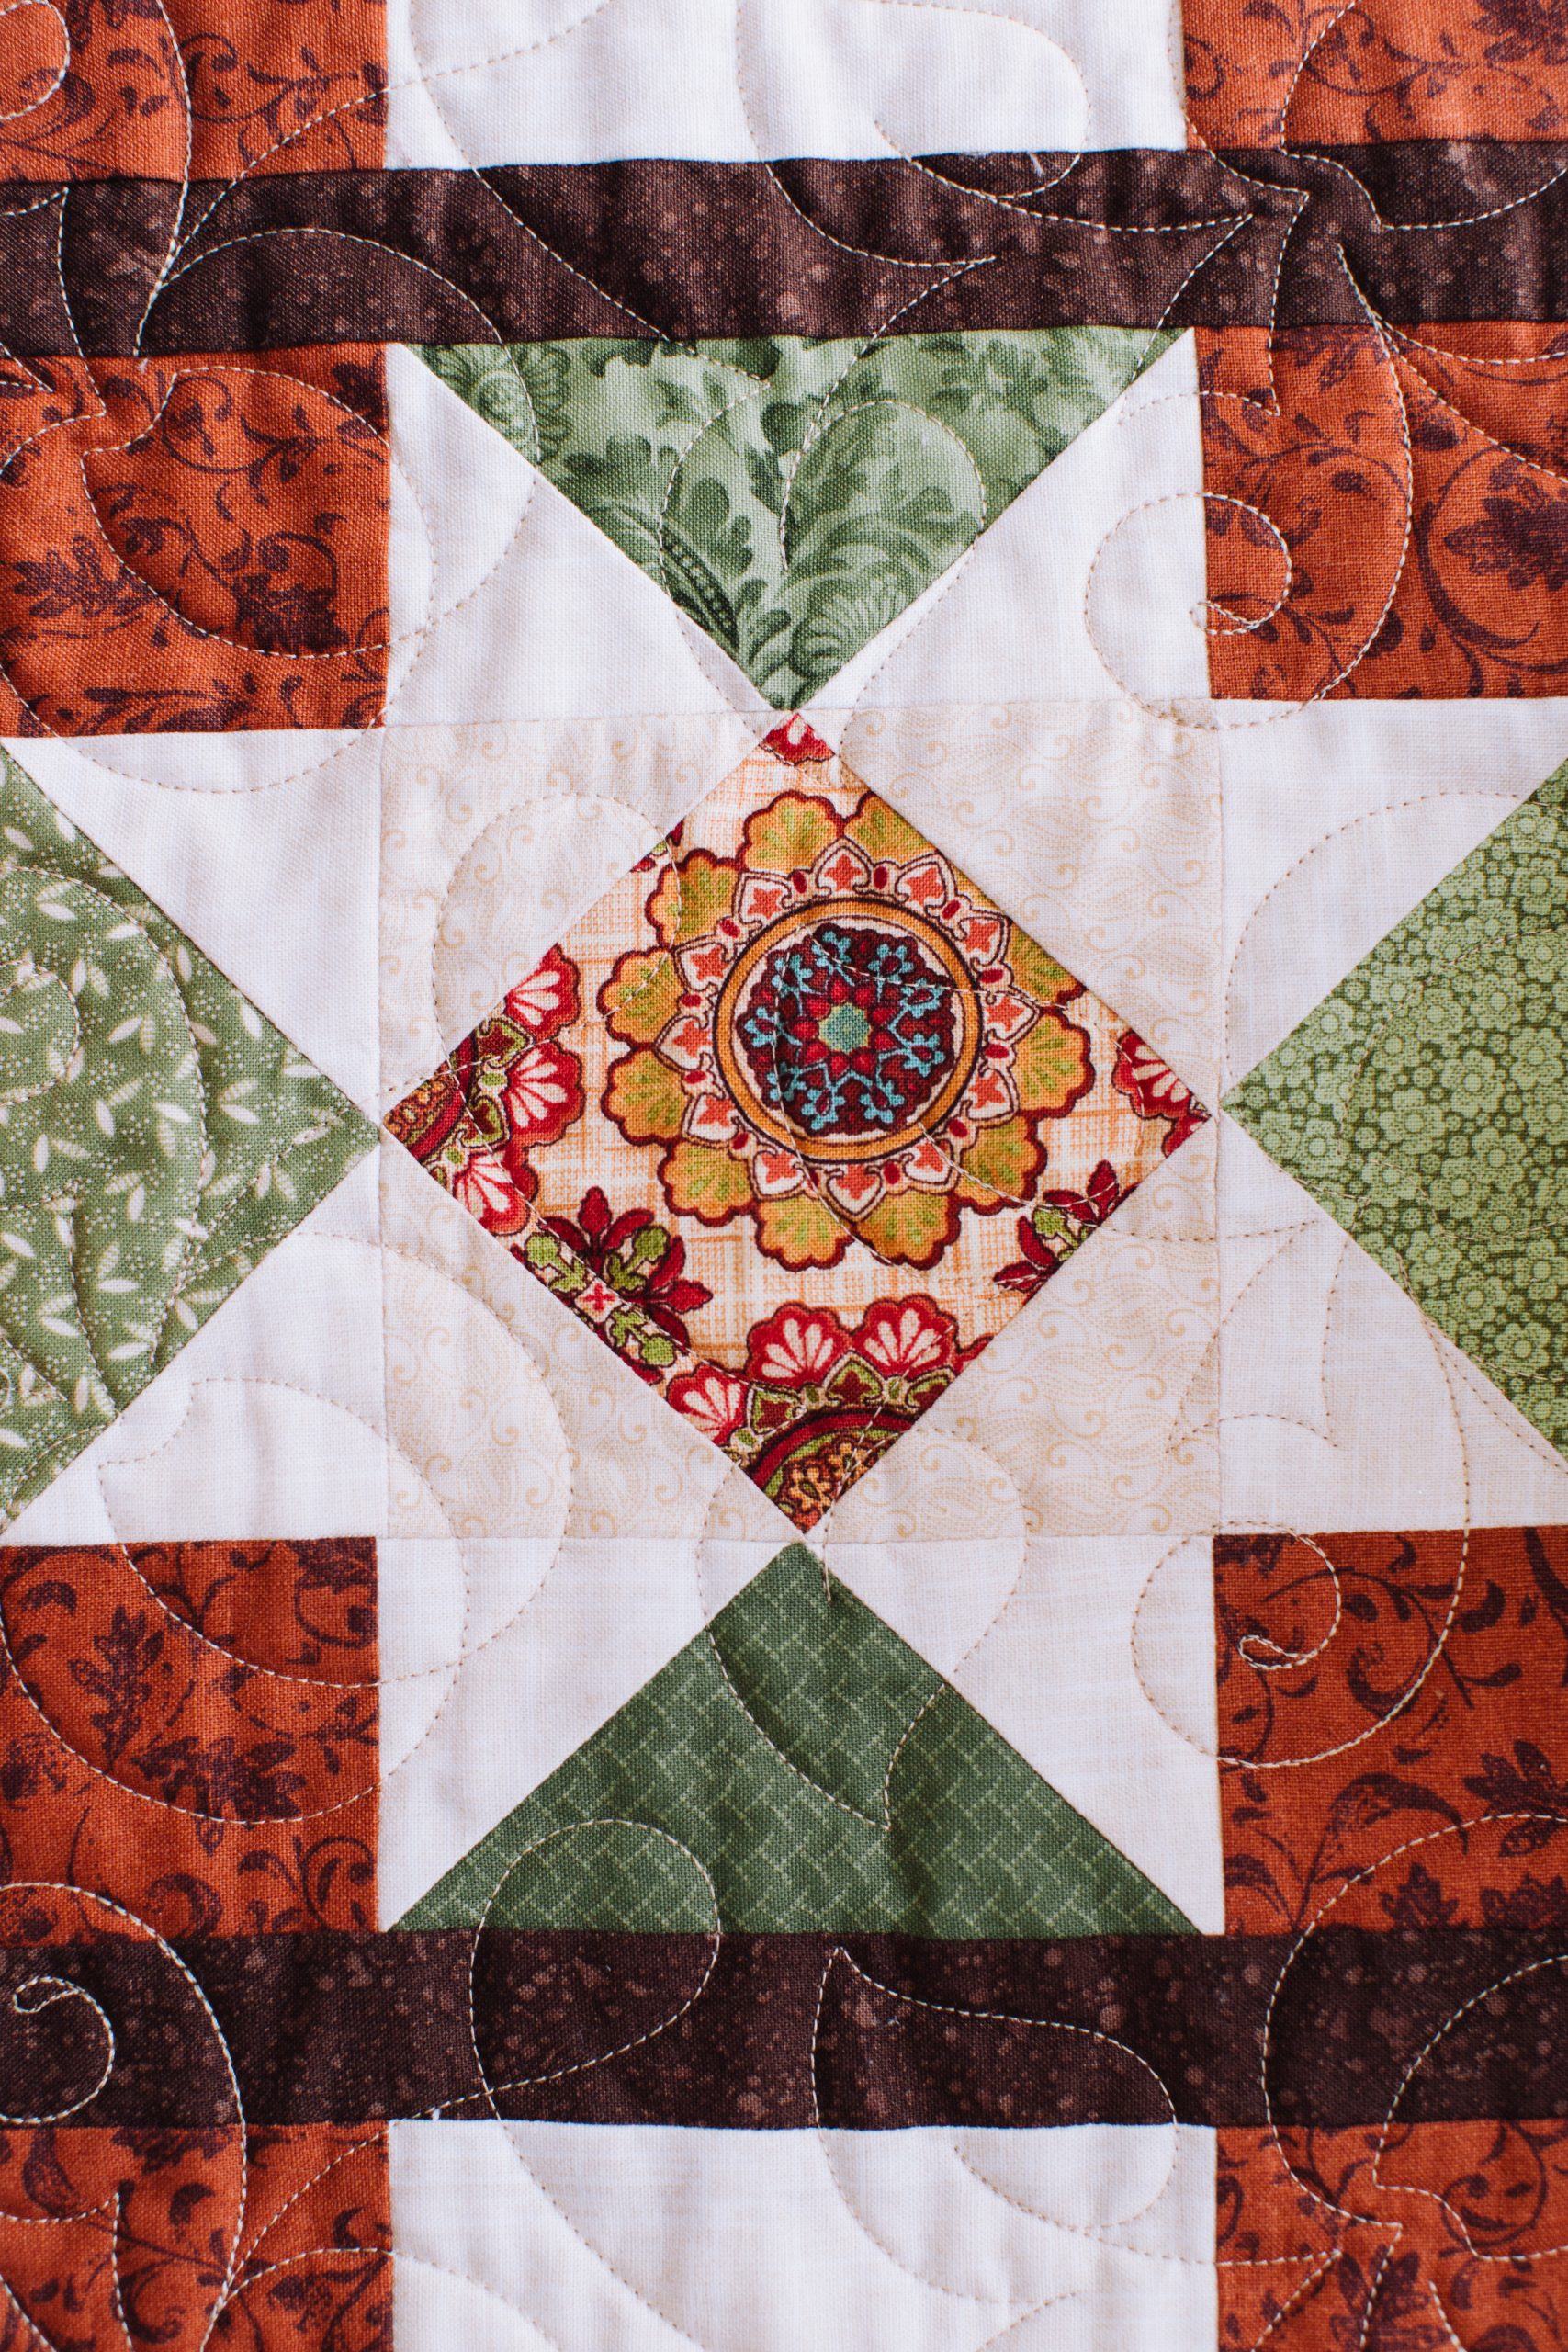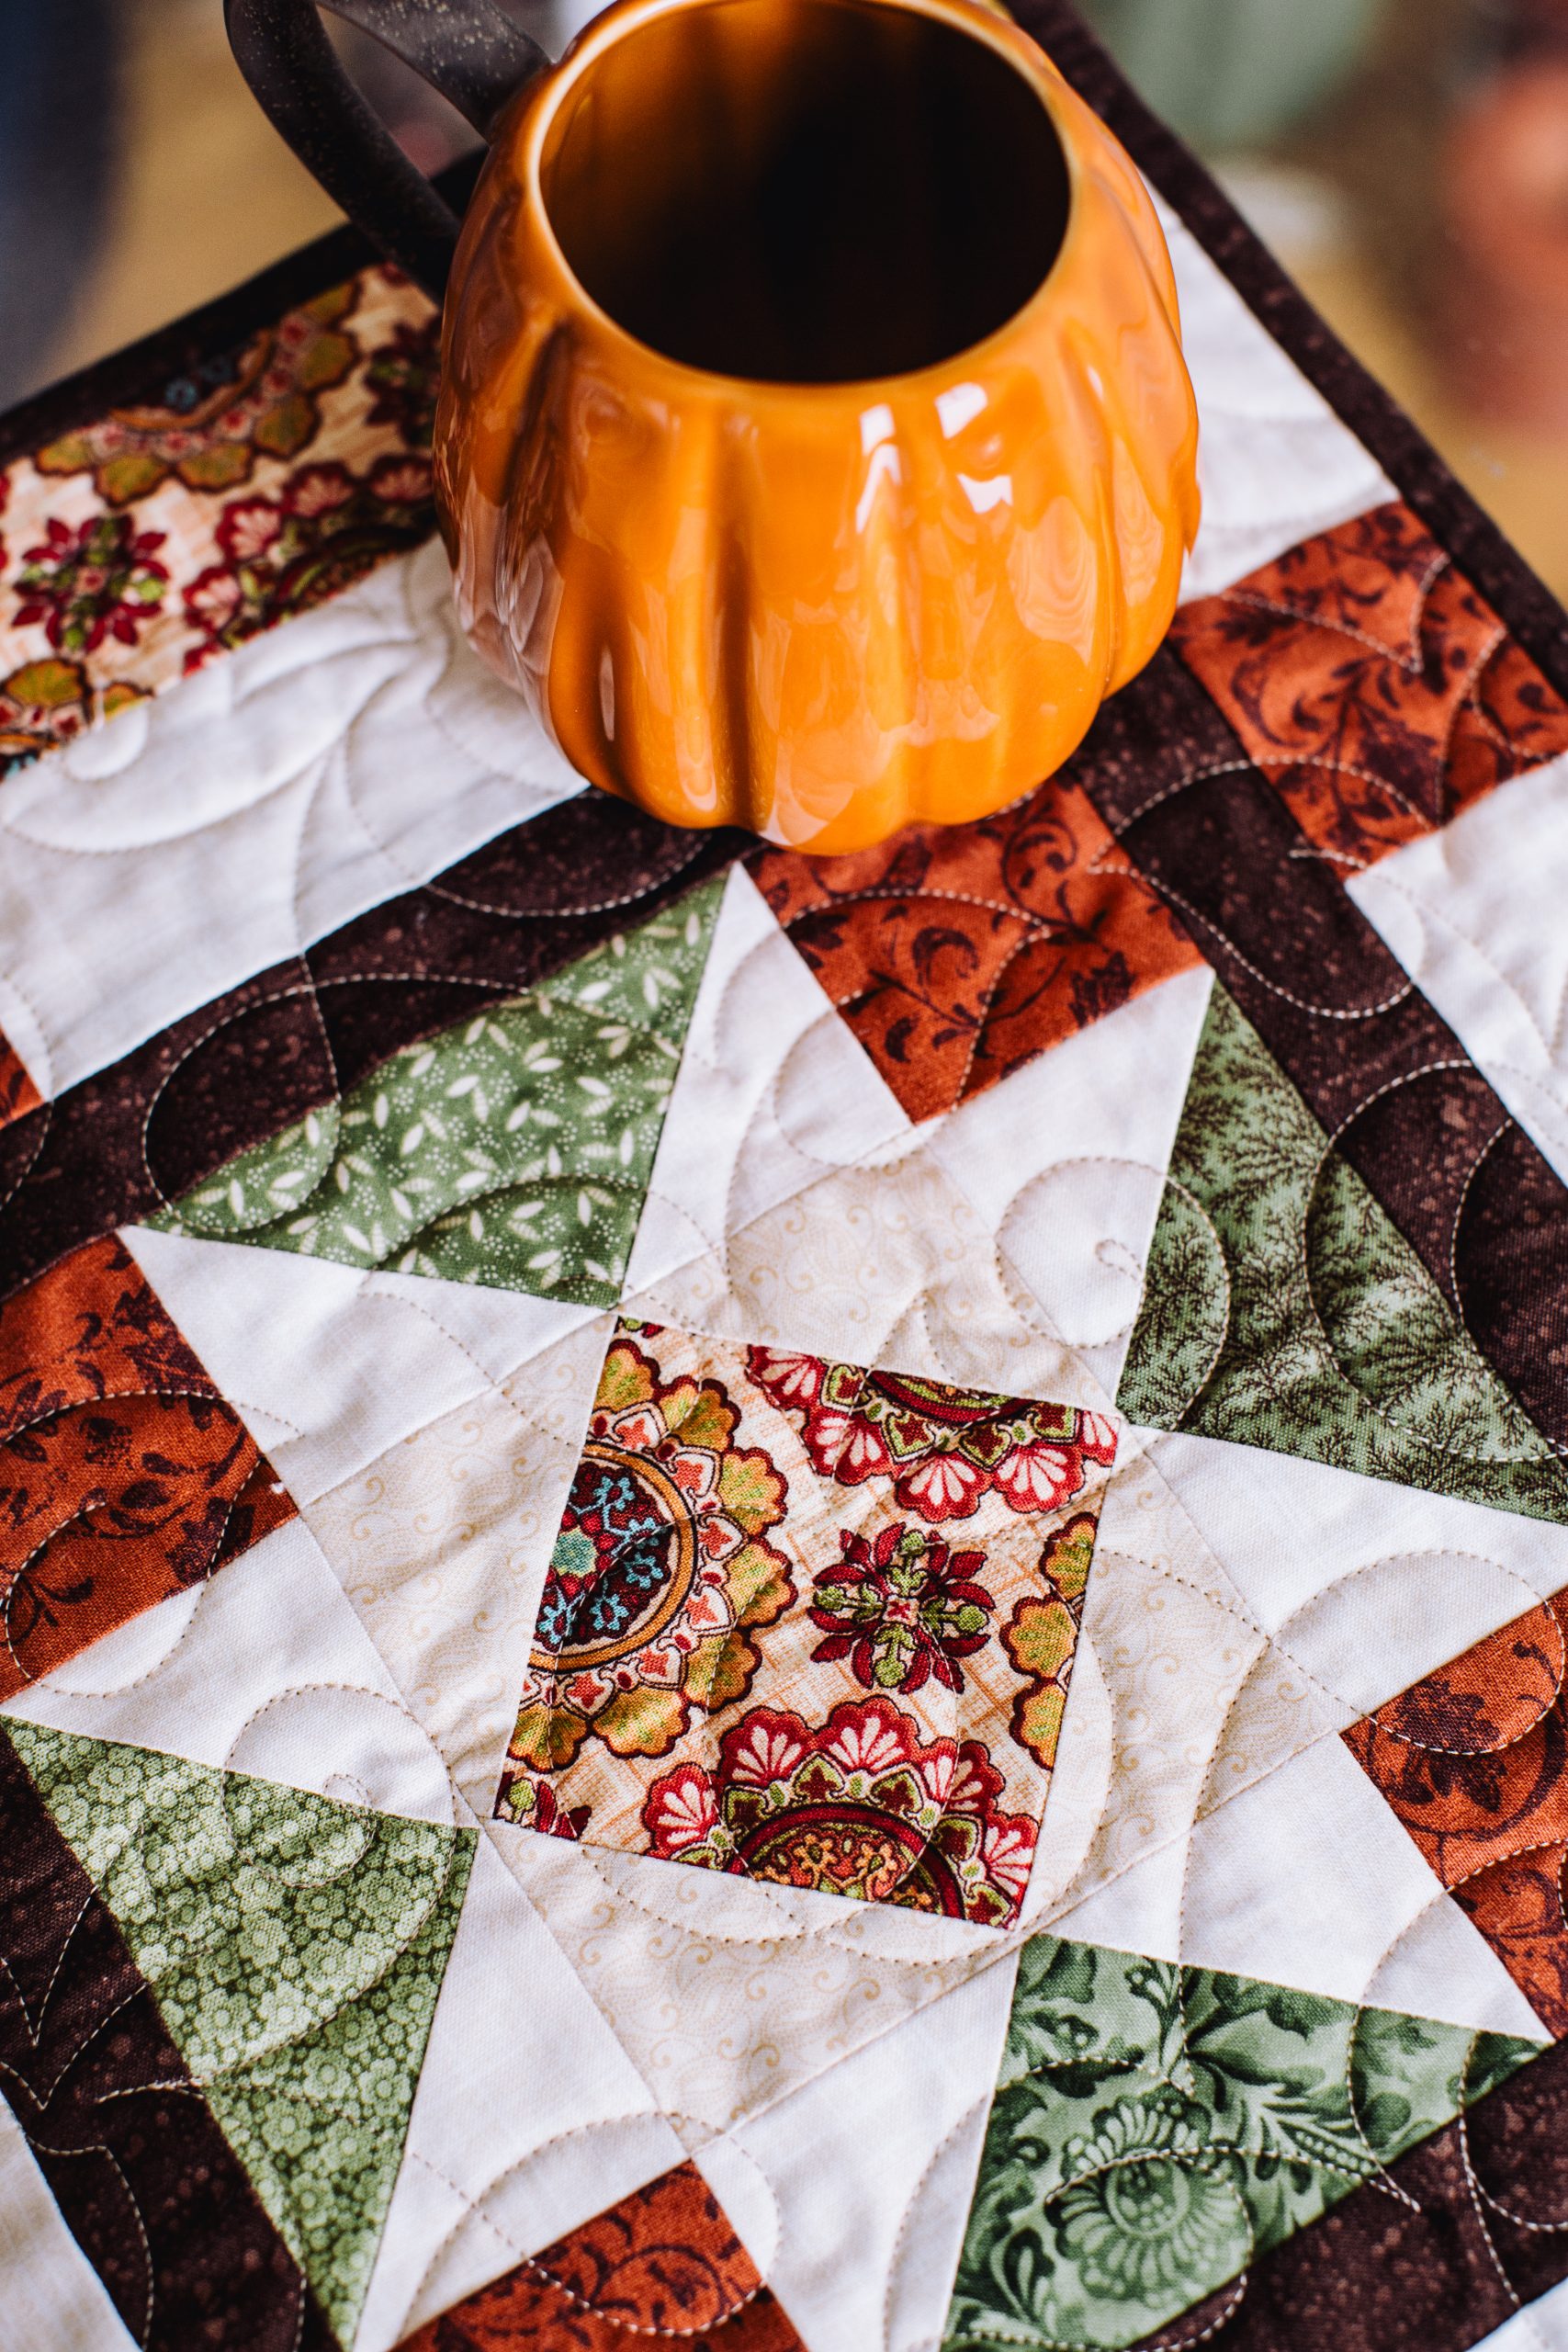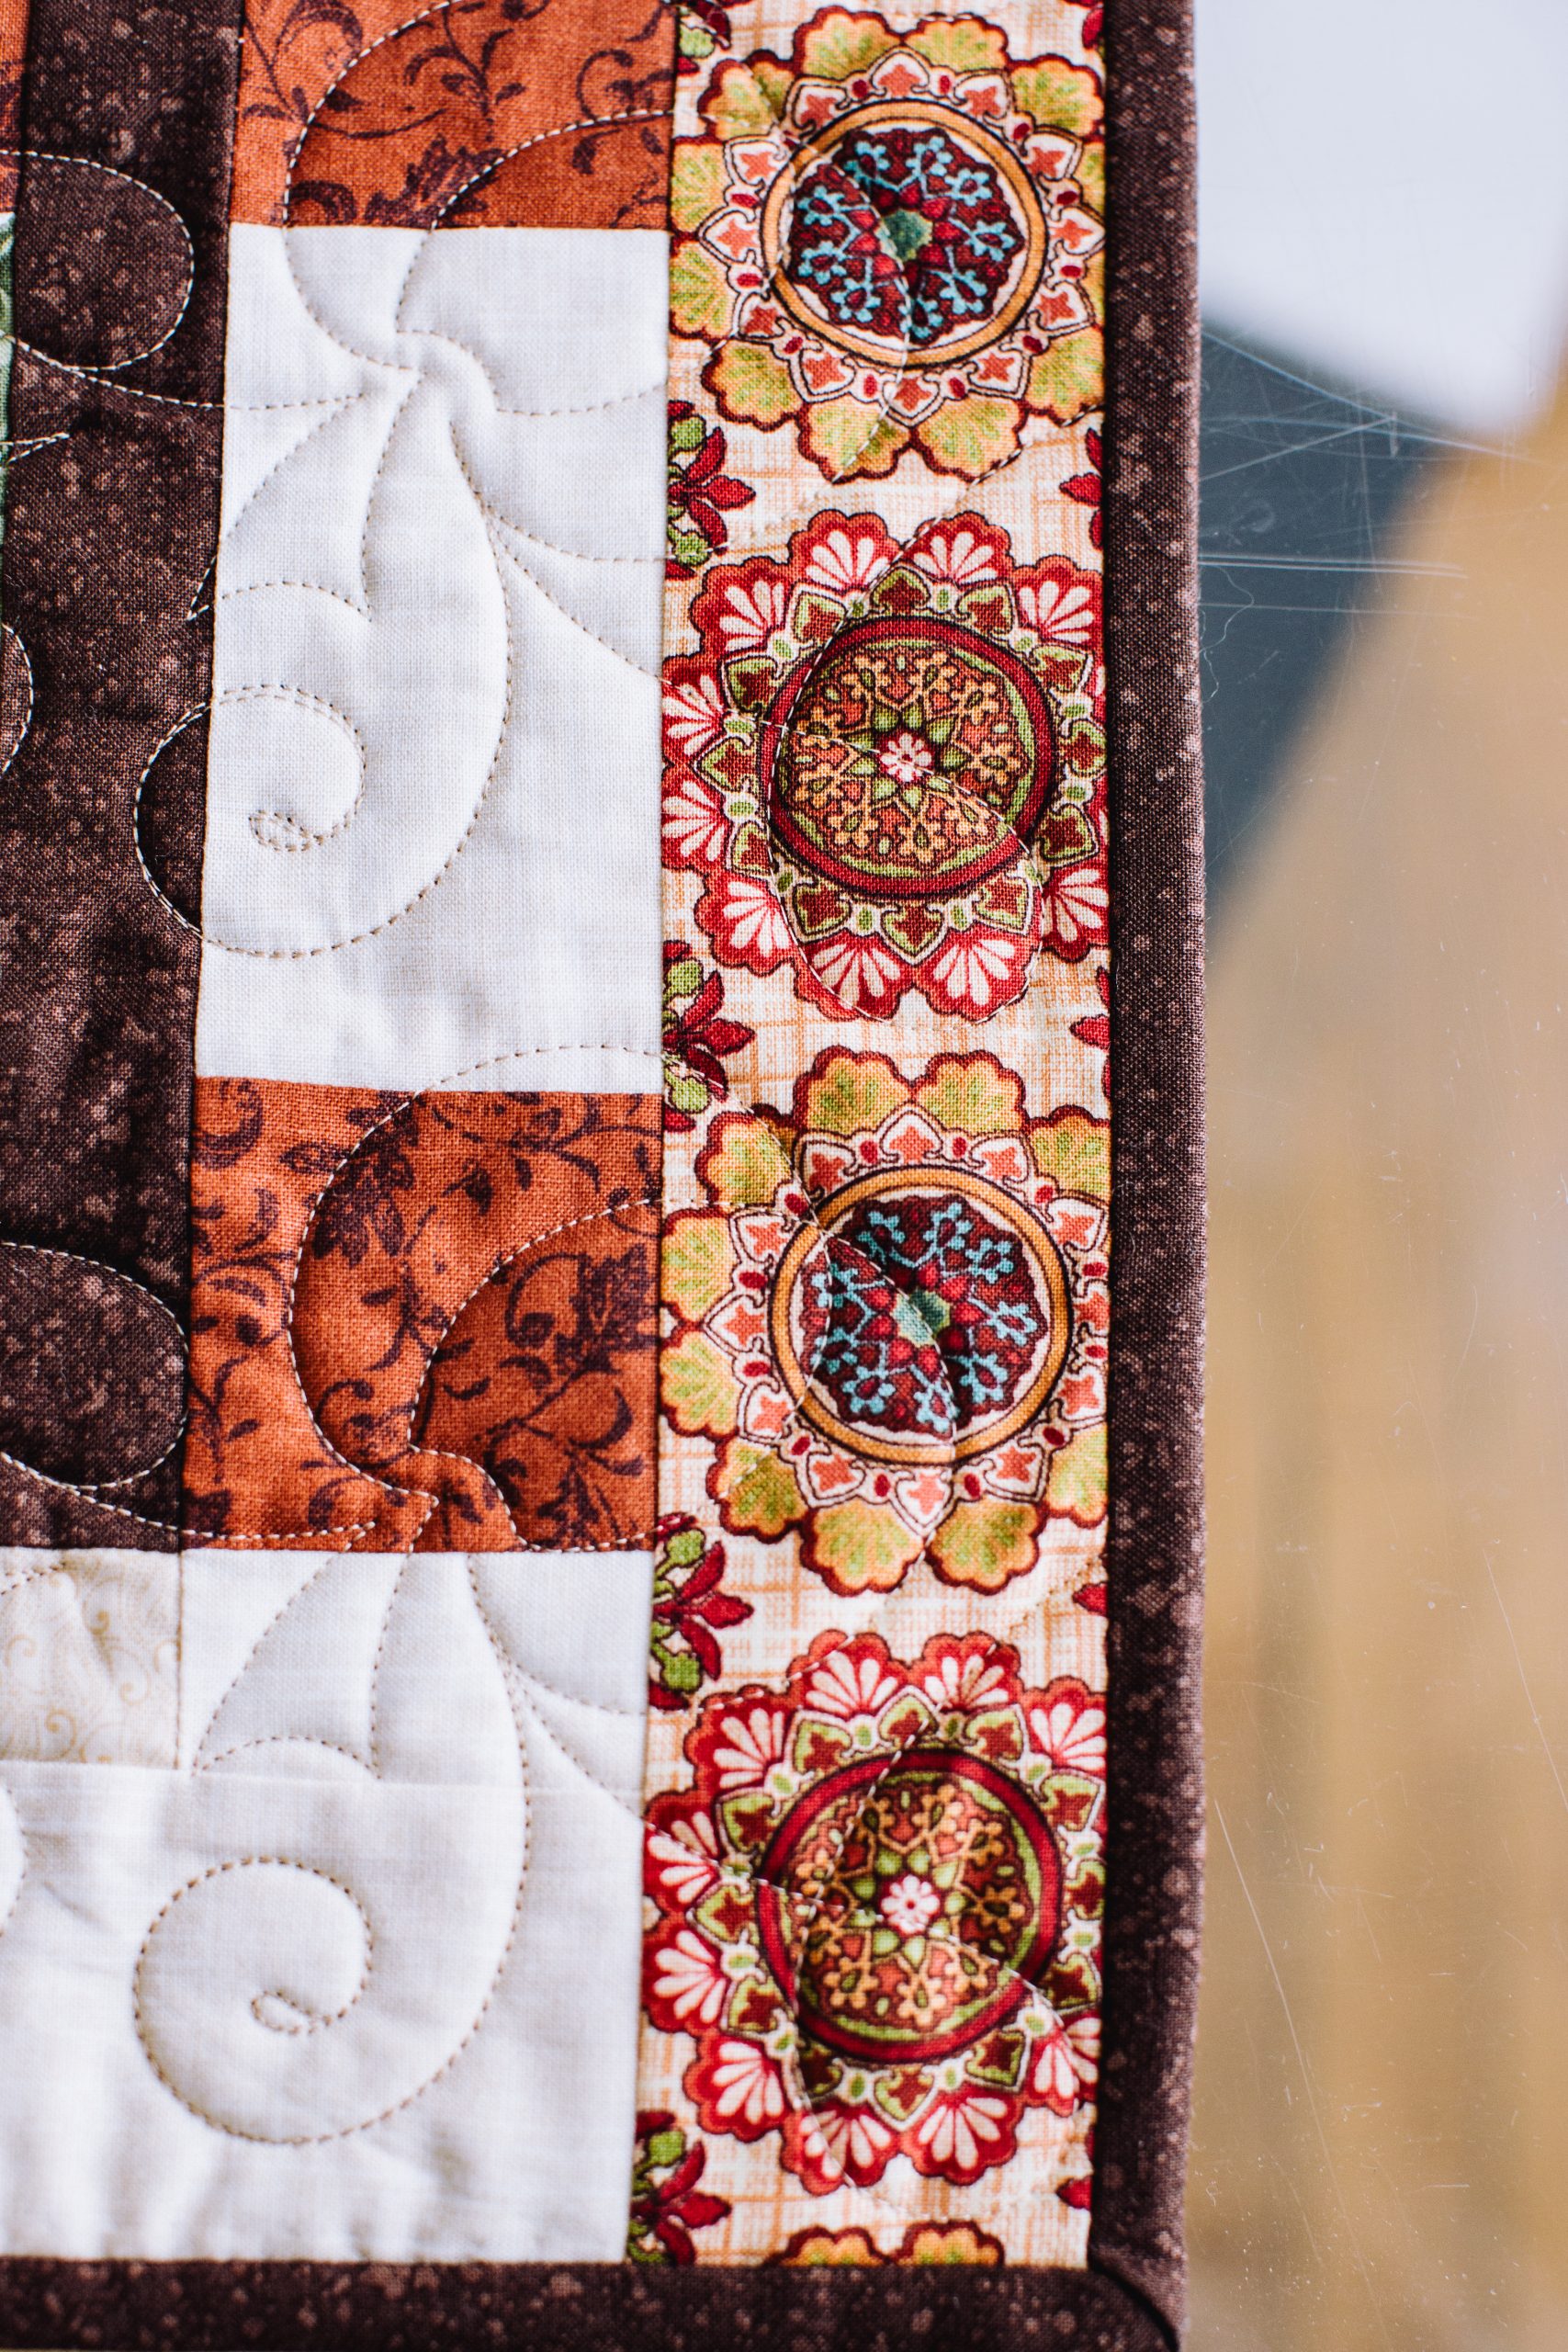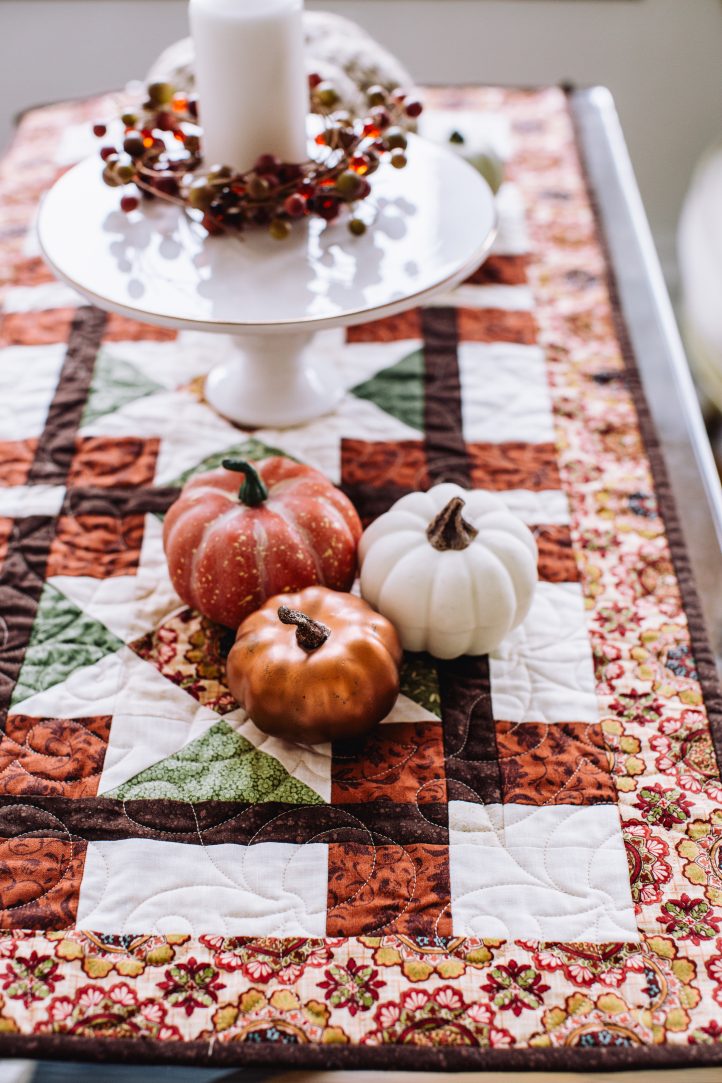
Create a gorgeous tablescape for fall with this scrappy quilted set from Megan Farrell. Originally featured in our sister magazine We Like Quilting, this table runner and placemat pattern features classic 8-point stars made from fabric scraps in rich, autumn colors. A dreamy way to set your table for the upcoming Thanksgiving holiday, this quilted table runner pattern will give your dining room sweet, country kitchen vibes all season long.
Designer Note: All directions based on 1/4” seam allowance.
Materials:
- Fabric Requirements:
- Accent Fabric #1: 1/2 yard
- Accent Fabric #2: 1/3 yard
- Background Fabric #1: 1/4 yard
- Background Fabric #2: 1 yard
- Sashing: 3/4 yard
- Accent Fabric #3: 3/4 yard
- Binding: 3/4 yard (suggested cut into 2 1/2” strips)
- Backing: 3 yards
- Scrappy:
- Quantity 28: Scrappy 2 1/2” x 4 1/2” rectangles
Cutting Instructions:
- Accent Fabric #1: Cut 5 strips 2 1/2” x Width of Fabric, sub cut qty 76 2 1/2” squares.
- Accent Fabric #2: Cut 1 strip 8 1/2” x Width of Fabric, sub cut qty 26 1 1/2”x 8 1/2” rectangles (sashing).
- Background Fabric #1:
- Cut 2 strips 2 1/2” x Width of Fabric, sub cut qty 28 2 1/2” squares.
- Cut 1 strip 1 1/2” x Width of Fabric, sub cut qty 24 1 1/2” squares.
- Background Fabric #2:
- Cut 5 strips 2 1/2” x Width of Fabric, sub cut qty 56 2 1/2” squares, qty 24 1 1/2” x 2 1/2” rectangles.
- Cut 2 strips 4 1/2” x Width of Fabric, sub cut qty 24 2 1/2” x 4 1/2” rectangles.
- Cut 2 strips 3 1/2” x Width of Fabric, sub cut qty 20 2 1/2” x 3 1/2” rectangles.
- Accent Fabric #3:
- Cut 7 strips 2 1/2” x Width of Fabric, sub cut:
- Qty 10 2 1/2” x 14 1/2” rectangles.
- Qty 2 2 1/2” x 36 1/2” rectangles.
- Cut 1 strip 4 1/2” x Width of Fabric, sub cut Qty 7 4 1/2” Squares.
- Cut 7 strips 2 1/2” x Width of Fabric, sub cut:
Sewing Instructions:
DIRECTIONS TO PIECE YOUR BLOCK:
You will be completing these steps to create 7 blocks (4 for your placemats and 3 for your table runner).
- To create center of block (complete this step 7 times):
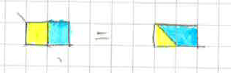
- Snowball opposite corners of your Accent #3 4 1/2” scrappy square with quantity 2 2 1/2” back ground #1 squares. To Snowball, you will place your 2 1/2” background #1 square right sides together with your Accent #3 4 1/2” square in in the corner. Sew from corner to corner (see image below). Once you have sewn from corner to corner, you will cut the outside of the square off and press the remaining portion toward the corner.
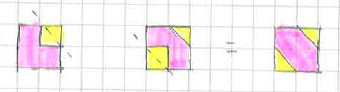
- Snowball remaining corners of your 4 1/2” Scrappy square with quantity 2 2 1/2” background #1 squares.
- Snowball opposite corners of your Accent #3 4 1/2” scrappy square with quantity 2 2 1/2” back ground #1 squares. To Snowball, you will place your 2 1/2” background #1 square right sides together with your Accent #3 4 1/2” square in in the corner. Sew from corner to corner (see image below). Once you have sewn from corner to corner, you will cut the outside of the square off and press the remaining portion toward the corner.
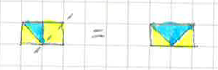
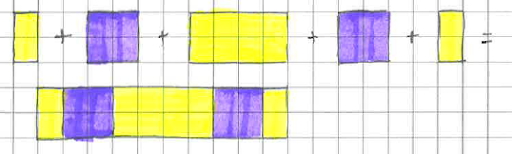
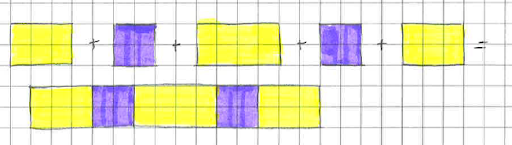
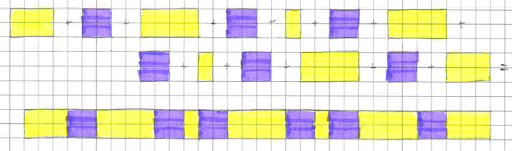
- Snowball bottom Left corner of 2 1/2” x 4 1/2” scrappy Rectangle with quantity one 2 1/2” background #2 square. Complete four times for one block (total of 28).
- Snowball bottom right corner of 2 1/2” x 4 1/2” scrappy Rectangle (from Step 2) with quantity one 2 1/2” background #2 square. Complete four times for one block. This will complete 2 1/2” x 4 1/2” flying geese. (four per block, total of 28) ***Flying geese are units with that can be seen in image below.
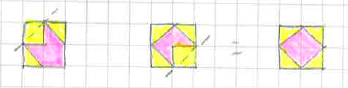
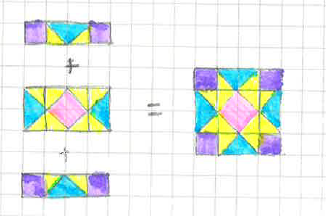
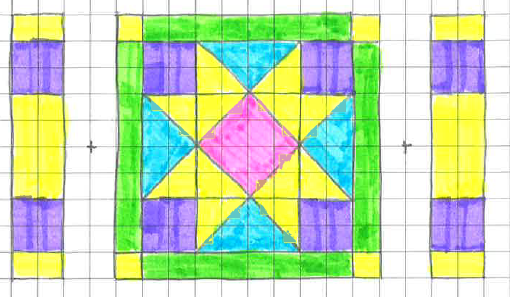
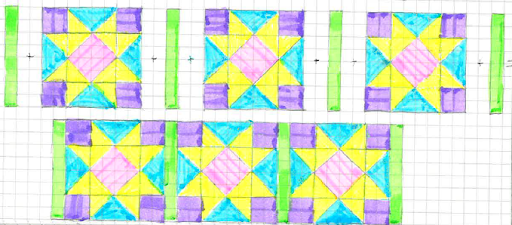
- To complete block, you will sew rows of block together:
- (Step A) 2 1/2” Accent square + 2 1/2”x 4 1/2” flying geese (with snowballs on bottom of rectangle) + 2 1/2” Accent square.

- (Step B) 2 1/2”x 4 1/2” flying geese (with snowballs on the right) + Center 4 1/2” square + 2 1/2”x 4 1/2” flying geese (with snowballs on the Left).
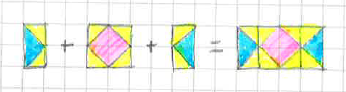
- (Step C) 2 1/2” Accent square + 2 1/2”x 4 1/2” flying geese (with snowballs on top of rectangle) + 2 1/2” Accent square.
- (Step D) Sew Step A to the top of Step B and then Step C to the bottom of Step B.
- (Step A) 2 1/2” Accent square + 2 1/2”x 4 1/2” flying geese (with snowballs on bottom of rectangle) + 2 1/2” Accent square.
Note: ****Complete Steps 4A-4D a total of 7 times.
DIRECTIONS TO LAY OUT SASHING AND BLOCK FOR PLACEMENT:
- Create sashing row (border row) – Complete quantity 2 per placemat.
- 1 1/2” background square + 1 1/2” x 8 1/2” sashing + 1 1/2” background square.

- 1 1/2” background square + 1 1/2” x 8 1/2” sashing + 1 1/2” background square.
- Create one Block Row:
- 1 1/2”x 8 1/2” sashing + block +1 1/2”x 8 1/2” sashing.
- 1 1/2”x 8 1/2” sashing + block +1 1/2”x 8 1/2” sashing.
- Sew one sashing (border) row (Step 1) to top of Step 2 and sew last sashing (border) row (Step 1) to bottom of Step 2.
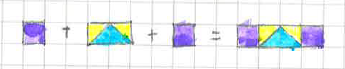
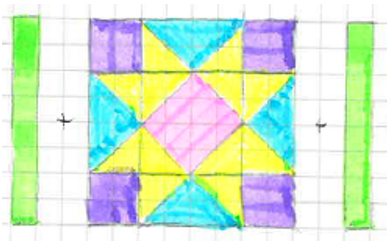
DIRECTIONS FOR PIECED BORDER FOR PLACEMENT:
- Sew together in this order: 1 1/2”x 2 1/2” BG #2 to 2 1/2” Accent #1 to BG #2 2 1/2” x 4 1/2” rectangle to 2 1/2” Accent #1 to 1 1/2”x 2 1/2” BG #2 (complete this twice for each placemat – total of eight short borders).
- Sew together in this order: 2 1/2” x 3 1/2” BG #2 to 2 1/2” Accent #1 to BG #2 2 1/2” x 4 1/2” rectangle to 2 1/2” Accent #1 to 2 1/2” x 3 1/2” BG #2 (complete this twice for each placemat – total of eight long borders).
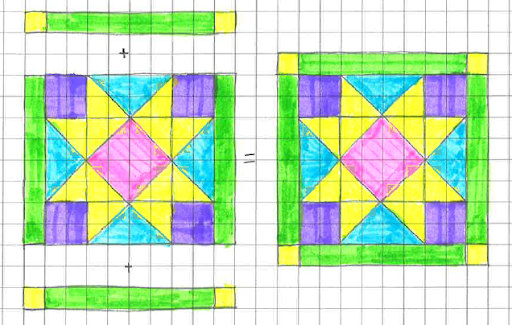
DIRECTIONS FOR LAYOUT OF PLACEMAT:
- Sew Short placemat border to left and right side of the block.
- Sew Long placemat border to top and bottom of Step 1.
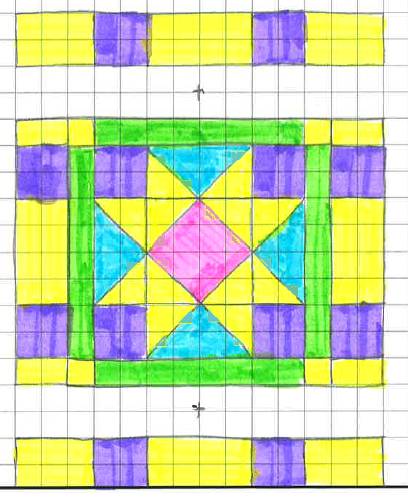
- Sew Accent #3 2 1/2” x 14 1/2” rectangles to left and right of Step 2.
Note: ****Complete these steps for all four placemats.
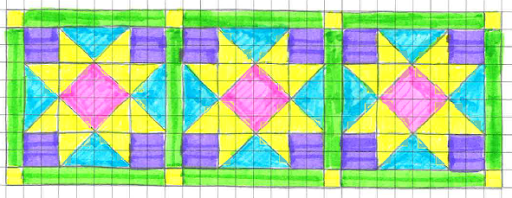
DIRECTIONS TO LAY OUT SASHING AND BLOCKS FOR TABLE RUNNER:
- Create rows for the layout:
- (A) Sashing Rows: 1 1/2” background square + 1 1/2” x 8 1/2” sashing + 1 1/2” background square + 1 1/2” x 8 1/2” sashing + 1 1/2” background square + 1 1/2” x 8 1/2” sashing + 1 1/2” background square (complete this 2 times).

- (B) Block Rows: 1 1/2”x 8 1/2” sashing + block +1 1/2”x 8 1/2” sashing + block + 1 1/2”x 8 1/2” sashing + block + 1 1/2”x 8 1/2” sashing.
- Sew rows together: Sashing row (1a) + Block Row (1b) + Sashing Row (1a).
- (A) Sashing Rows: 1 1/2” background square + 1 1/2” x 8 1/2” sashing + 1 1/2” background square + 1 1/2” x 8 1/2” sashing + 1 1/2” background square + 1 1/2” x 8 1/2” sashing + 1 1/2” background square (complete this 2 times).
DIRECTIONS FOR PIECED BORDER FOR TABLE RUNNER:
- Sew together in this order: 1 1/2”x 2 1/2” BG #2 to 2 1/2” Accent #1 to BG #2 2 1/2” x 4 1/2” rectangle to 2 1/2” Accent #1 to 1 1/2”x 2 1/2” BG #2 (Complete this twice for the table runner).

- Sew together in this order: 2 1/2” x 3 1/2” BG #2 to 2 1/2” Accent #1 to BG #2 2 1/2” x 4 1/2” rectangle to 2 1/2” Accent #1 to 1 1/2” x 2 1/2” BG #2 to 2 1/2” Accent #1 to BG #2 2 1/2” x 4 1/2” rectangle to 2 1/2” Accent #1 to 1 1/2” x 2 1/2” BG #2 to 2 1/2” Accent #1 to BG #2 2 1/2” x 4 1/2” rectangle to 2 1/2” Accent #1 to 2 1/2” x 3 1/2” BG #2 (Complete this twice for table runner).
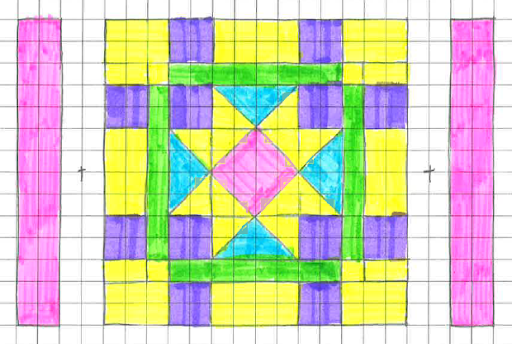
DIRECTIONS FOR LAYOUT OF TABLE RUNNER:
- Sew Short table runner border to left and right side of the table runner row.

- Sew long table runner border to top and bottom of Step 1.
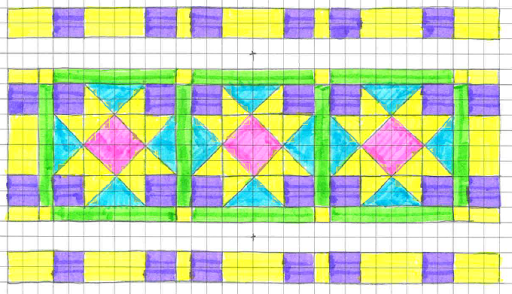
- Sew Accent #3 2 1/2” x 14 1/2” rectangles to left and right of Step 2.
- Sew Accent #3 2 1/2” x 36 1/2” rectangles to top and bottom of Step 3.