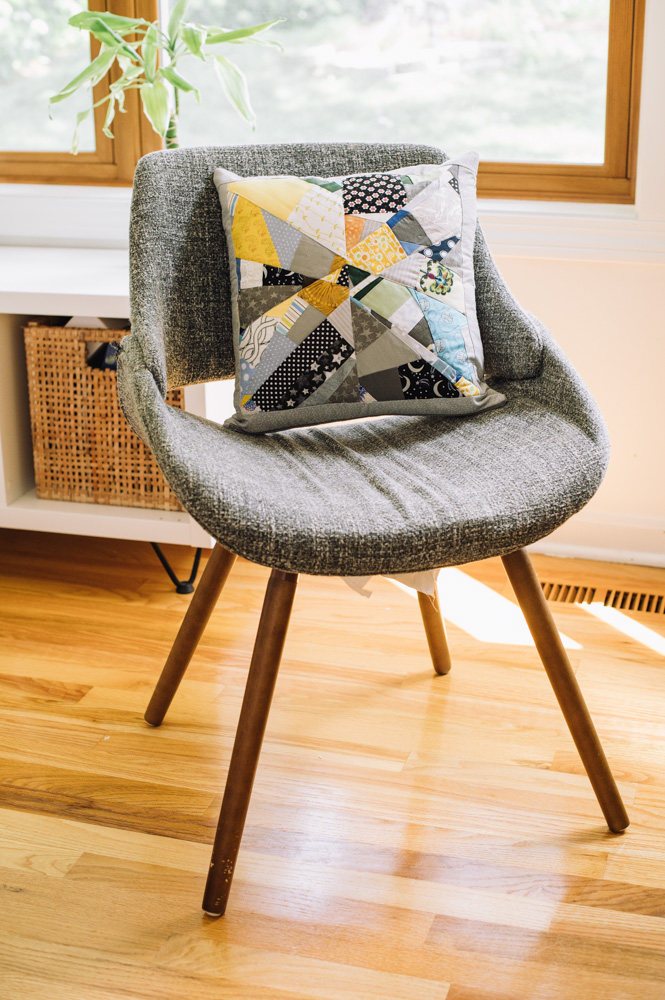
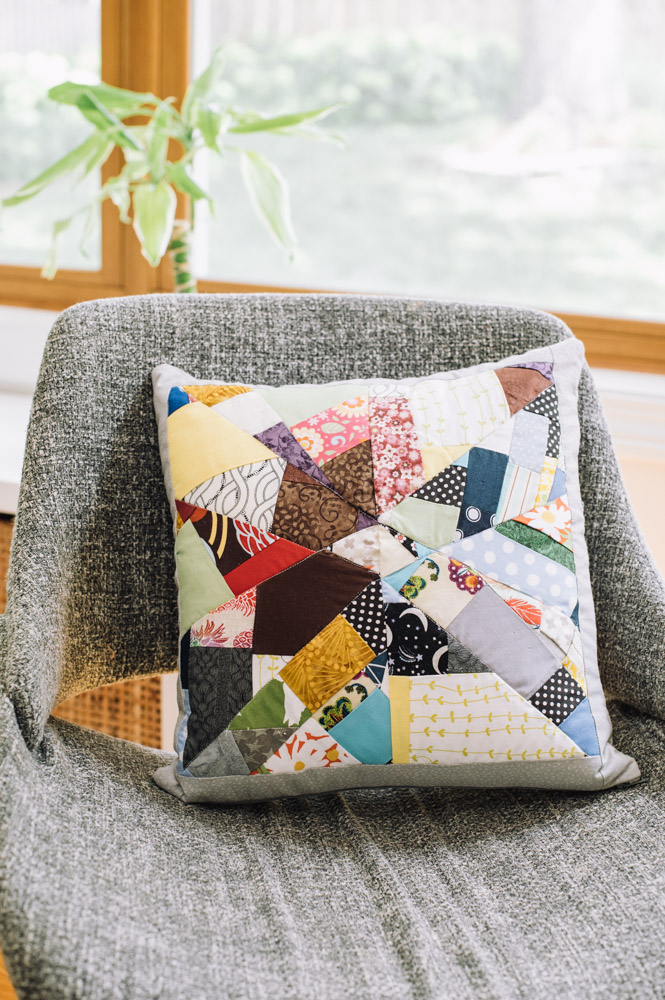
Have you ever wanted to create your own unique fabric? Using any leftover scraps and the technique of crumb quilting, any beginner to advanced quilter can create their own quilted throw pillow that will add fun and charm to any room. If you’re searching for a dreamy homemade gift idea, look no further! Create crumbs using the recipient’s favorite colors and prints, and you will delight them with a gift they will cherish forever. For a limited time, you can download this pattern for free.
Materials:
- PDF Templates – These are located at the bottom of this page. See printing instructions below.
- White thread
- Hand sewing needle
- 14” pillow form
- 1/2 yard of quilt batting
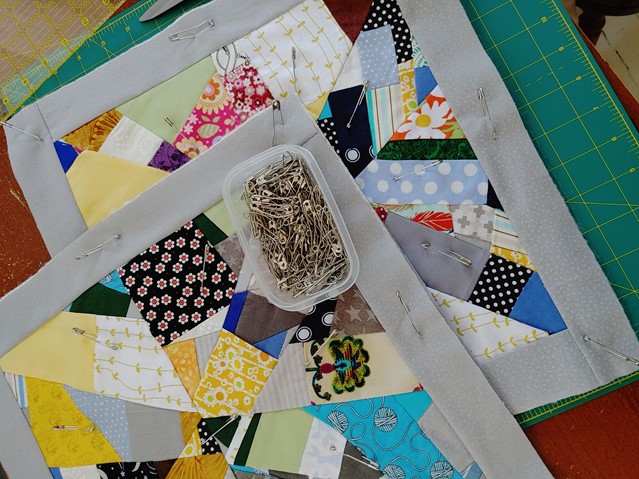
- Quilting safety pins
- Rotary cutter and mat
- 14” zipper
Fabric Requirements:
- Fabric scraps cut into strips or rectangles
- 1 yard of fabric for inside of pillow and framing
PRINTING INSTRUCTIONS:
To download the PDF templates, click on the download button at the bottom of the page. We recommend opening your download using Adobe Acrobat.
Instructions:
Note: 1/4” seam with small stitch 2.5mm
CREATE THE CRUMBS
- Using pre-cut strips and rectangles, pin pieces together.
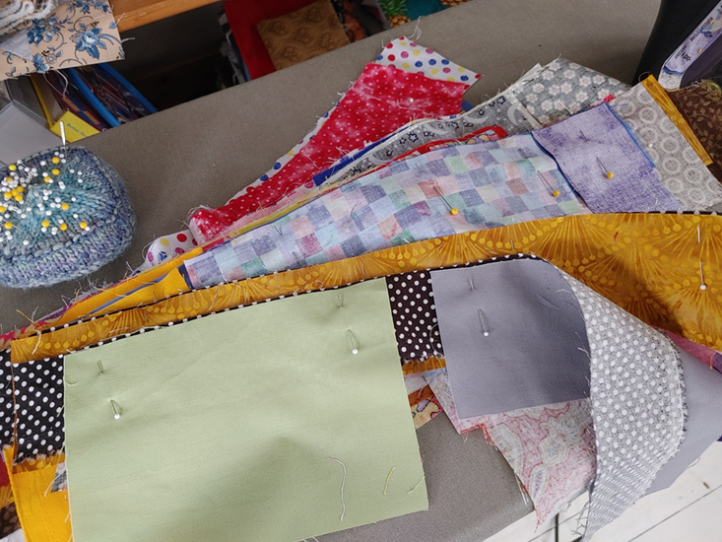
- The strips and rectangles are sewn right sides together and pressed open.
- The strips and rectangles are cut into crumbs using a rotary cutter.
CREATE THE FABRIC
- Sew the crumbs together to create a piece of fabric. Create a strip using a variety of crumbs. Sew it to another strip of crumbs. Slowly, you will create a piece of fabric. Keep trimming the fabric as it grows to keep the edges straight.
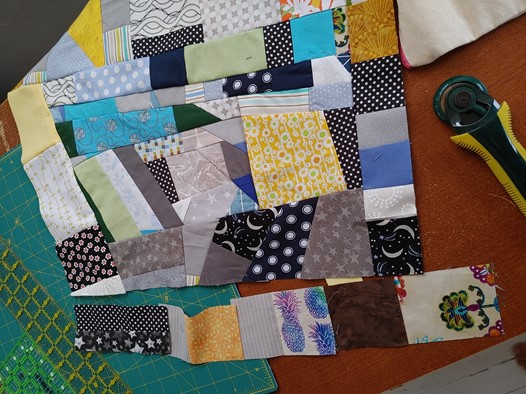
- You need to create a piece of fabric that is 30”x 36”. If your fabric isn’t big enough when you start cutting the block, just keep adding strips on. You need to create 2 blocks.
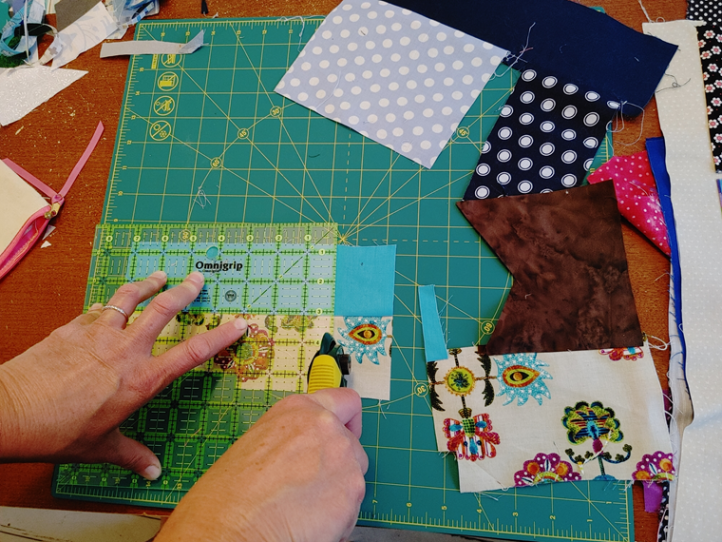
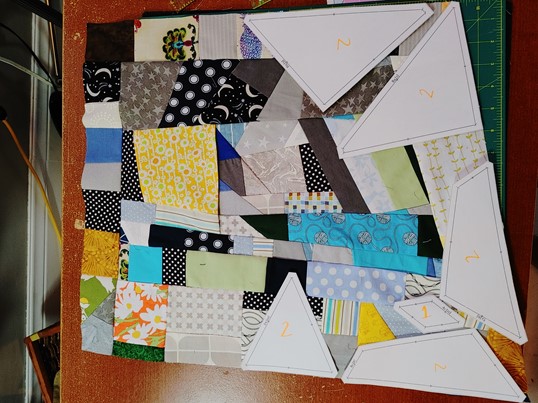
CUTTING OUT THE PIECES OF THE BLOCK
- Cut out the pieces from PDFs #2- 4.
- Lay them out on your fabric and pin and cut.
- You need to cut 4 of each piece to make a block for the front and back of the pillow.
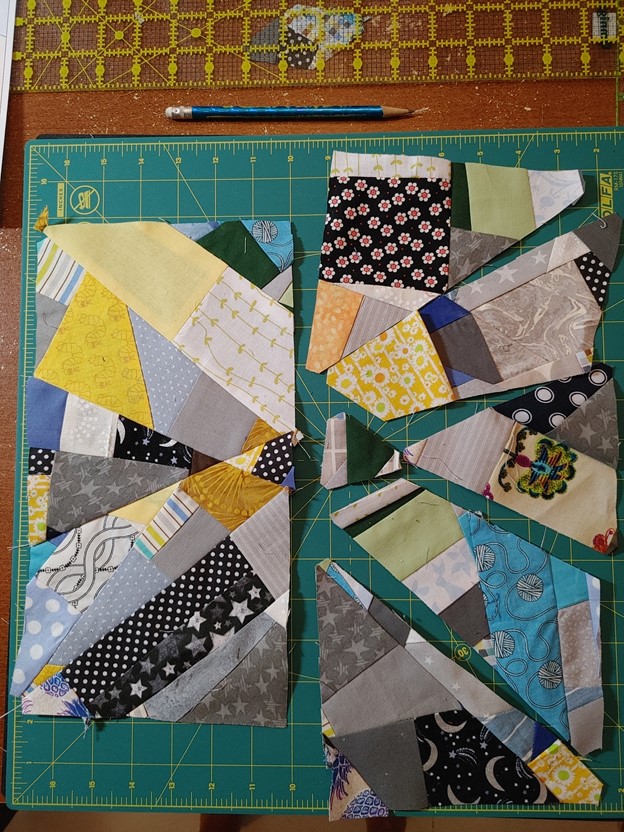
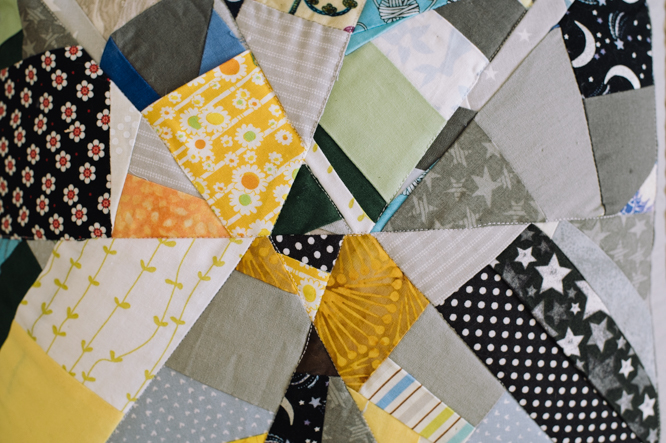
CREATE THE BLOCK
- Sew the pieces together by referring to PDF #1.
- Assemble as follows – A1 to A2, B1 to A, C1 to C2, C to A, D1 to C
- This creates one half of the block; repeat that step 3 more times.
- Sew the first half of the block to the second by matching triangle D to B on both top and bottom.
- Your finished block should be squared to 12”.
CREATE A BORDER
- Cut four strips 3” wide by 12” long and sew to the top and bottom of each block.
- Cut four strips 3” wide by 18” long and sew to the sides of each block.
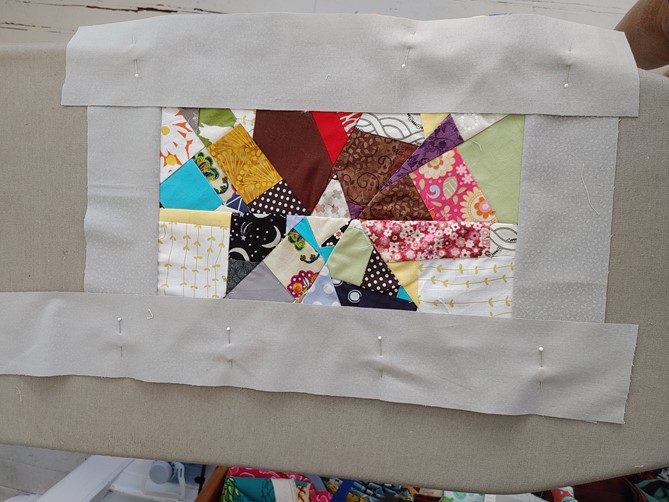
- Trim the completed, framed block to 15” square.
QUILTING
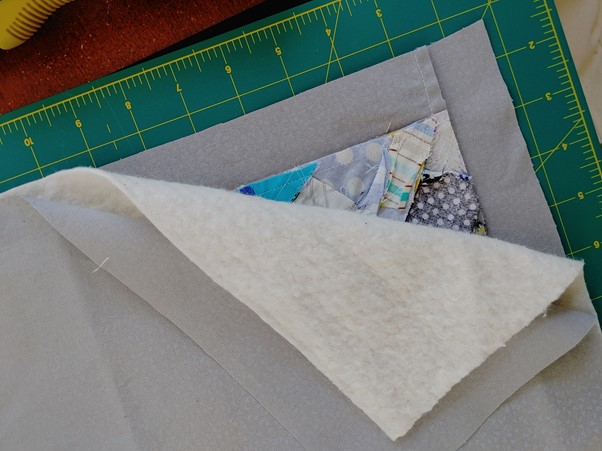
- Cut 15” squares of batting and backing fabric for each side.
- Place quilt block right side down, placing batting on top. Cover with backing fabric, right side up.
- Repeat for the second side. Pin the fabrics for quilting.
- Using your sewing machine and a suitable thread, stitch in the ditch (stitch in the seam to outline the parts of the block) around the outside of each block.
- Stitch around each piece of the quilt block to define the individual shapes of the block.
- You can also hand quilt hearts or flowers on the pillow.
ZIPPER
- Create zipper tabs by folding two – 2”x 1” rectangles into thirds and sewing them to each end of the zipper.
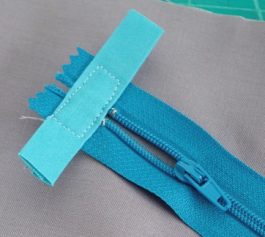
- Place the zipper right side down on the right side of the top of the pillow – place the zipper so that there is a 1/4” seam allowance on each end.
- Using a zipper foot, sew across as close to the zipper as possible. Move the zipper pull out of the way as you sew.
- Take the other side of the pillow and place it on the zipper – right side of zipper and pillow square together. Sew the zipper on.
- Lay the pillow flat with the right sides facing up and the zipper in the middle, and press flat. Open the zipper.
FINISHING
- Fold the pillow right sides together, and pin or clip to keep the edges even. Starting at the top right side, sew a generous 1/4” seam to close the side. Continue all the way around the pillow to the top. Clip the corners and the edges and turn the pillow out, pressing out the corners with a knitting needle. Slip the pillow form into the pillow and zip it shut.
love this pattern!
Can’t wait to get started 2023 here I come !!