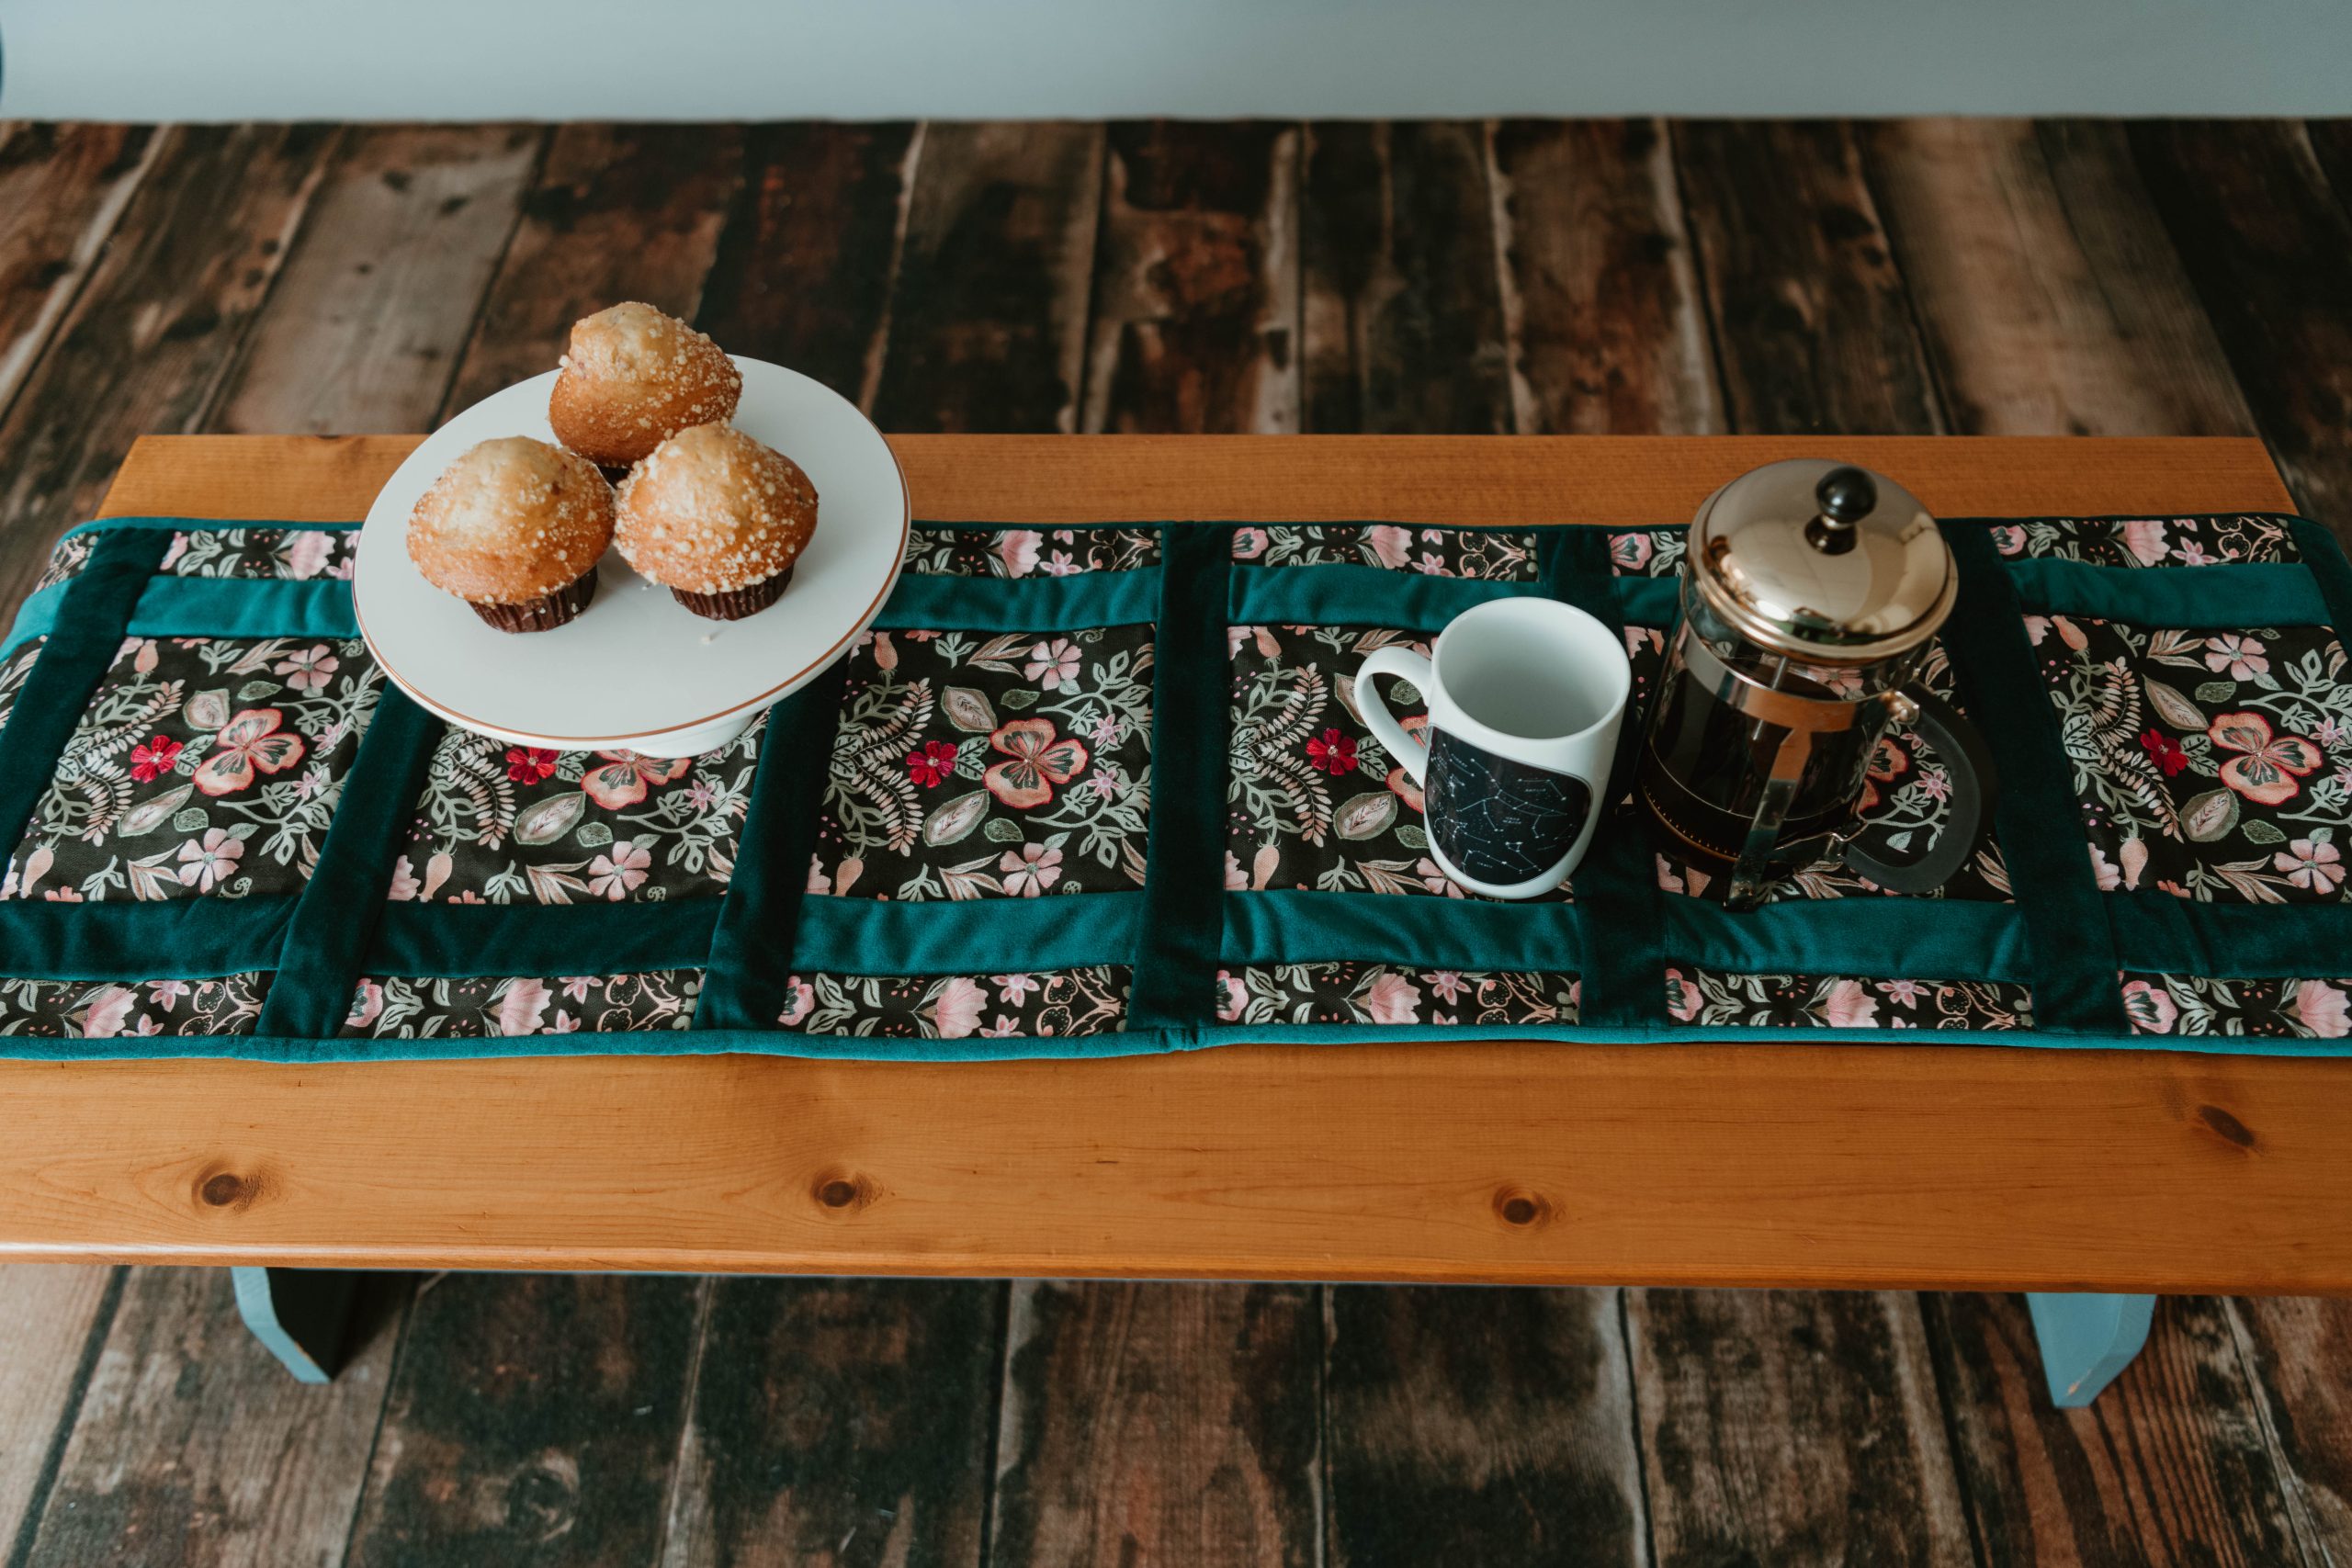
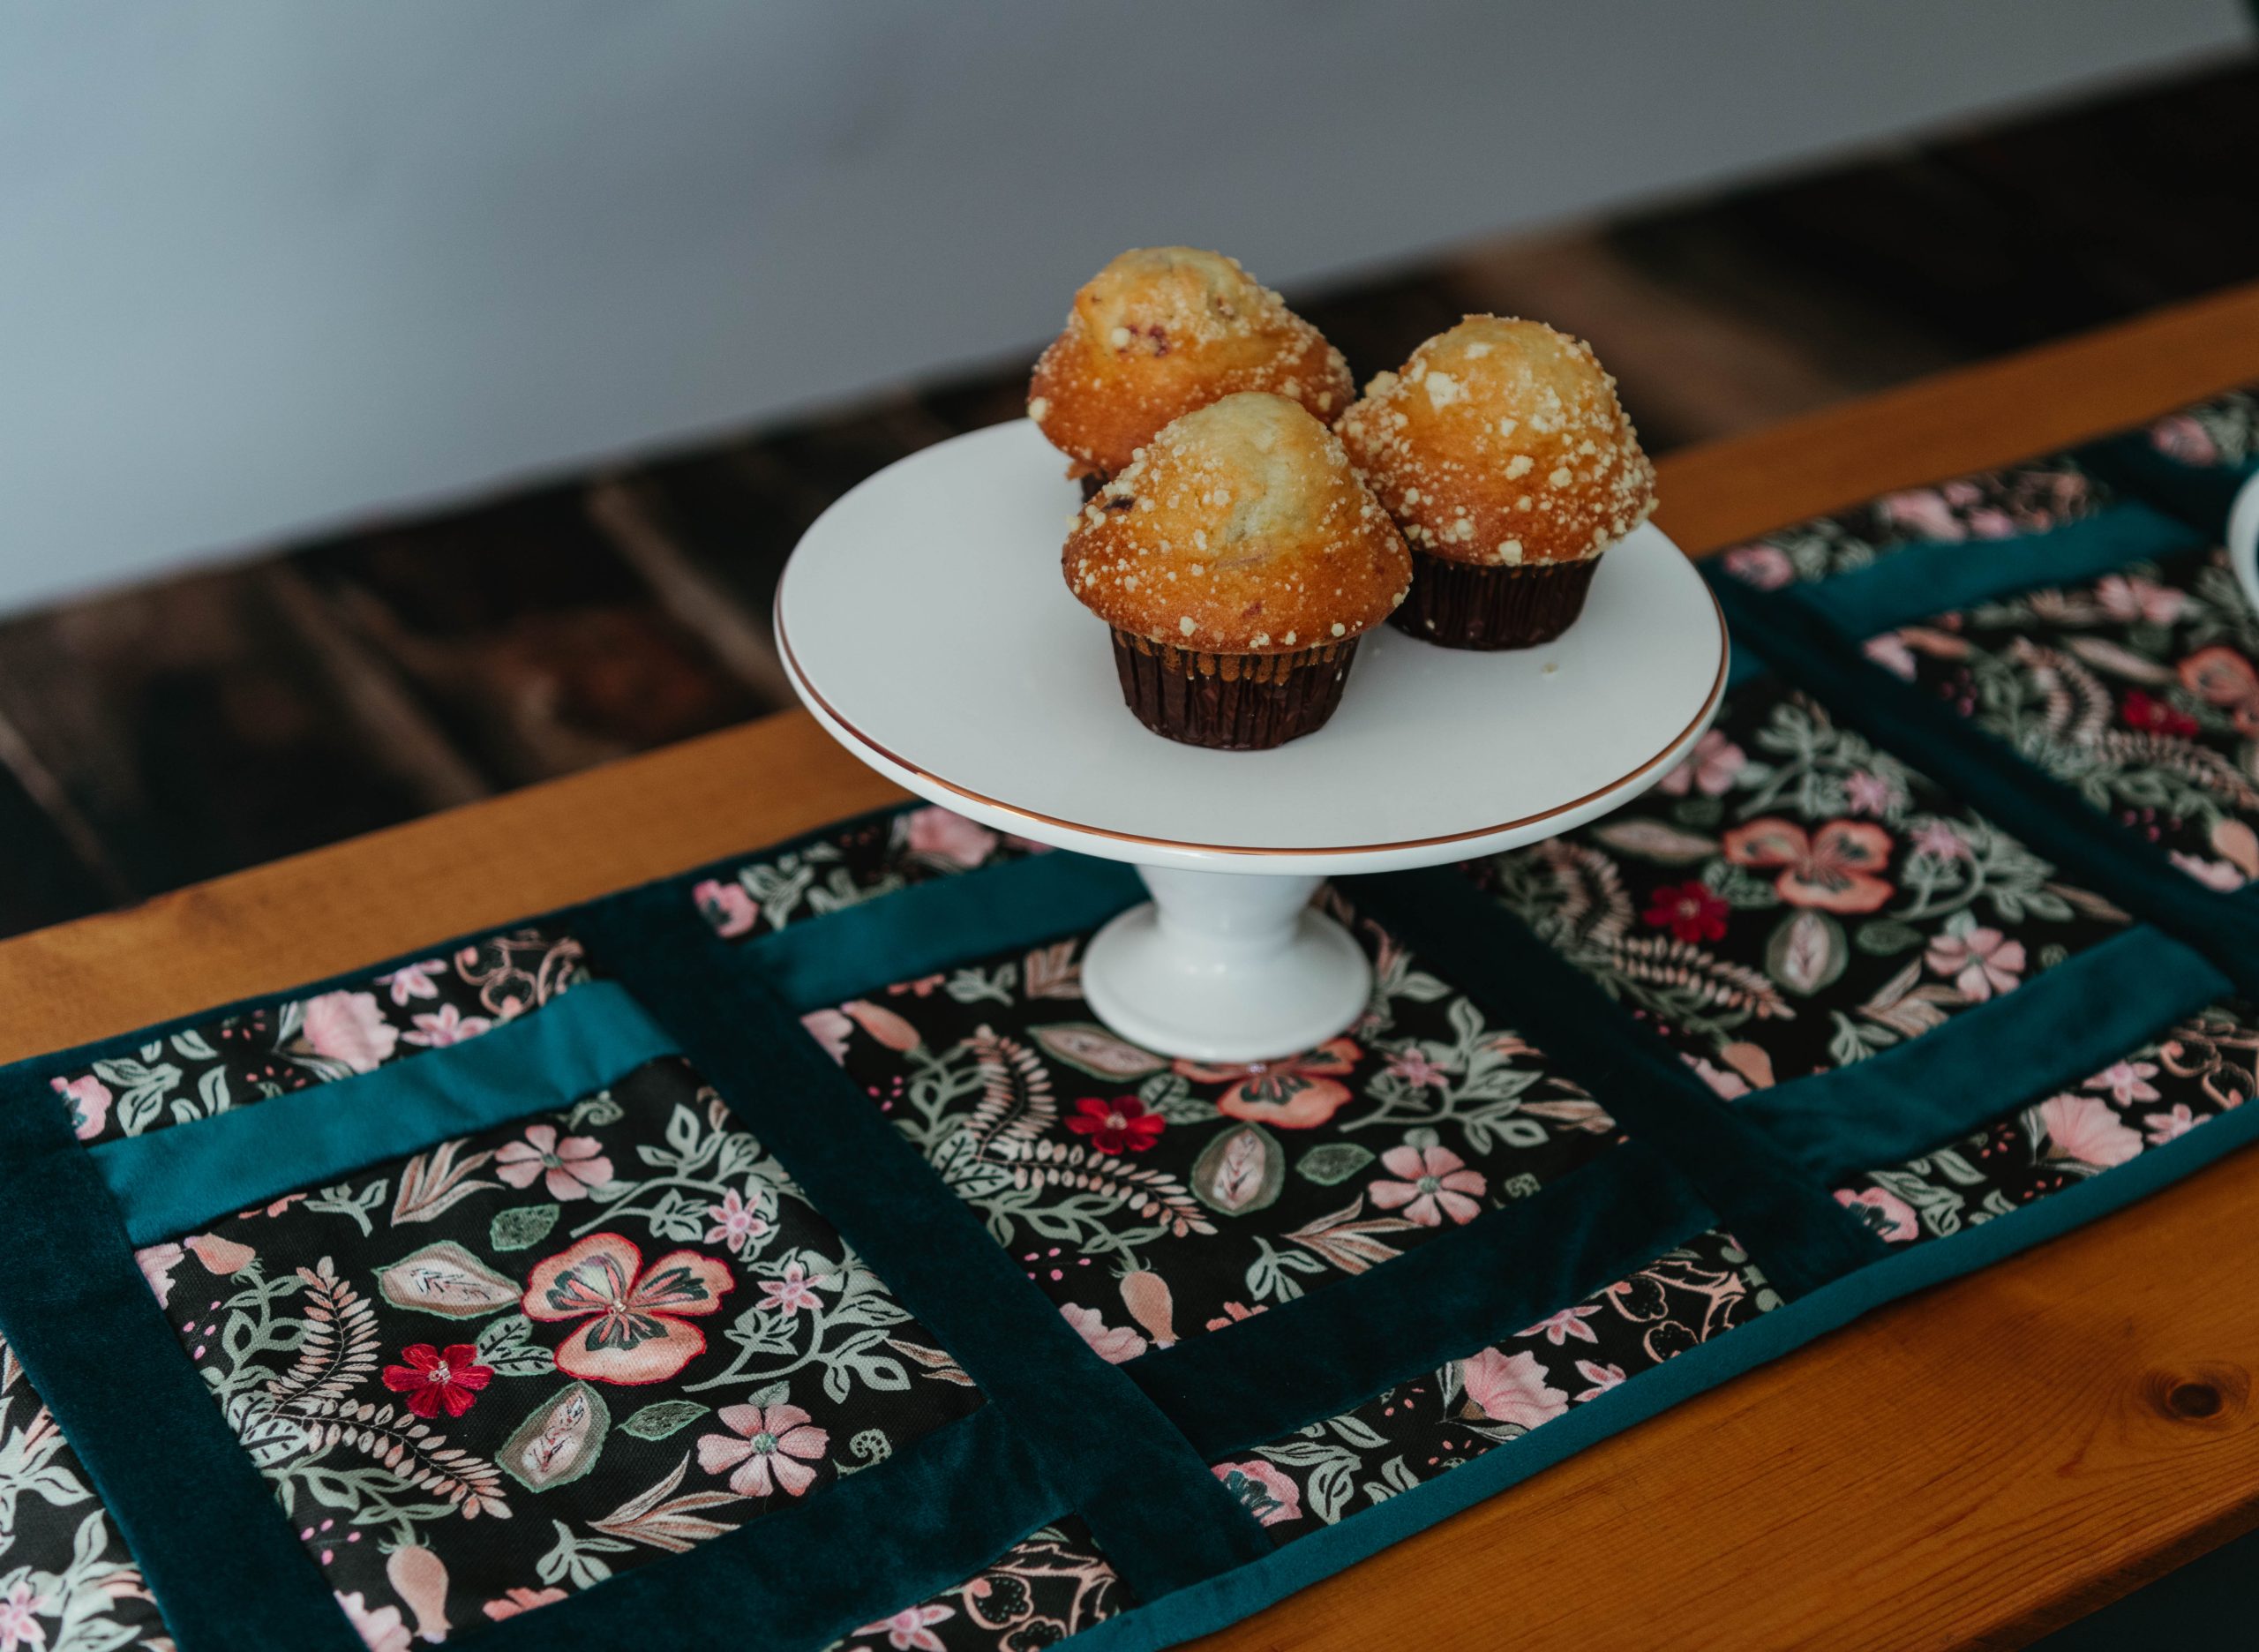
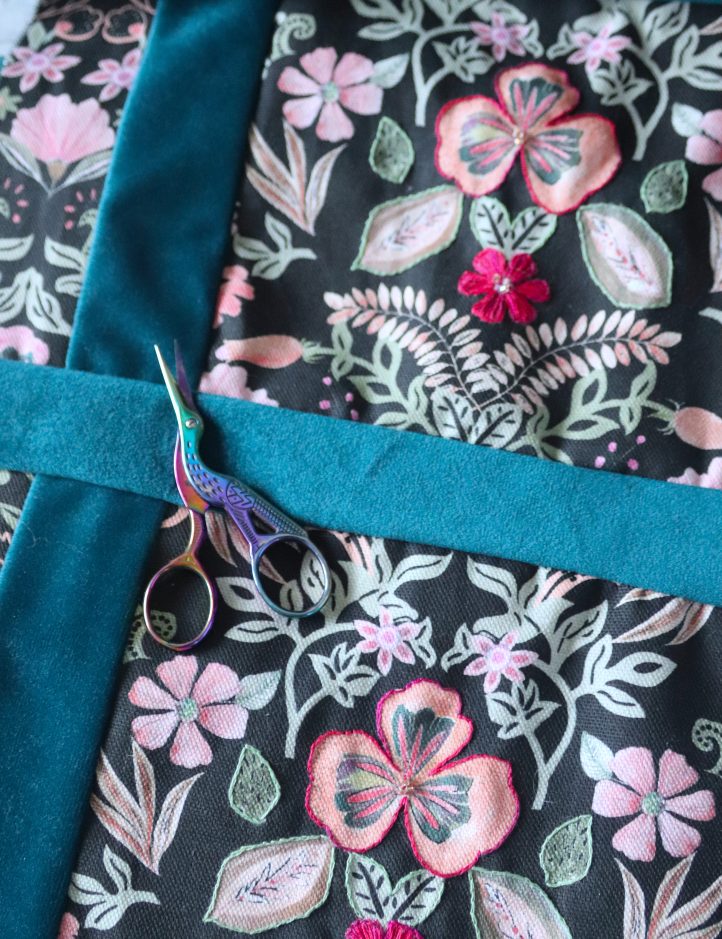
Our favorite trend for Fall 2024? Dark and moody florals! Create your own stunning quilted table runner in gorgeous fall florals with this pattern from Sophie Tarrant. Featuring sumptuous teal velvet trim, this fall table runner pattern has embroidered highlights accented with golden seed beads that will shimmer under evening candlelight. Add a luxe feel to your next gathering with this elegant, quilted table runner.
Skill Level: Easy
Seam Allowances: 1/4”
Size: Custom to fit your table
Designer Note: As a general rule, a runner should overhang each end of your table by approximately 6” – 10”. Therefore, to work out how long your runner needs to be, measure your table and add an additional 12”-20” to the length. This table runner is a modular patchwork design, so you’ll need to divide your finished runner size into sections – after stitching, each finished embroidered block is 6 1/2” square, and the horizontal velvet strips that divide them are 1 1/2” wide. Therefore, for each embroidered block and velvet strip pair, you need to add at least 8” to the length of your runner, plus an additional 3” for the top and bottom edge blocks.
Materials:
- Fabric: Dark floral graphic print, 2 yards – We used Skoll Folk Art 100% cotton from terrysfabrics.co.uk; teal velvet, 1/2 yard
- Lightweight quilt batting: 13” x 71”
- Sewing thread: Black
- Embroidery floss: Colors to match your floral print – We used DMC Color Variations in shade 4210 Radiant Ruby, and DMC Mouline in shade 988 Olive
- Seed beads: Gold
- PDF Layout – This is located at the bottom of this page. Please see printing instructions below.
Tools:
- Embroidery hoop: 6”
- Ruler
- Rotary cutter and mat
- Water-erasable fabric pen
- Pins or clips
- Sewing machine
- Embroidery needle
- Beading needle
PRINTING INSTRUCTIONS:
Note: To download the layout, click on the pattern download button at the bottom of the page. We recommend opening your pattern download using Adobe Acrobat.
Sewing Instructions:
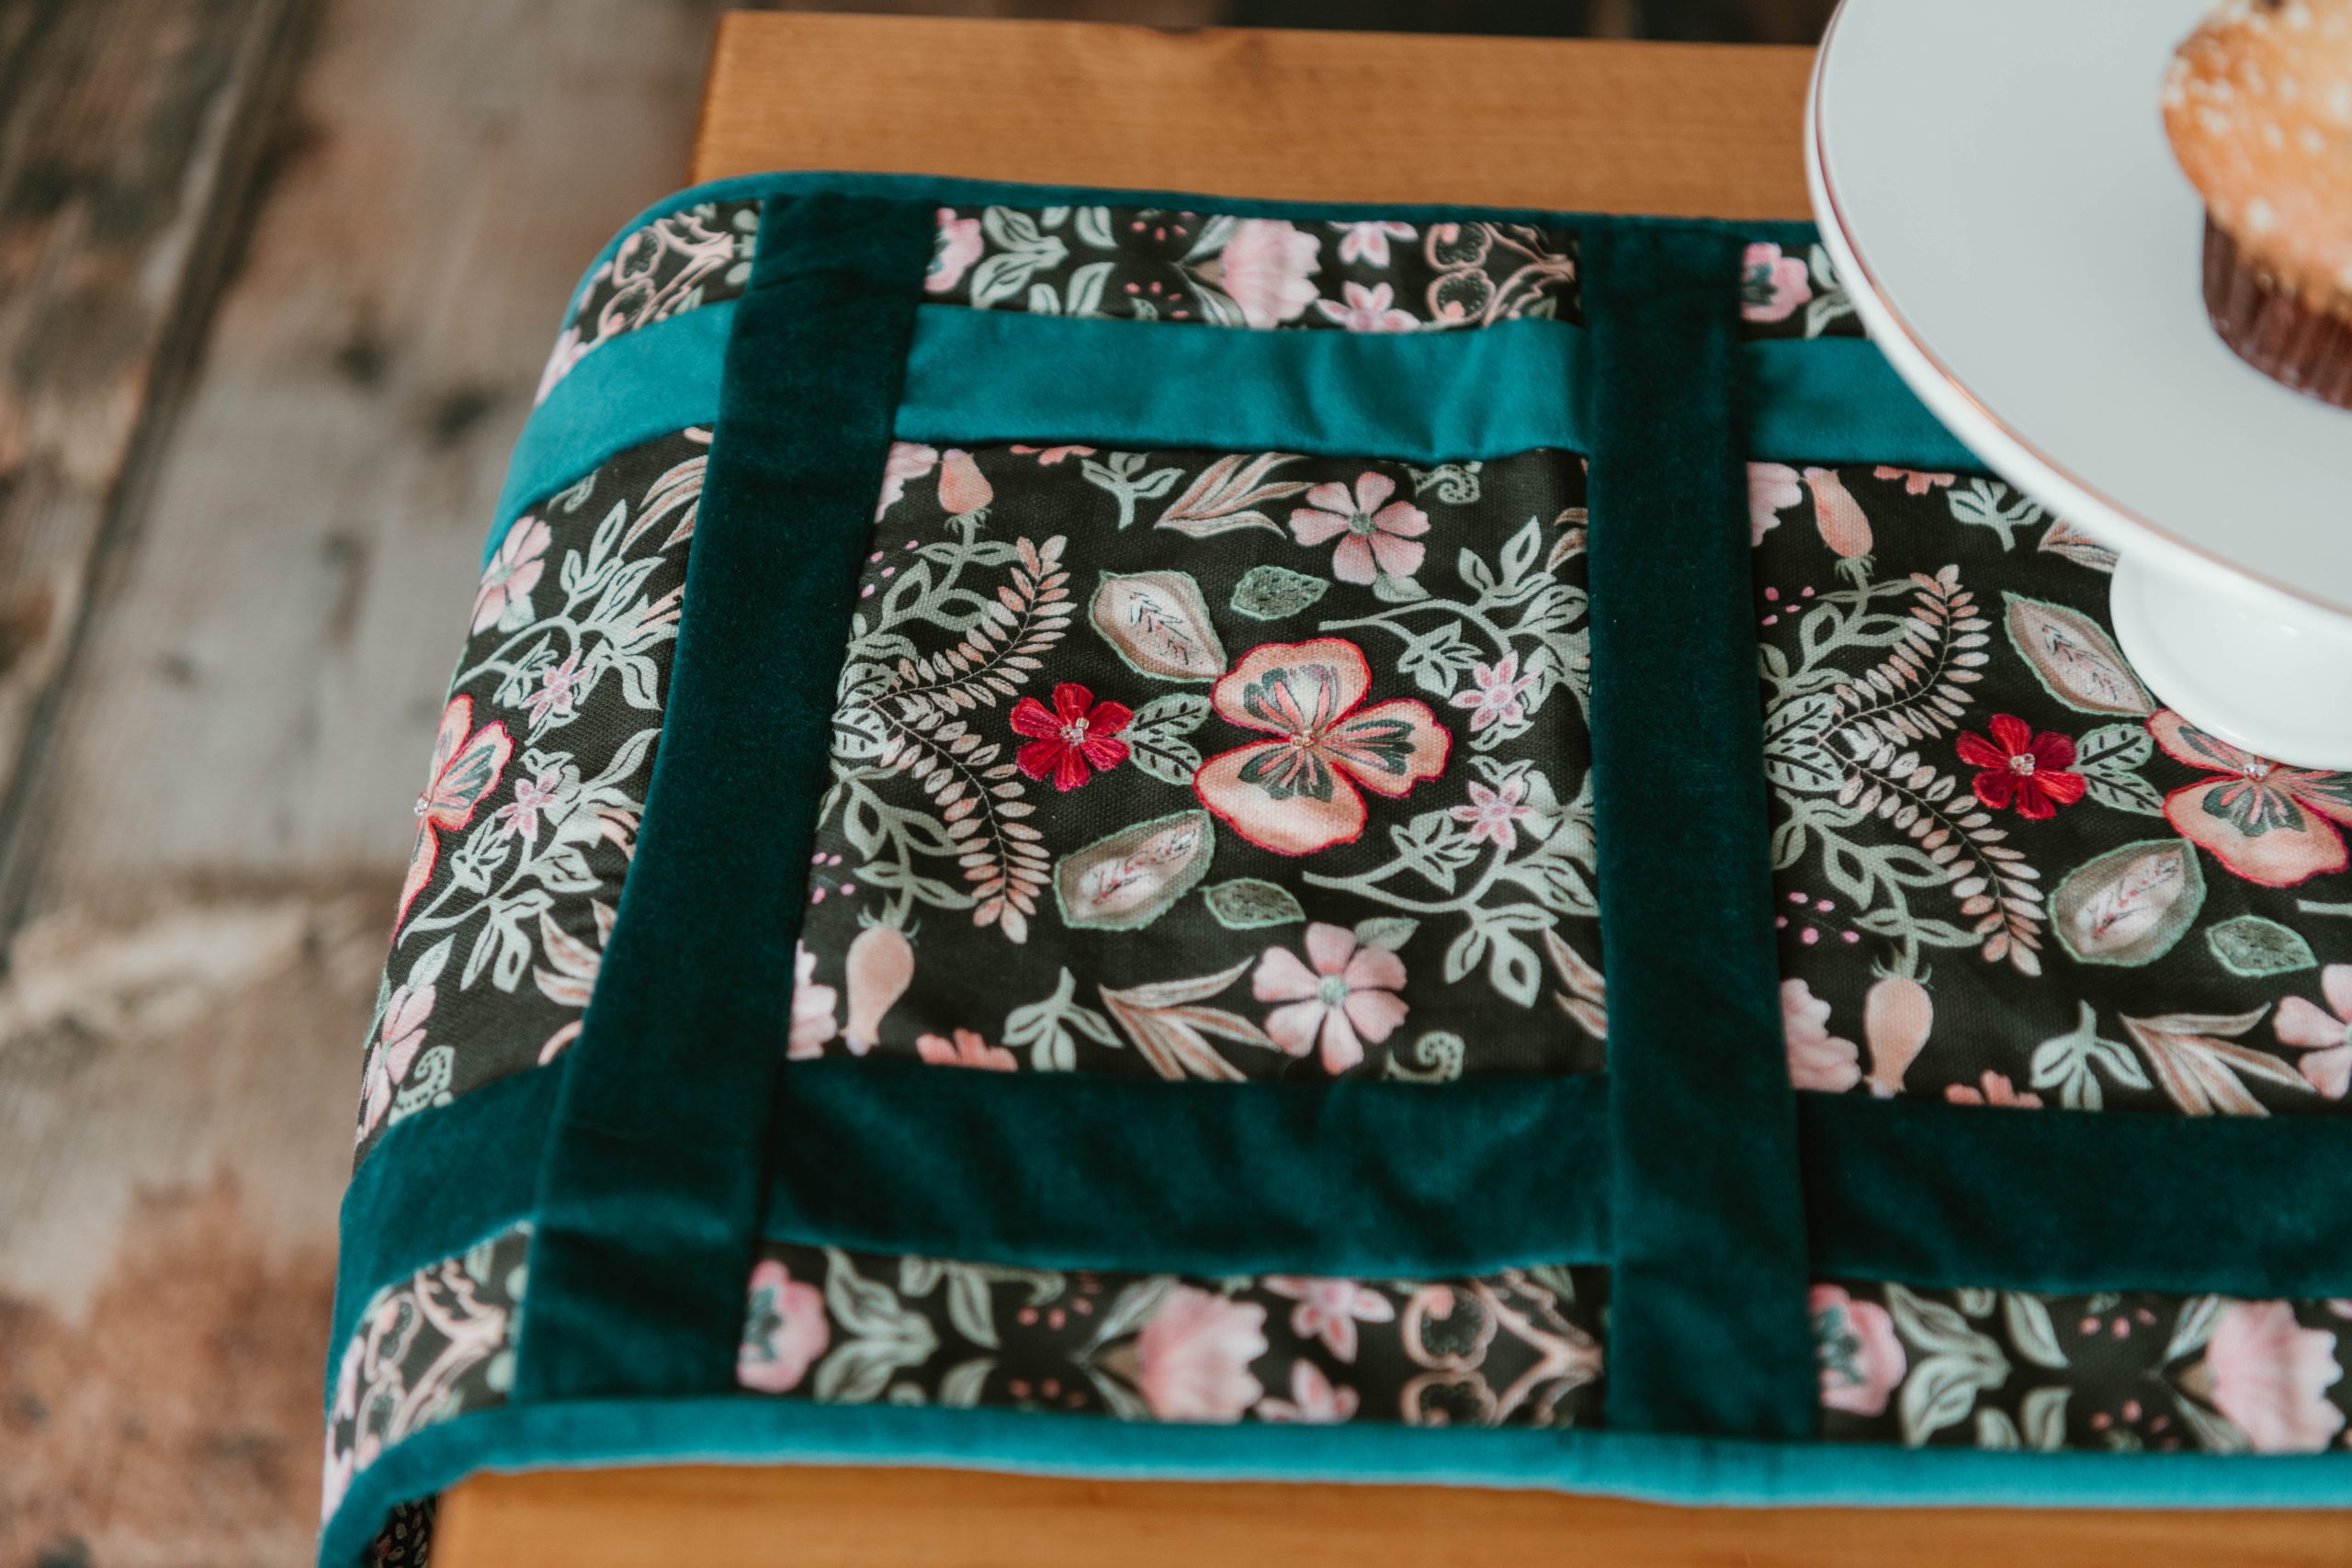
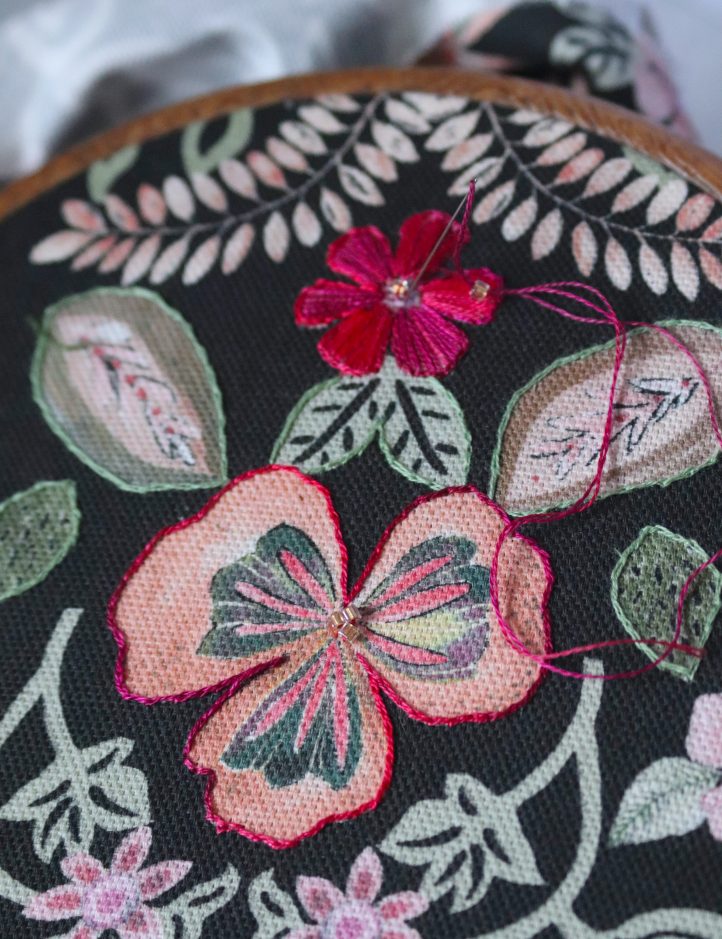
- Begin by working out how big your table runner needs to be and how many embroidered 7” squares you should make, using our guide below. Our sample uses eight squares, but you may need more or less depending on the size of your table. Take a look at your floral fabric, and decide which elements of the print you’d like to embellish – our material had a symmetrical floral design, so we used that as the basis for our stitch work. Mount your fabric in an embroidery hoop (with the floral design positioned in the center) and embroider it however you like – we outlined the petals and leaves in split stitch, then filled one of the main flowers with satin stitch.

- Once you’ve embroidered each motif, thread a fine beading needle with a single strand of thread and add a smattering of gold seed beads to highlight the design. Make sure to tie the thread off at the back between each bead – this ensures that even if one gets caught and becomes unstitched, the rest won’t follow.
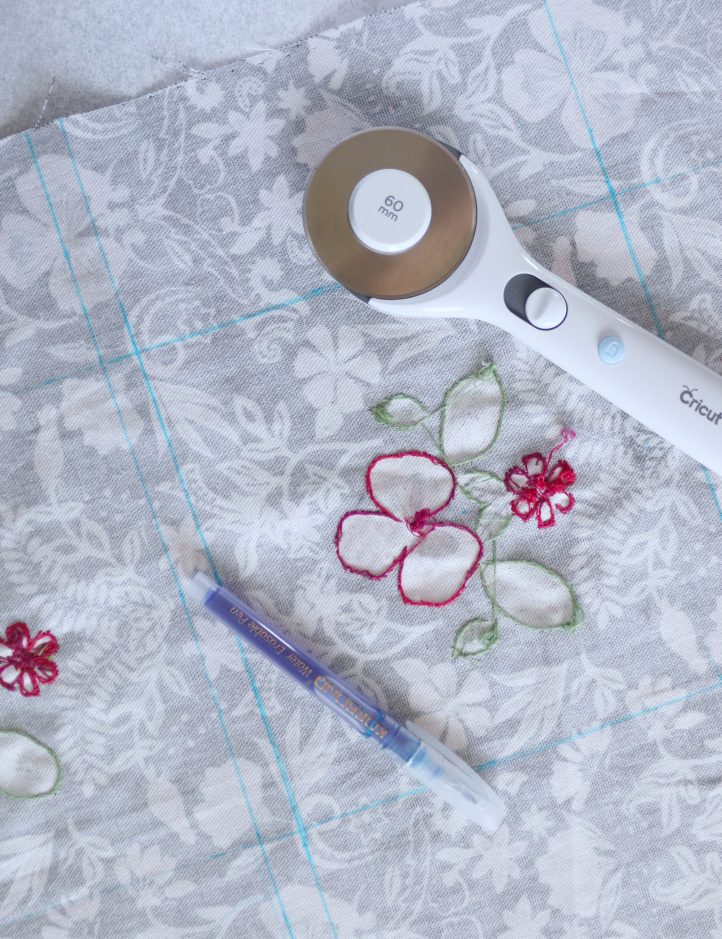
- Once you’ve finished your embellishments, you can cut the patchwork pieces from your floral fabric. Cut each embroidered motif down to a 7” square, with the design positioned in the center. Next, cut 16 2” x 7” vertical border panels (you may require fewer, or more, depending on what size runner you’re creating), two 7” x 2” horizontal border panels, and finally, four 2” squares, for the corners.
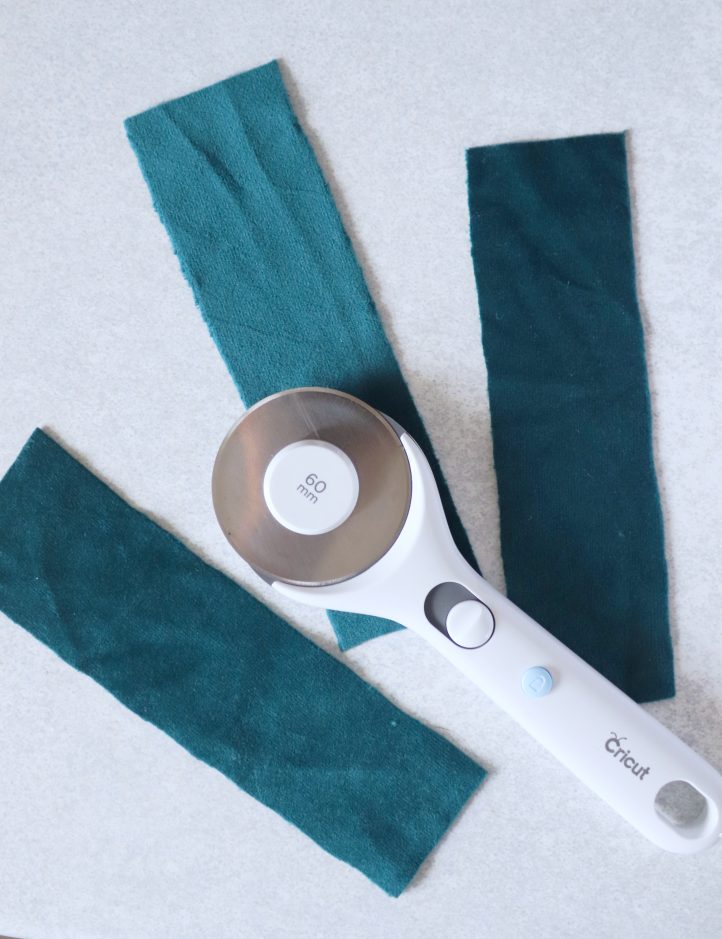
- Cut the rest of your patchwork pieces from teal velvet fabric. Cut 16 2” x 7” pieces for the vertical strips that sit on either side of the embroidered squares, nine 2” x 13” pieces for the horizontal strips, and four 2” squares for the borders. As before, you may require more or fewer pieces, depending on your finished runner size.
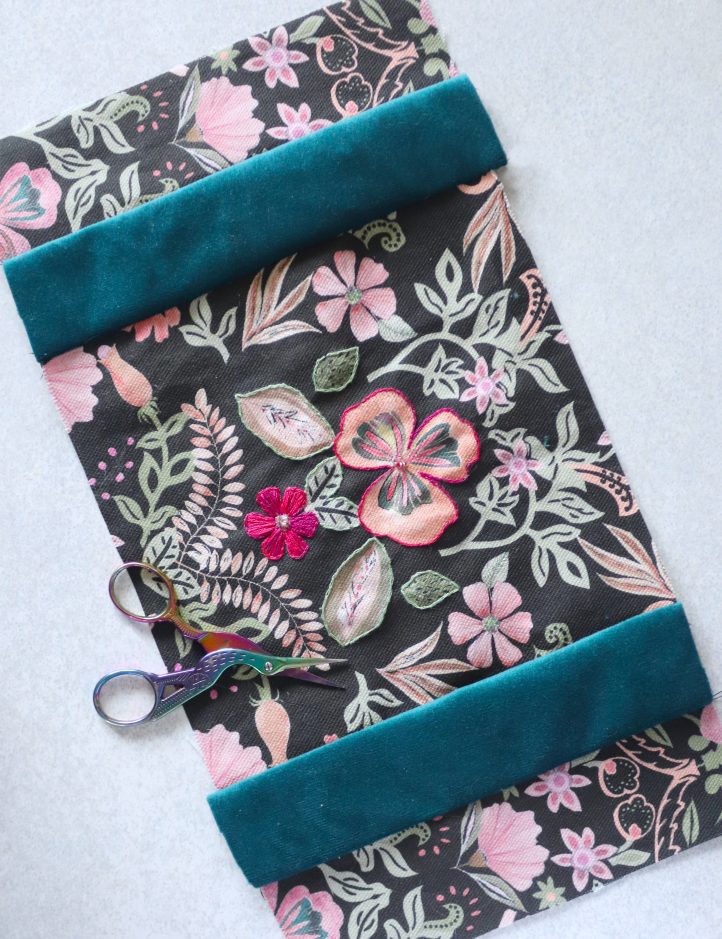
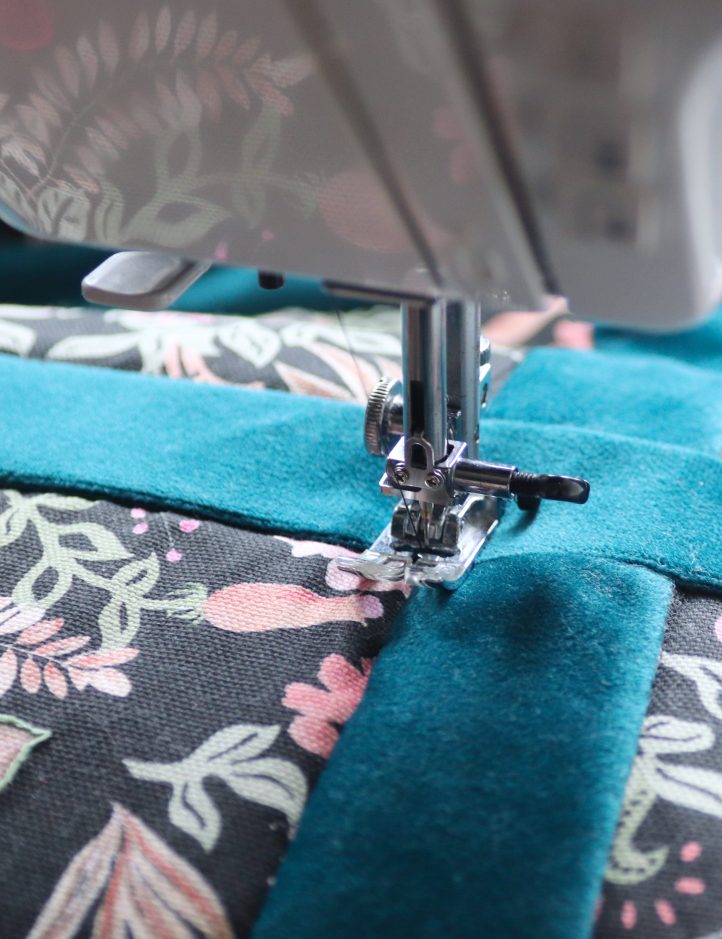
- Join your pieces into blocks. You can see how they all fit together using our layout diagram (Note: This is located at the bottom of the page). Lay one of your embroidered squares out flat with the right side facing up, then place a 2” x 7” vertical velvet strip along one side edge, with the right side facing down. Use a straight machine stitch to sew the pieces together with a 1/4” seam allowance. Repeat to add a second vertical strip along the opposite side edge of the embroidered square, making sure that the nap of both velvet pieces faces the same direction. Add a 2” x 7” floral vertical border piece to the outer edge of each velvet strip in the same way to complete the block. Gently press the seams open, taking care not to crush or singe/burn the velvet. A pressing cloth can help to keep your fabric safe. Repeat this step to add two velvet strips and two floral border pieces to each of your embroidered squares. Always ensure that the nap of your velvet faces the same way.
- Use the blocks you just made to create your table runner top. Take your first block, and lay it out flat with the right side facing up. Place a 2” x 13” horizontal velvet strip on top of it with the right side facing down, aligning the long top edge of the velvet with the top edge of your block. Stitch into place with a 1/4” seam allowance. Add another velvet strip along the bottom edge of the block, once again making sure the nap of the velvet faces the same direction as the strip before. Repeat this step, alternating between patchwork blocks and velvet strips, until you’ve run out of both. Next, make the top and bottom edge blocks. For each one, stitch a 2” floral square, a 2” velvet square, a 7” x 2” horizontal floral border panel, a second 2” velvet square, and finally, another 2” floral square into a horizontal strip. Stitch one of these blocks to the top edge of your work, and another to the bottom – you’ve now completed your table runner top!
- Cut a 13” x 71” piece of floral fabric to make your backing, and another the same size from lightweight quilt batting. Lay the backing out with the right side facing down, then place the batting on top, aligning the edges. Finally, lay the finished patchwork runner on top with the right side facing up, once again taking the time to ensure the edges line up neatly. Pin all over, then quilt the layers together. You can do this however you wish – by hand or machine. We wanted to make the most of our floral fabric and not hide the print beneath a busy stitch, so we opted to work a straight stitch-in-the-ditch along each seam line in black thread.
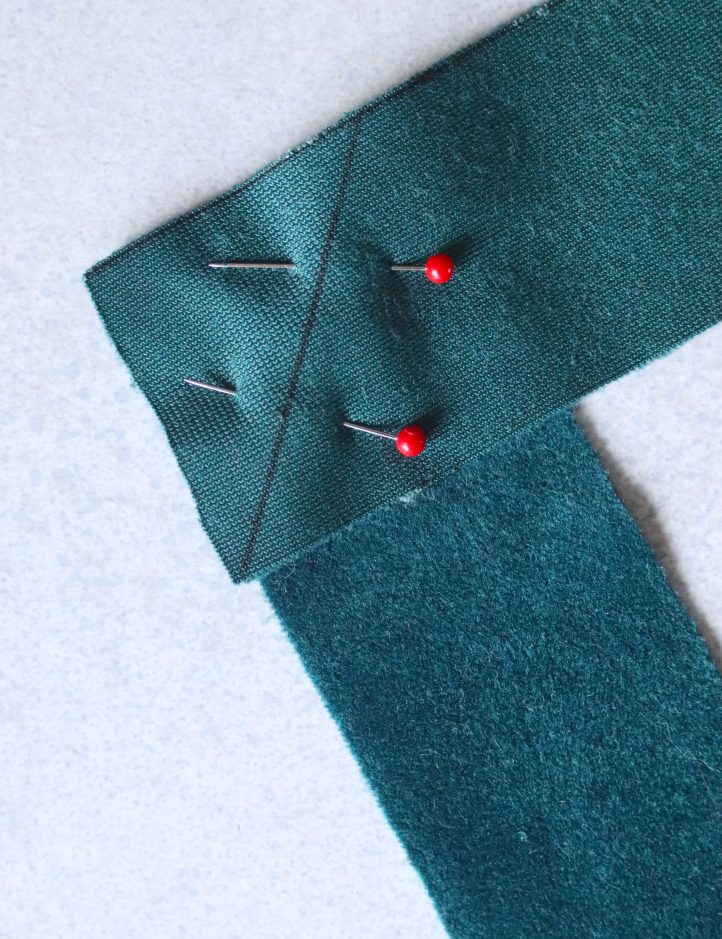
- Cut five 2” x 38” strips from your velvet fabric. Take two strips and place one end of each together at a 90° angle with right sides facing, ensuring the nap of both strips is facing in the same direction. Stitch diagonally across the overlap to join the pieces. Trim the seam allowance down to 1/4”, open the fabric out, and gently press the seam allowances open. Repeat to add all five strips into one continuous length.
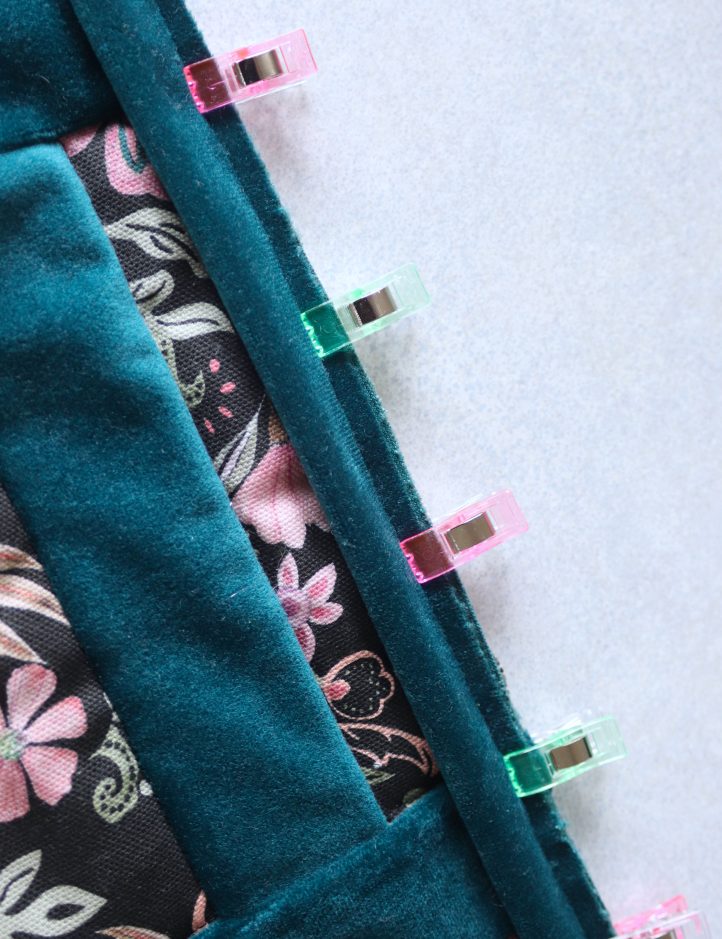
- Fold your velvet binding in half lengthways with right sides facing out, and gently press. Measure out 5” of binding (leave this unattached for now), then begin to clip the strip along one long edge of the runner, aligning the raw edges of both the binding and the fabric. When you reach a corner, fold the binding upwards and then back down onto itself, to create a miter and change direction. Continue to clip the binding all the way around the edge until you reach the starting point again. Leave another 5” of binding unclipped, then trim any excess away. Machine stitch the binding into place with a 1/4” seam allowance, leaving the first and last 5” of the clipped binding unstitched, in addition to the 5” extra you left unclipped at each end. Take the two unattached ends of the binding and measure and mark the point they meet. Clip and then stitch them together at the mark, with right sides facing. Trim away the excess seam allowance and finally, sew the joined binding to the edge of the runner to create a neat finish. Wrap the folded edge of the binding around to the back of the runner and clip or pin it into position, then hand stitch into place to hold it securely and finish the project.