
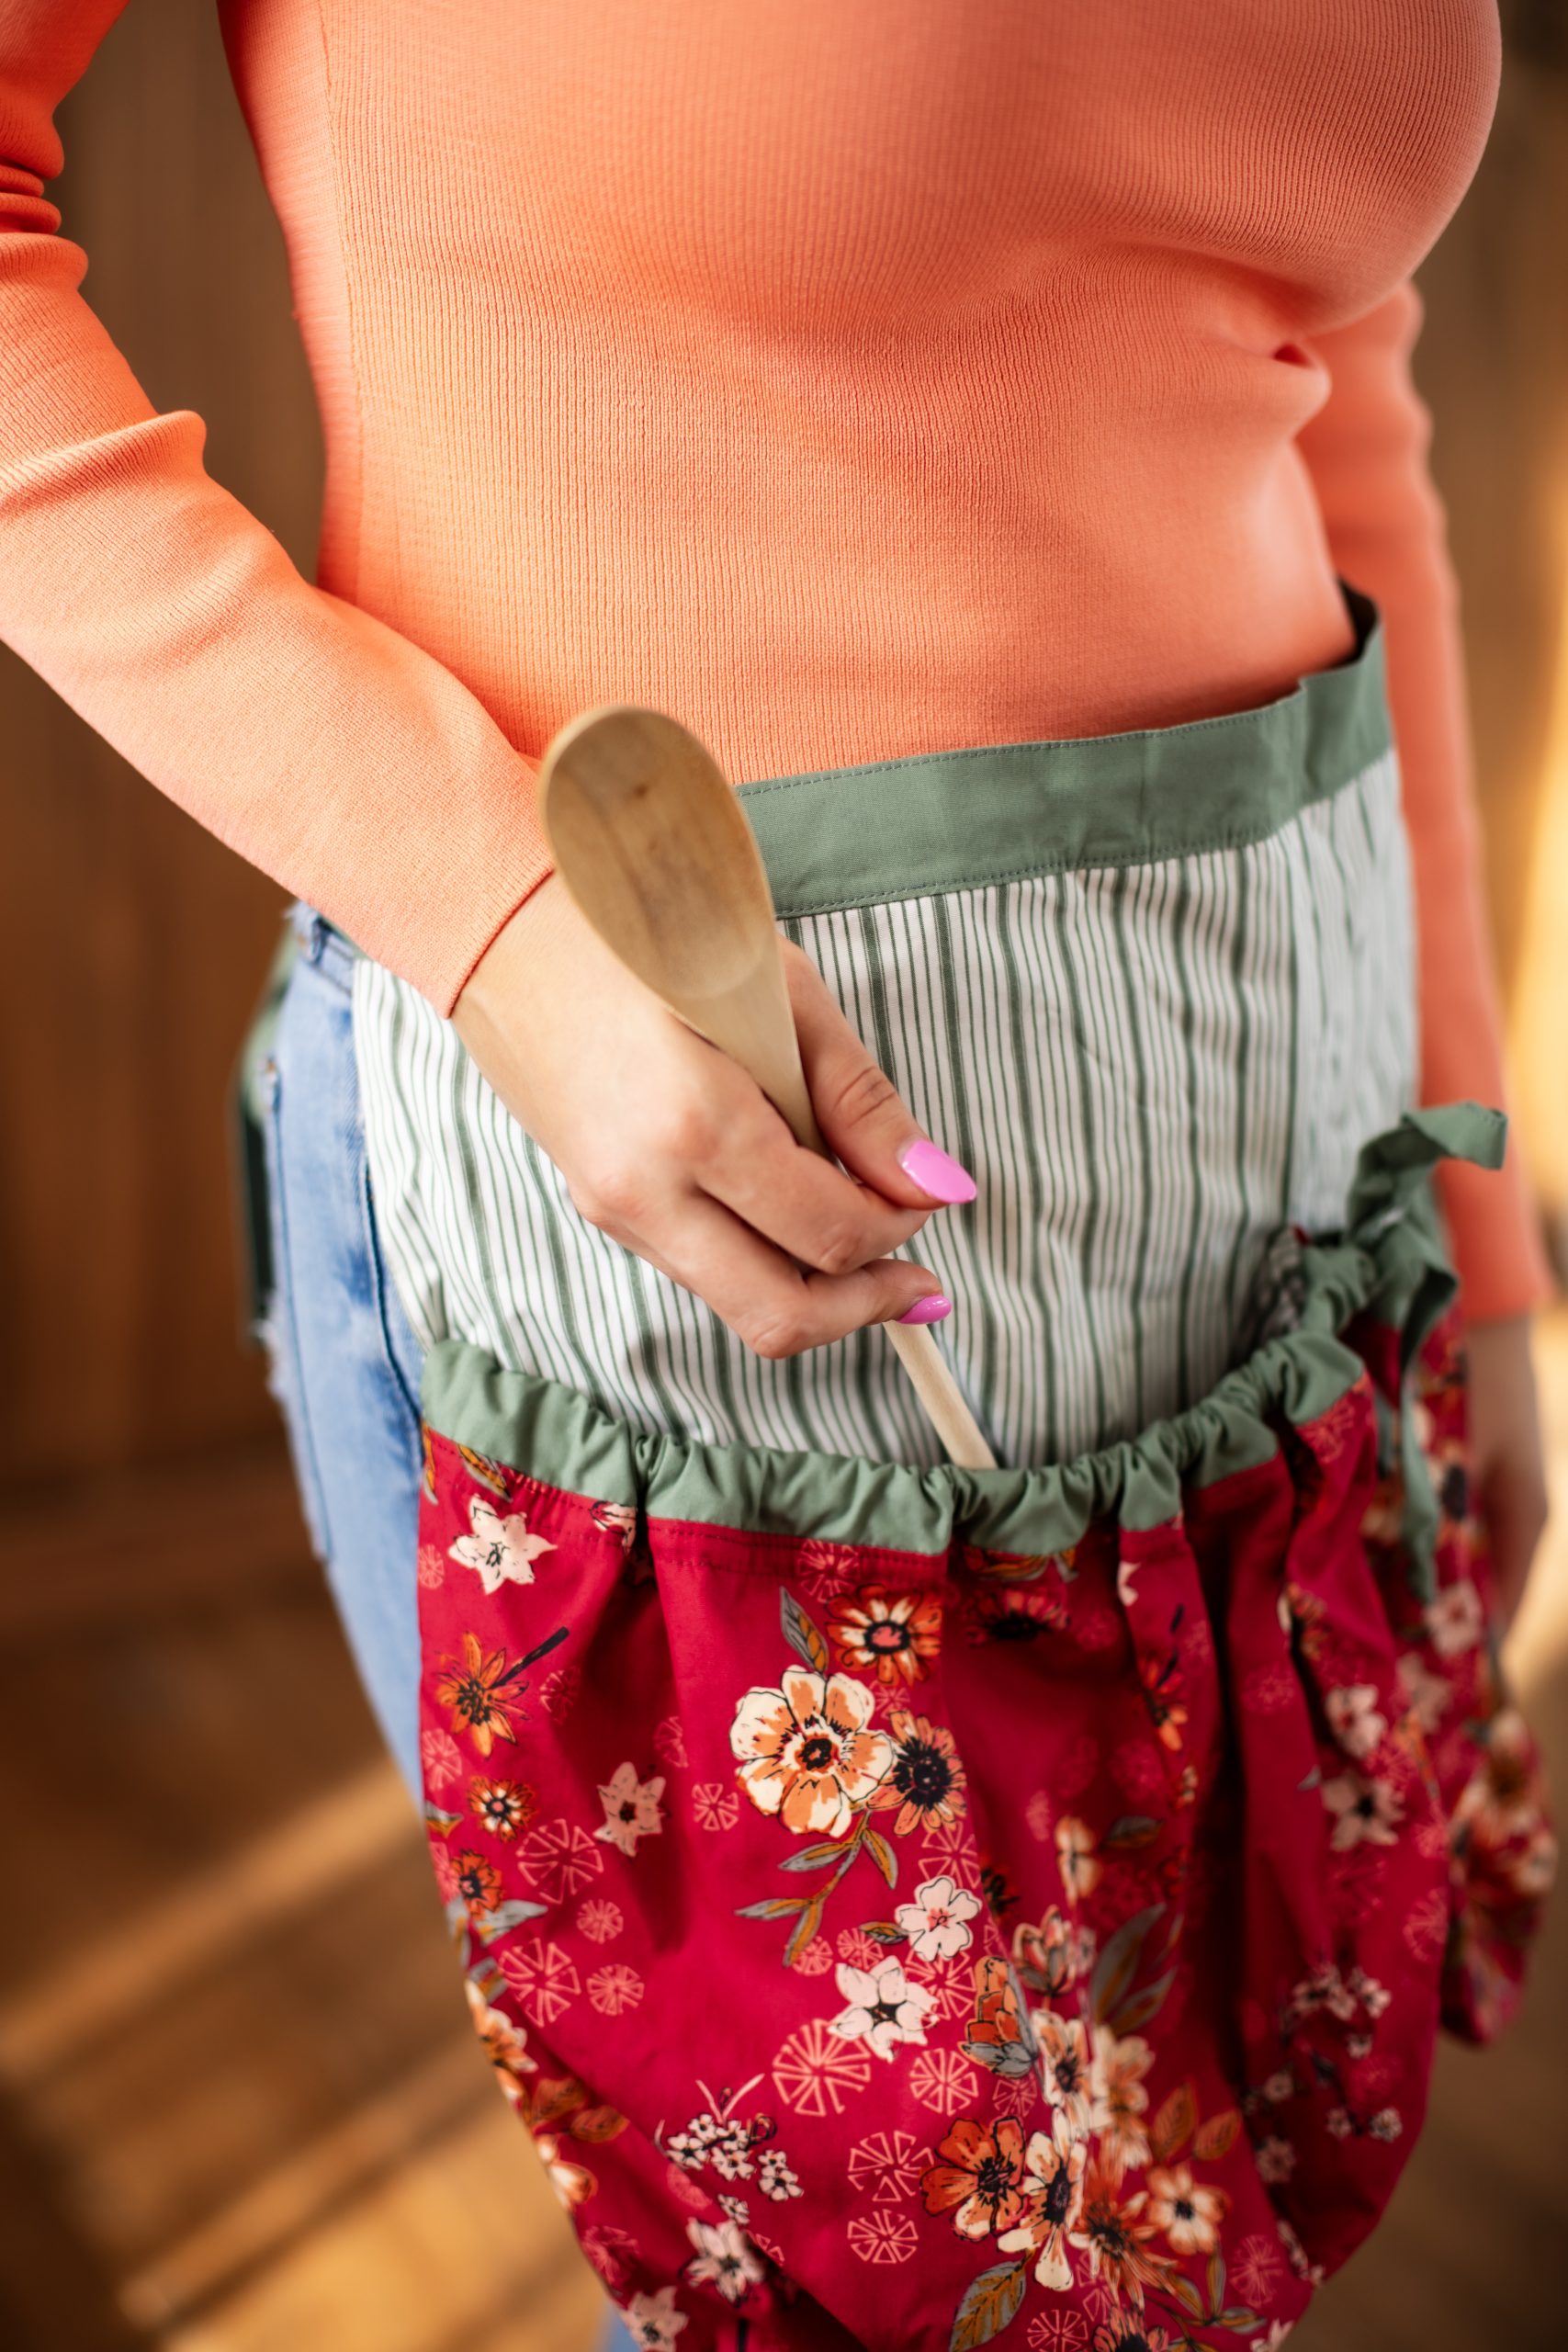
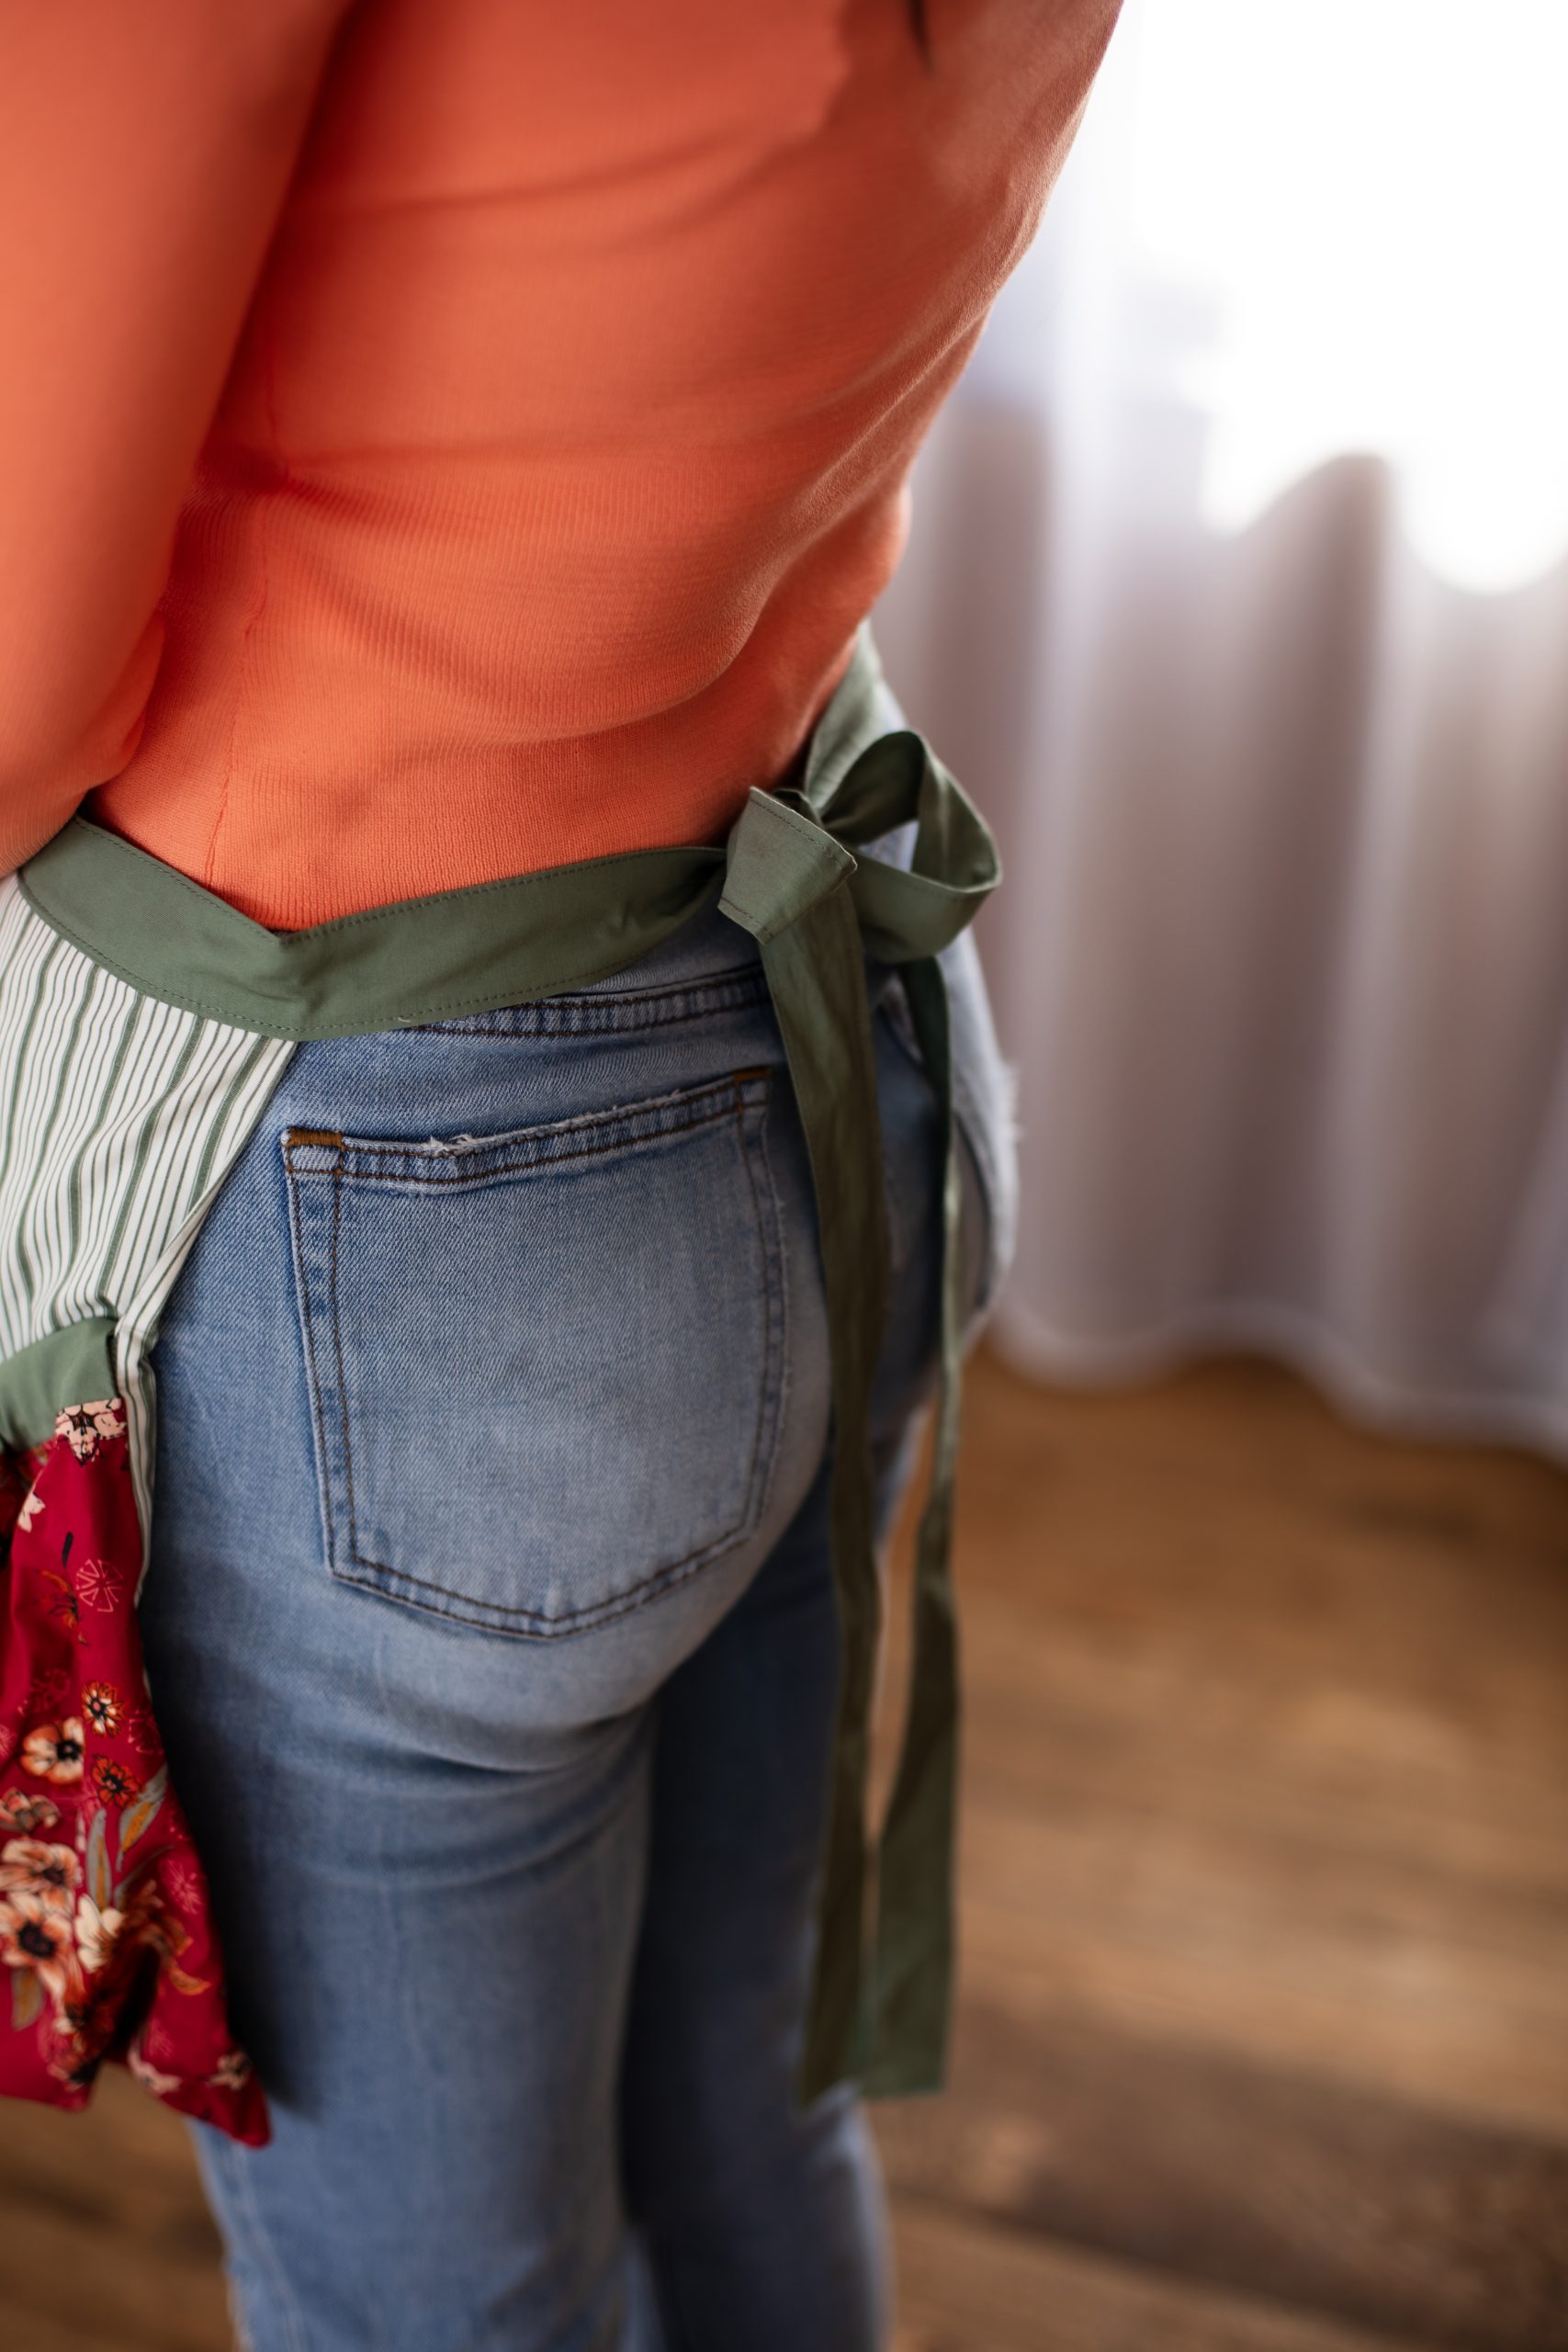
Fall marks the beginning of holiday gatherings filled with family, friends and delicious food, so if you’re planning on spending hours in the kitchen cooking, you’ve got to check out this pattern from Debbie von Grabler-Crozier. This helpful half apron pattern features a large front pocket that can easily hold utensils and dish towels, as well as a classic apron string closure. Whip up a batch of coordinating aprons now so that you and your mom or sisters can match on Thanksgiving with this fall apron pattern.
Designer Note: Seam allowances are all 1/4” and have already been added.
Materials:
- Fabric: (Note: All fabrics are all by Art Gallery Fabrics.)
- 1/2 yd. floral fabric for the front pocket. The designer’s choice is Constant Companion Heart from the Kindred collection by Sharon Holland for AGF.
- 1 yd. striped fabric for the lining. Debbie loves Timeless Ticking Sage from the Juniper Collection by Sharon Holland for AGF.
- 1/2 yd. coordinating solid fabric. This time, the designer used Rosemary from the Pure Elements collection by AGF.
- Coordinating threads for all fabrics and trims
- Scissors
- Fabric marking tools
Cutting Instructions:
From the floral fabric:
- 1 piece 40” wide x 11 1/4” tall for the apron front pocket panel
From the striped fabric:
- 1 piece 40” wide x 11 1/4” tall for the front pocket panel lining
- 2 pieces 20 1/2” wide x 15 1/2” tall for the apron main panel front and lining
From the solid fabric:
- 1 piece 3” wide x 88” long* (joined as necessary) for the apron strings
- 4 pieces 2 1/4” wide x 20 1/2” long for the front pocket drawstring casing
- 2 pieces 2” wide x 24 1/2” long for the drawstring
Note: *The apron strings can be made longer if needed to suit the wearer. Be aware that if you do this though, you may need to increase your fabric purchase.
Sewing Instructions:
PREPARATION:
The Apron Strings:
- Fold the apron string in half lengthways with the right sides together and sew the ends and about 4” along from the ends on each side. Clip across the corners to reduce bulk.
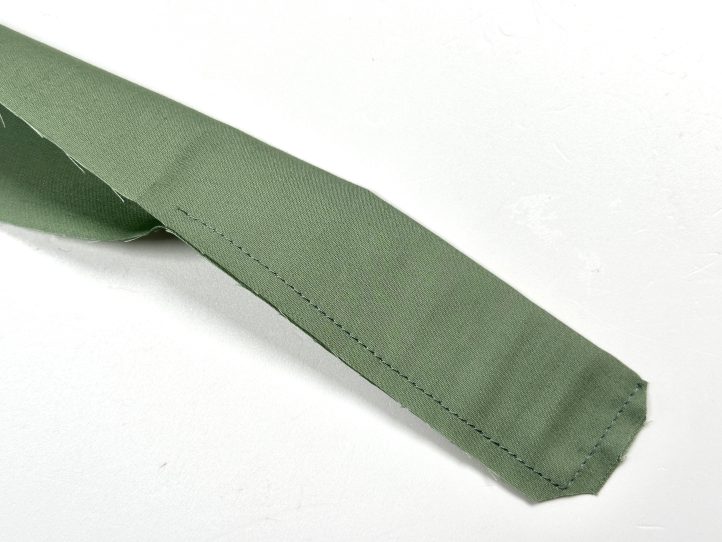
- Open the right way out and push the ends out so that they are sharp. Fold in half lengthways again but this time, wrong sides facing and press a center crease.
- Find the center of the apron strings and mark it, ready for when it is needed.
- TIP: You will have a handy join in the center in most cases.
The Drawstring:
- Fold the drawstring in half lengthways with the wrong sides together and press to obtain a long center crease. Open out and fold the two long raw edges to the center crease and press again.
- Re-fold along all of the creases, press and topstitch down the open end. Knot one end.
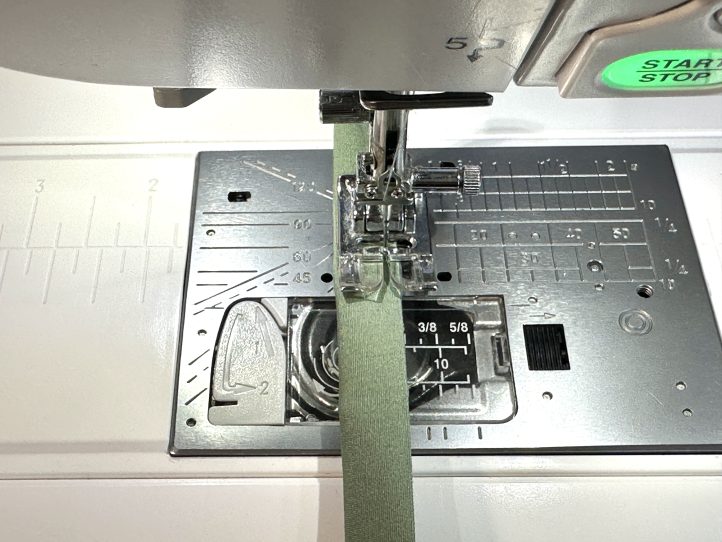
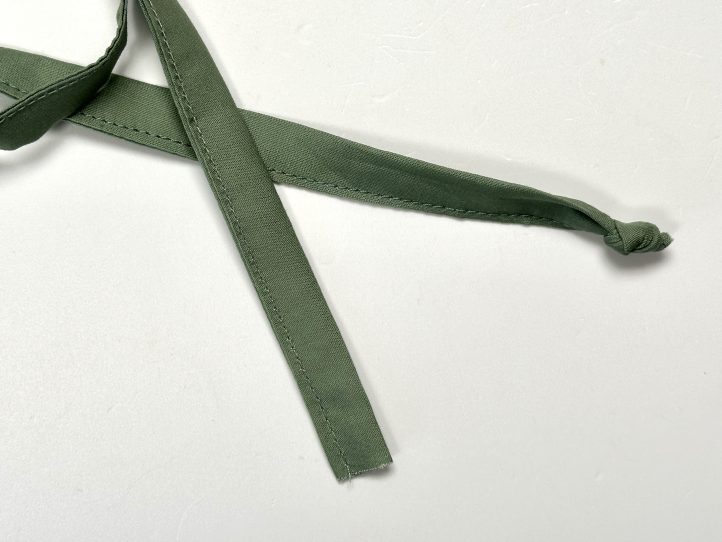
- Repeat for the other drawstring.
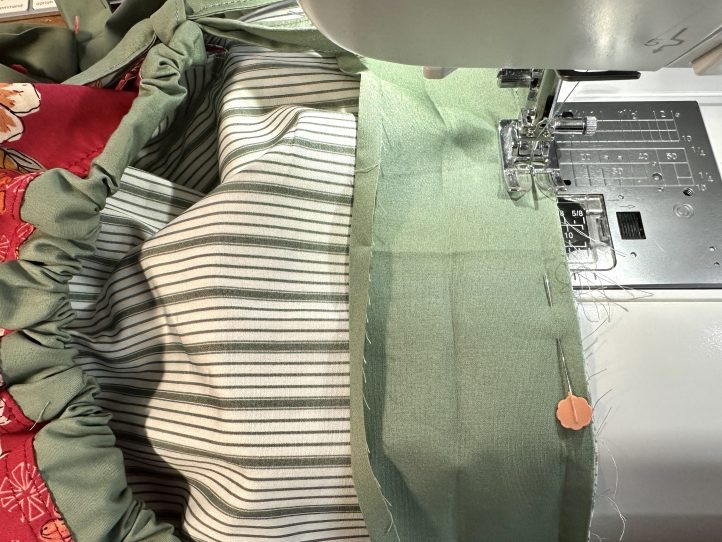
The Drawstring Casings:
- Pin or clip two casing pieces together, right sides facing and sew the short ends only. Turn the right way out so the wrong sides face each other now, and press the ends. Fold the casing in half lengthways and press. Baste the long raw edge together.
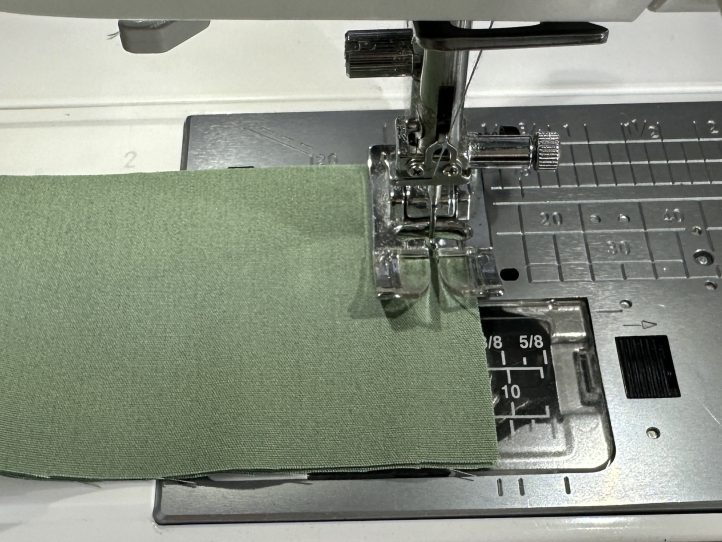
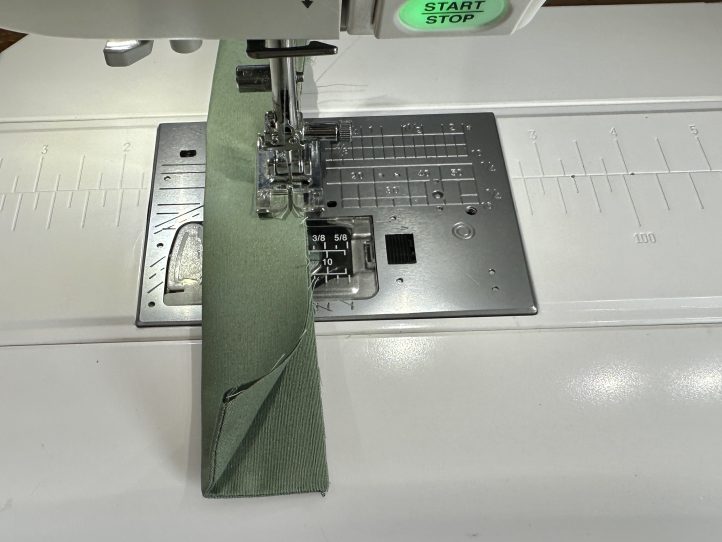
- Repeat for the other casing.
The Front Pocket:
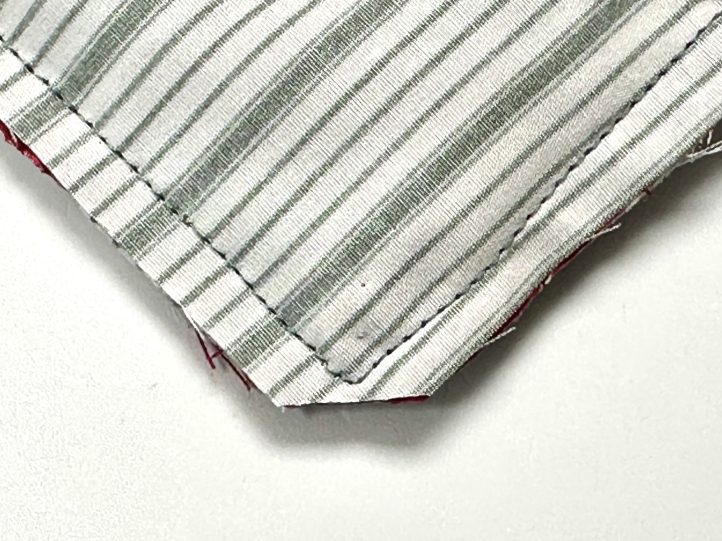
- Measure in 1/4” on each outer side of the top edge and make a mark.

- Place the casing’s short ends on this mark (There will be a gap in the middle where the opposite short ends meet). Sew the casings on.
- Pin or clip the front pocket lining panel right sides together onto the front floral panel. The casings will be pointing down between the layers. Sew the top edge only.
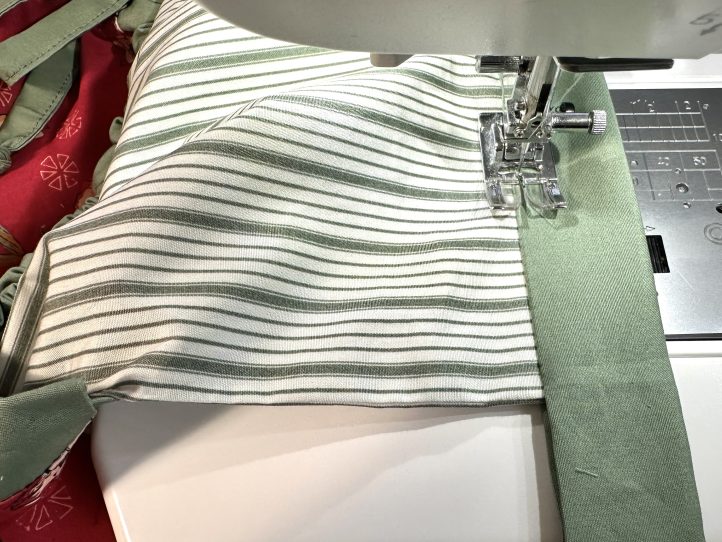
- Flip the layers the right way out and press the top edge. Topstitch twice along under the casing. The first pass at 1/8” and the second 1/4” under that. Baste the side and bottom edges.
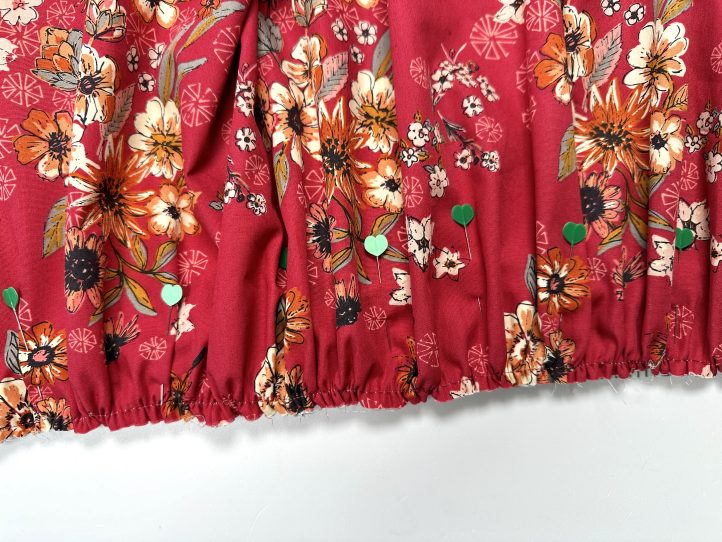
- Gather the bottom edge so that it is 20 1/2” long and fits the bottom edge of the apron front panel exactly.
MAKING:
- Attach the pocket to the front panel by arranging the gathers along the bottom edge of the pocket so that they are even. Baste the bottom edge.
- Pin or clip the sides and baste them on, too.
- Find the vertical center of the apron and the front pocket and draw a line from the bottom of the pocket to the top edge.
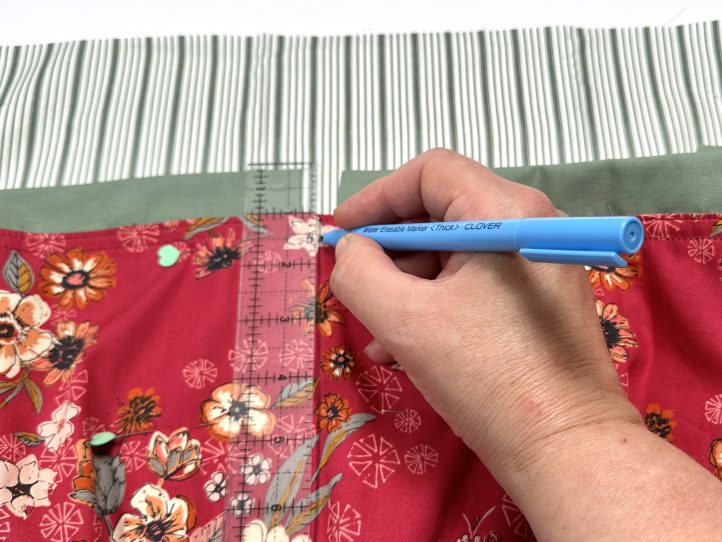
- Topstitch along this line backstitching at the top for greater strength.
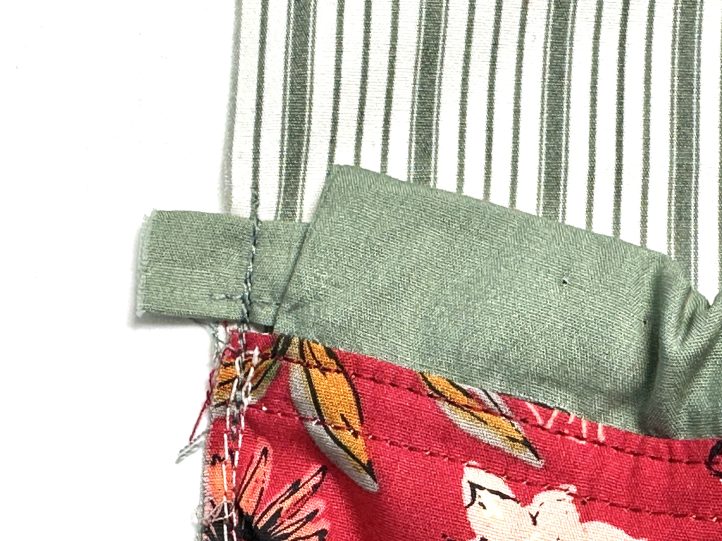
- TIP: This will stop the apron from gaping when you are putting things into it. The drawstring then closes the whole apron.
- Keeping the knotted ends of the drawstring to the middle of the apron, thread the drawstring through the casing and attach it on both sides allowing 1/2” overhang for extra strength.
- Lay the apron lining right sides together onto the pocket and clip the sides and corners. Sew the sides, and across the corners to reduce bulk
- Turn the apron body the right way out through the open part on the top and press so that the edges are perfect.
- Find the center of the apron body on the top edge and mark it.
- Line up the mark on the apron body and the one on the apron string and pin or clip the apron string to the panel.
- Sew the apron string on along the panel.
- On the back, fold the raw edge of the apron string in towards the wrong side by 1/4” on all raw edges. Topstitch narrowly (1/8”) right around the apron string.
I don’t see the button to download the instructions for this Harvesttime Half Apron Pattern just a Pinterest button.
Hi Barb! There is no downloadable PDF with this pattern. PDFs are listed in the Materials list for applicable patterns. Please let us know if you have any questions. Thanks so much! – Ashley, We Like Sewing
Oh my God I love this! I so got to make it it’d be perfect in the garden!