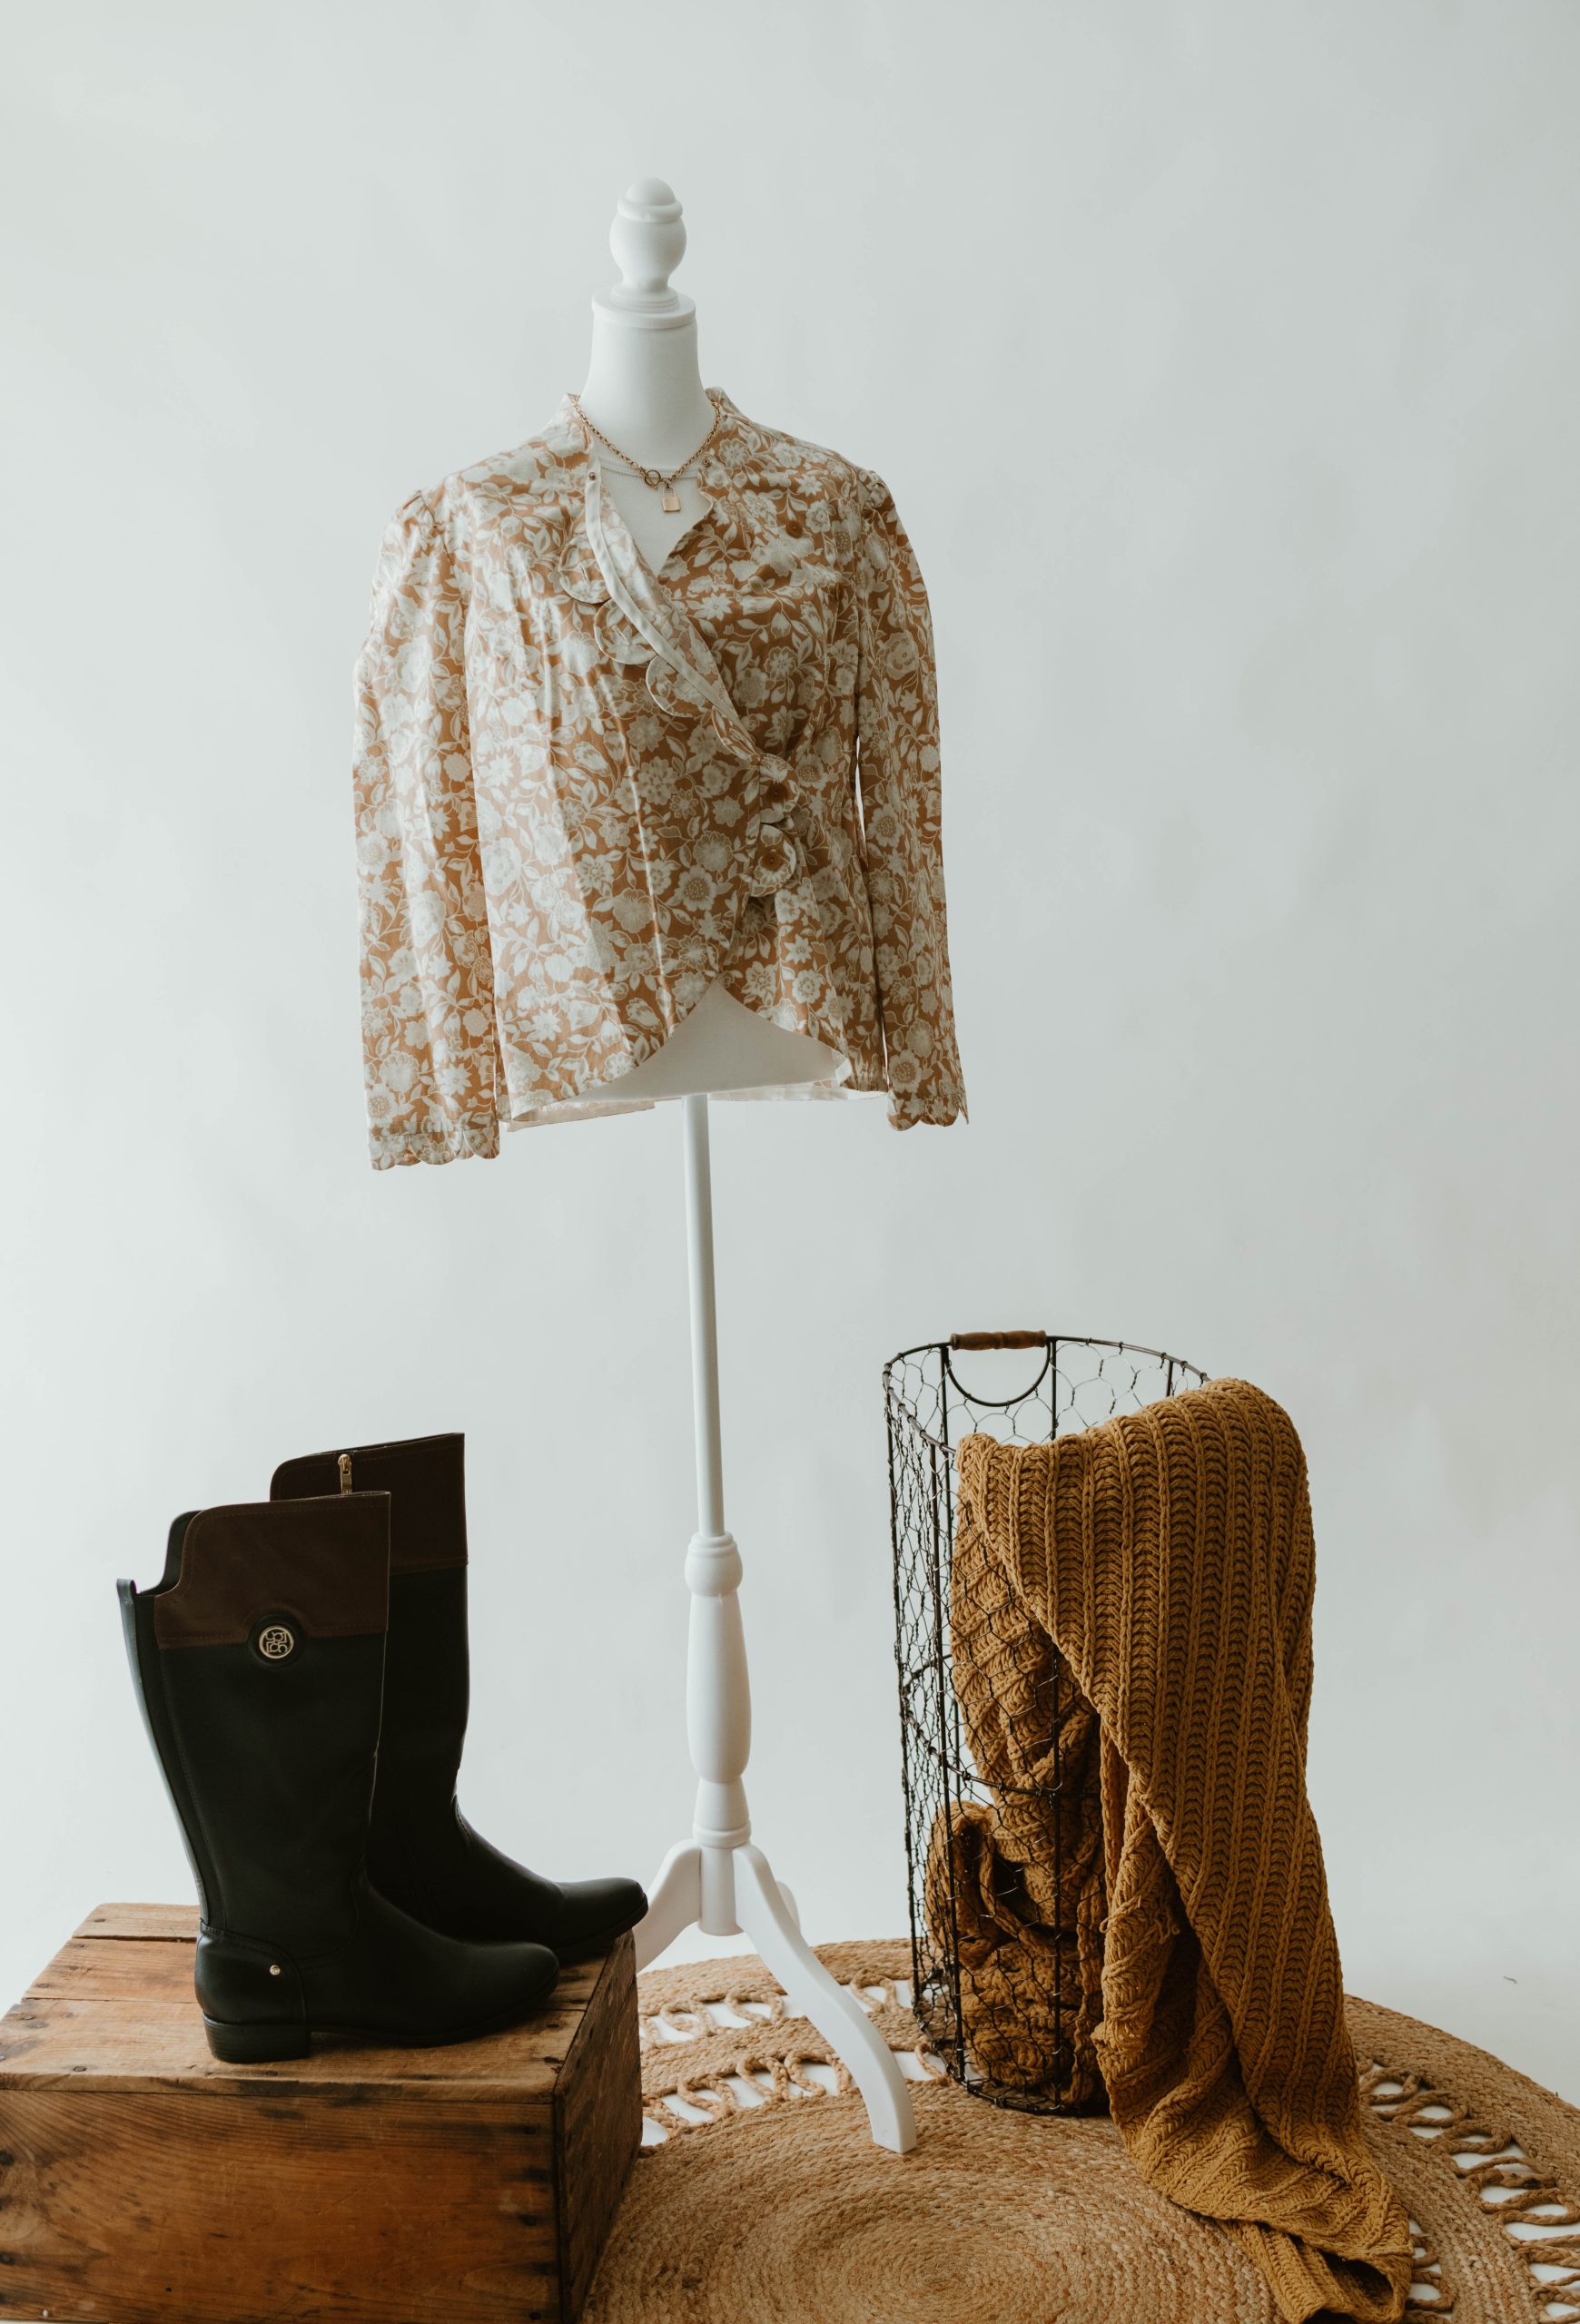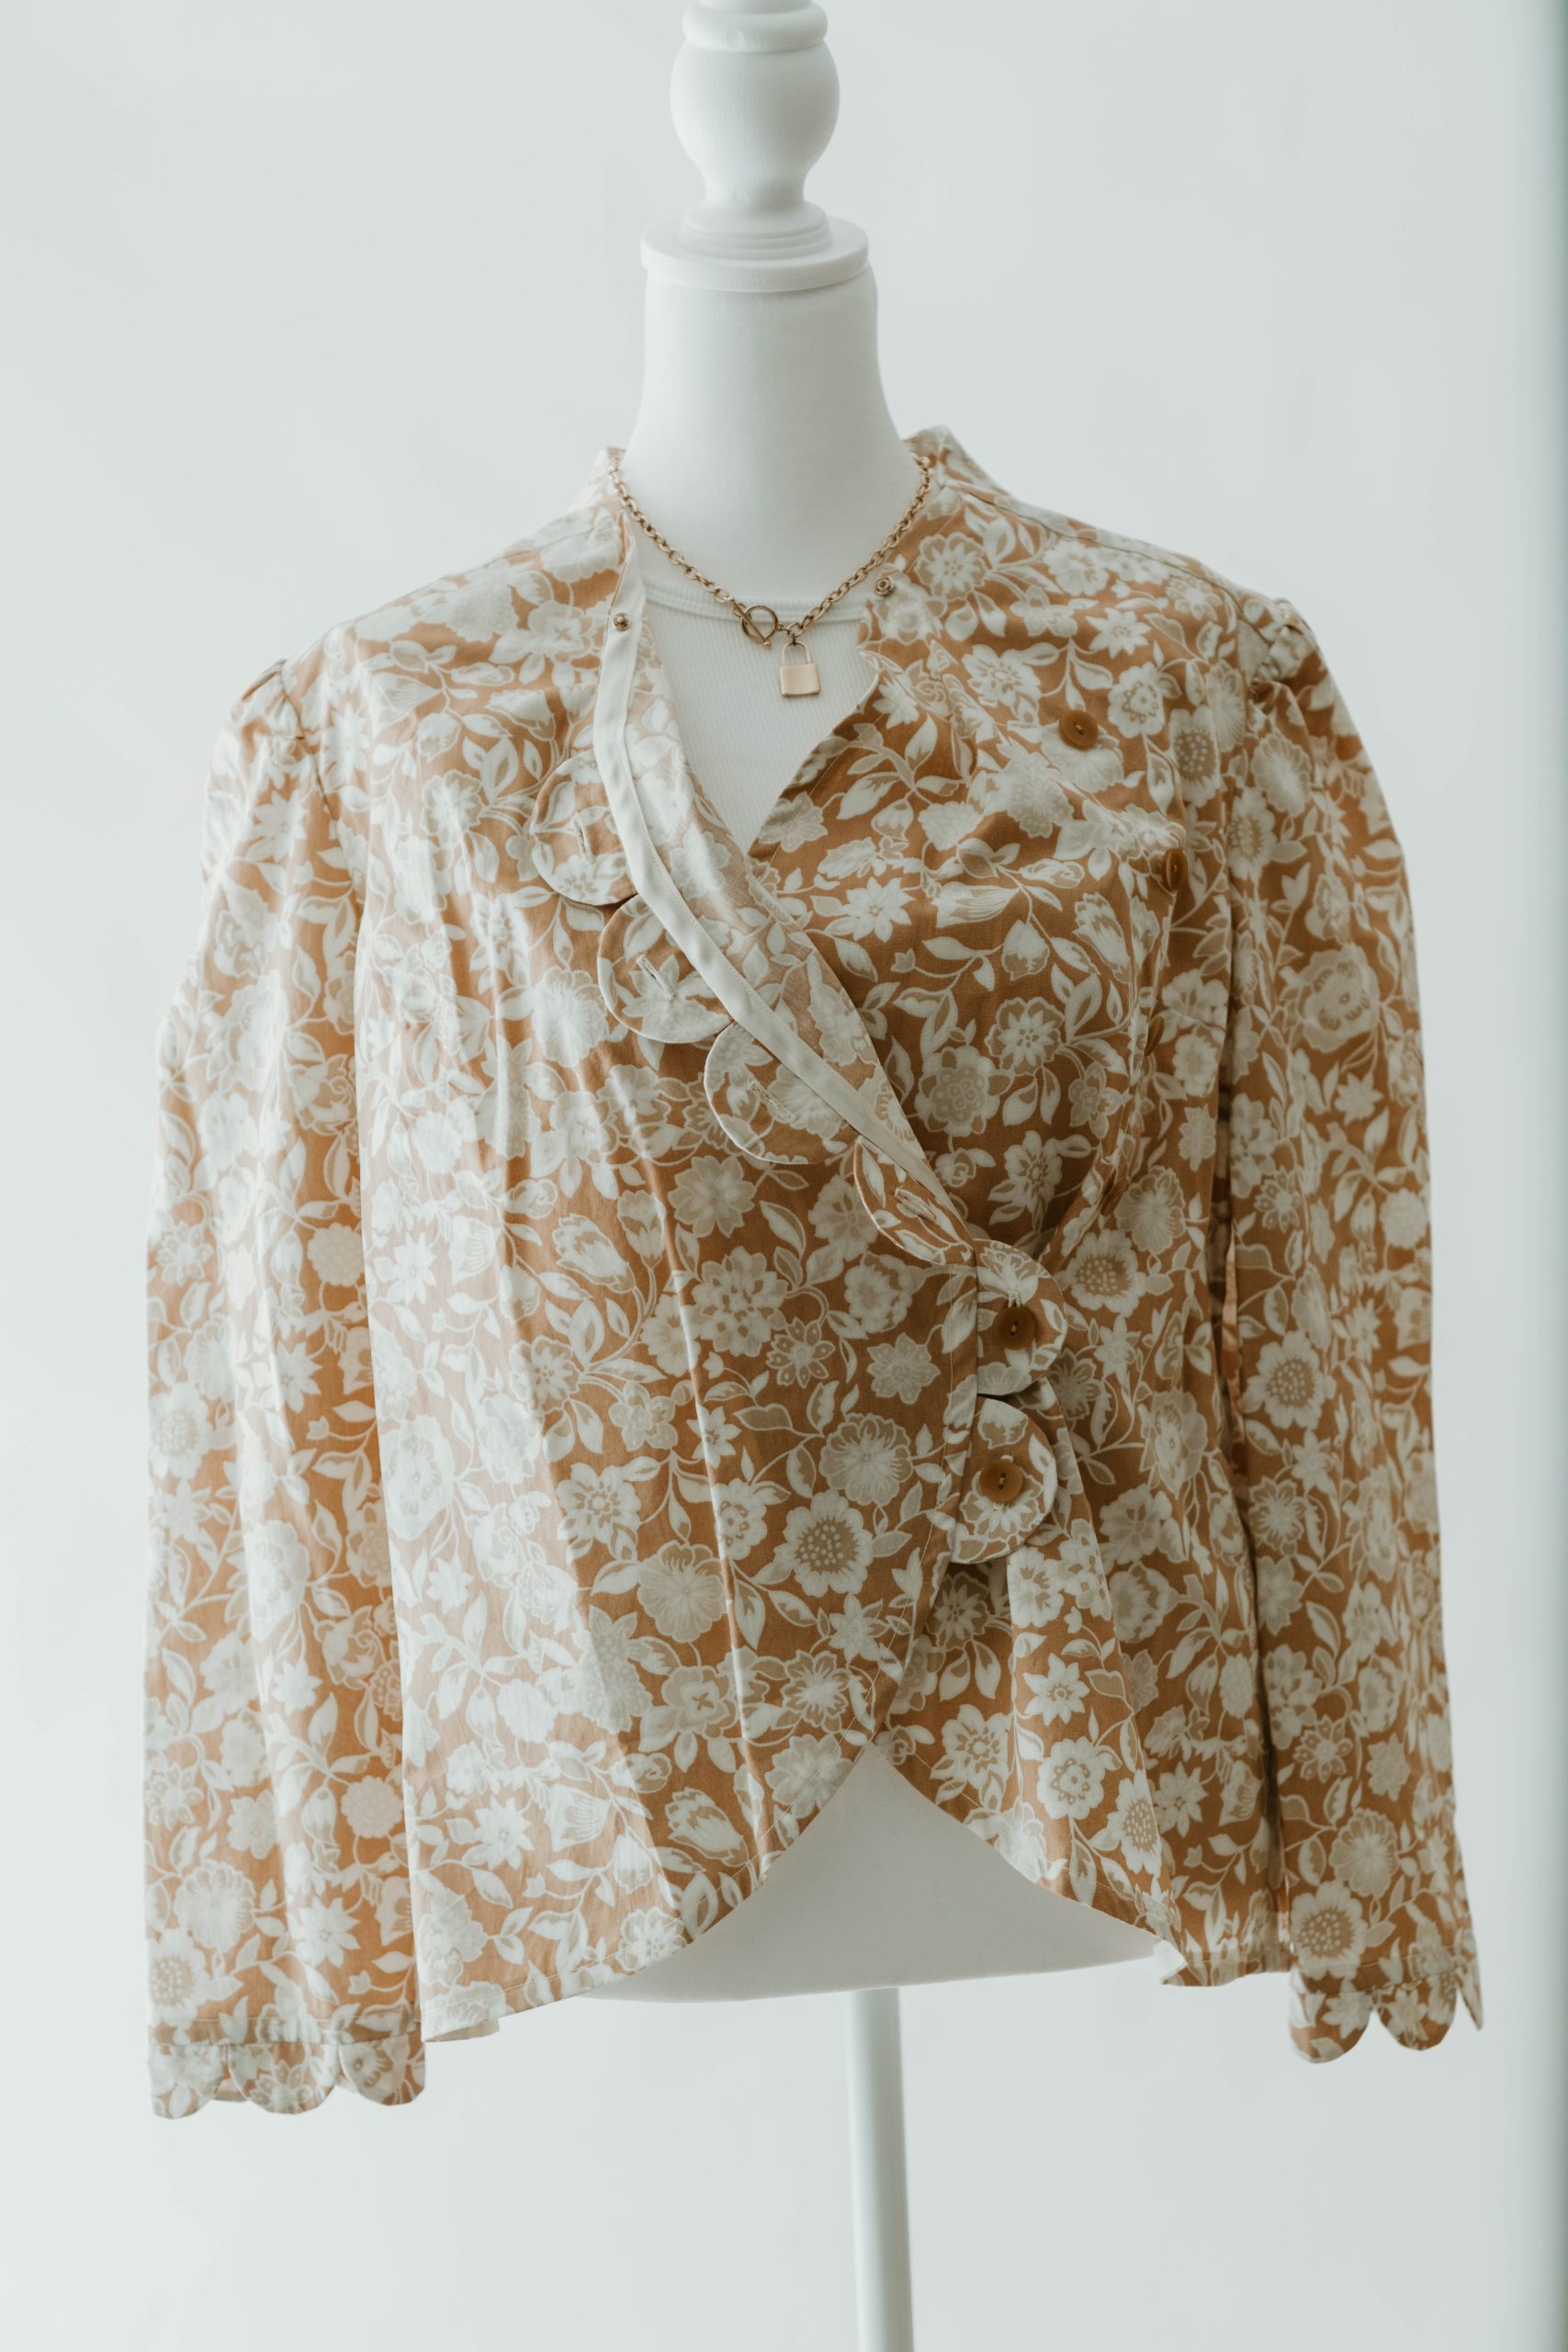
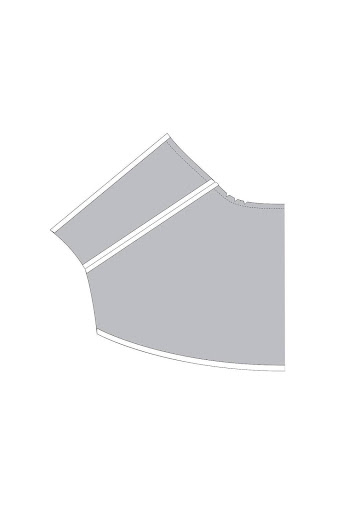
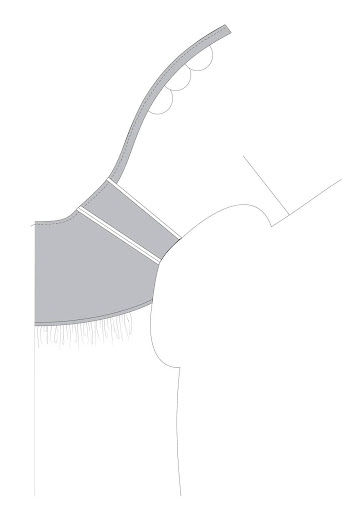
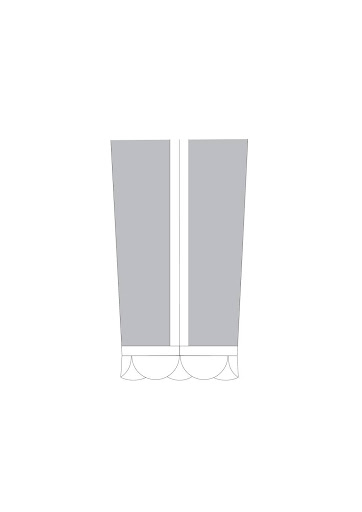
Step into fall with a beautiful, detailed blouse that’s perfect for layering with this pattern from Andini Wijendaru. Featuring a decorative button placket, this top sewing pattern has a stylish tulip hem and sleeve embellishments that resemble delicate flower petals. Layer this lightweight blouse over a tank for casual wear or pair it with a slinky dress and boots for a sleek yet cozy autumn look.
Skill Level: Advanced beginner/Intermediate
Seam Allowances: 3/8 inch (1 cm) seam allowances given on all patterns, unless otherwise indicated.
PATTERN DESCRIPTION:
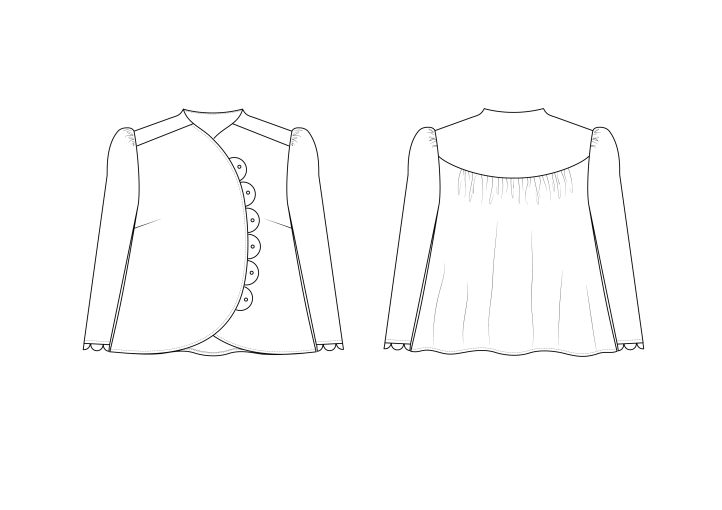
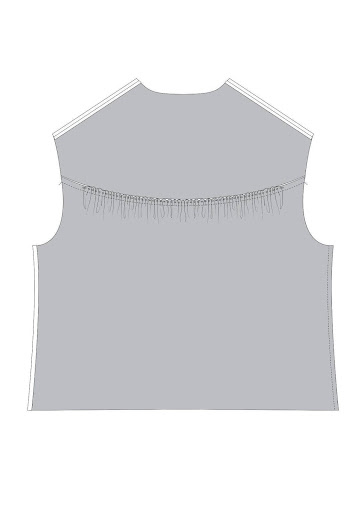
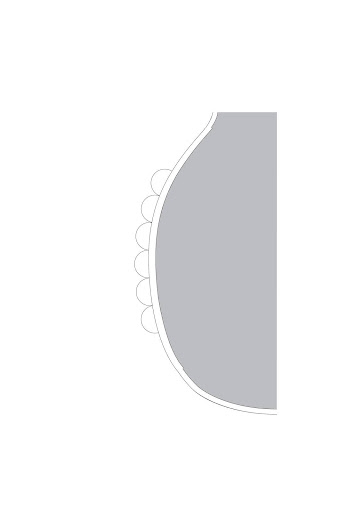
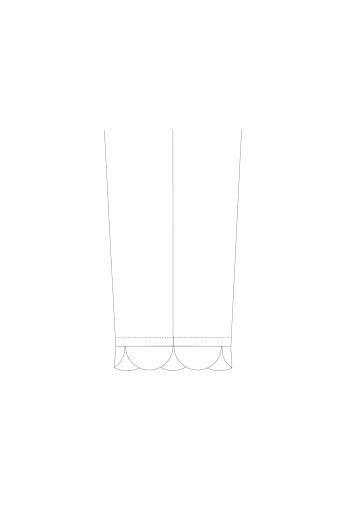
A tulip hem loose blouse with a decorative button placket. Its’ long sleeve edges are embellished with flower petals resemblance.
“You’ll do a little bit of crafting for the petals. If you find it’s too time-consuming, lace trim is an option for the sleeves opening. Have fun by mixing-and-matching fabric motifs for the yokes, button plackets, or sleeve edges, especially if you have some scraps left over from other sewing projects.”
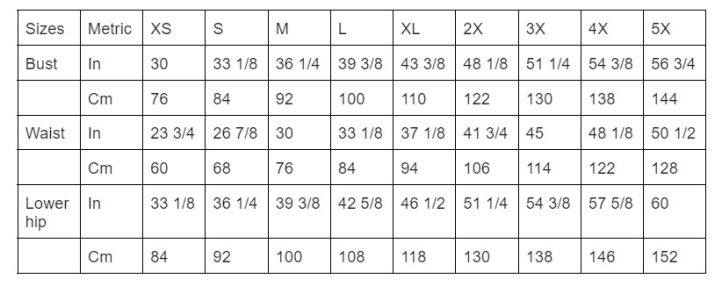
FINISHED GARMENT MEASUREMENTS:
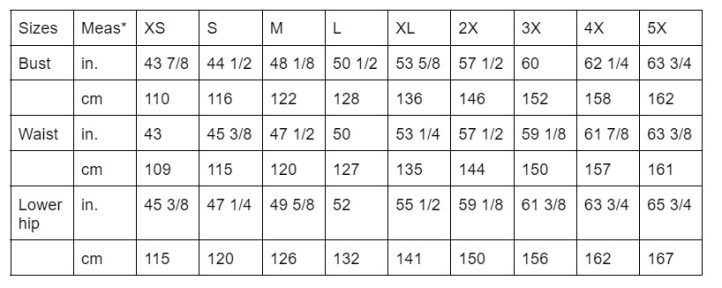
*Meas. refers to measurements
FABRIC RECOMMENDATIONS:
Medium-weight cotton is ideal for balancing between comfort and structure. Other options would be linen or lightweight cotton.
Materials:
- Fabric Requirements:
- 3/8 inch (1 cm) bias tape for finishing
- 19 3/4 x 2 inch (50 x 5 cm) interfacing for button placket
- Six 5/8 inch (1.5 cm) buttons
- One 1/4 inch (0.6 cm) snap button
- PDF Pattern – This is located at the bottom of this page. Please see printing instructions below.
PRINTING INSTRUCTIONS:
Note: To download the pattern, click on the pattern download button at the bottom of the page. We recommend opening your pattern download using Adobe Acrobat.
GENERAL GUIDELINES:
Body Measurements:
BASTE with pins or thread.
PRESS as you sew. Press seams open unless otherwise indicated, clipping inner curves or notching outer curves where necessary so seams will lie flat.
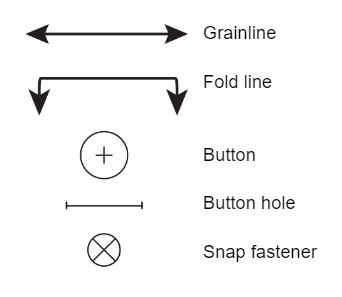
SHADING on sewing illustrations denotes:
VISUAL KEYS in the patterns:
Special Technique:
Stitching in the ditch is a technique which involves sewing down the channel of an existing seam (the “ditch”) to secure the fabric on the wrong side and leaves a neat finish with no visible stitch on the right side. It can be used to finish the inner edge of a waistband, yoke, cuff, collar or binding.
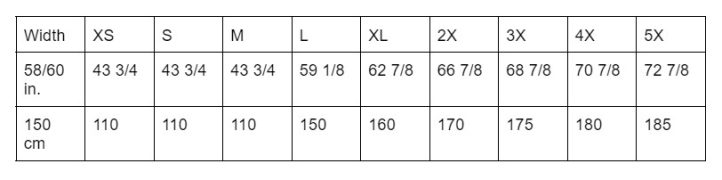
Home Printing A4 Preview:
Use the default setting on your computer and print the square page first to make sure the pattern prints correctly.
PREPARATION:
Pre-shrink fabric.
Lengthen or Shorten pattern at adjustment lines or where indicated on pattern.
- TO LENGTHEN – Slash between adjustment lines. Place on paper – spread pattern amount needed.
- TO SHORTEN – Crease along adjustment lines. Make a fold, half the amount needed to shorten.
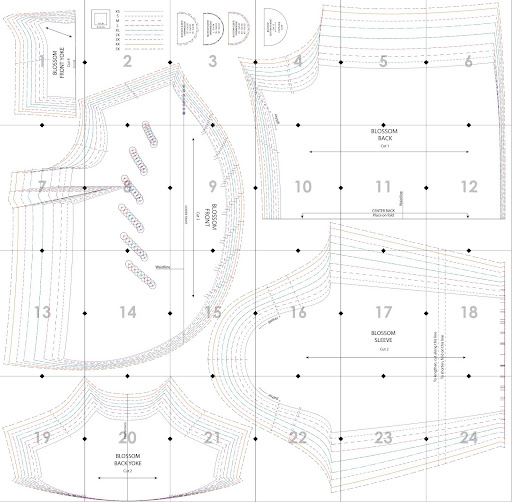
Layout and Cutting Instructions:
- 2 x front
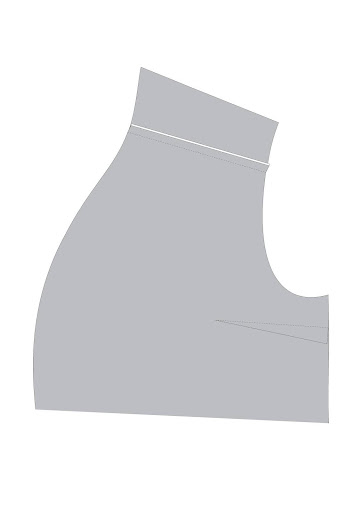
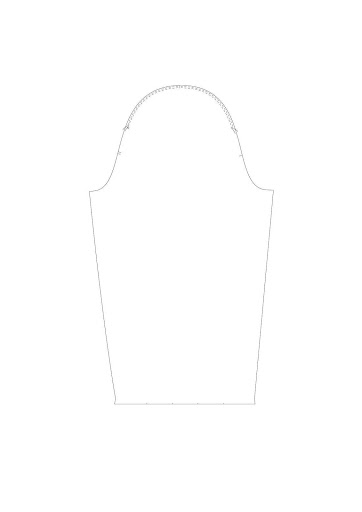
- 4 x front yoke
- 1 x back on fold
- 2 x back yoke
- 2 x sleeve
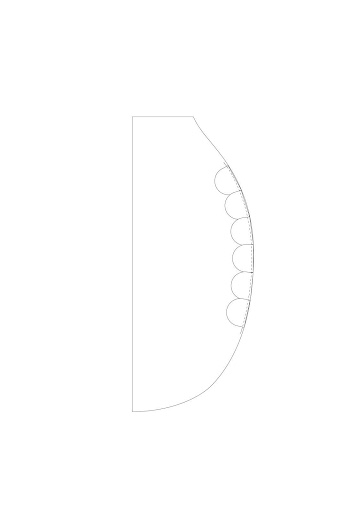
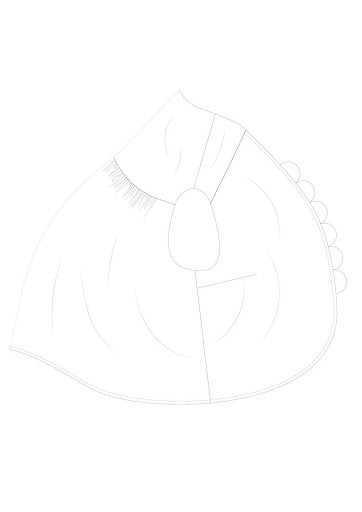
- 12 x button placket petal
- 20 x sleeve opening petal (XS, S, M); 24 (L, XL, 2X); 28 (3X, 4X); 32 (5X) **Note: Remove or add additional sleeve opening petals to your fabric for cutting as listed before sizes here if not provided on the paper pattern.
Layout and Cutting Directions:
Fabric yardage should be laid out on the fold with selvages layered on top of each other. Layout pattern pieces on your fabric with grain lines running parallel to your selvage.
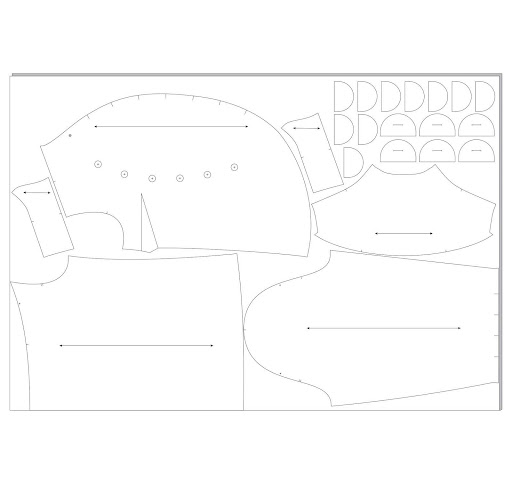
*Layout reference for sizes XS-M
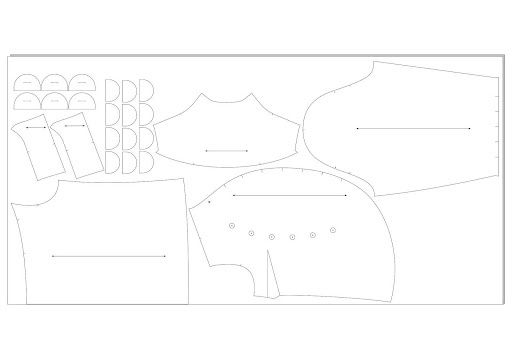
*Layout reference for sizes L-5XL
Sewing Instructions:
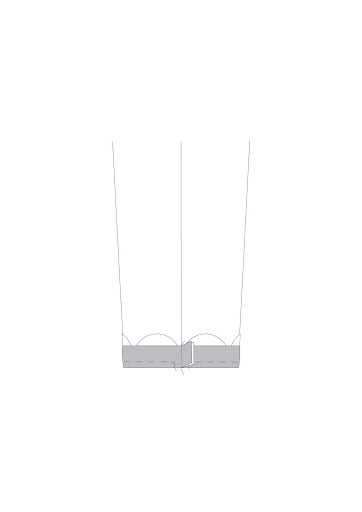
BUTTON PLACKET AND SLEEVE OPENING EDGE PIECES:
- Iron interfacing to the wrong side of six of the button plackets. With remaining button plackets, place pieces right sides together and stitch each petal. Trim seam allowance by 1/8 inch/0.4 cm and clip curve. Turn placket inside out and press flat. Repeat for all plackets.
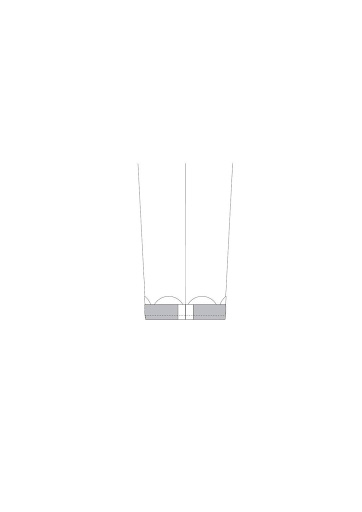
- For each petal of the sleeve opening, follow the same step as making the button placket, except without interfacing.
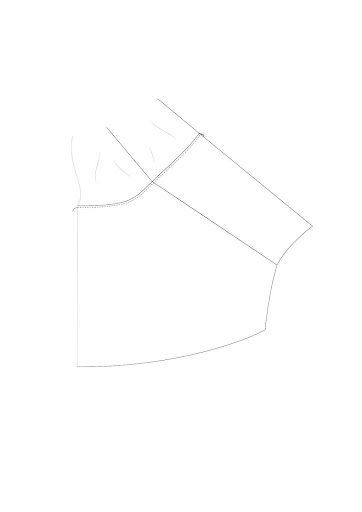
FRONT AND BACK:
- Make darts; press down. Finish raw edges of side seam pieces by using a serger, zigzag stitching or pinking shears.
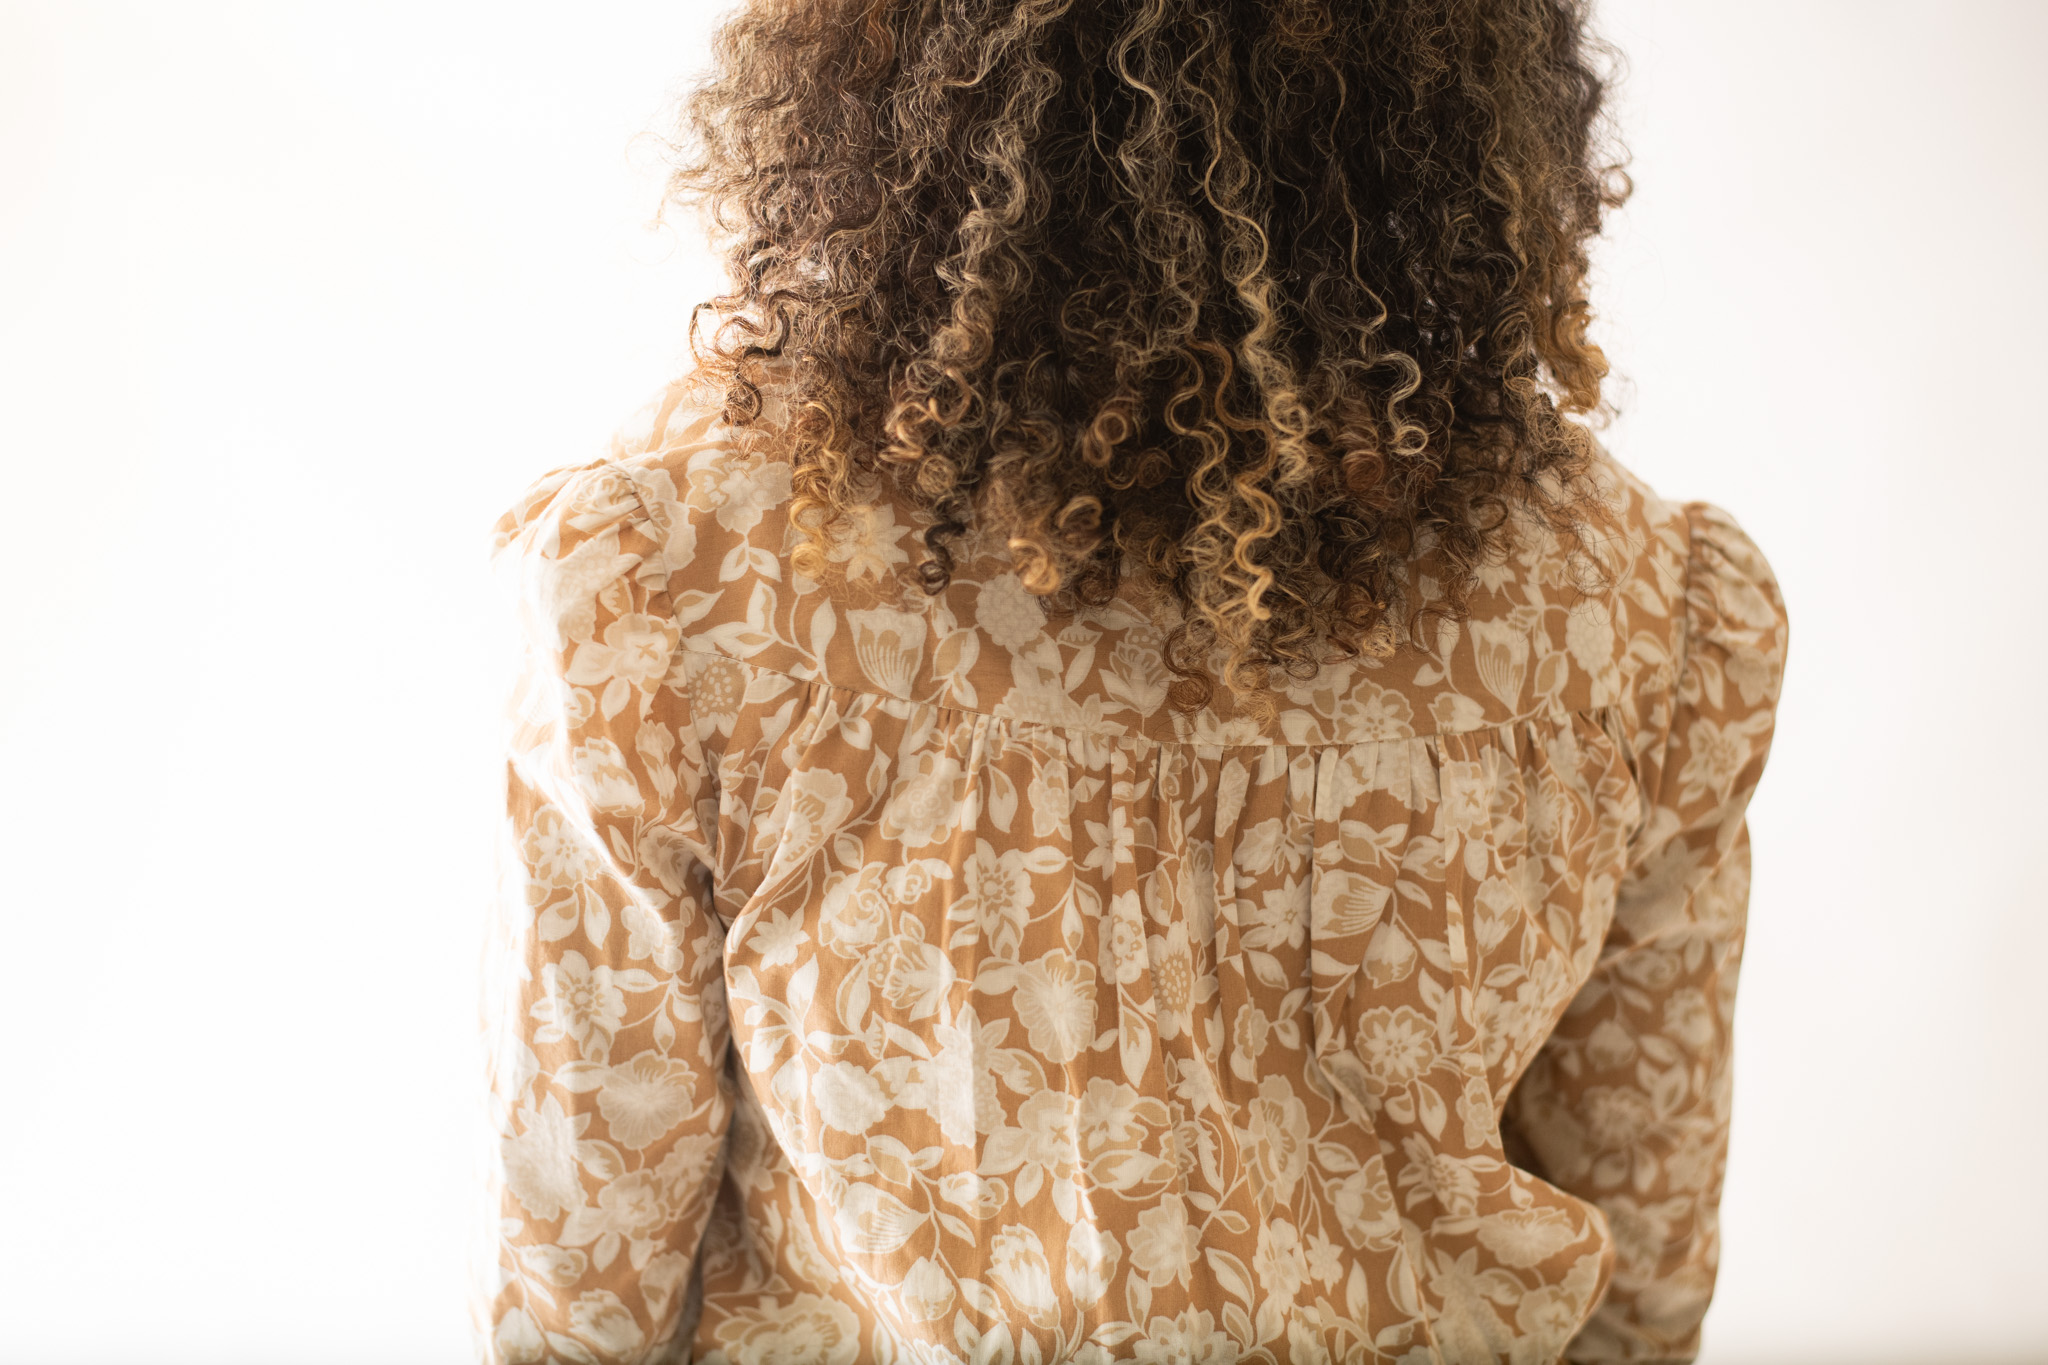
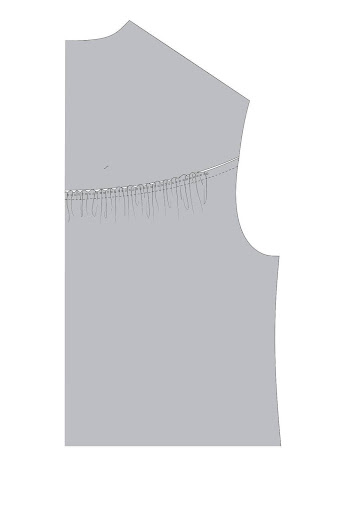
- Stitch front yoke to upper edge of front piece. Press seam towards yoke.
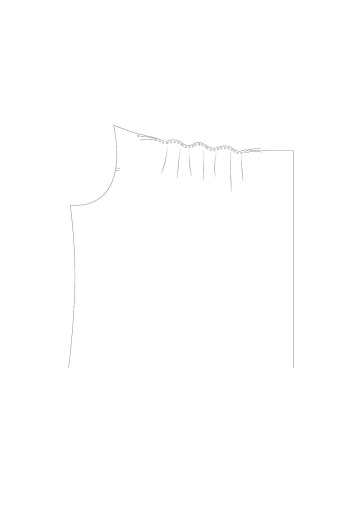
- Gather upper edge of back piece between small dots. To gather, stitch between dots indicated on pattern, using long machine stitches. Adjust gathers and stitch to lower edge of back yoke matching notches and center back. Press seams towards yoke.
- Stitch back to front at shoulders and sides. Press seams open.
- Baste button plackets at the indicated marks.
- Stitch bias tape along the blouse edge, on top of the button plackets. Leave it while you are working on the yoke and facing.
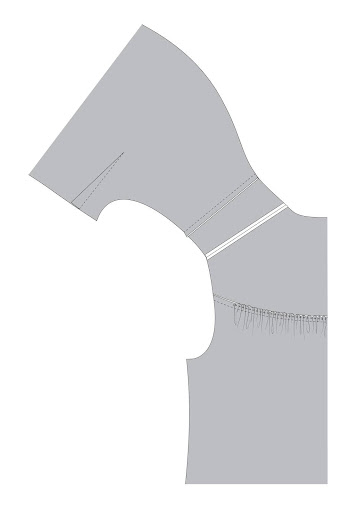
- Stitch back and front yoke facing at shoulders and press seams open. Press back and front yoke seam allowances inside 3/8 inch/0.8 cm.
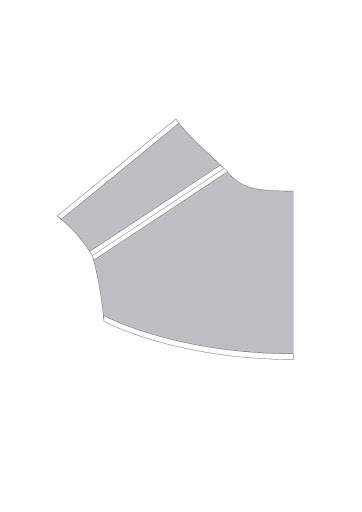
- With right sides together, stitch yoke facing upper edges to yoke upper edges. Clip neck curve. Turn facing to inside, press seam allowance toward facings and understitch. Leave folded edges of lower yoke facings open.
- Go back to finish bias tape along blouse edge by turning bias tape to inside, fold and press. Topstitch 3/8 inch/0.8 cm from the right side.
- On inside, cover stitching line with the pressed edge of yoke facings; extending past the stitch by approximately 1/8 inch/0.2 cm. Pin the edge in place and baste through the ditch of the seam to secure the inside piece in place.
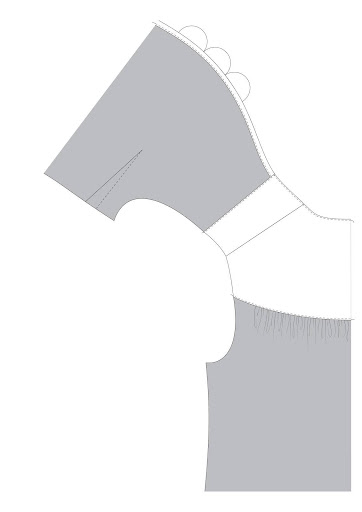
- On outside, stitch in the ditch of the yoke seam, catching pressed edge underneath.
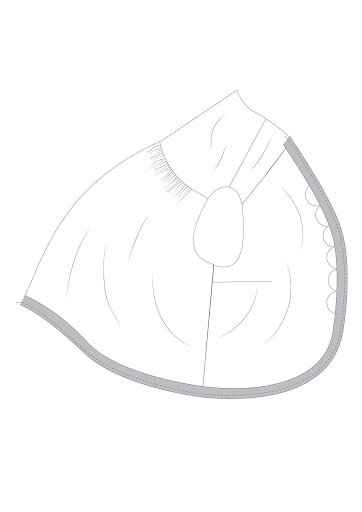
SLEEVES:
- Finish sleeves raw edges by serging, zigzag stitching or pinking shears.
- Gather upper edge of sleeve between small dots. To gather, stitch between dots indicated on pattern, using long machine stitches.
- On the right side, baste sleeve edge to sleeve petal pieces matching indicated marks along the lower edge of sleeve. Baste along placement line.

- With right side together, stitch sleeves. Press seams open.
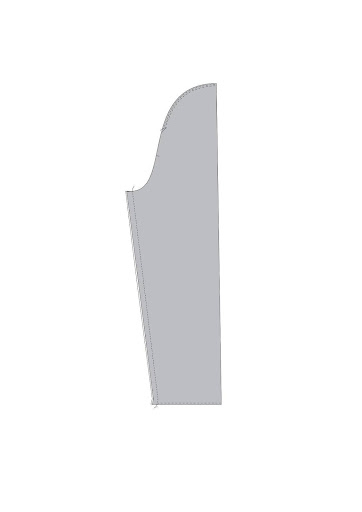
- On the right side, baste bias tape on top of the sleeve and petal edge pieces. Stitch bias tape ends together and press open. Stitch bias tape to lower edge of sleeve. Remove bastings and trim seam allowance by 1/4 inch/0.6 cm. Turn bias tape to inside, fold and press. Topstitch 3/8 inch/0.8 cm from the right side.
- Turn sleeve right side out. Hold garment wrong side out with armhole toward you. With right side together, baste sleeve to armhole edge with center notch at shoulder seam, matching underarm seams and remaining small dots. Adjust gathers, baste and stitch. Stitch again 1/4”/0.6 cm away in seam allowance. Serging or zigzag stitching seam allowances altogether. Press seam toward sleeve.
BUTTONS:
- Make button holes at markings on button plackets.
- Stitch buttons on indicated marks at the bodice.
- Add snap at markings on center front. Awesome! Your blouse is ready.