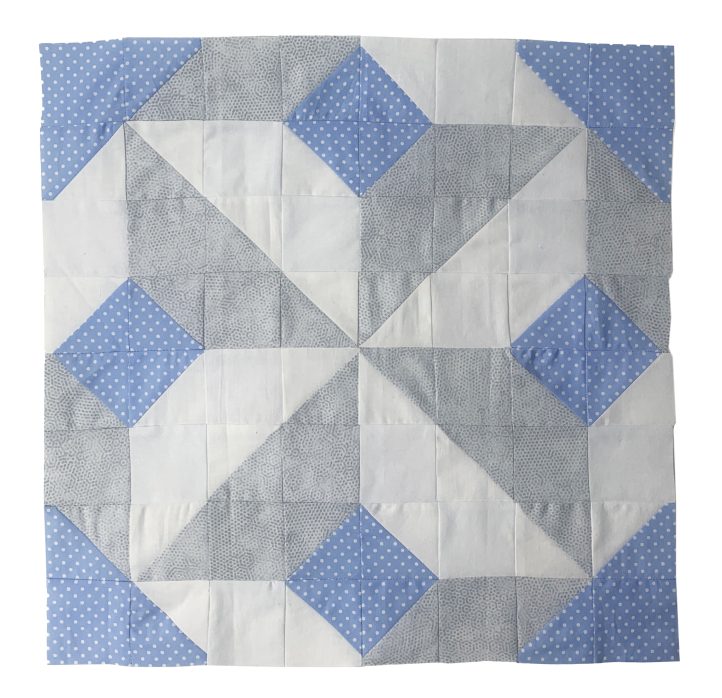
Channel the crisp air of the season’s first snowfall by creating this winter quilt block. Made in shades of silver, winter white and sky blue, this snowflake quilt block is an excellent project for advanced beginner quilters and uses half square triangles for the building block of its design. This block design is ideal for solids and low-volume prints, which will allow the delicate design of the center pinwheel to shine. Perfect for winter mini quilts and home décor, this quilt block has us dreaming of a white Christmas.
Finished Size of Block: 16″ x 16”
Designer Note: Use a 1/4” seam throughout.
Materials:
- Fabric A (polka dot on blue): Fabric piece at least 13″ x 13″
- Fabric B (low volume gray): Fat quarter (21″ x 18″)
- Fabric C (white): Fat quarter (21″ x 18″)
- Ruler
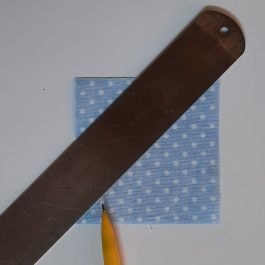
- Pencil or erasable fabric marker
- PDF Quilt Block Layout – This is located at the bottom of this page. See printing instructions below.
PRINTING INSTRUCTIONS:
To download the PDF layout, click on the download button at the bottom of the page. We recommend opening your download using Adobe Acrobat.
Cutting Instructions:
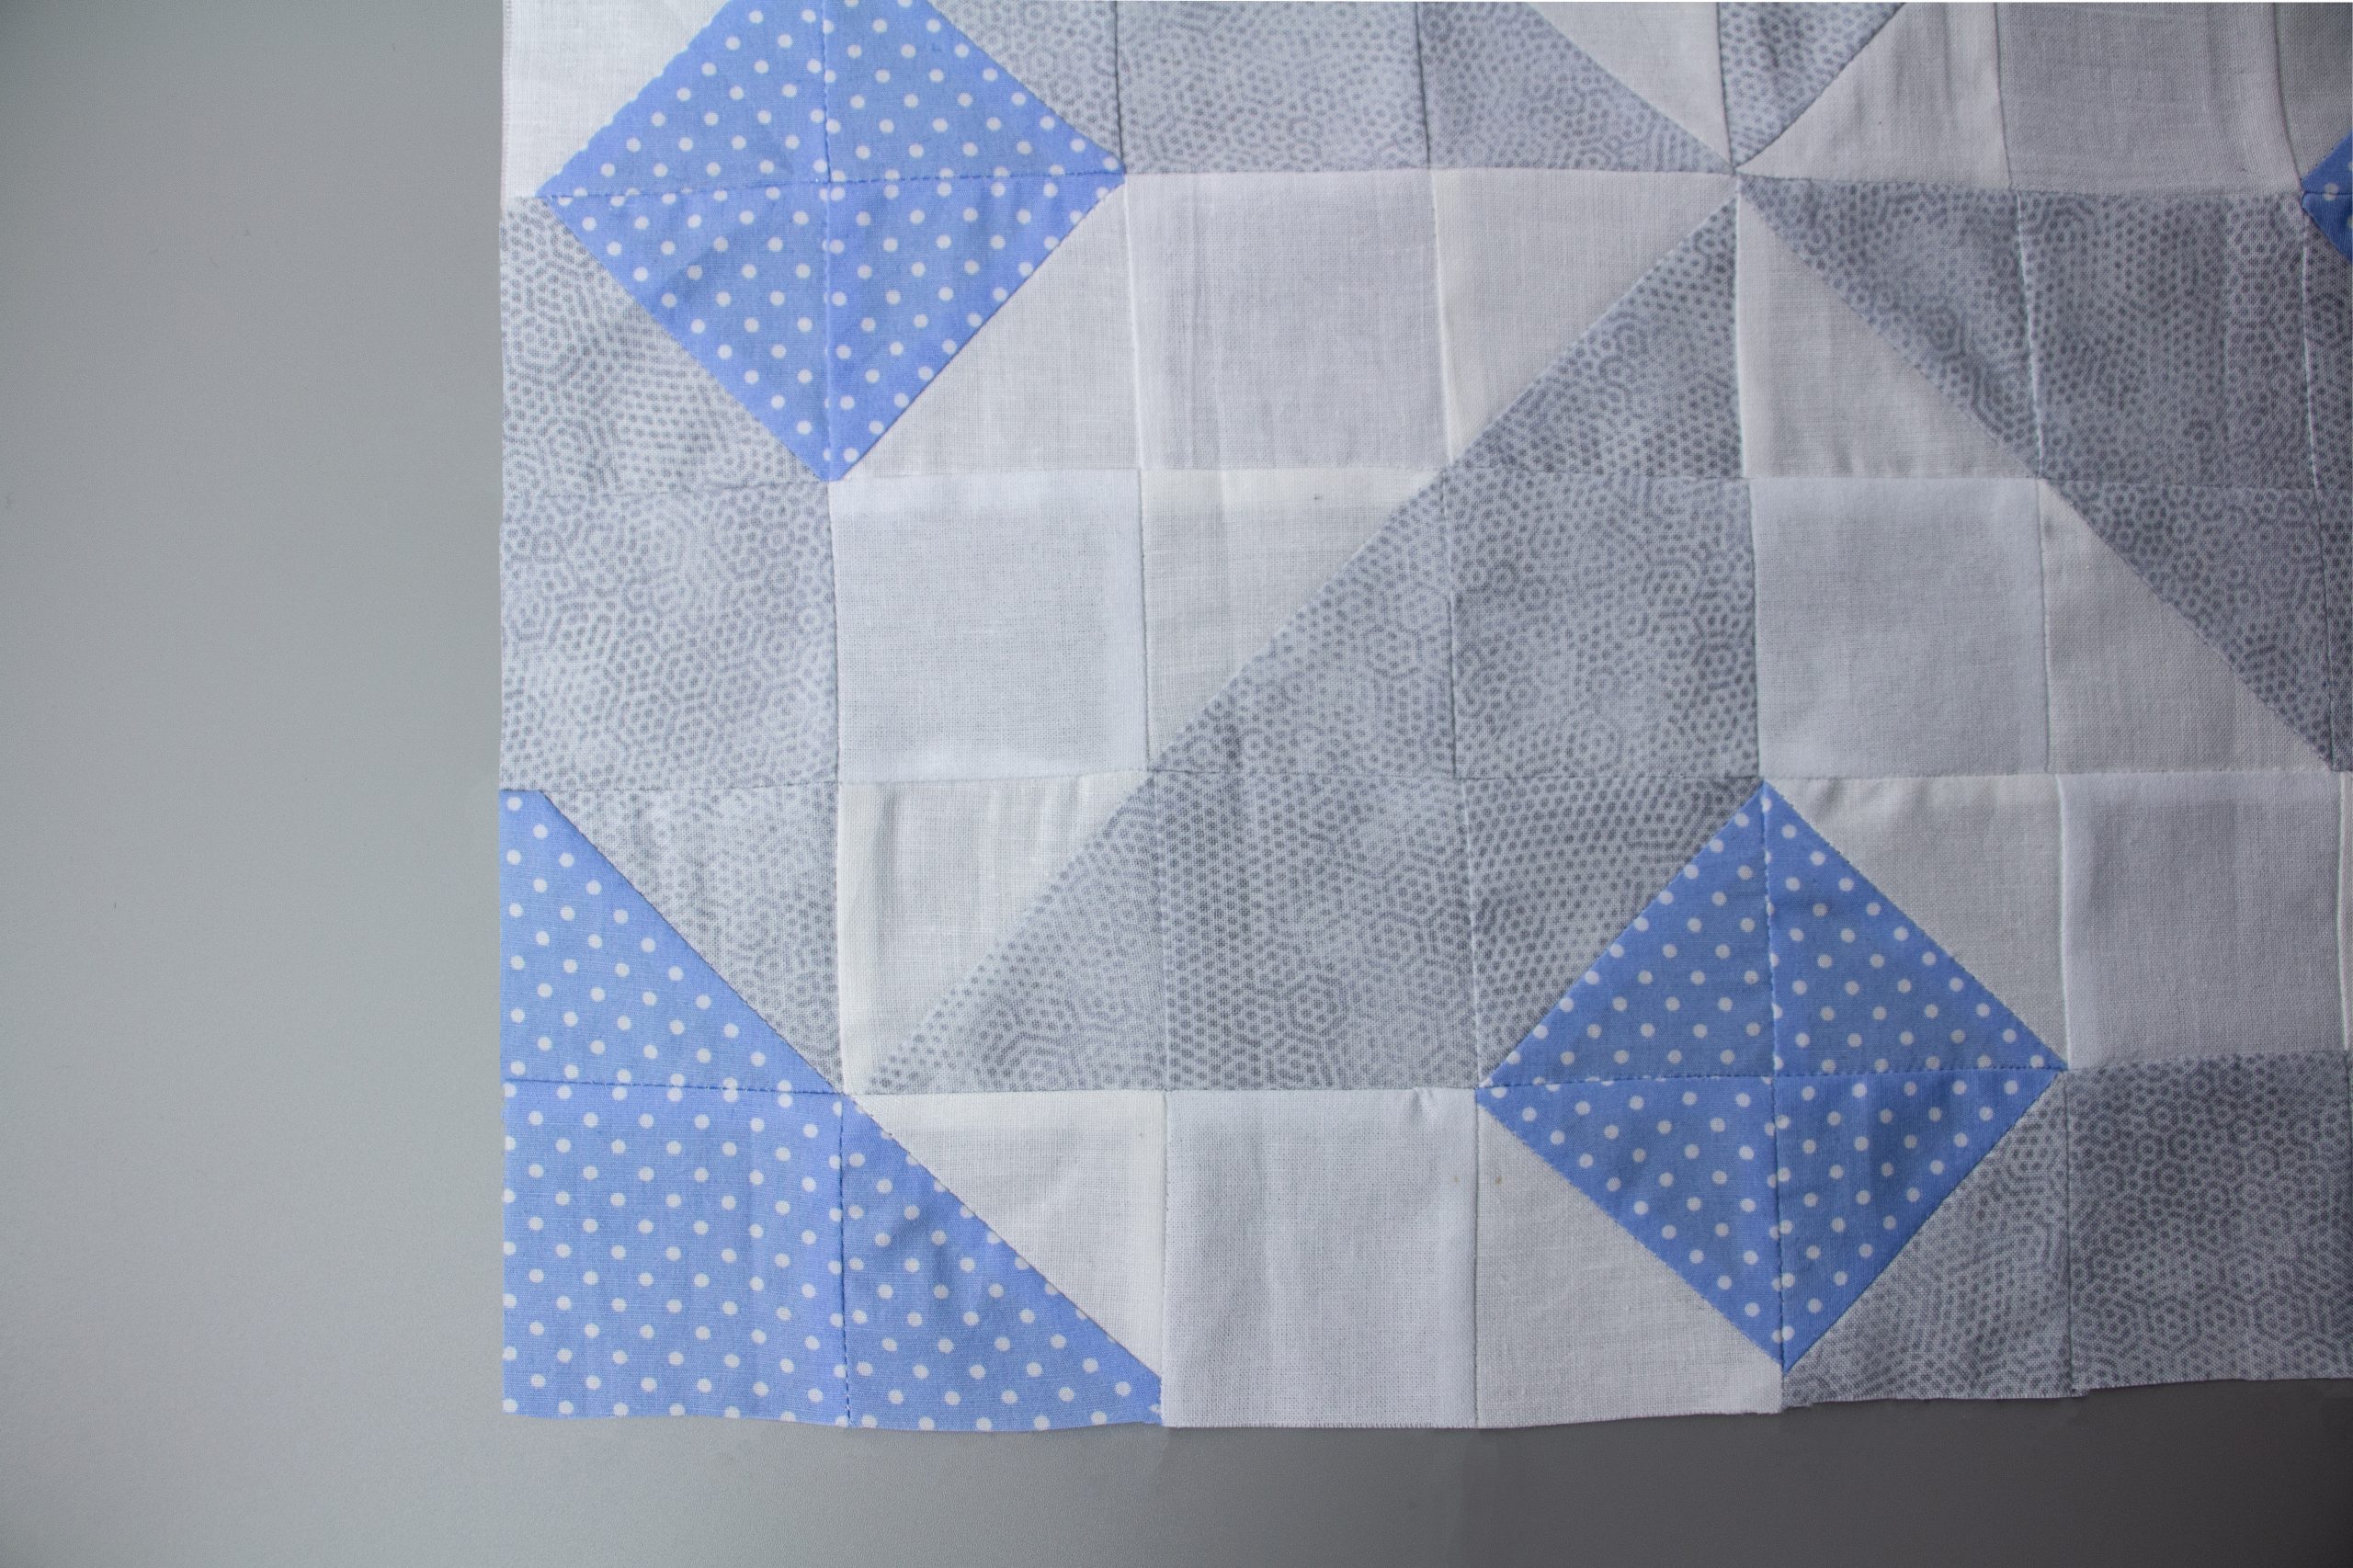
- From Fabric A (polka dot on blue), cut four squares 2 1/2 x 2 1/2” and twelve squares 2 7/8 x 2 7/8”.
- From Fabric B (low-volume gray), cut twelve squares 2 1/2 x 2 1/2” and twelve squares 2 7/8 x 2 7/8”.
- From Fabric C (white), cut twelve squares 2 1/2 x 2 1/2” and twelve squares 2 7/8 x 2 7/8”.
Piecing Instructions:
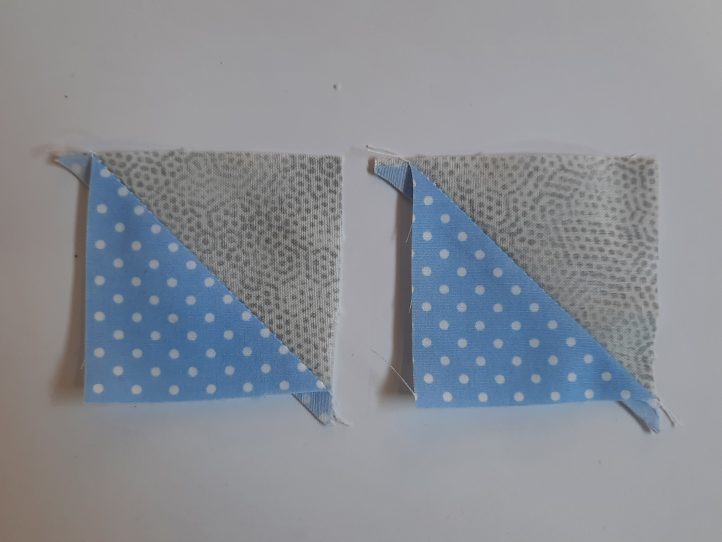
MAKING A HALF-SQUARE TRIANGLE UNIT:
This block uses many half-square triangle units. This is how to make the first one.
- Take a Fabric A 2 7/8 x 2 7/8” square and on the wrong side, draw a diagonal line across it with a ruler and a sharp pencil (or erasable fabric marker).
- Place this square right sides together with a Fabric B 2 7/8 x 2 7/8” square and pin in the un-marked corners.
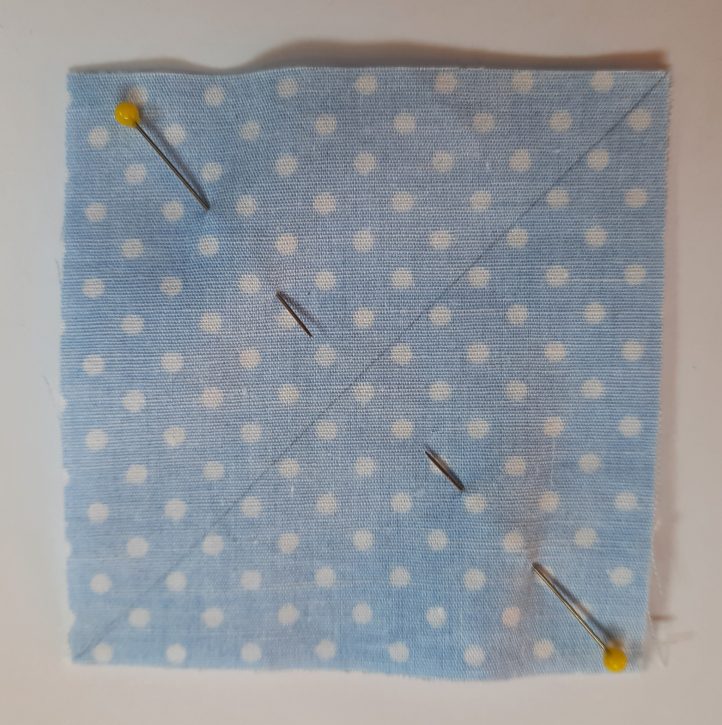
- Stitch a seam, 1/4” away from the line, to the left of the line. Take the unit out of the sewing machine and stitch again, in the same direction, 1/4” away from the line, this time to the right of the line.
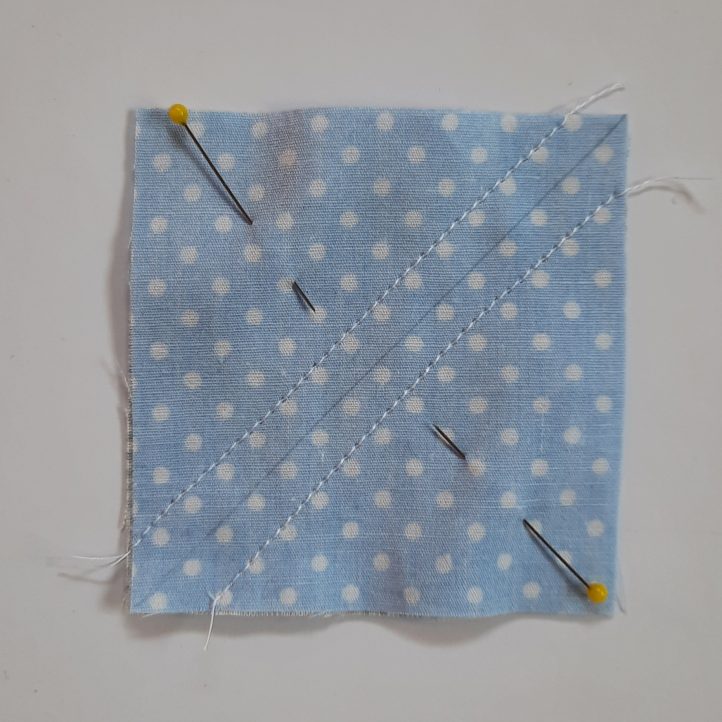
- Cut along the line with scissors.
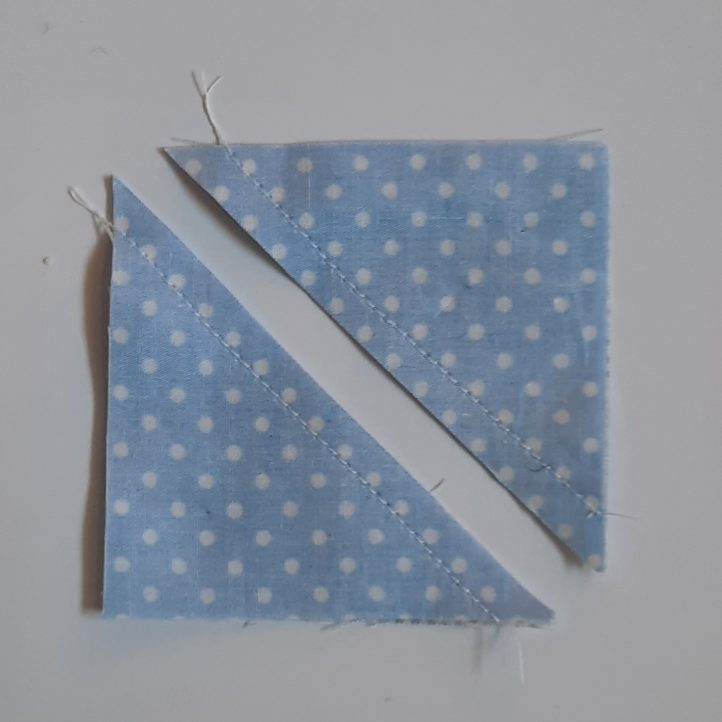
- Press the seam, then open the triangles and press the seam allowances over towards the Fabric A side. With subsequent units, always press the seam allowances towards the darker side.
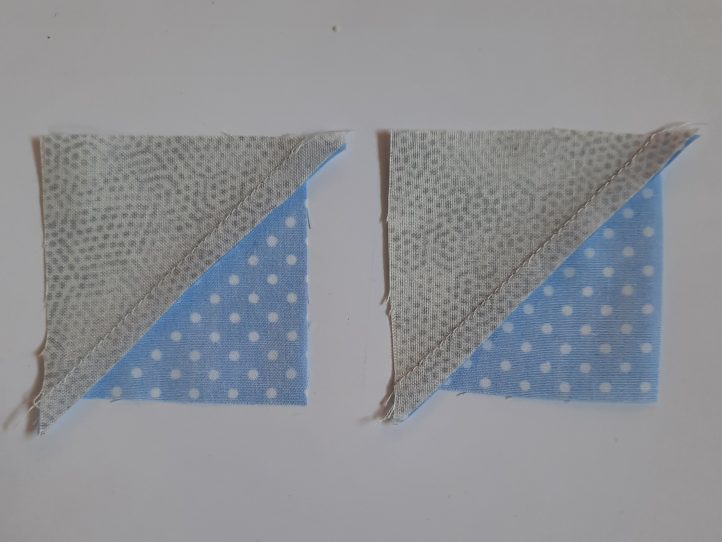
- This process makes two half-square triangle units.
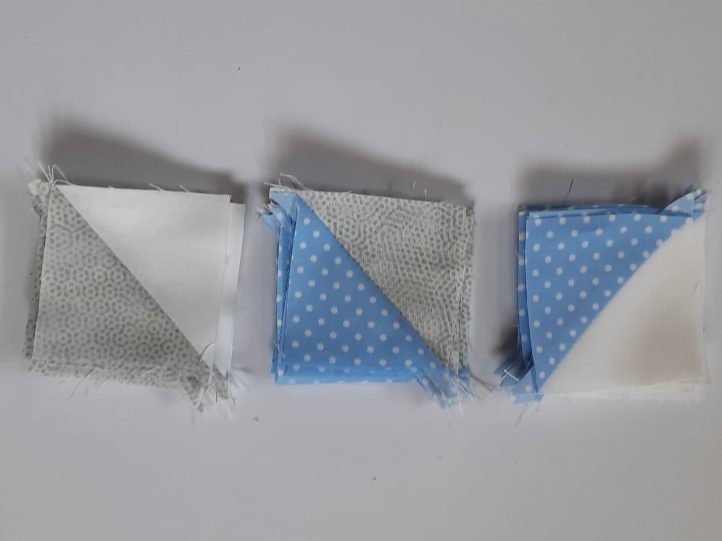
MAKING THE BLOCK:
- Repeat Steps 1-6 (in the above section) five more times with Fabrics A and B so you have twelve A/B units in all. Repeat Steps 1-6 (in the above section) six times, this time using Fabrics B and C so you have twelve B/C units. Repeat Steps 1-6 (in the above section) six times, this time using Fabrics A and C so you have twelve A/C units.
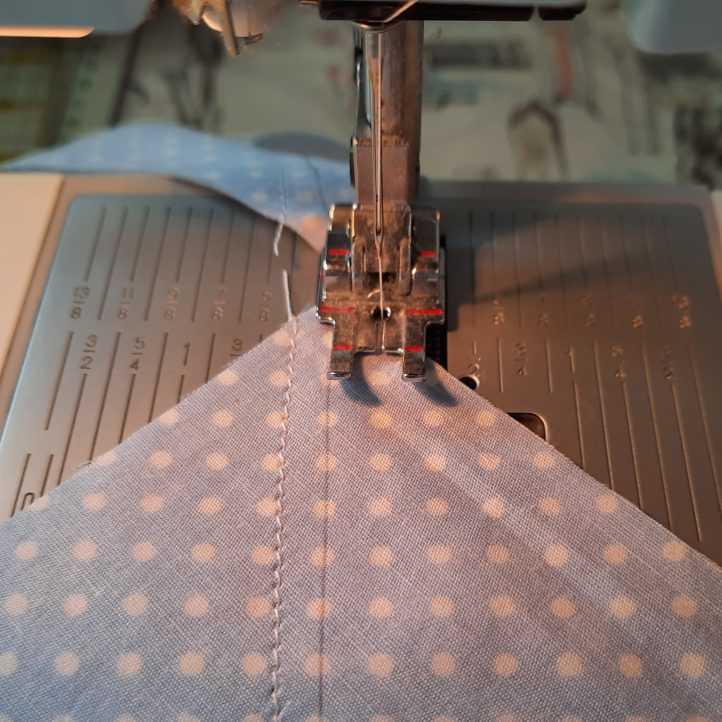
- To save time, you can chain-piece these units, running them one after another under your machine presser-foot, as shown in the photo below.
ASSEMBLING THE ROWS:
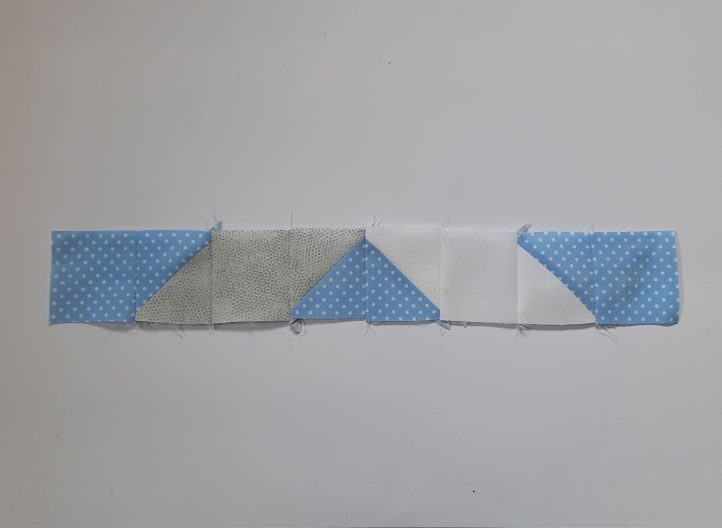
Assemble the rows by joining the squares. In each row, there is a mixture of 2 1/2 x 2 1/2” squares and the half-square triangle units made in Steps 1 – 6 in the above HST section, as well as Step 1 in the Making the Block section. Follow the block diagram carefully, to make sure that you have the orientation of the half-square triangle units arranged correctly, with the diagonal seam sloping in the correct direction in each case. Below are the sequences of squares in each row.
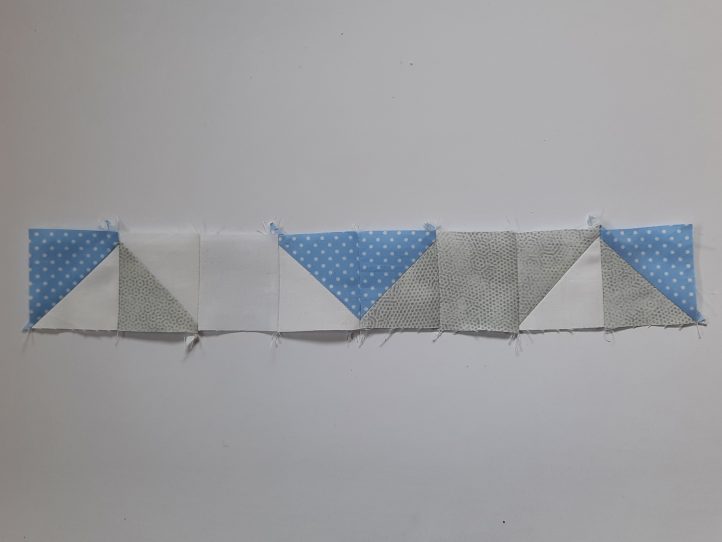
- Row 1: A – A/B – B – B/A – A/C – C – C/A – A
- Press the seam allowances to the right.
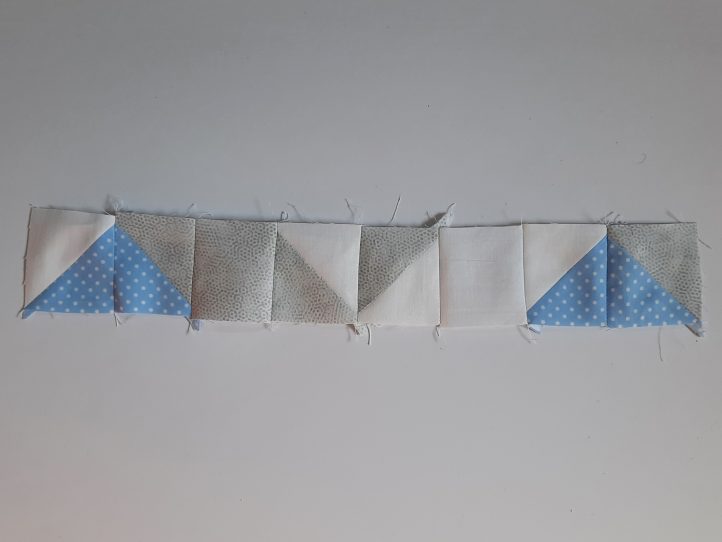
- Row 2: A/C – B/C – C – C/A – A/B – B – B/C – B/A
- Press the seam allowances to the left side.
- Row 3: C – B – B/C – C – B – B/C – C – B
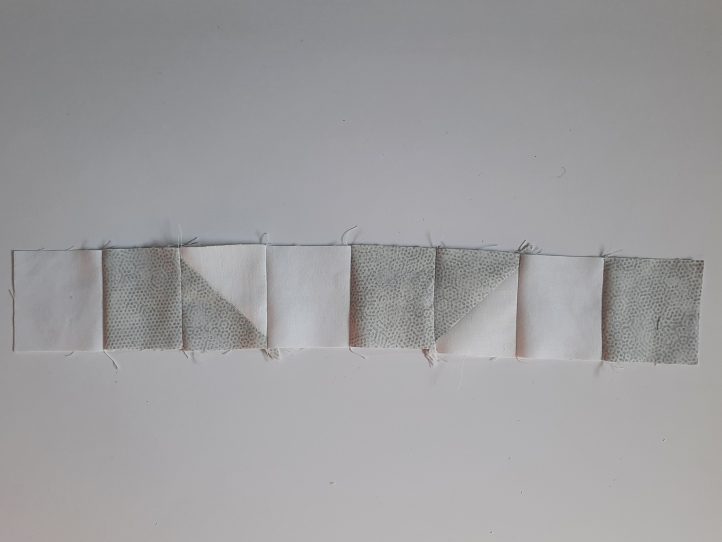
- Press the seam allowances to the right side.
- Row 4: C/A – A/B – B – B/C – B/C – C – C/A – A/B
- Press the seam allowances to the left side.
- Row 5: Repeat the sequence for Row 4, turn the piece through 180 degrees and press the seam allowances to the right side.
- Row 6: Repeat the sequence for Row 3, turn the piece through 180 degrees and press the seam allowances to the left side.
- Row 7: Repeat the sequence for Row 2, turn the piece through 180 degrees and press the seam allowances to the right side.
- Row 8: Repeat the sequence for Row 1, turn the piece through 180 degrees and press the seam allowances to the left side.
JOINING THE ROWS:
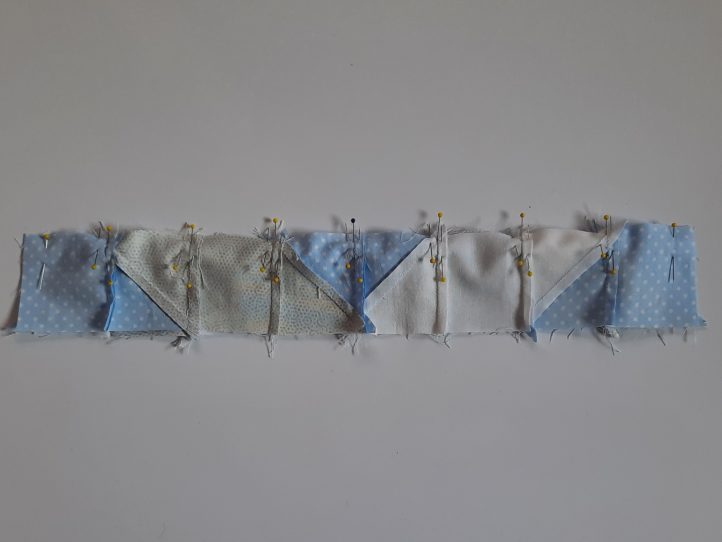
- Join the rows by pinning them together in pairs 1 to 2, 3 to 4, 5 to 6, and 7 to 8. Pin carefully to ensure that the vertical seams are aligned. At each point where the vertical seams align, the two sets of seam allowances should be facing in opposite directions. It is helpful to also pin down these seam allowances so they don’t fold back as you stitch.
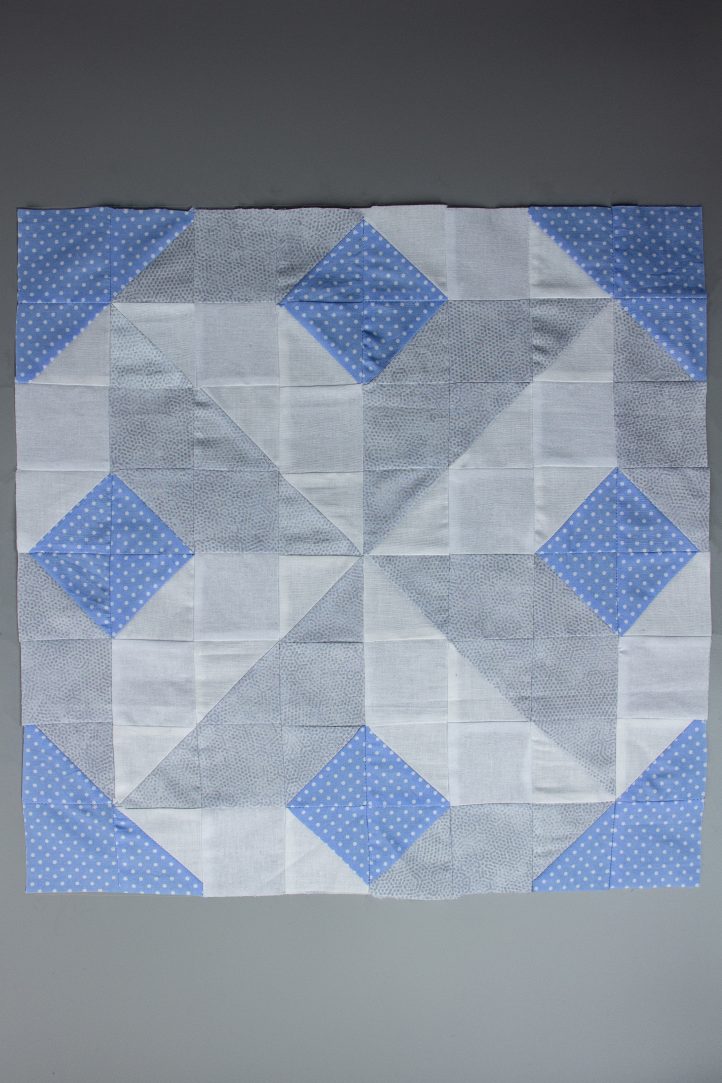
- Join the pairs of rows together: 1/2 to 3/4, then 5/6, and 7/8. Press well. [See reference photo of finished block.]