
Instead of dropping major bucks for a trendy pair of jeans, why not DIY your own for next to nothing? Designer Mary Beth Temple shows you how to update a pair of jeans by adding fabric flares in her newest article! We’ve been seeing flared jeans all over the runway, so Mary Beth is here to show you how to get the designer look for less.
Fabric support for this project is provided by Verhees Textiles. Check out Verhees here or follow them on Instagram!
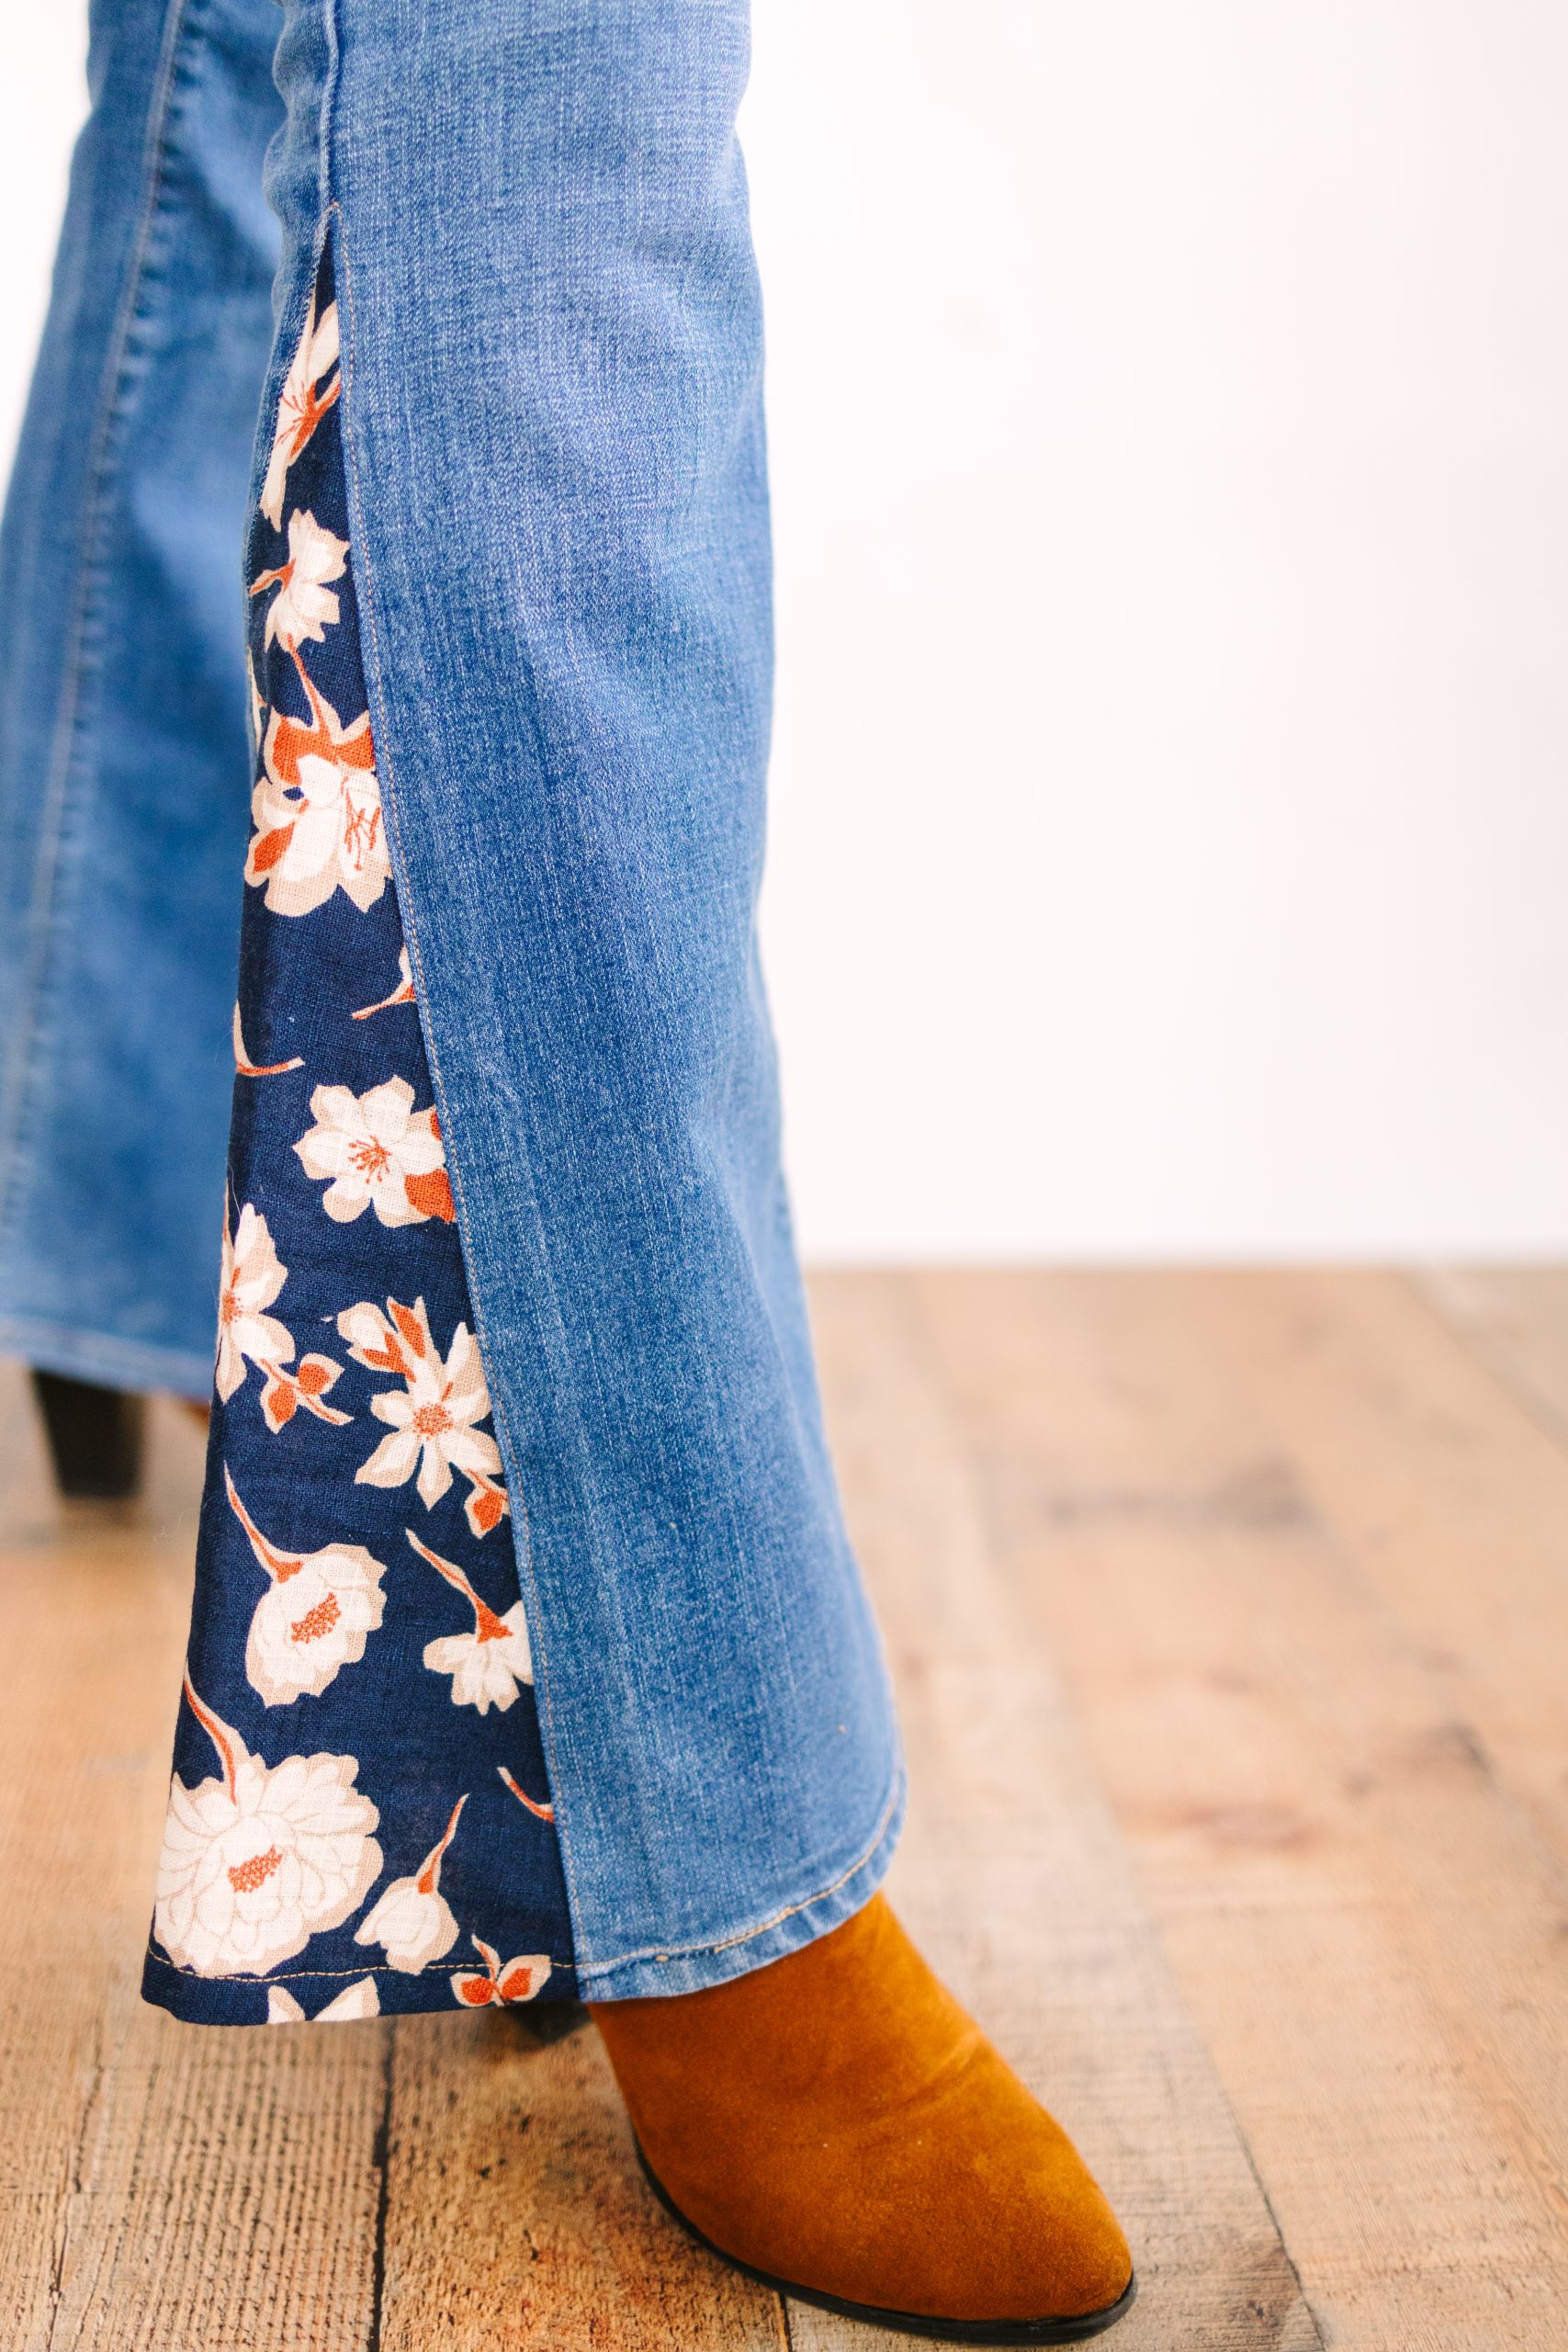
One way to fancy up a pair of plain jeans is to add a little flair – or flare!
Before You Start Sewing
The first thing you need to do is select your materials. For your jeans, a straight leg or boot cut is the easiest to work with but you can use anything from skinny jeans to flares. Choose a pair that does not have a flat felled seam on the outside edge – they can be harder to unpick, and also some brands cut those seam allowances really narrow so you would have less to work with.
Choose fabrics that are durable and have some weight to them – you don’t want to combine light and gauzy with jeans-weight denim. A half yard should do it if the print isn’t directional, 3/4 yard to be sure, if your print is directional, or for you taller folks.
Wash your jeans and pre-wash your fabric – you want to make sure you can toss your finished item in the wash.
How to Alter Jeans
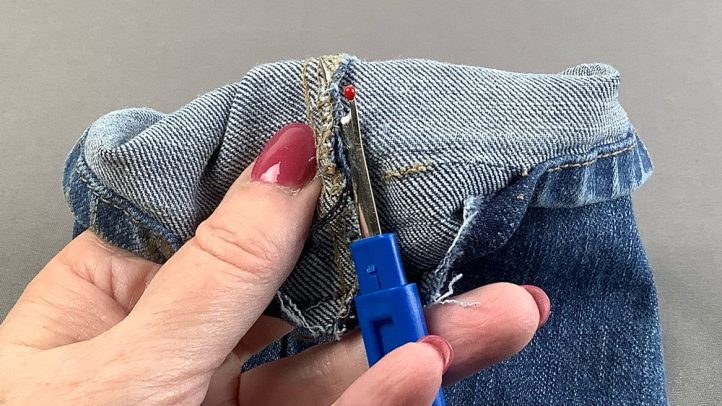
- The best place to start your flare is the place where the leg starts to widen, below the knee. That will be in different places depending on the style of the jean you are cutting. Place a pin there so you don’t overcut your side seam.
- Using your seam ripper, pick out the hem for 2–3 inches on either side of the outside seam.
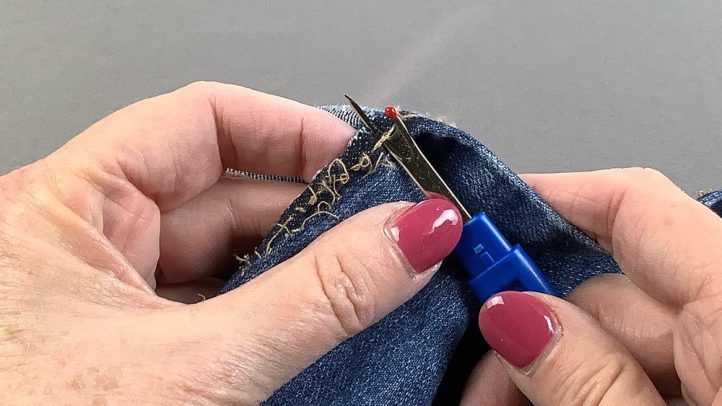
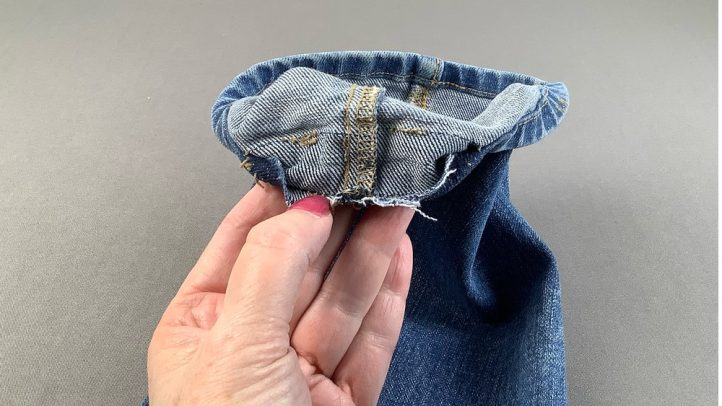
- Open up the side seam from the hem to the pin marking the top of your flare. It will probably have some overlock/serger stitching on that seam, and you’ll have to pick that out.
- Now you want to cut a tall triangle, but the measurements will be different for every person depending on the size/shape of the jeans and how much flare you want to add. You want the height of your triangle to be the measurement from the top of your open seam to the bottom of the jeans AFTER you have unpicked the hem PLUS 1/2” for a seam allowance at the top.
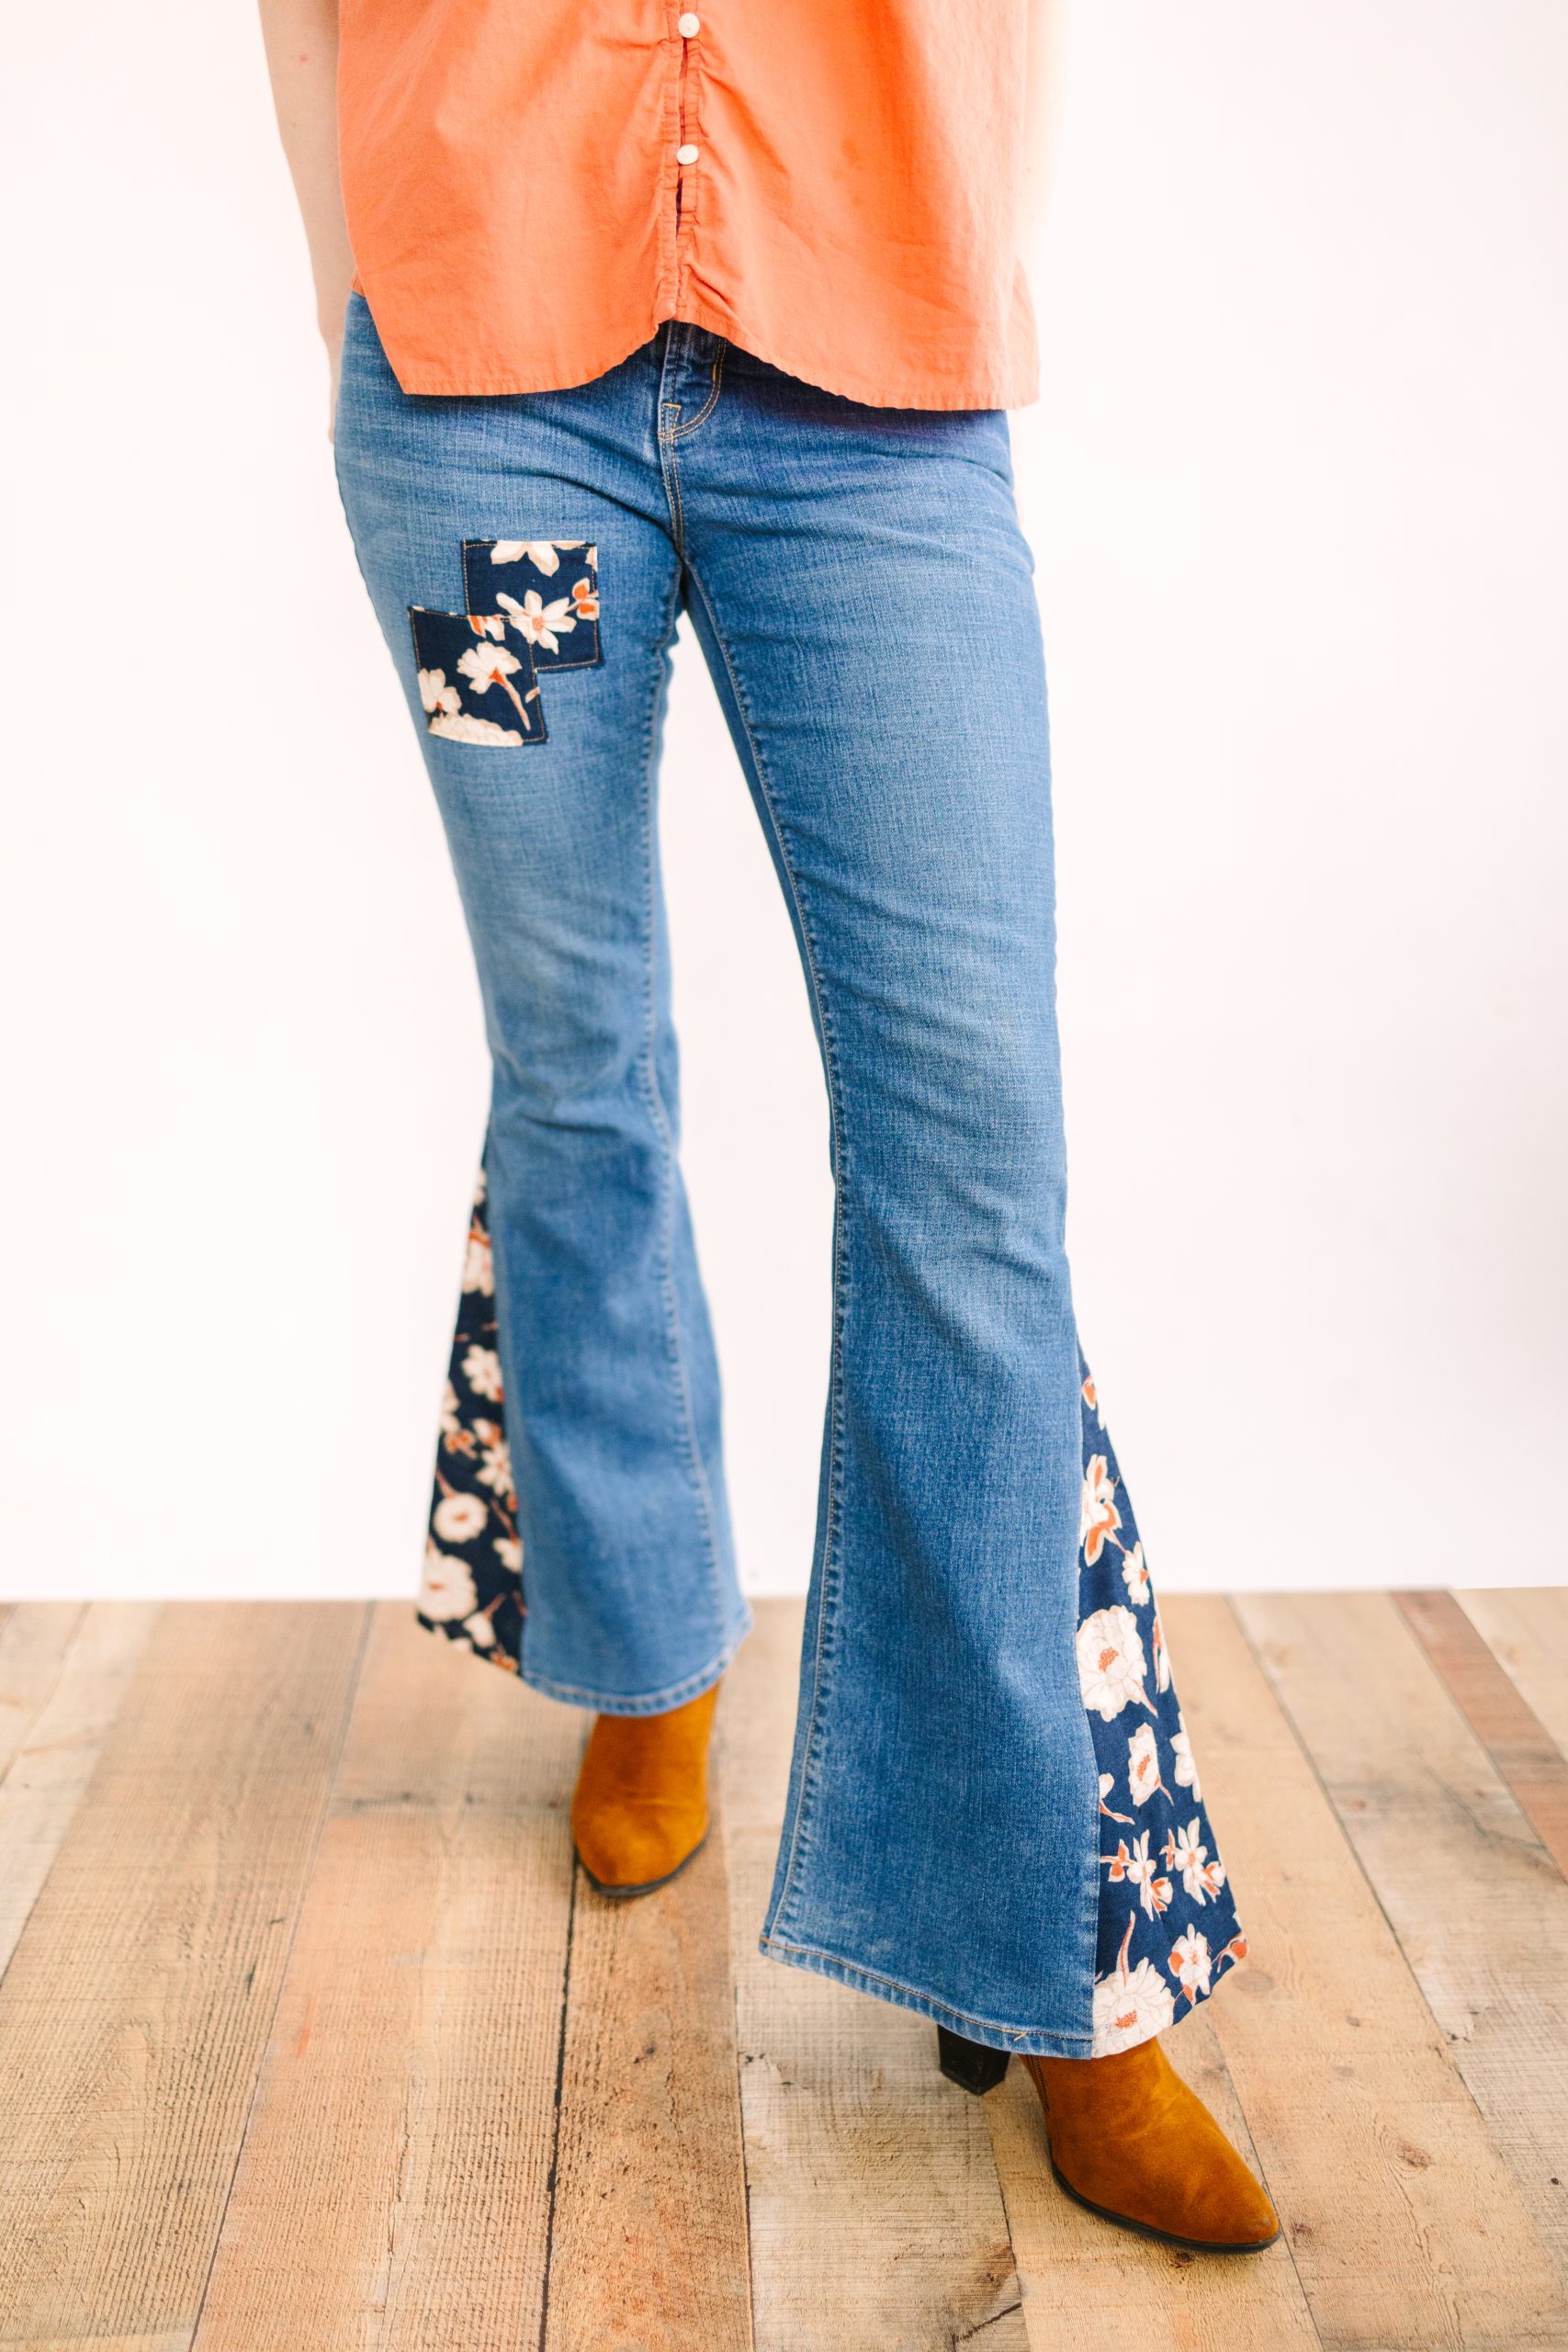
- For the width at your bottom edge, you want the measurement of the amount of flare you want to add PLUS 1” – 1/2” seam allowance on each side. For the jeans in the photos, I added 12” of flare, and my measurement from the top of the seam to the bottom hem was 18”, so I made a rectangle 18 1/2” tall x 13” wide at the bottom. Then, using a straight edge, I drew a line from the center of the top to the outer edge of the bottom on each side, giving me a tall triangle. Cut along the lines.
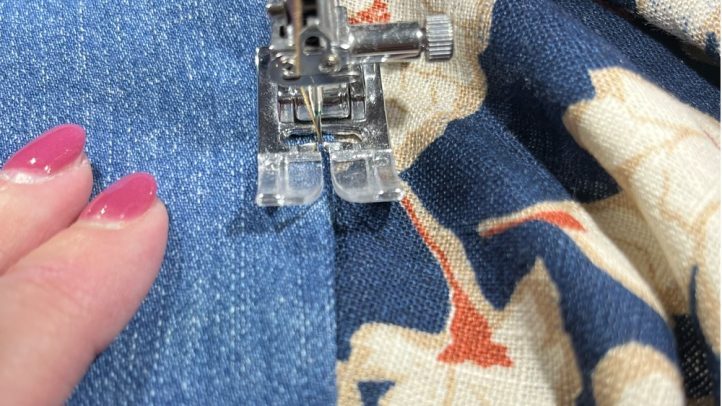
- Pin or clip the right sides of the flare fabric to the right sides of the jeans. While I would normally assume a 1/2” seam allowance, you want to make sure that you are stitching in the ditch formed by the original seam you ripped out – otherwise you could have some dark lines showing since the fabric inside the seam allowance is usually darker because it didn’t fade as quickly in the wash.
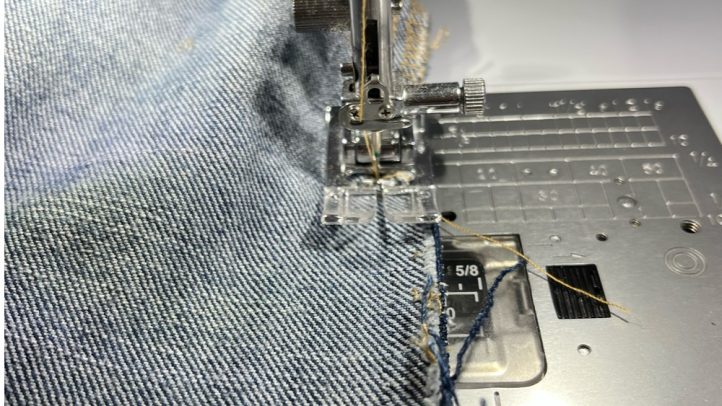
- If you have access to a serger or overlock machine, this is a great time to use it to finish off those seams. If you don’t though, you can use a faux overlock stitch on your sewing machine if you have one, and if you don’t, a simple zigzag stitch will work.
- Press your seams towards the denim. Topstitch the pressed seams. It’s up to you if you want to use a color of thread that matches the denim, or maybe use the same color as the other topstitching on your jeans. In the case of the sample, the topstitch color was gold.
- Now fold up the hem in the same way the original hem was folded and topstitch that into place using the same color thread as the original hem.
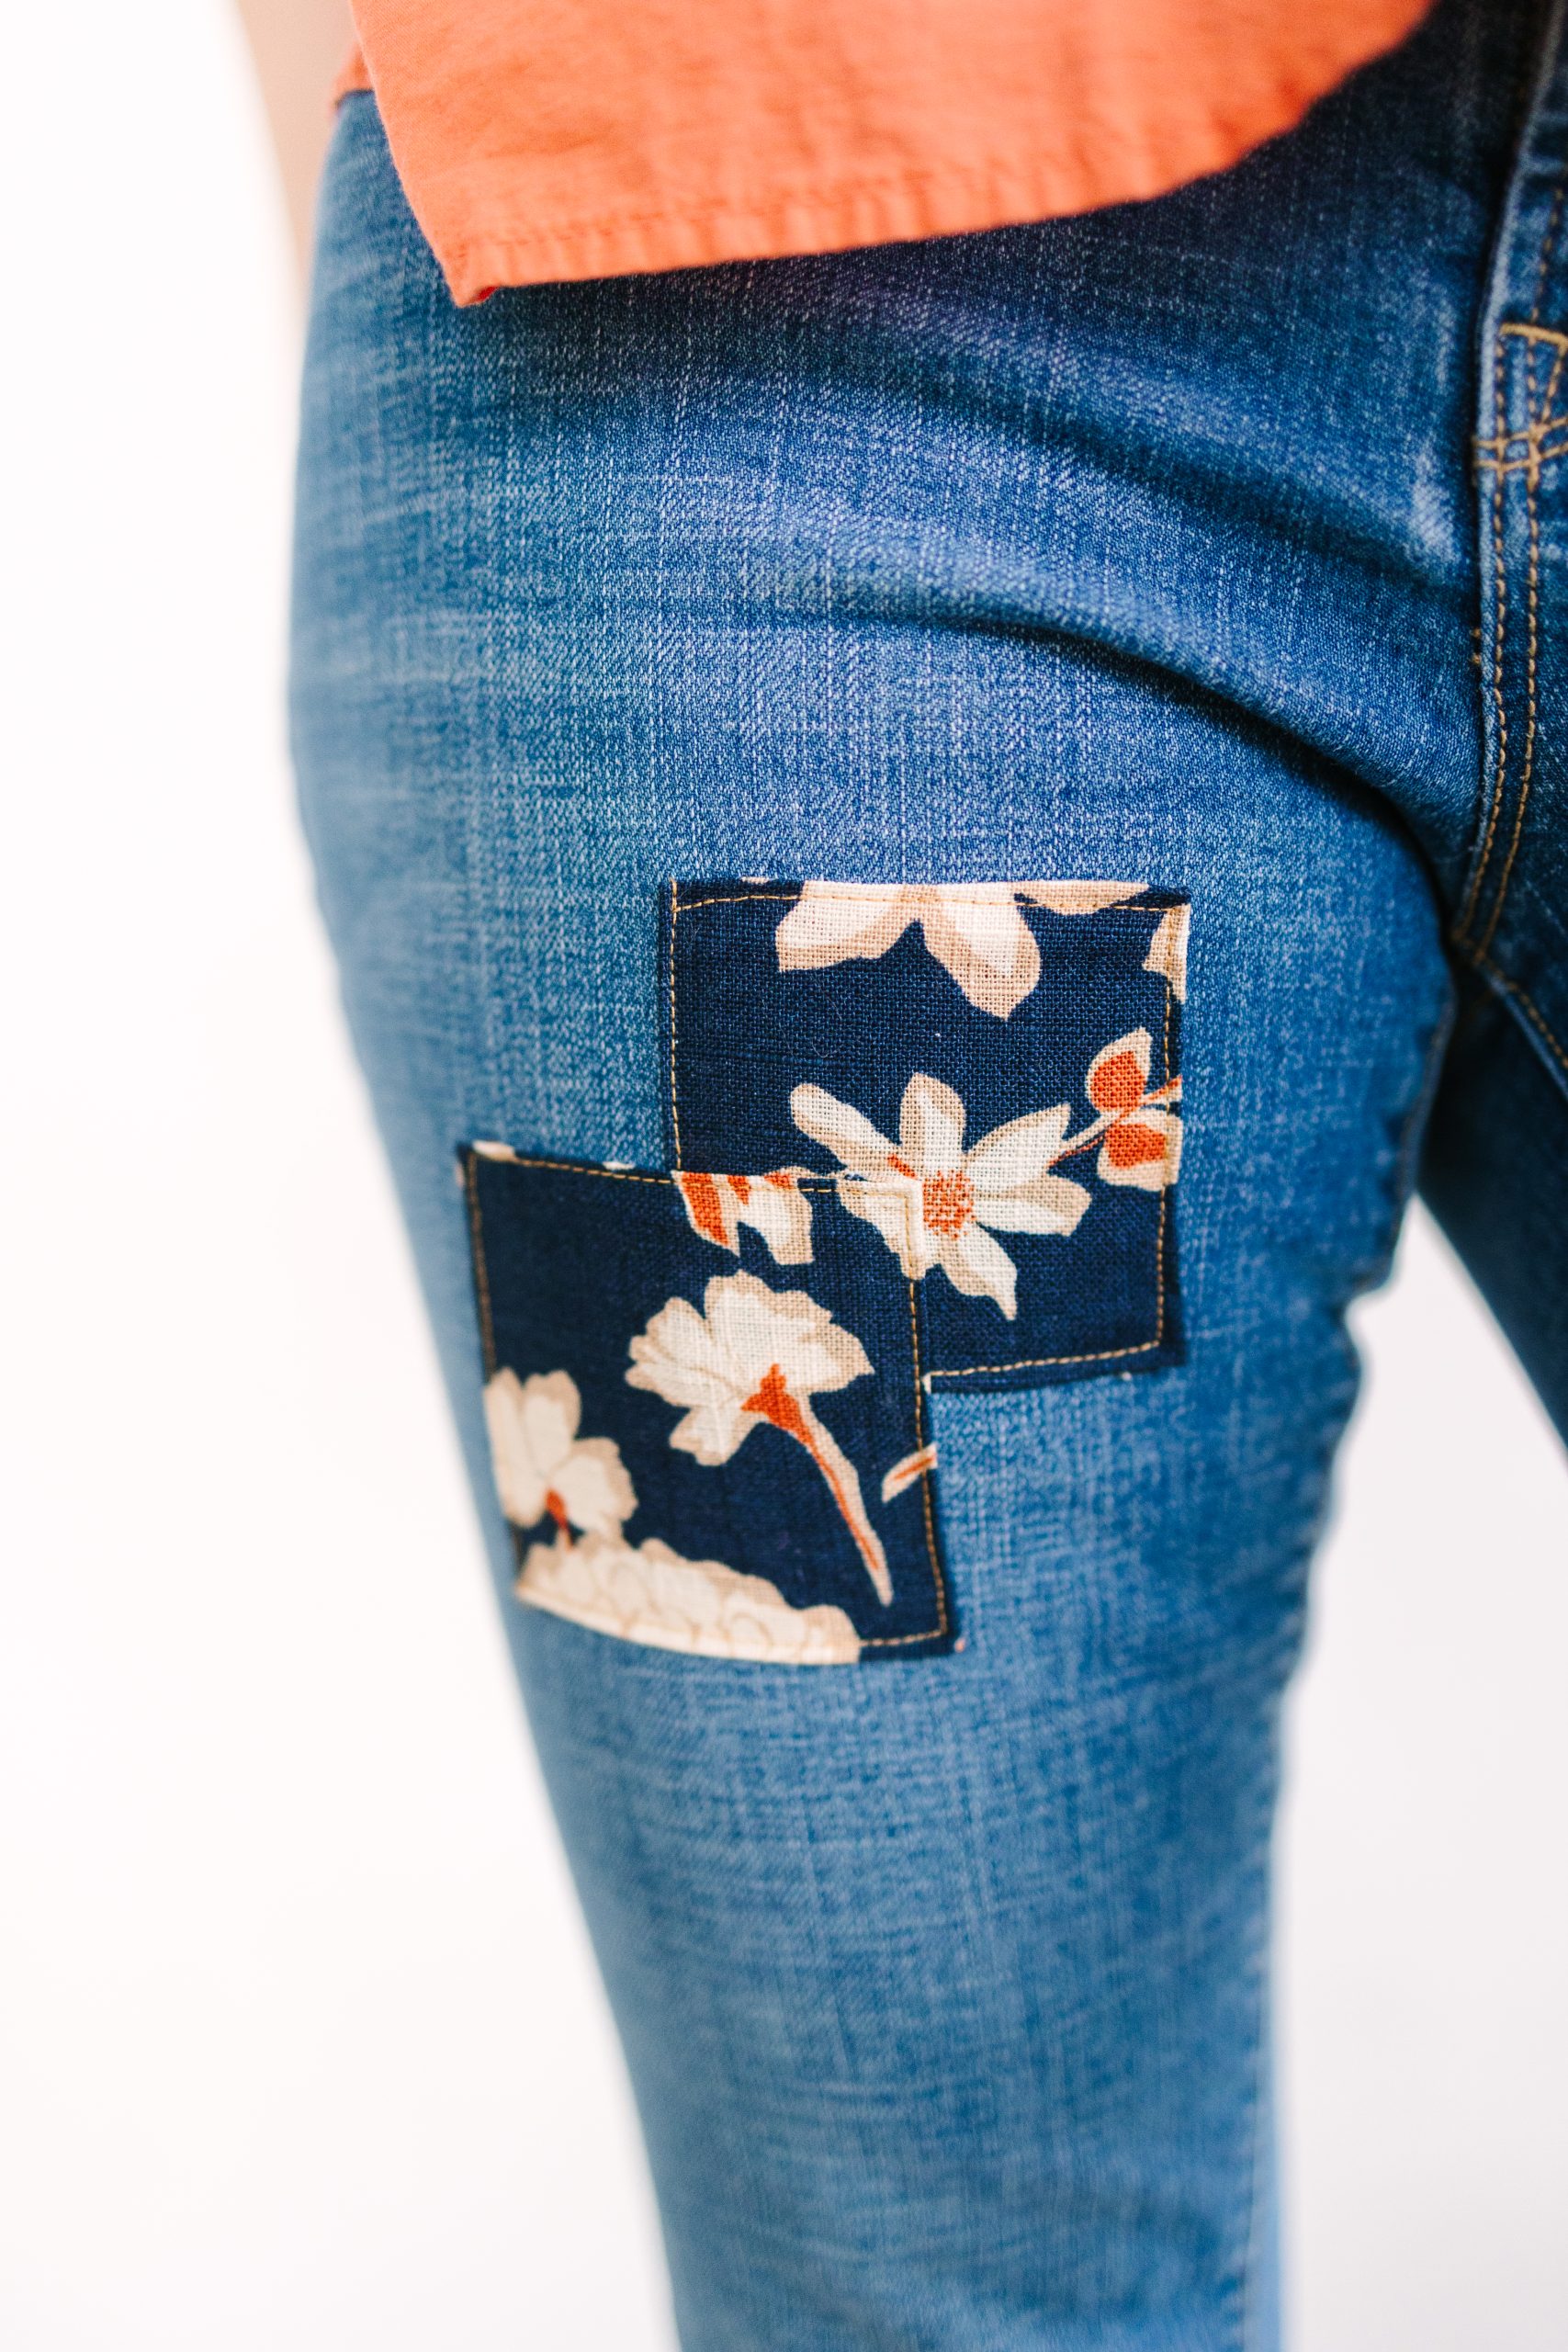
- Since I had some fabric leftover from cutting out my triangle, I made two 3” squares of fabric centering a pretty part of the fabric print. I pressed under a 1/2” seam allowance on all four sides, then topstitched one down on a thigh of the jeans. I topstitched the other square on top of the first one, offsetting it just a bit. The alternative if you are working with something with a relatively coarse weave like the linen I was working with is to topstitch with a narrow zigzag any geometric shape about 1/4” x 3/8” from the raw edge. When you throw the jeans in the wash, the raw edges will fray and look interesting!
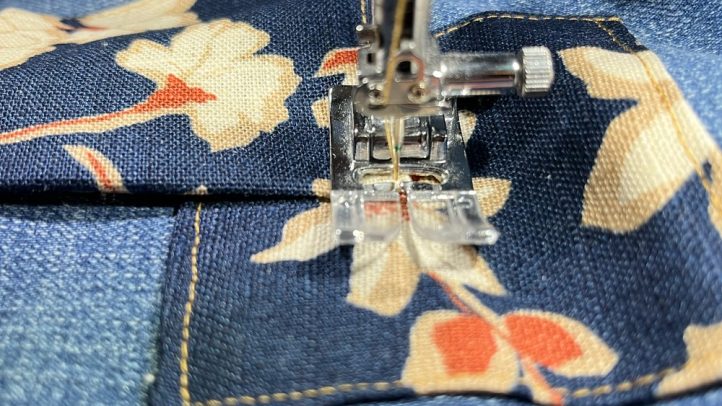

What’s the best, or easiest, way to do the top of the triangle insert? I’ve done this before, but never get a smooth finish at that point. Now, I want to do this with a couple of t-shirts that are too small in the belly area. Thanks!
Hello there! According to the designer, “The trick to a clean top point is to stop the seam exactly where the point is – not to cross that intersection on either seam. Then trim the top seam allowance close.” Hope this helps! – Ashley, We Like Sewing