What Is a Walking Foot and When Do I Need One?
If you go through the box of things which came with your machine (you know, those strange and alien things that you assumed you would never need), you just may spot a walking or dual feed foot amongst the collection.
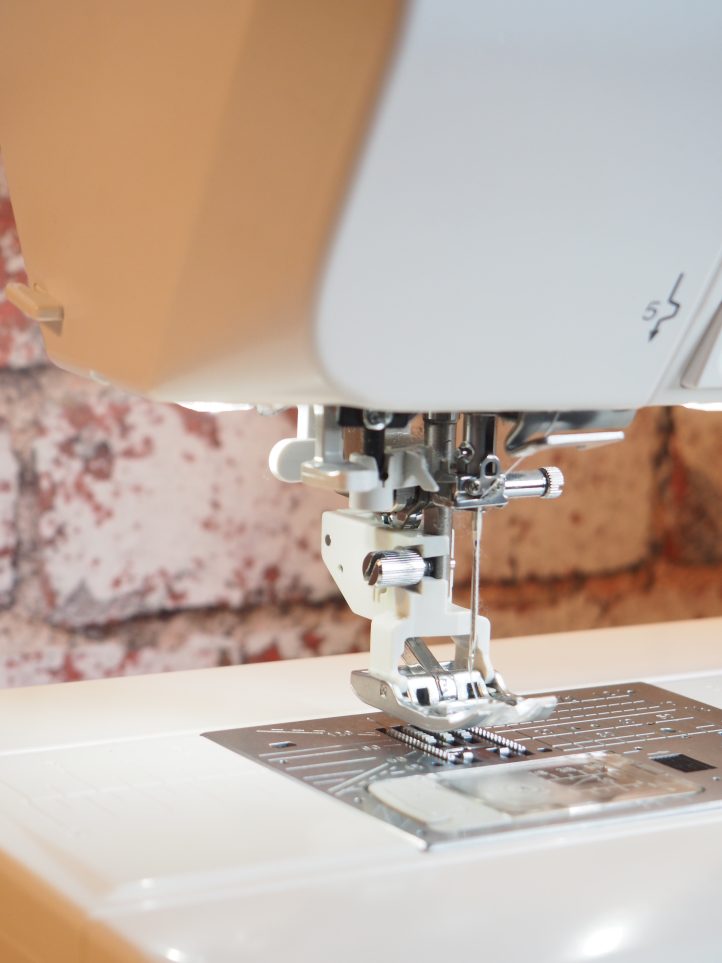
It will look something like this.
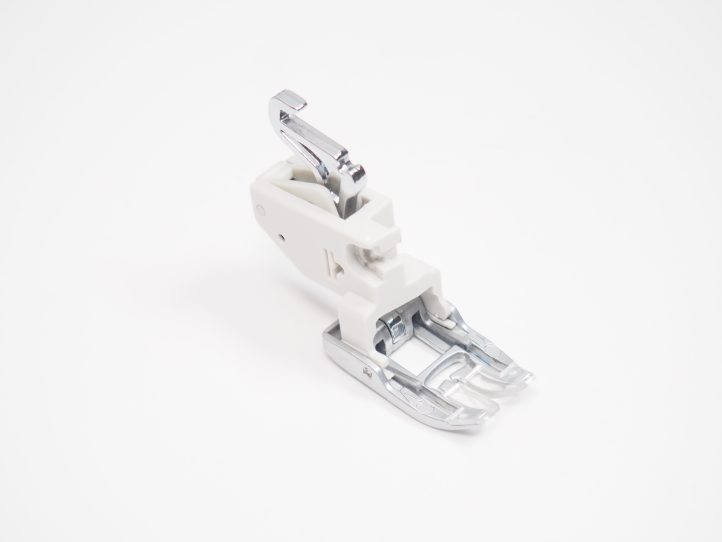
It really looks odd but it is a powerful thing and if you are even considering quilting, then make sure that you put it where you can find it again.
All modern sewing machines have feed dogs (those rough teethy things on the needle plate) and their job is to feed the fabric layers through so that the stitches are even and you can sew things together. Normally when you sew, you use a version of a normal presser foot, which is smooth underneath so the feed dogs feed the fabric through on the bottom while on the top, the fabric layers just sort of slip under the presser foot.

But if you have more than two layers of fabric (or even some specialty fabrics), you can find them moving unequally because the lower layer moves at one speed and the upper layer moves at another. This can cause slipping, puckering and unsightly stitching.
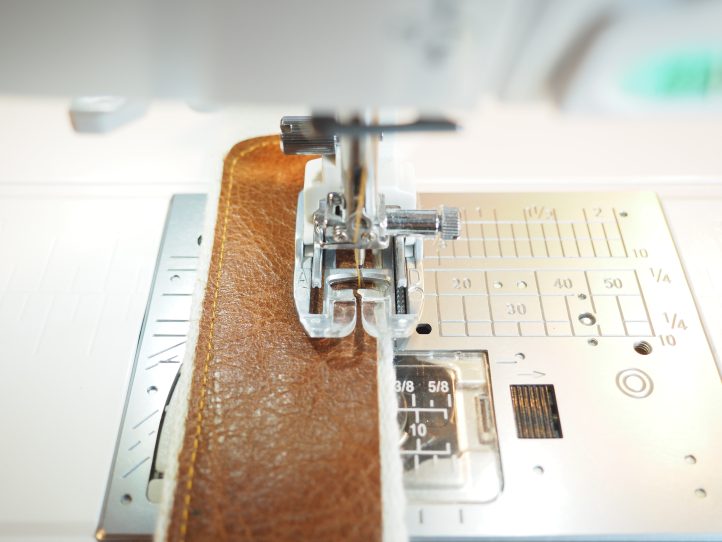
The point of the walking foot is that it has its own feed dogs so the layers of fabric all move smoothly through at roughly the same time. Quilters will know all about the marvels of the walking foot because quilting routinely uses three layers of fabric.
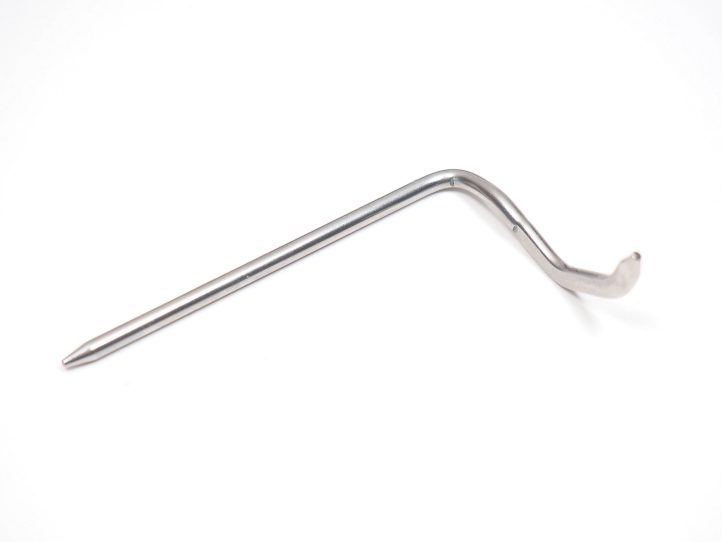
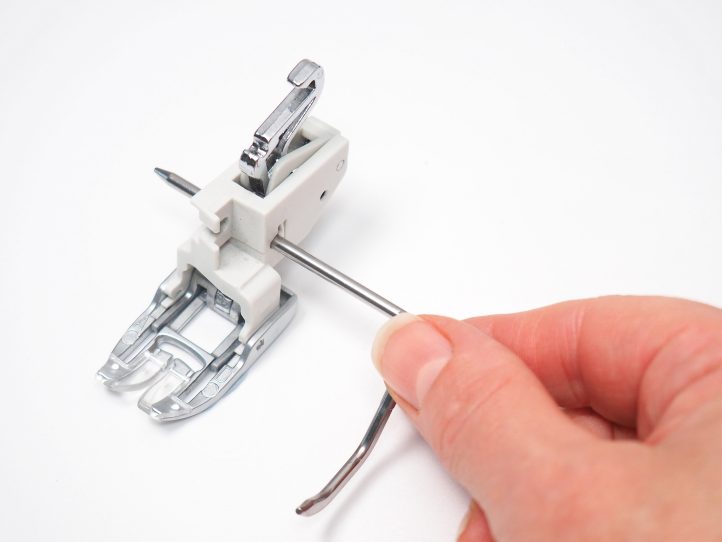
The walking foot has another trick too. It will often come with a strange looking bar. This fits into a hole (can be in different places for different brands) and the idea of this bar is to be able to perfectly place your quilting lines depending on where you set the bar too (really easy to do too; just push or pull most of them and off you go!). Essential for the quintessential Chanel-style quilting squares.
So even though we talked about a walking foot being just the thing when you are sewing more than two layers, it is not only a boon companion for quilters. It can be useful for lightweight knits to help stop them from stretching and it is also helpful for perfectly matched plaids, so dressmakers may want to cheer at this point!
I use mine when I am sewing very thick things like leather too. My machine, although pretty heavy duty, isn’t wildly happy about sewing leather and the stitches can get a little messed up. The walking foot can solve the problem for you.
Back to quilting though (since this is the theme of the pattern this time), the quilting foot is brilliant for use on softly curving quilting patterns. I have a signature pattern which I use for absolutely every quilt that I make, and it is so easy and satisfying. I would love to show you how to do it. It is perfect to make the glasses case.
Find your walking foot first (check that shoebox under the bed) and attach it. I won’t go into details here because they are so different. Have a look in your manual for help. My beloved Janome is modeling for you today.
By the way, if you have bought a machine where the walking foot didn’t come with it (despite having cleaned out the sewing room looking for it), do consider buying one. They are a little more expensive than a regular presser foot but absolutely worth it. At least the sewing room is tidy now…
Next, you need three layers – top fabric, batting and backing fabric. These requirements are actually all in the pattern below so go there for sizes. You will see that the floral top panel is the smallest, the batting is slightly larger and the backing fabric is largest of all. That is because although when you use a walking foot, the fabric movement is minimized compared to a normal presser foot, it cannot be entirely eliminated. Whatever you quilt, the batting and backing fabrics always need to be larger than the top. Just about all fabrics (even quilting cottons) will stretch slightly as you sew them together like this, too. Having extra on the layers gives you something to trim.
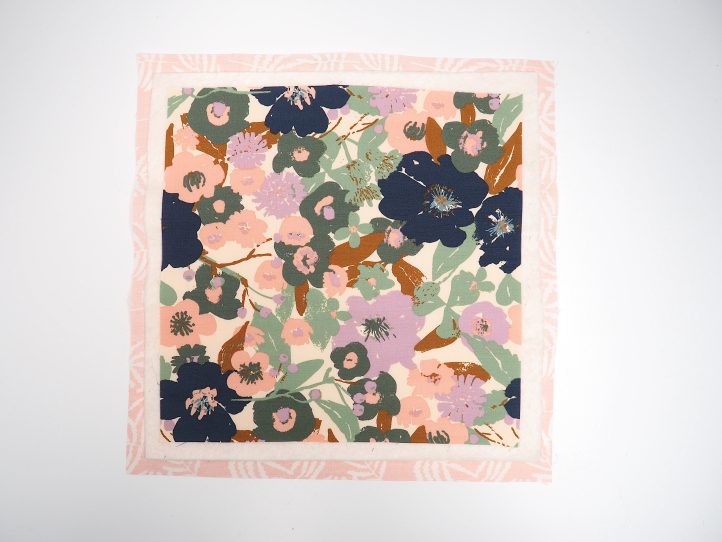
Lay the backing fabric right side down, the batting on top and the top fabric right side up on top of that. This is called a ‘quilt sandwich’ in quilting circles. Pin it so that it cannot move.
Now, starting in one corner, sew a gently wiggling line working diagonally. Come back and make more wavy lines which come close to the one next to them but don’t quite touch. Keep doing this until your three layers of fabric and batting are laminated together with thread. Keep an eye on all three layers so that they are smooth on the back too.
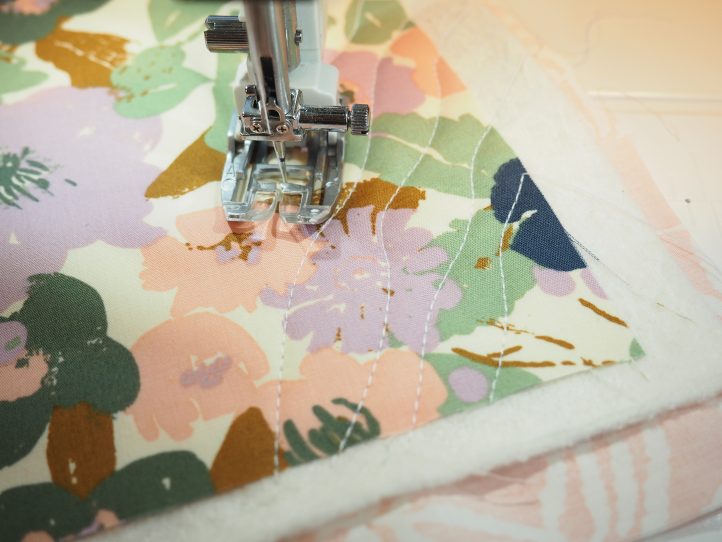
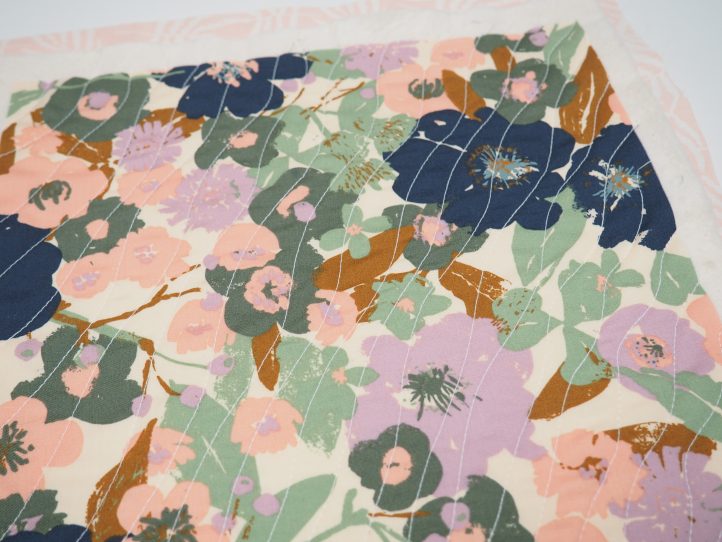
There are many, many quilting patterns possible and sadly, not all of them are suitable for your walking foot. But a fair few are and anything with straight lines or gently curving ones will work beautifully. The thing that I love most about my wavy design is that it is almost impossible to get ‘wrong’. It flows so organically.
The pattern will guide you each time but that is the basic idea. Now, speaking of a pattern….
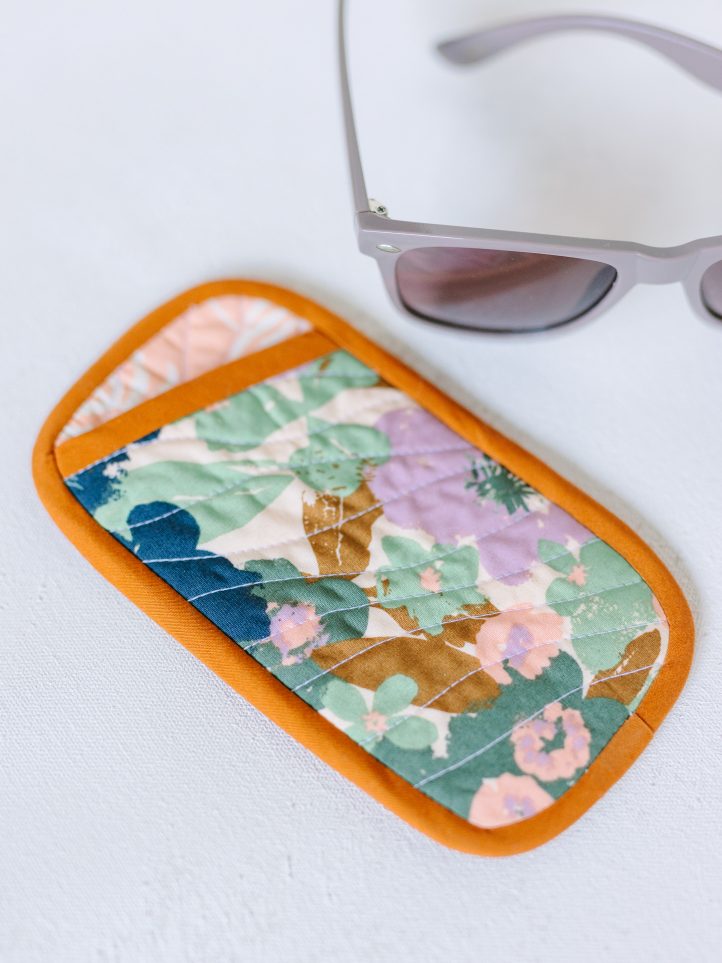
Glasses Case Pattern
MATERIALS:
- I am using a couple of fabrics from the Lilliput collection by Sharon Holland for Art Gallery Fabrics.
- 1 fat quarter floral fabric for the outer
- 1 fat quarter coordinating fabric for the lining
- Interfacing:
- 1 fat quarter #279 80/20 cotton mix batting (Vlieseline)
- 25” bias tape
- Your usual sewing needs including scissors, markers, and extra feet for your sewing machine (walking foot for example). You know, the usual stuff!
Note: Please read all instructions and assembly requirements before beginning the pattern. Seam allowances are all 1/4” and have already been added.
CUTTING INSTRUCTIONS:
- From the floral outer fabric: 1 piece 10” sq.
- From the lining fabric: 1 piece 12” sq.
- From the batting: 1 piece 11” sq.
SEWING INSTRUCTIONS:
- Make yourself a ‘quilt sandwich’ as described in the tutorial above and quilt your floral, batting and lining.
- TIP: Remember the floral goes on the top (right side up), the batting in the middle and the lining on the bottom (right side down). All of the wrong sides are facing.
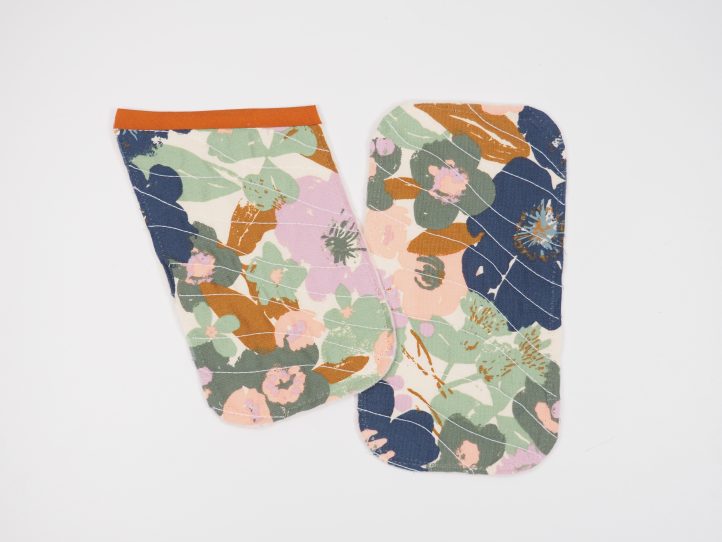
- When you have a quilted panel, cut two rectangles from it which measure:
- 3 1/2” wide x 6” tall for the front panel
- 3 1/2” wide x 6 1/2” tall for the back panel
- TIP: You will have some offcuts from your square which can be used for something else.
- TIP: If your glasses (sun glasses or reading glasses) are larger, you can add 3/4” all around to the above measurements to get a good fit. You will need to slightly increase the bias tape needs too.
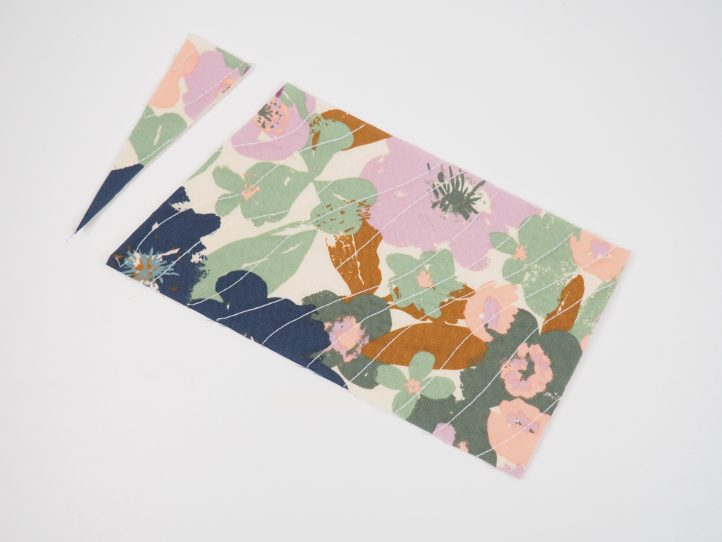
- Put the larger rectangle aside (this will be the back of the case) and let’s shape the other one. With the right side facing up, measure down 1” on the right hand side and make a mark.
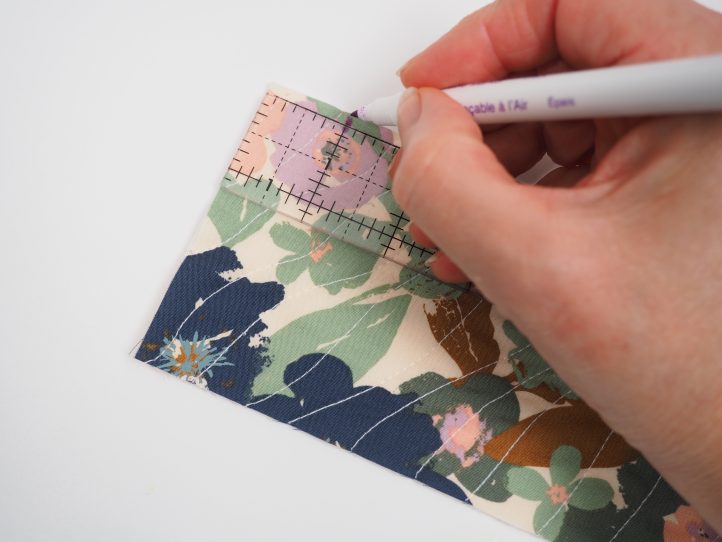
- Cut from the top left corner to this mark.
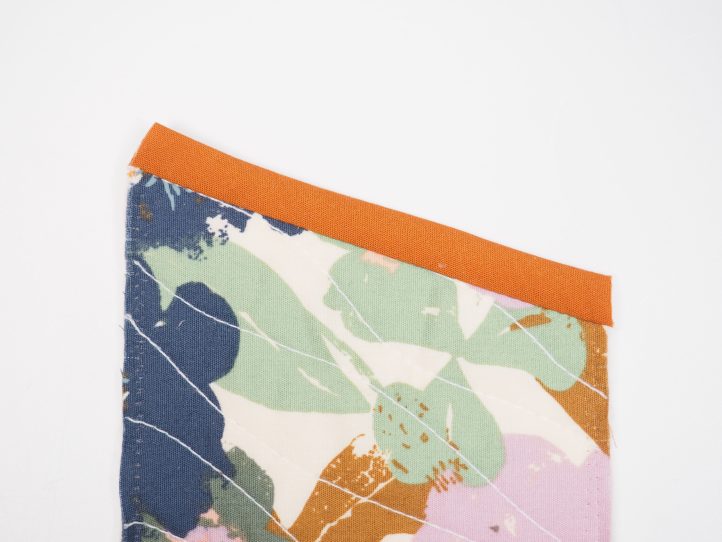
- Bind that edge with your bias tape.
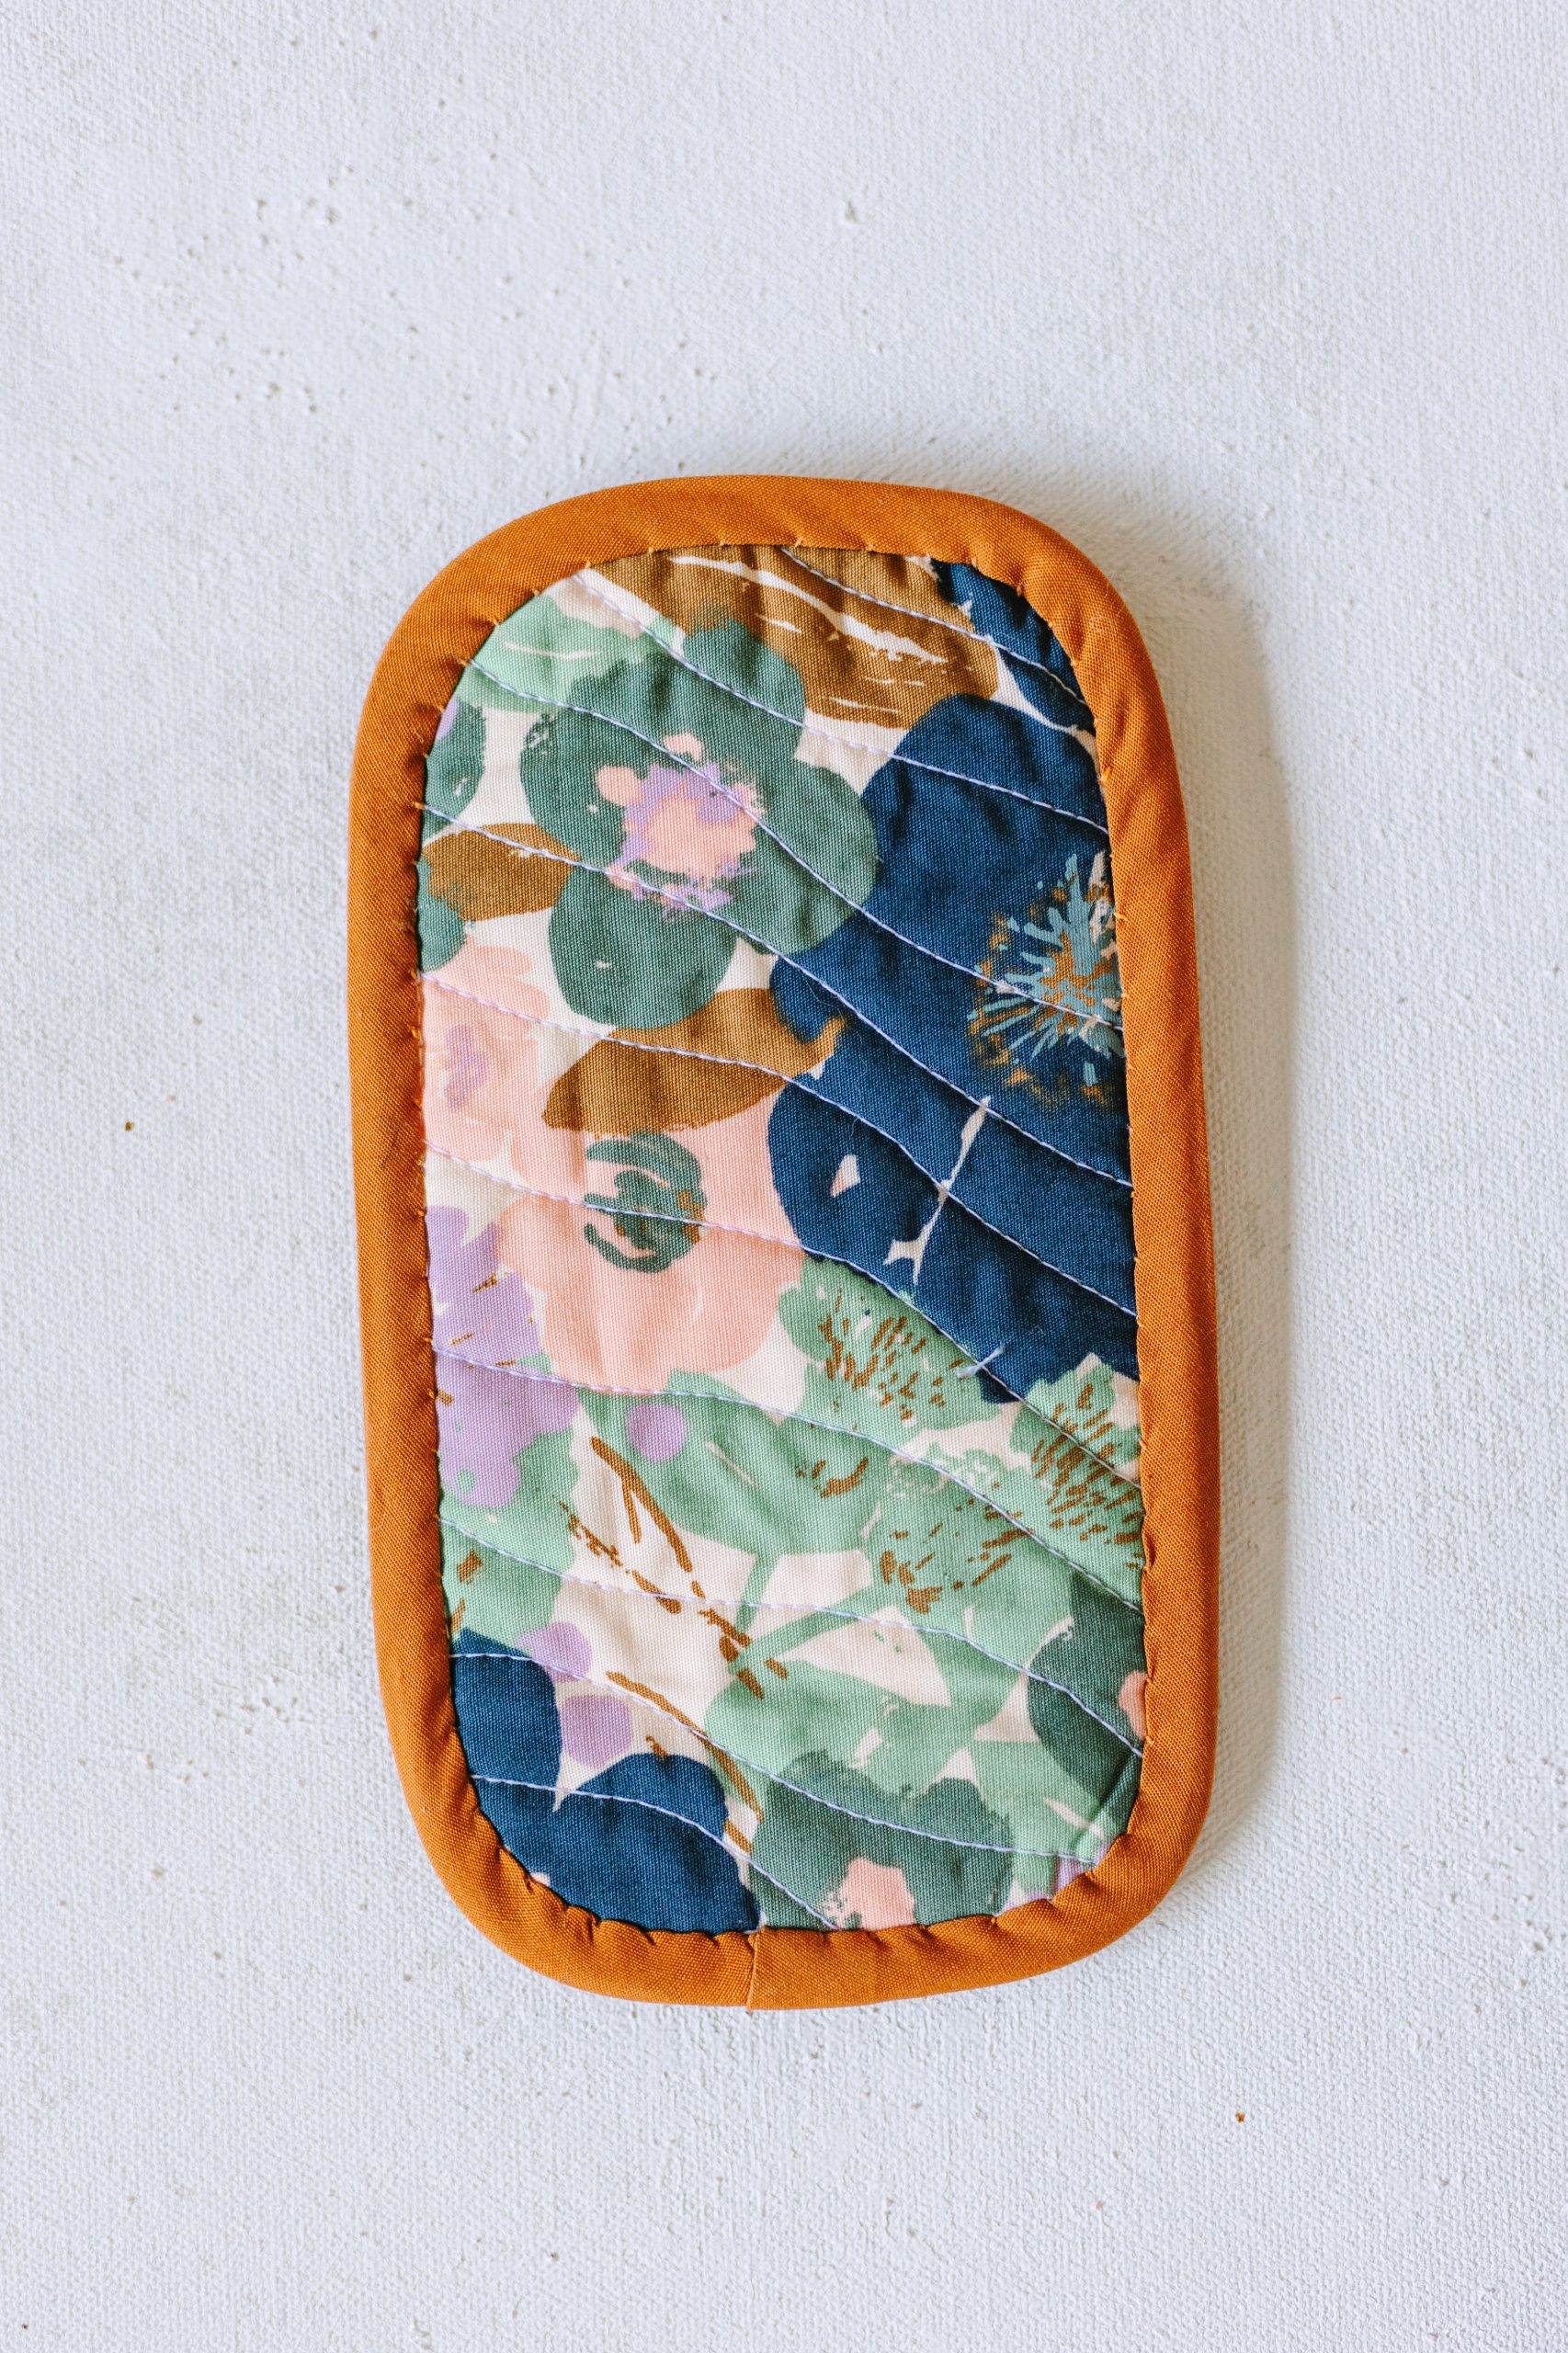
- Round the two bottom corners on the front panel and all four on the back.
- TIP: Rounding the corners like this makes it much easier to bind – no mitered corners. Find something round to draw around – you can use a proper quilting ruler if you have one or simply a ‘round thing’. I used a roll of washi tape.
- Lay the trimmed front panel onto the back and align the bottom and side edges. The lining will be together. Machine tack the sides and bottom. By the way, you can use your walking foot for sewing this whole case. It is great for multiple thick layers like this, especially if you do not have a large, heavy duty machine.
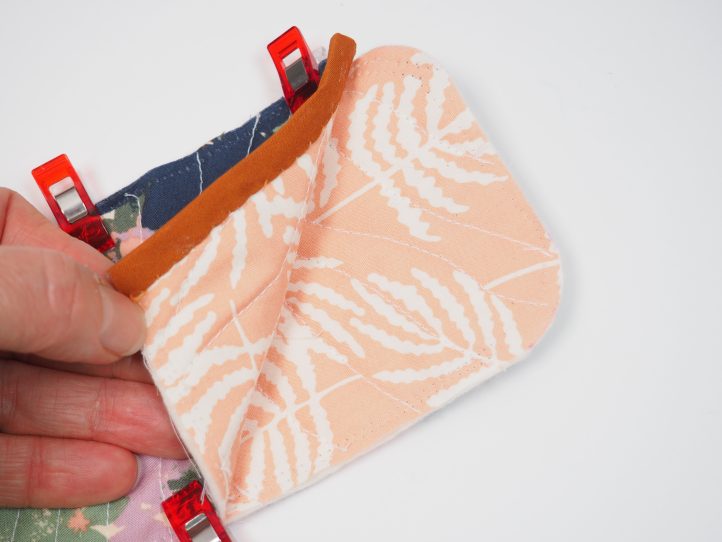
- TIP: The back panel is actually the same fabric and quilting as the front panel. All we do to use it is to flip it over so that the ‘backing’ on the quilt sandwich becomes the lining when we make it into the case.
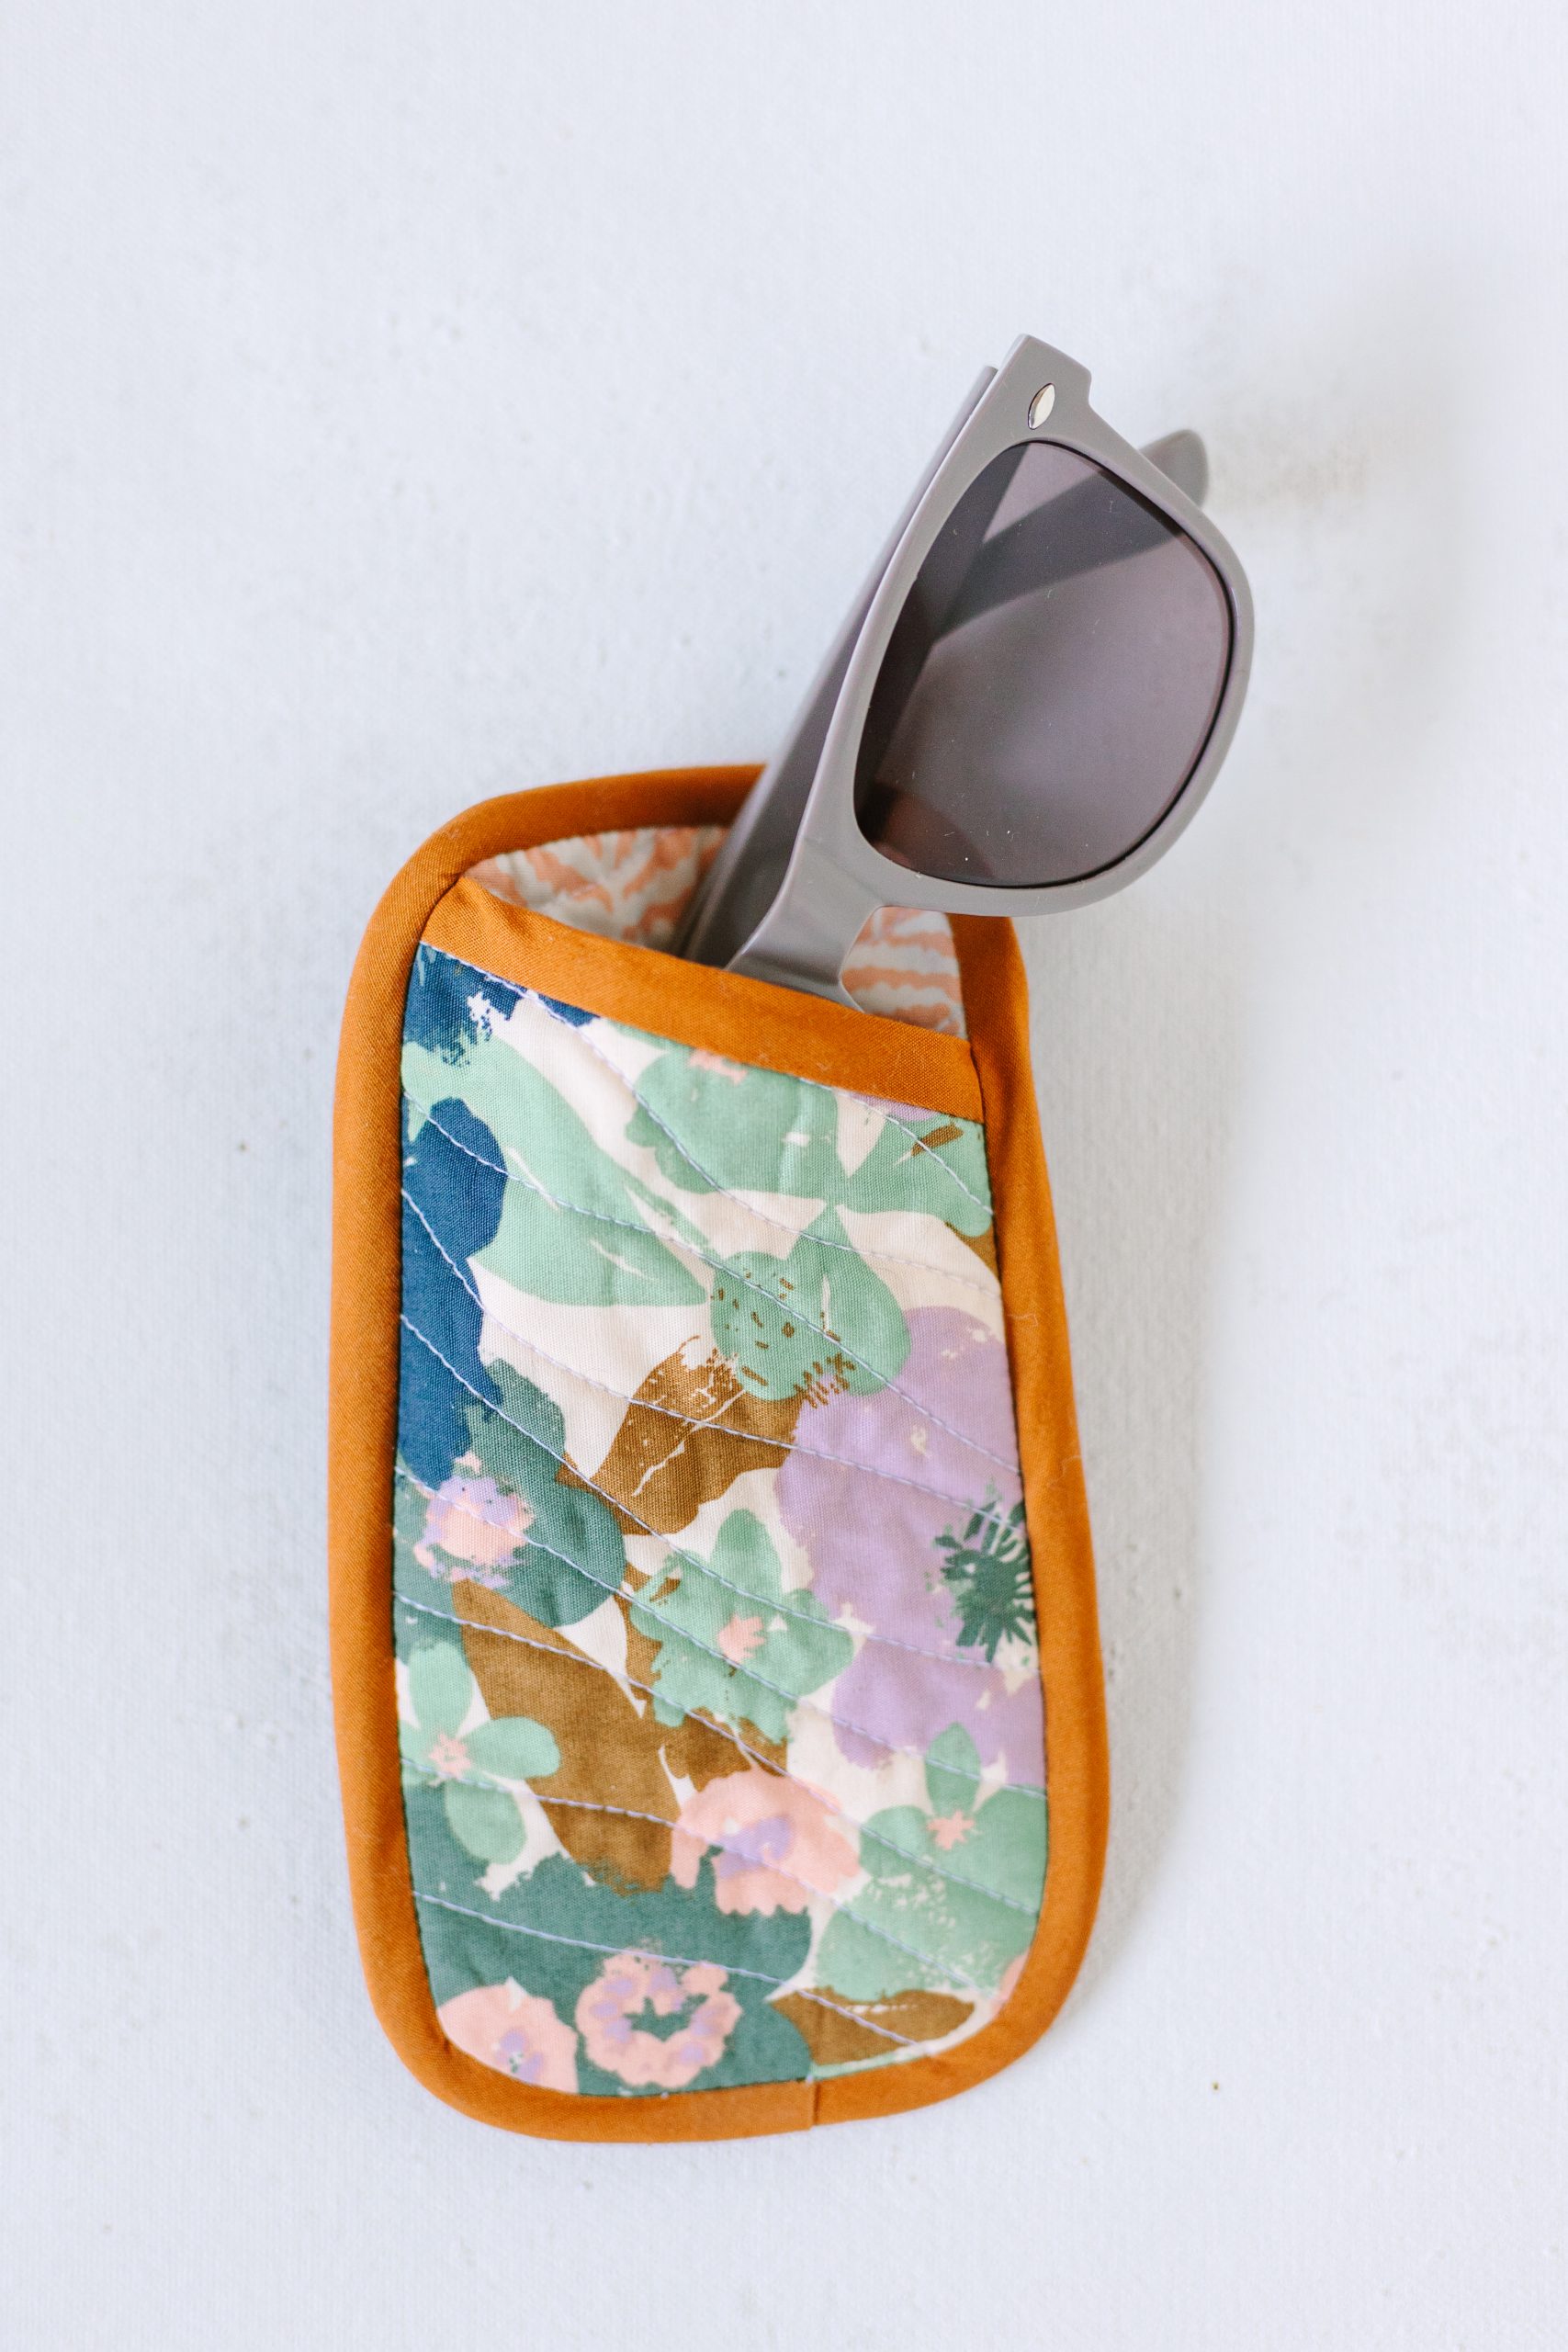
- Bind the raw outer edges of your case and you are done!
how to sign up for the magazine?
Hello there! When you visit our site, you should see a pop-up that will let you sign up for the magazine. You can also contact our customer service team and they can walk you through the process. To contact our customer service, scroll down to the bottom of our homepage and click the ‘Contact Us’ link. Please let us know if you have any other questions. Have a great day! – Ashley, WeLikeSewing
Don’t be surprised if your rotary cutter also fits into it instead of your eyeglasses… Easy way to carry it to sew-ins etc. That’s what I use one of these for…
That’s such a great idea! Thank you for sharing 🙂 – Ashley, WeLikeSewing