Velvet is one of those fabrics that is intimidating to sew, but with a few tips in your back pocket, it can be so much easier than you think.
The first time I sewed with velvet, I just threw caution to the wind and hoped for the best; take it from me, that was not the best method. My garment was unwearable, but yours doesn’t have to be if you do a little prep work and follow these tips.
7 Time-Saving Tips for Sewing Velvet
- Choose a Simple Pattern. Try to choose a pattern that is simple without complicated details such as buttonholes, darts, or bulky seam finishes. This also means the pattern needs to be free of topstitching, as velvet does not take to topstitching well. Since velvet drapes beautifully, look for a pattern to highlight that element of the fabric.
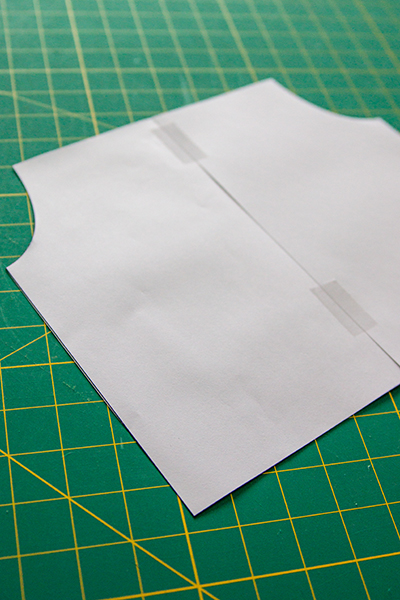
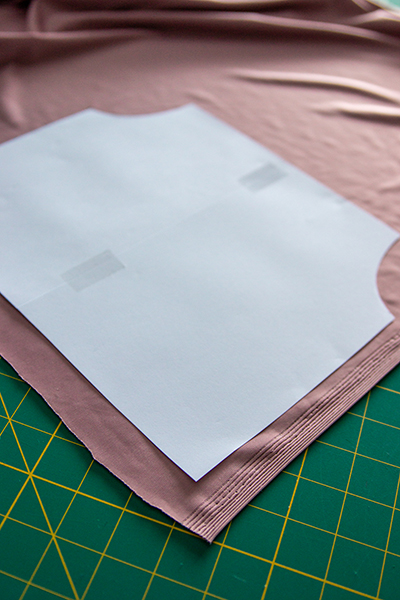
- Cut and Mark Your Fabric Carefully. Before cutting your fabric, consider the nap of the velvet. Velvet typically wears better when the nap is running down the garment, but the color is much richer with the nap running up the garment. To determine the nap of the fabric, run your hand down the grain of the fabric; if it is smooth, the nap is down, if it is rough, the nap is up. There is no right or wrong way to wear velvet. You just have to be consistent for all the pattern pieces. Think of velvet like directional pattern on fabric; once you decide which way is up, stick with it. Velvet needs to be cut as a single layer, as it is way too shifty to be cut on the fold. If you have a pattern piece that is meant to be cut on the fold, trace the full pattern piece on paper by mirroring the piece.
 To keep pattern pieces from shifting while cutting, place the velvet with the right side down towards the cutting mat.
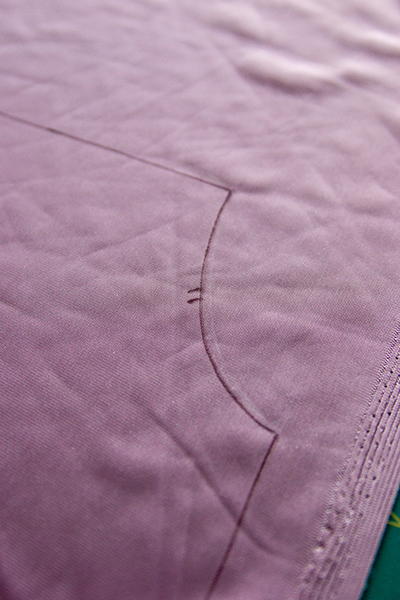
 Not only does this help with cutting but it allows you to mark any notches on the wrong side of the fabric with chalk, fabric pen, or tailor tacks.
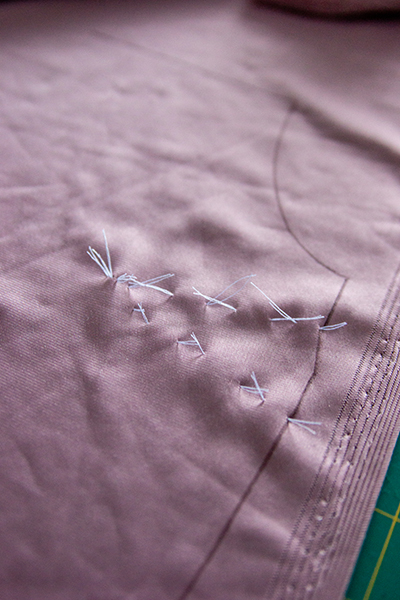
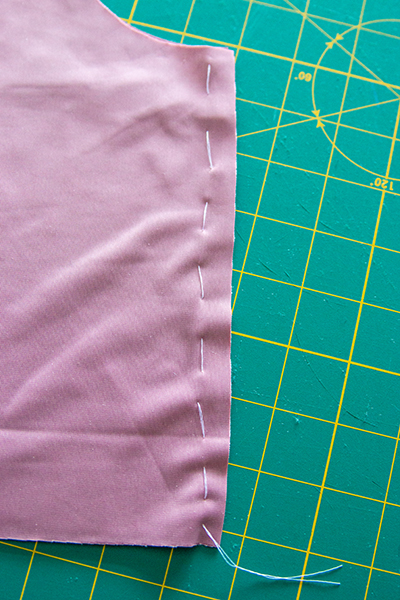
Lastly, make sure to cut velvet with a nice sharp rotary cutter, as using scissors will cause the velvet to shift under the pattern pieces. - Experiment Before You Start Stitching. Before sewing the pattern together, do a bit of testing on your machine to get all settings figured out. This will save you the hassle of seam ripping your projects. Start with a universal or sharp needle (either a 70/10 or 80/12) and cotton or silk thread, although polyester works well too. Loosen the tension on the machine and lower the feed dogs slightly if you have the ability. This will keep the machine from smashing the nap and leaving marks on the fabric. You can also consider sewing the garment with a walking foot, which will pull on the fabric less while sewing. Finally, test out a few different stitch lengths to determine what will work best for your fabric. Velvet is notorious for creeping while sewing. No amount of pins will keep this from happening when the fabric goes under the presser foot, but there are ways to lessen it. The best way to minimize creeping is to hand baste all seams together before sewing. This is a bit more work but the end results will be worth it.
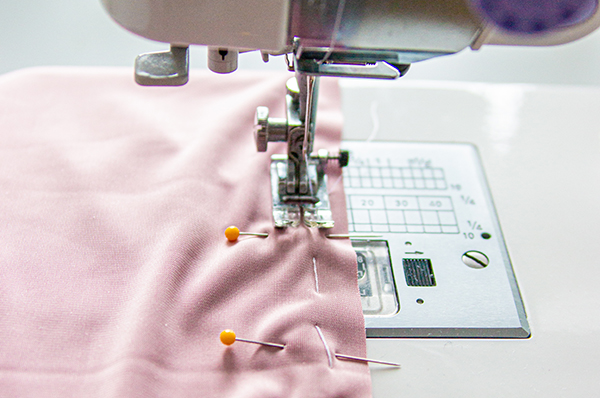
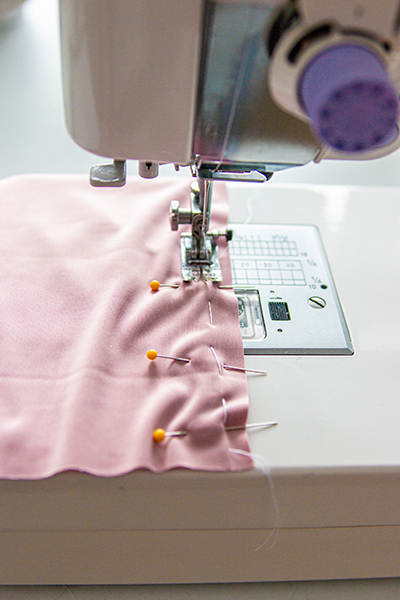
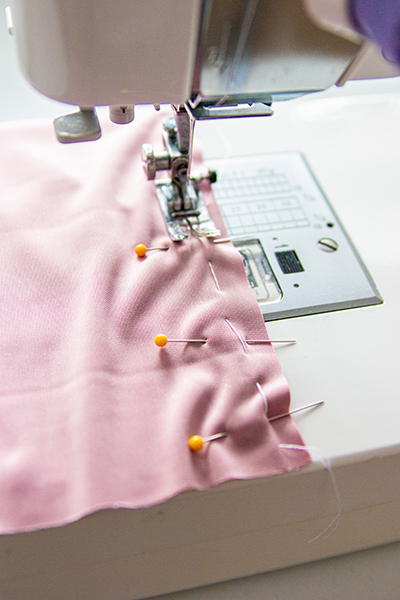
 When pinning your fabric, place the pins perpendicular to the fabric with the ends pointing towards the machine. This allows you to keep the pin in the fabric all the way up to the needle before pulling it out.
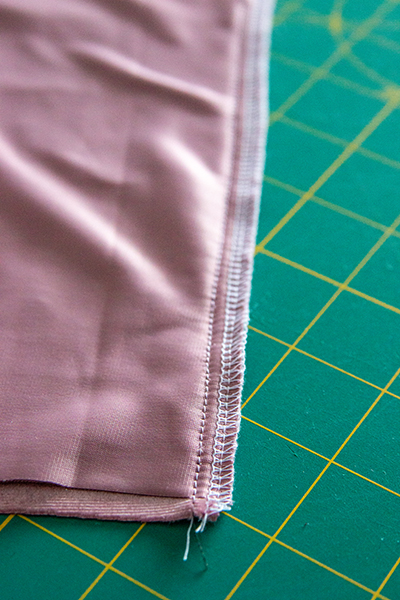
Velvet can be bulky when multiple layers are involved, such as at seam allowances and hems. Keep seam allowances simple by finishing with a zigzag stitch or a serger and avoid French seams and bound hems.
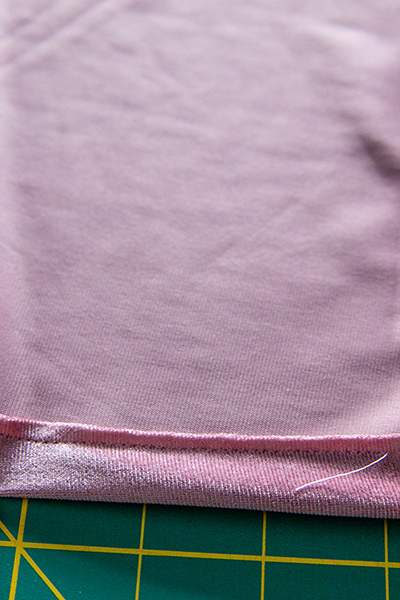
 When hemming velvet, hang the garment for at least 24 hours so the fabric can relax before hemming. After relaxing, adjust the bottom hem as needed and hem with a single fold to avoid bulk.
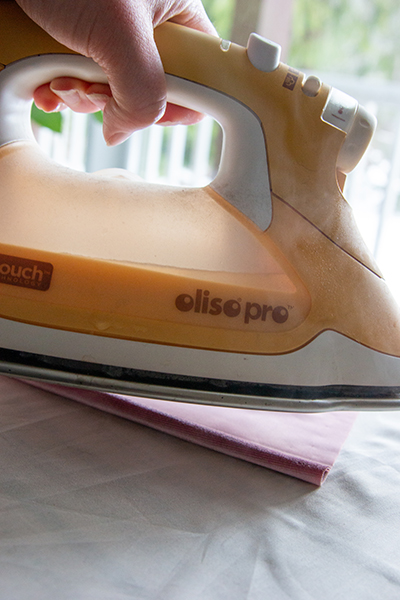
- Press the Velvet Carefully. Avoid pressing the iron directly to the velvet, as this will crush the nap. Instead, hover the steam iron about an inch above the fabric and then hand press the seams.
- Work with the Fabric. Sew the direction of the nap when possible to keep the velvet from working against you.
- Stabilize the Fabric. Tissue paper can be used to stabilize the fabric when sewing. Place it between the layers of fabric or even between the fabric and the feed dogs.
- Line Your Garment. If the pattern calls for lining fabric, consider using something other than another layer of velvet. Not only does this reduce bulk but the garment will wear better with a light lining fabric.
Have fun learning this new skill! It doesn’t have to be scary, but it definitely takes patience and a slower pace of sewing.