
One basic skill that every sewist should master is how to add pockets to a garment, whether you’re sewing your own clothing or altering clothes you already have. That’s why we’re bringing you a handy three-part series on how to sew pockets! In the first installment, you’ll learn how to add an inseam pocket to your favorite skirt or pair of pants, so that your wardrobe is practical AND pretty. This tutorial for how to sew pockets also includes a printable pattern, along with its step-by-step instructions.
Materials
- Already made article of clothing, or a handmade in-progress project.
- *Fabric to make a pocket (thinner material is best to reduce bulk or use lining fabric)
- Print out of PDF pocket pattern
- Pins
- Needle
- *Thread
- Seam Ripper
- Scissors or rotary cutter
- Chalk or any fabric marking tool
*For this tutorial contrasting colors of fabrics and threads are used for the reader’s sake. However, it is recommended that fabric and thread should match the garment.
Instructions
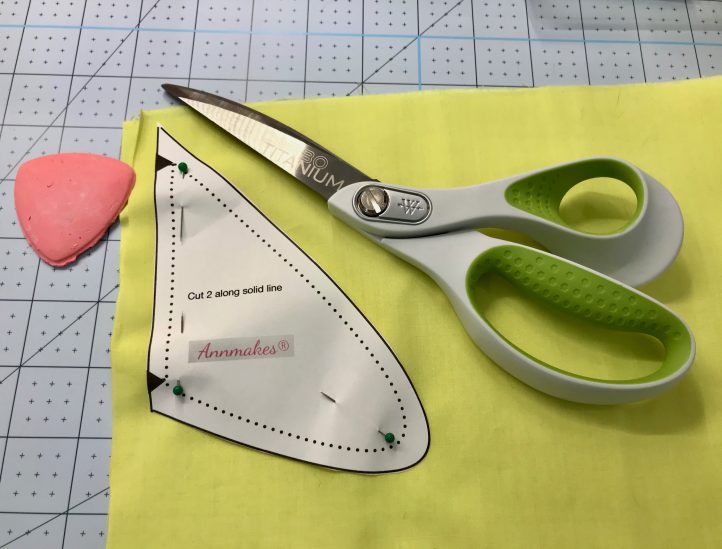
- Print and use included PDF pattern as is or adjust the scale on the printer to make the desired size. Tip: you want to be able to slip your hand into the pocket.
- Cut out the pattern with paper-cutting scissors. TIP: Reserve your best scissors for cutting fabrics only.
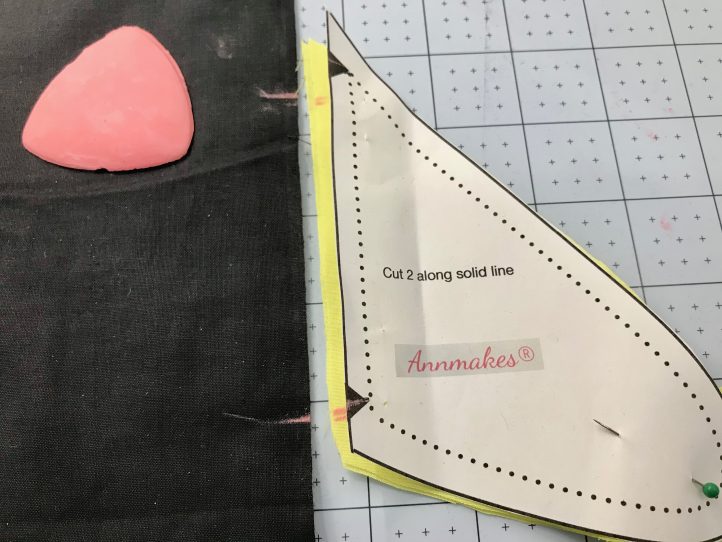
- Lay two pieces of fabric right sides together, and pin pattern on top. Cut along the outer line.
- Mark with chalk where the pocket opening will be (shown by arrows). Repeat on the inside of the garment.
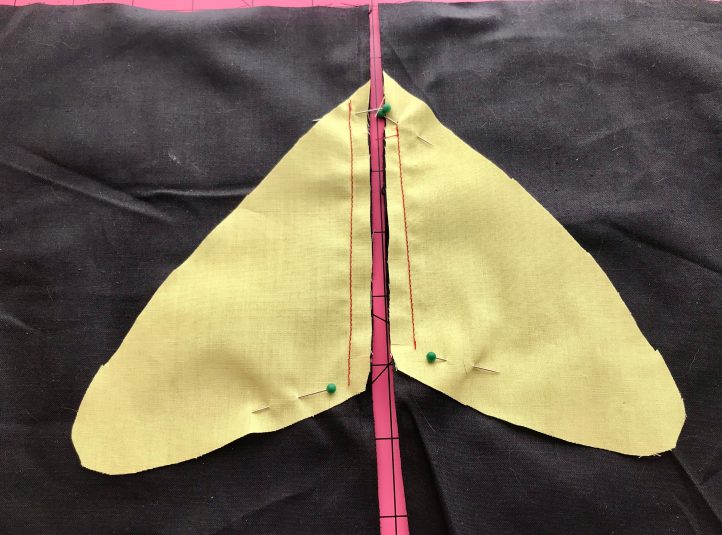
- Pin each pocket piece to the front and back of the garment, placing fabrics right sides together.
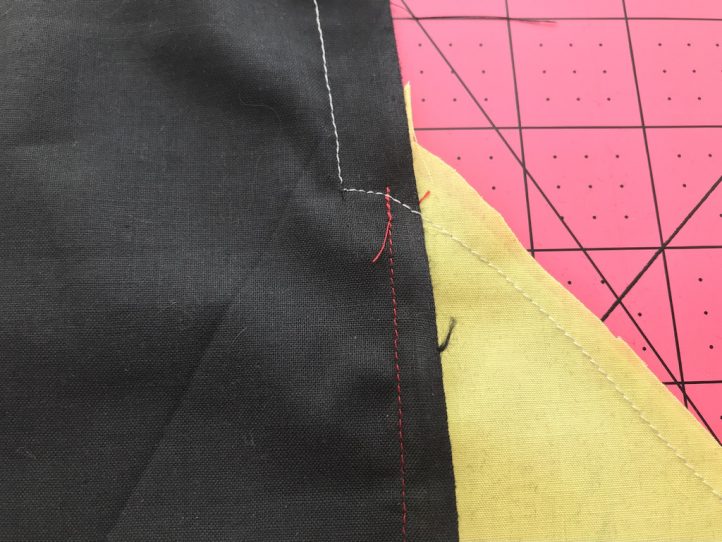
- Begin by sewing each pocket piece matching seams and using a narrower seam allowance such as a 3/8 inch (as most garments are sewn in 5/8 inch seams). Shown in red thread.
- Turn pockets outside for each front and back piece. Pin the side seams together of the garment leaving the pocket opening open. Pin pocket pieces together.
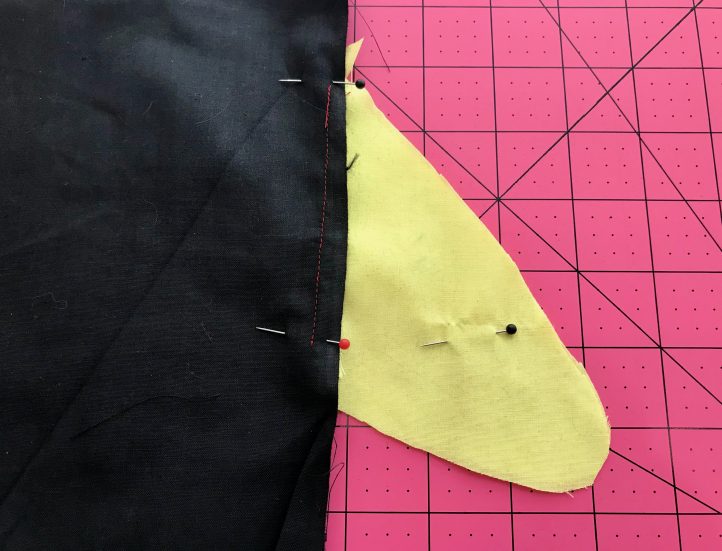
- Sew down garment side seam (5/8 inch) until the first top arrow. Stop leaving the needle down, lift up the presser foot, pivot. Continue sewing around the edge of the pocket. Stop when you reach the bottom of the pocket opening, and repeat. Shown in white thread.
- Press the seams towards the front of the garment.
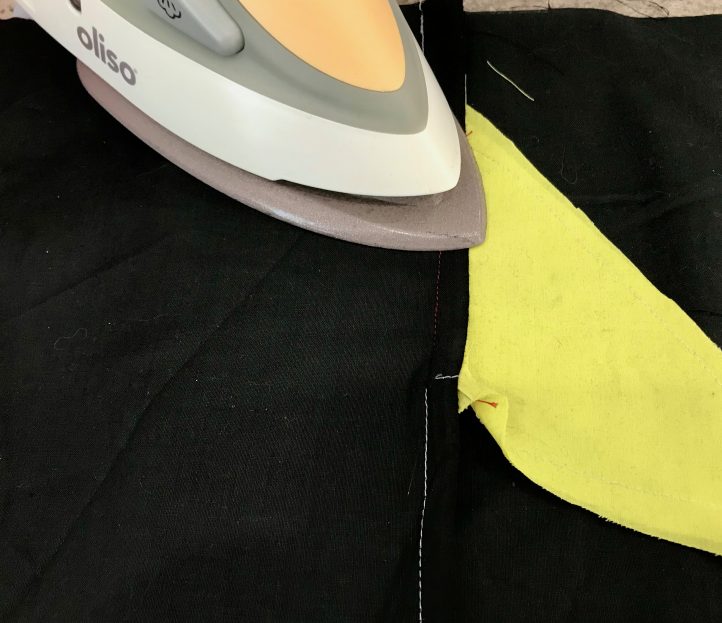
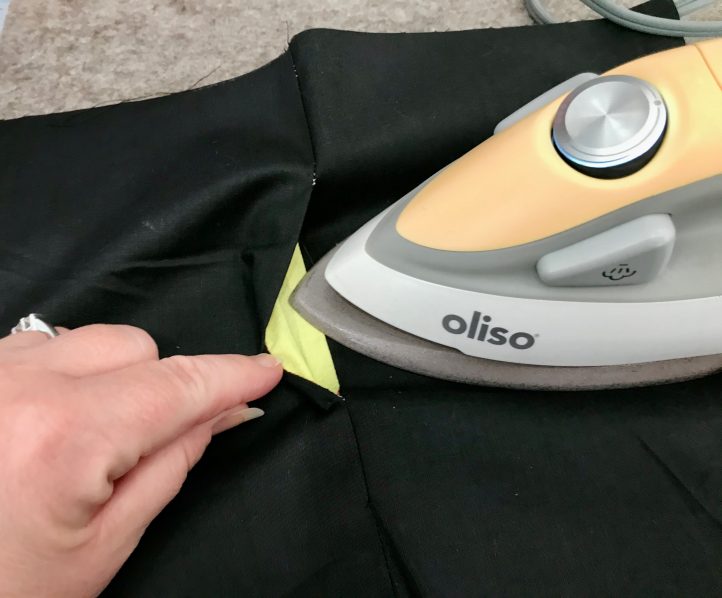
- Turn the garment to the right side and press the pocket again. TIP: Pressing while sewing makes for a professional finished look.
Pocket pattern is missing
Hi Jen! Thanks so much for letting us know. This issue should now be resolved and the PDF should be showing up now at the bottom of the page. Please let us know if you’re still having issues accessing this PDF. Have a great day! – Ashley, WeLikeSewing
Thank you
You’re welcome, Jen! Have a great day! – Ashley, WeLikeSewing