Join us as we continue our journey through the ins and outs of all things smocking! In the second installment of our Smocking 101 series, you’ll learn how to create a stem stitch, which is placed against seams and helps keep your gathers firmly in place. This embroidery tutorial teaches you step-by-step how and where to place your needle and pull the thread through, so that you’re left with sturdy gathers that look tidy. Keep your smocking projects looking pristine with this handy tutorial for sewists of all skill levels.
Smocking Embroidery — Edge/Outline Stitch: The Stem Stitch
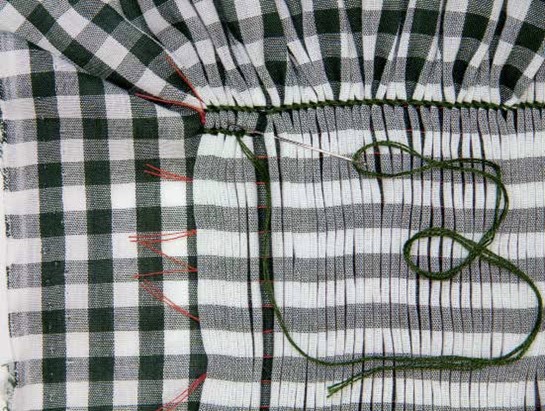
Stem stitch is often used for the first or last row in a smocked panel because it provides a straight stitch to butt up against a seam.
Stem stitch, a basic outlining stitch with a slanted shape, also can be worked along a curve for a vine or wavy design.
How to Create the Stem Stitch
- Stem stitch is worked from left to right. Working on the right side of the fabric, bring the needle up through the left side of the first reed, above the gathering stitches, at half to a third of the depth of the reed. Bring the needle and thread to the right and, with the needle pointing left, insert it into the right side of the second reed at the same depth. Bring your needle and thread out on the left side of the second reed, just above the standing thread (the thread coming out of the fabric from the previous stitch). Pull the thread through.
- Repeat this process across the row, continuing to work from left to right.