Smocking, a classic embroidery technique, is easy to recognize but the detailed stitching and tiny pleats can seem intimidating to new sewists. That’s why We Like Sewing is bringing you a new three-part series that deep dives into everything smocking, so that you can conquer your sewing fears one stitch at a time. In our first installment, we’ll be discussing the basics of smocking, from its long history in clothing design to the proper fabric to choose for this embroidery method. Learn how to add beautiful decorative stitches, as well as give your fabric some extra stretch, with our brand new sewing series.
Smocking Basics
When fabric was a precious, hand-made commodity, many garments were made from uncut rectangular pieces. The fabric was gathered around the neck, at the shoulders, and around the torso and wrist, shaping it to fit the body. In England, laborer’s overshirts created in this way became known as smocks. The gathers were embroidered with stitches that helped to hold the gathered fabric close to the body, yet allowed it to stretch as needed. This stretchy embroidery became known as smocking and was later codified into guild symbols: a farmer’s smock would be embroidered with wheat grains, for example, while a shepherd’s smock would feature shepherd’s crooks. “Smocking” often conjures images of little ducks on children’s clothing but can be sewn on adult clothing with stunning results.
This article, Part 1 of 3, explains how to prepare the fabric for the embroidery-based smocking stitches. Part 2 explains sewing the stem stitch, which is an edge or outline stitch. Part 3 explains sewing the wave or chevron stitch. There are lots of smocking stitches, many with multiple names (for example: the wave/chevron stitch). Many stitches can be combined to create other stitches: two rows of the wave stitch can be offset from each other to make the diamond stitch. Christine of The House of Smocking (in the U.K.) has a wonderful YouTube series showing how to sew a garment featuring a smocked panel.
In the U.S., the Smocking Arts Guild of America (SAGA) is quite active; there are lots of Pinterest pages and blogs focused on smocking to explore as well. I hope this series of three introductory articles whets your interest in smocking for adults and children’s garments.
Choosing the Fabric
Any plain weave fabric can be used for smocking: many cottons, lightweight wools, and silks gather well and make good backgrounds for the embroidery. Always start with the grainlines squared up; a piece of fabric that is off-grain will fall unevenly. The columns of deep, even gathers are called “reeds.” The embroidery stitches that embellish a smock and provide the elasticity are worked through a third to half the depth of each reed; the stitches must hold the gathers, yet should not be so deep that they flatten the reeds.
If you are using a thick fabric, you may need three times the width of the finished piece for your base fabric. If you are using a thinner fabric, you may need four to six times the width. Remember that all fabrics will lose a little of their length when gathered and smocked.
Gathering the Fabric
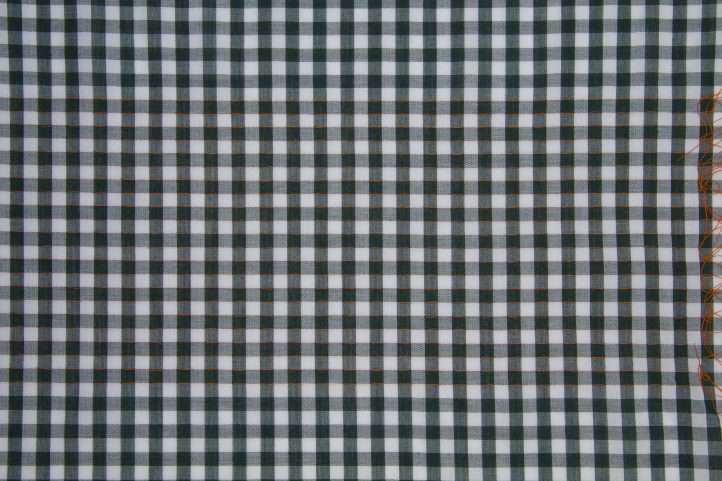
Gingham is an ideal fabric for a first smocking project — the squares woven into the fabric make their own smocking grid. The gingham can be 100% cotton or a cotton and polyester blend; be sure to preshrink the fabric before you begin.
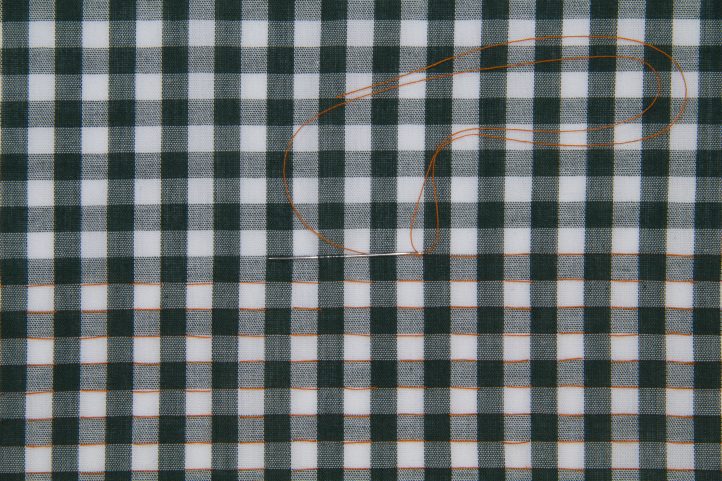
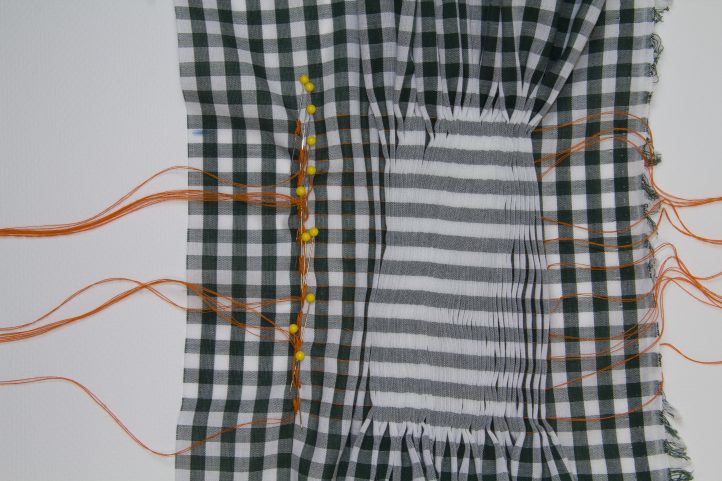
- Thread a needle with a long piece of strong thread – long enough to traverse the width of the gingham plus 6″ (15 cm). Mark the area to be smocked. Make a large knot 3″ (7.5 cm) from the end of the thread. Working on the right side, insert the needle and thread into a corner of a gingham square just inside the seam allowance. Bring the needle and thread out at the far corner of the same square. Skip the next square and then sew through the following square. Repeat this sequence across the fabric, leaving a long thread tail at the end of the row. Continue stitching along each row in the same way.
- Repeat the same sequence until you have sewn all the rows to be gathered.
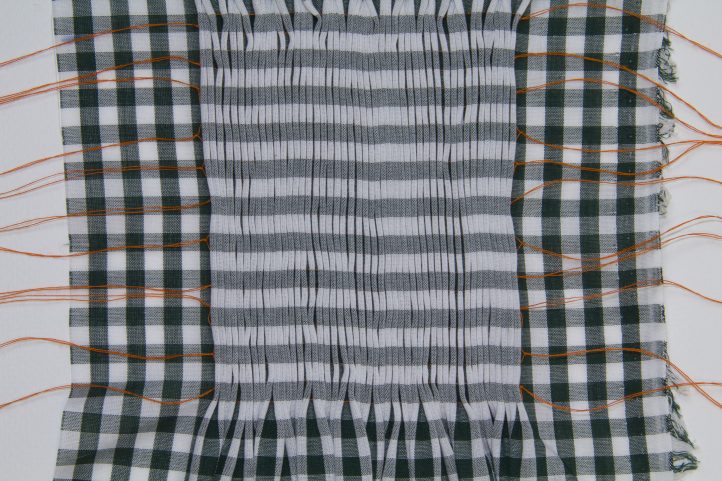
- Slide the fabric across on the gathering threads. Note the depth of gathers formed by the even gathering stitches; these vertical columns are the reeds.
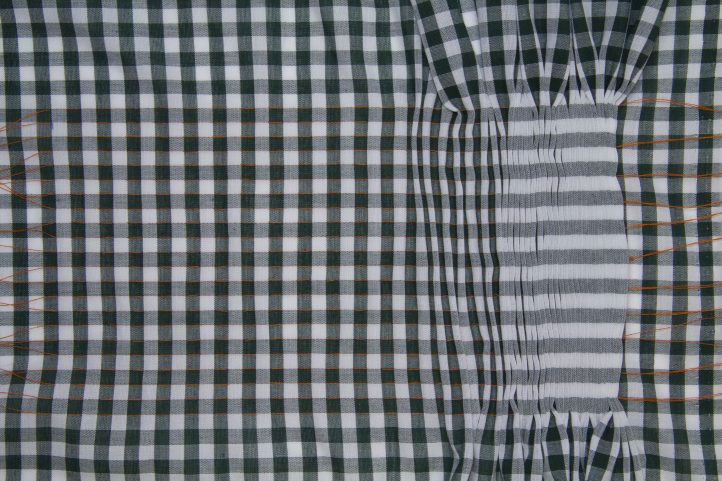
- Do not gather the fabric as compactly as possible. Leave a little play between the reeds; working the embroidery stitches requires some space, and they will take up some space on their own. When the fabric is gathered to the required width, wrap the thread tails around pins in a figure of eight. You can leave the threads on the pins or knot them together in pairs.
- Arrange the gathered fabric so all the reeds are straight vertically and horizontally. The reeds do not need to be precisely spaced because you will be shifting them slightly as you work. Steam the reeds lightly to help set their columnar shape.
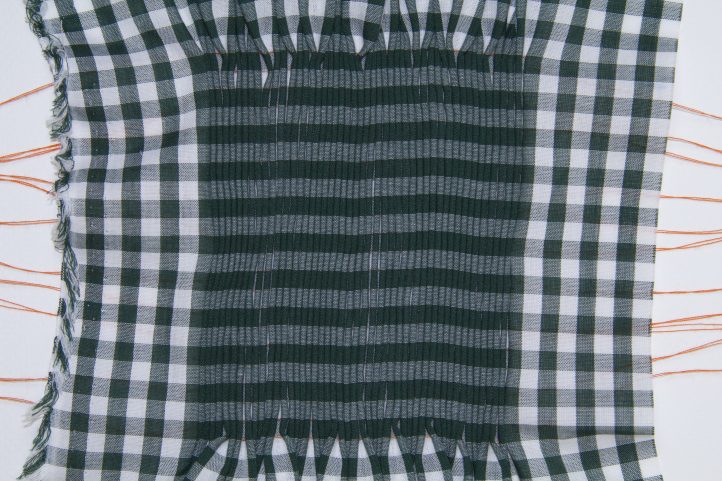
- Example of the gathered gingham from the wrong side.
Smocking Dots
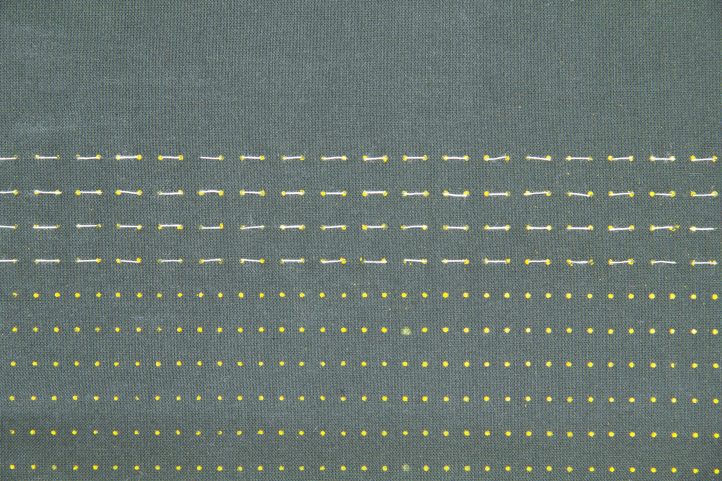
Gingham provides a ready-made grid for gathering, but if you are smocking a plain piece of fabric, you can use wax-transfer smocking dots to mark the grid.
- First created in the 1870s, iron-on smocking dots are available in yellow and blue wax and should be applied to the back of the fabric following the manufacturer’s instructions. Test the dots on a scrap of fabric, as the wax may bleed through to the right side of a lightweight fabric.

- Use a dressmaker’s pencil to fill in any missing dots in the grid. Prepare the fabric for gathering by sewing from dot to dot.
I’m sorry. The above comments were directed at the Cosy Dress pattern. I finally figured out how to put the printed pattern together. The skirt overlay was what was confusing me. Thank you for your patience.
Hi Helen! We’re glad to hear that you figured out how the pattern should be pieced together. Please let us know if you have any additional questions. Have a great day! – Ashley, WeLikeSewing
I downloaded the pattern and printed it out. It appears that something is missing. The sleeve appeared to be on 4 sheets of paper and when put together, would work. But then the bodice back (B) doesn’t have a bottom and does have a line running down the entire piece of the paper approximately 1/2” parallel to the fold line. It also has some writing on it which would lead me to believe that the line was meant to be the line for a skirt piece. The bodice Front is almost whole but not quite. Then there are two pages with just incomplete lines on them indicating sizes but to what? I’m confused. Please help. Tootsieschroeder@ICloud.com. Thank you.