When it comes to finishing your projects, there are certain age-old techniques that are always handy to have in your sewing arsenal – whether it be time-saving tips, ways to cut down on wastage, or tricks that make the fabric sit a little bit neater.
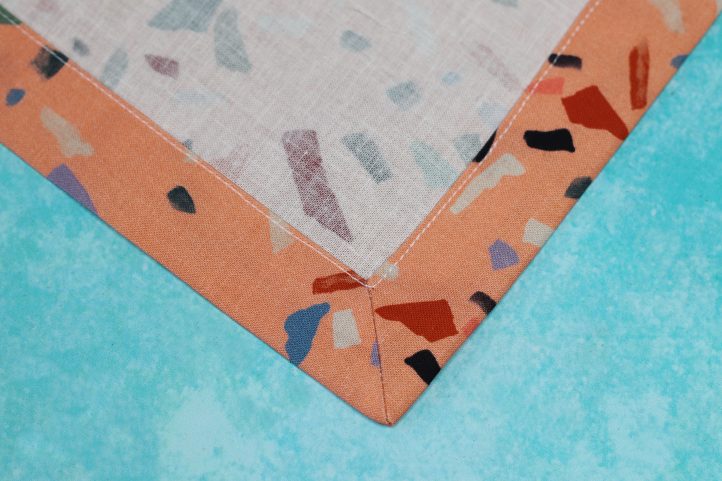
Learning to work a mitered corner is certainly handy to know – it can be used on a wide variety of different projects from napkins to quilts, garment hems, and more. The main advantage of using a mitered corner is that it cuts down on bulk, and makes for a super neat, professional looking finish, where the two edges of the fabric meet in a perfectly pressed 45 degree angle.
There are two ways to work a mitered corner – the quick method, which involves just pressing and topstitching the fabric edges down, or the full, self-turned method, in which the edges are also stitched together before being mitered. Today we’ll be showing you how to work the full method, as this creates a much stronger, neater, and longer-lasting finish. Grab your needles and your fabric and let’s get going – once you’ve worked this neat technique a few times, you’ll never go back!
How to Sew Mitered Corners
- Mitered corners require a square edge, so lay your fabric out and press it flat to begin. Decide how deep you want your mitered edge to be, and divide it in half. Fold and press your edges over to the wrong side by this amount – for example, if you want your mitered edges to be 1” deep (as in our example), fold and press each hem by 1/2”.
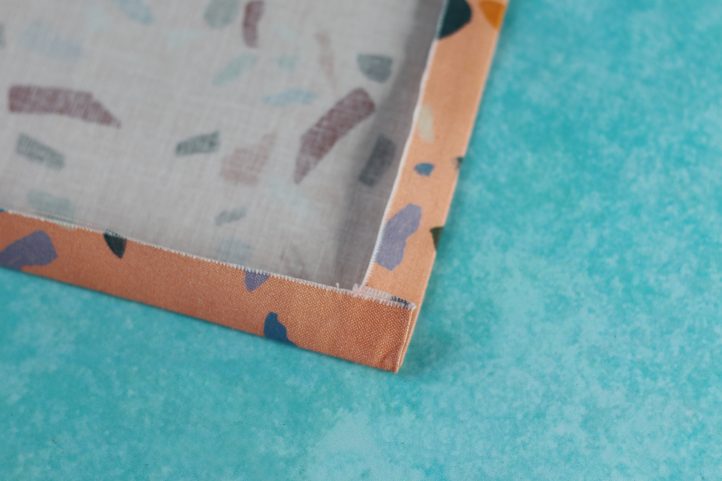
- Fold and press each edge over again, by the measurement you want the finished mitered edge to be (in our example, it would be 1”). You should now have folded each edge twice.

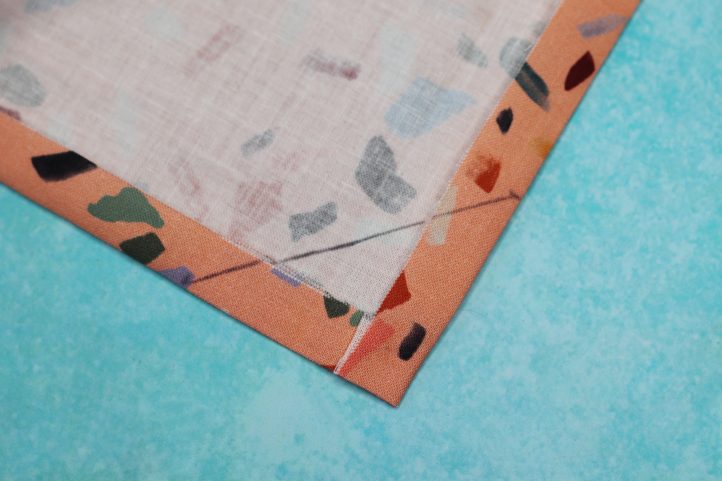
- Open up the second fold, then measure out from the corner and make a mark along each edge that is twice the width of your desired finished miter (for our example, this was 2”). Draw a line across the corner, going from one point to the other.
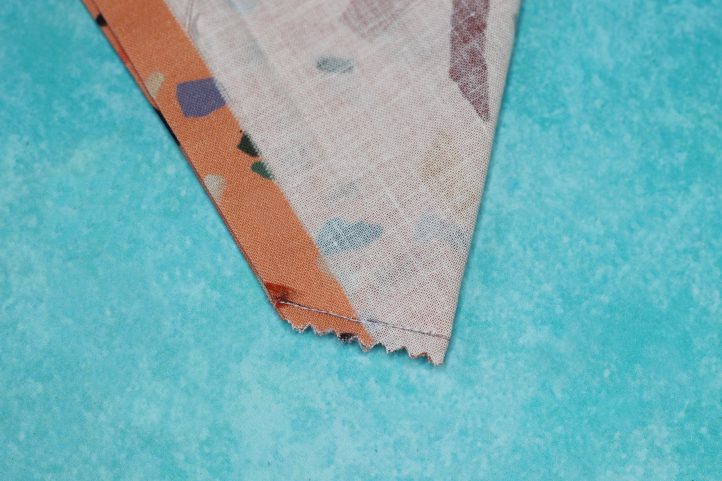
- Fold the corner in half with right sides together, aligning the edges, and pin. The line you drew in Step 3 should be lined up with itself.
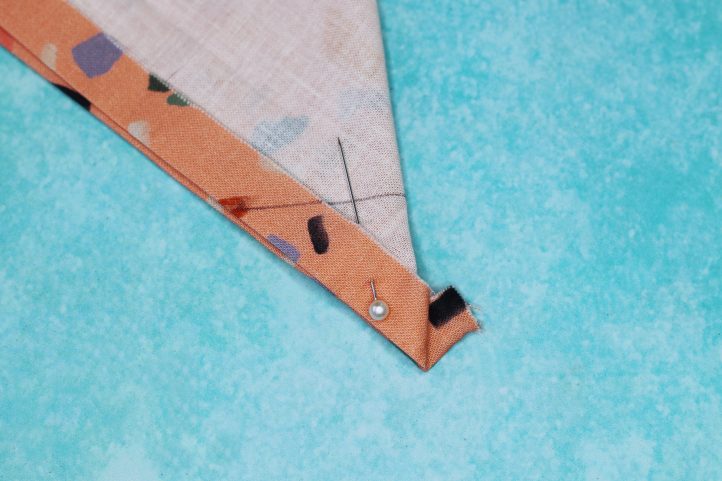
- Stitch along the crease, making sure to work a backstitch or a lockstitch at the beginning and end. Clip the excess from the corner, leaving a small seam allowance – in our example, we left 1/4”.
- Turn the work out using a point turner. Press flat once more, then work a straight machine top stitch along the folded edge of each edge to finish, pivoting in the corner.
What sewing tips would you like to see? Let us know below in the comments!