
Zippers are one of the most used sewing notions that sewists encounter, and learning the ins and outs of sewing zippers is an essential beginner skill. Designer Olu Falola is here to walk you through the process of sewing an exposed zipper, which can be found on garments such as skirts, tops, and dresses. Exposed zippers are both fashionable and functional, as unlike invisible or lapped zippers, they are meant to be seen on the outside of the garment. A popular trend on runways, exposed zippers add a bold finish and edge to the completed garment. Learn the process of how to sew an exposed zipper with this simple step-by-step guide!
Materials:
- Closed end zip (size according to your project)
- Zipper foot
- Scissors
- Pen
- Double sided tape (optional)
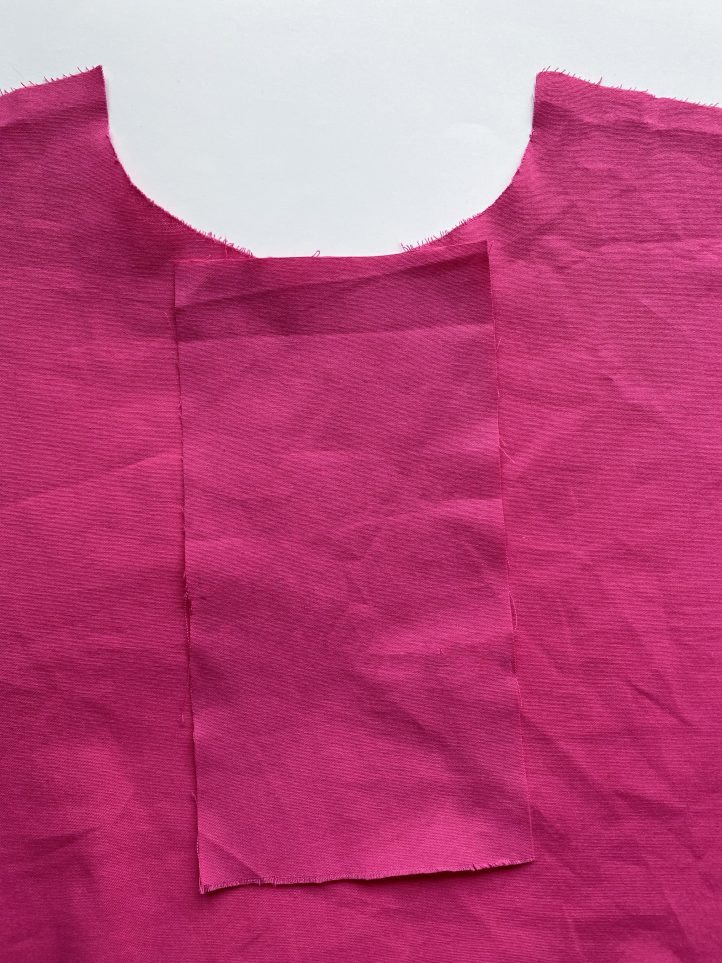
- Facing (a rectangle piece of fabric, wider and longer than the width and length of your zipper)
Instructions:
- With right sides together, place your facing onto your garment covering where you want your zipper to be inserted.
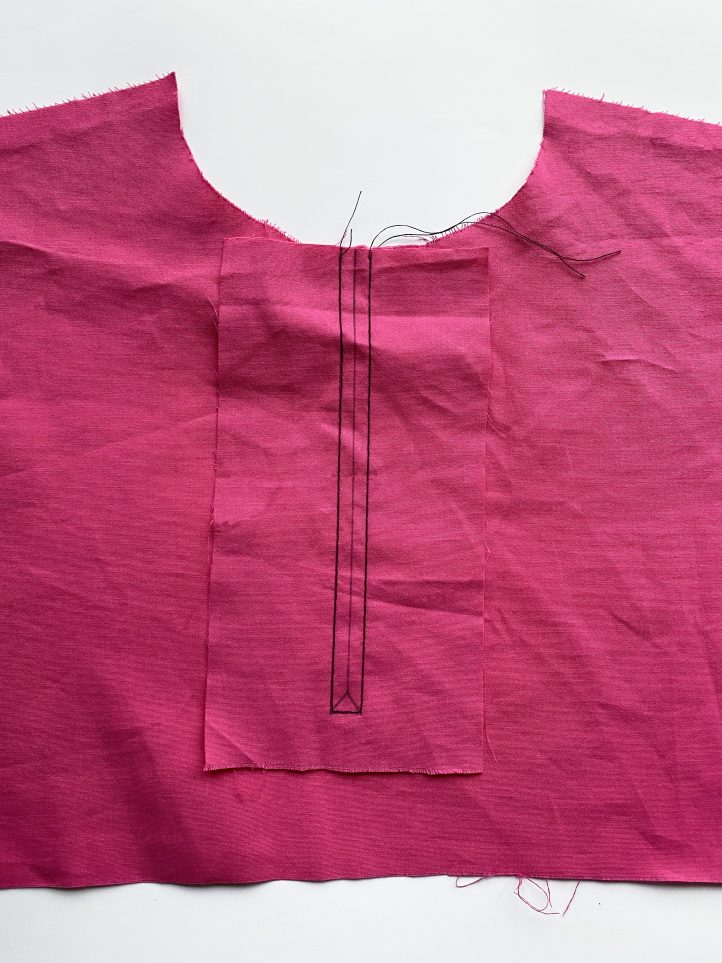
- Draw a rectangle to the length you want your opening and approximately 1cm wide (depending on how much zipper tape you want exposed). Draw a line down the center of the rectangle, stopping 1cm from the end. Draw a line from the end of the central line to each bottom corner of the rectangle.

- Stitch around the box using a basting stitch.
- Cut along the center line and into the corners, taking care not to cut through the stitching.
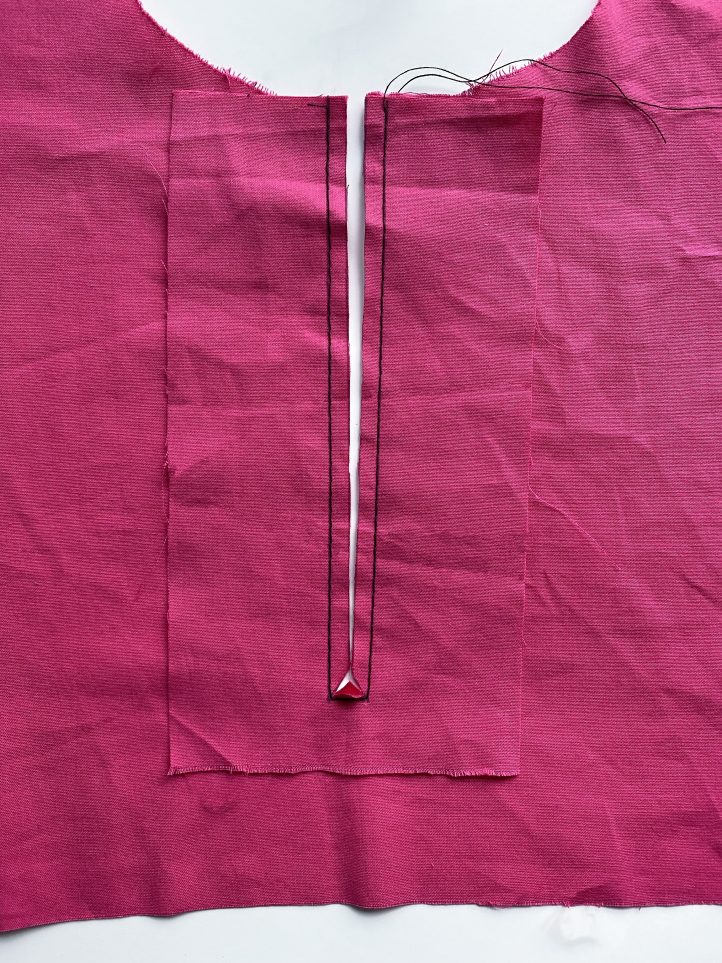
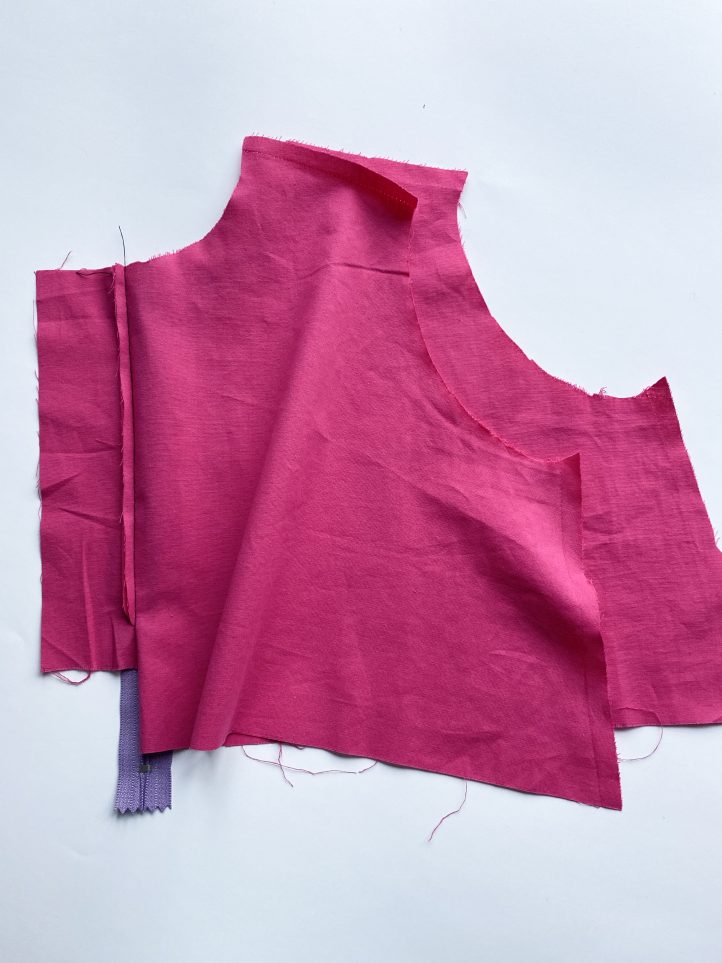
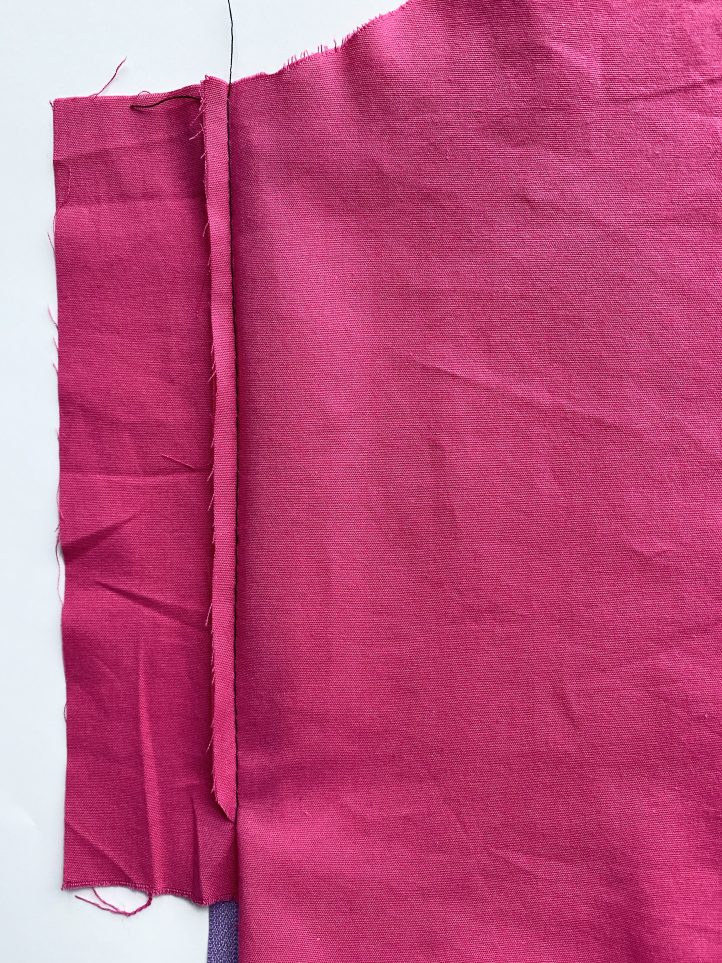
- Tuck the facing through to the wrong side of your garment. Press.
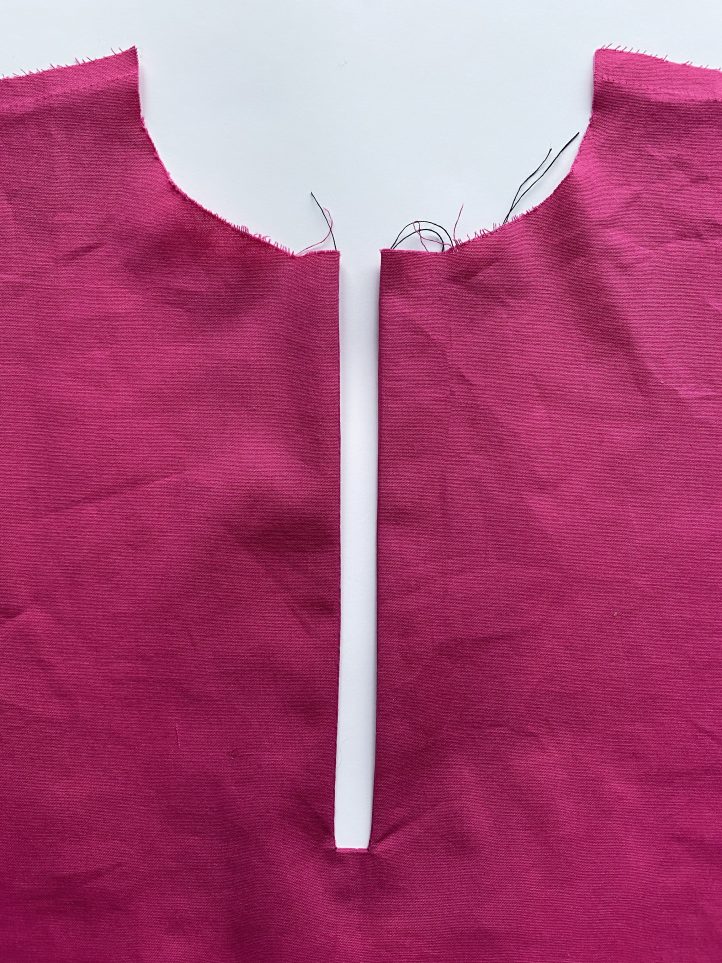
- Place the zipper underneath the gap you have just created. Hold in place with double-sided tape or tack into position (by hand).
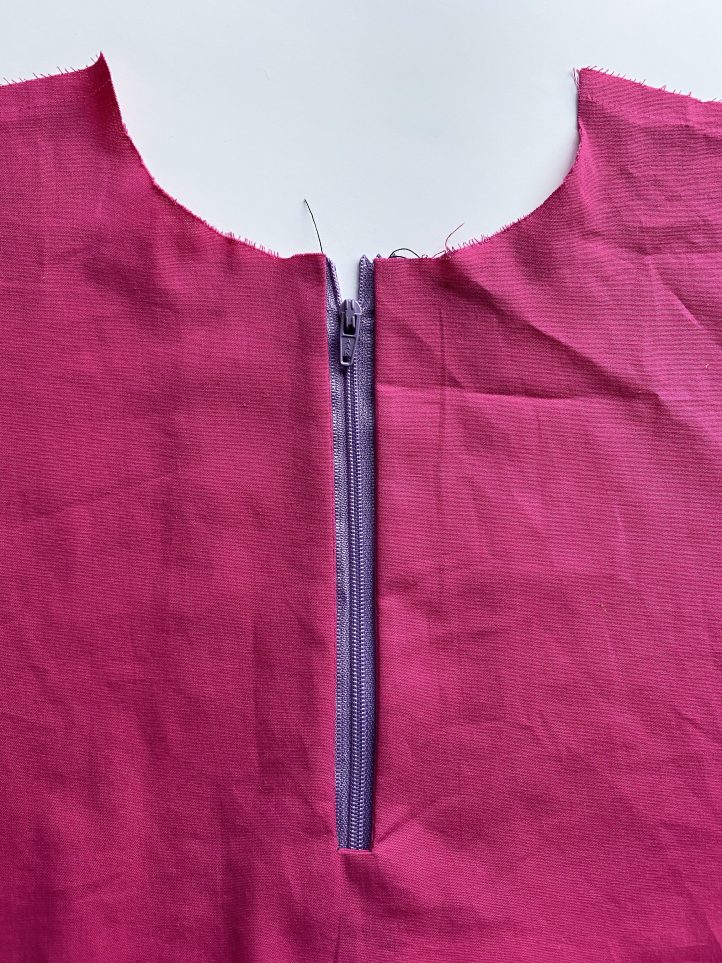
- With your garment facing up, flip one side over to reveal the facing and the basting stitch you made in Step 3. Attach your zipper foot and stitch over the basting stitch, attaching your garment to the zip tape. Repeat for the other side.
- With your garment still facing up, flip the bottom over to reveal the small triangle of fabric sitting over the facing. Stitch across the triangle.
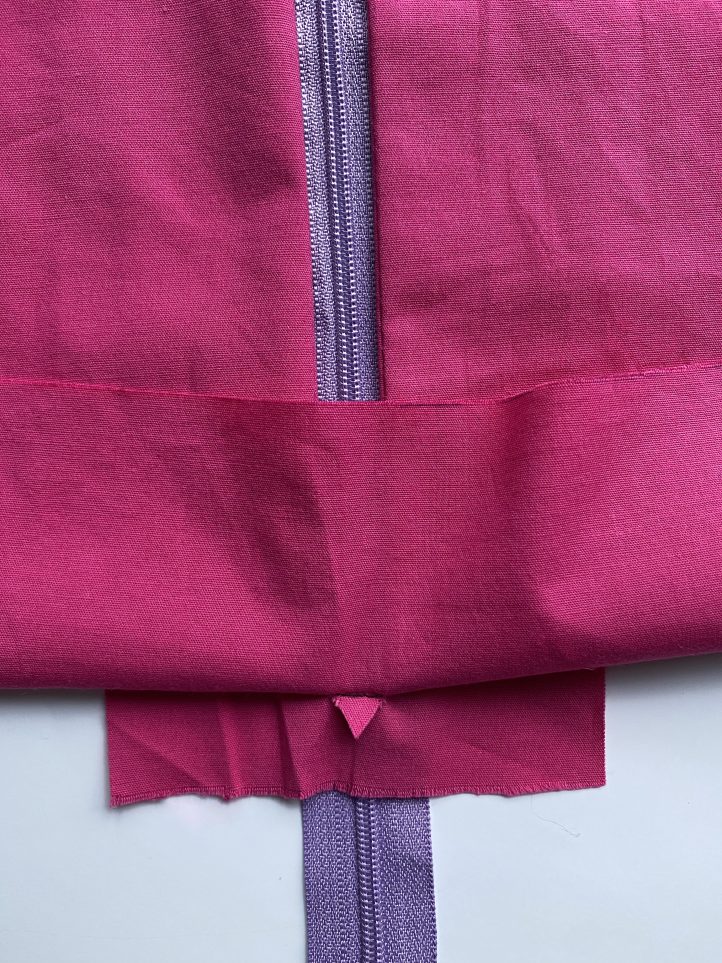
- Give everything a good press, step back and admire your handiwork.
I do not like this magazine as it only comes out over the net. I prefer material I can hold in my hand to read and to go over patterns. I thought when I subscribed that was what I was getting. Rita Maes
I agree Jann M. Being from ‘OLD SCHOOL’, I prefer the magazine to hold in my hand. NOT to mention when the computer crashes!
Thanks much for your tutorial. It has been over 50 years since I took Home Ec and things have changed! Joy
i think exposed zippers look cheap and tacky if they arent designer zippers e.g. silver metal ones with fancy pulls
I know you said exposed zipper, bit I think his is a little too exposed….I like the tutorial itself but I have never made a garment with the zipper showing so prominently. I prefer a more hidden zipper.